Let’s understand the process of SCCM Sync with MSfB Microsoft Store for Business | ConfigMgr. Microsoft Store for Business gives IT decision-makers and administrators an easy way to find, acquire, manage, and distribute free and paid apps to Windows 10 devices in select markets.
Once Microsoft Store for Business (MSfB) is integrated with SCCM, store applications need not be created manually. Instead, the apps will automatically sync from MSfB to ConfigMgr. You can view these apps in the SCCM admin console and deploy them like any other.
With the Configuration Manager client, you can utilize Configuration Manager to effectively manage Microsoft Store for Business and Education apps on devices running Windows 10 or later.
Microsoft has deprecated this feature, so it will no longer be available after the November 2022 release of SCCM. For more details, see the Microsoft Store for Business Education Retirement Updates HTMD Blog (anoopcnair.com).
- Add Microsoft Store Application to ConfigMgr | SCCM | MSfB
- Create Microsoft Store Apps available in the ConfigMgr Application
- Deploy Microsoft Store Apps using ConfigMgr | SCCM

SCCM and Microsoft Store for Business Support (NON-Co-Management Scenario)
For now, nothing has changed, as the Microsoft Store for Business is still available to provide offline Store apps as needed. However, once the Microsoft Store for Business retires, some changes will be required, but the exact changes involved are still in the design and development phase.
Updated on 13th April 2023—As per Jason Sandys from Microsoft, the retirement of MSfB (Microsoft Store for Business) is still postponed indefinitely to allow for “alternate” uses of the MSfB, like offline apps. This applies to SCCM Scenarios.
Prerequisites
Review the detailed list of prerequisites for integrating MSfB with Configuration Manager.
- ConfigMgr Infrastructure Admin access is required
- Browser compatible with Microsoft Store for Business
- The administrator account needed to integrate MSfB with SCCM
- Employees need Azure AD accounts when they access the content from MSfB
- Proxy configuration requirements for MSfB
- Devices must be registered with Azure AD or joined to the same Azure AD tenant where you registered the MSfB for online app deployment.
- Azure AD Global admin (or appropriate) access to create Applications to connect ConfigMgr site to Azure AD and MSfB
ConfigMgr Settings to Connect Microsoft Store for Business
Let’s check ConfigMgr Settings to connect to the Microsoft Store for Business.
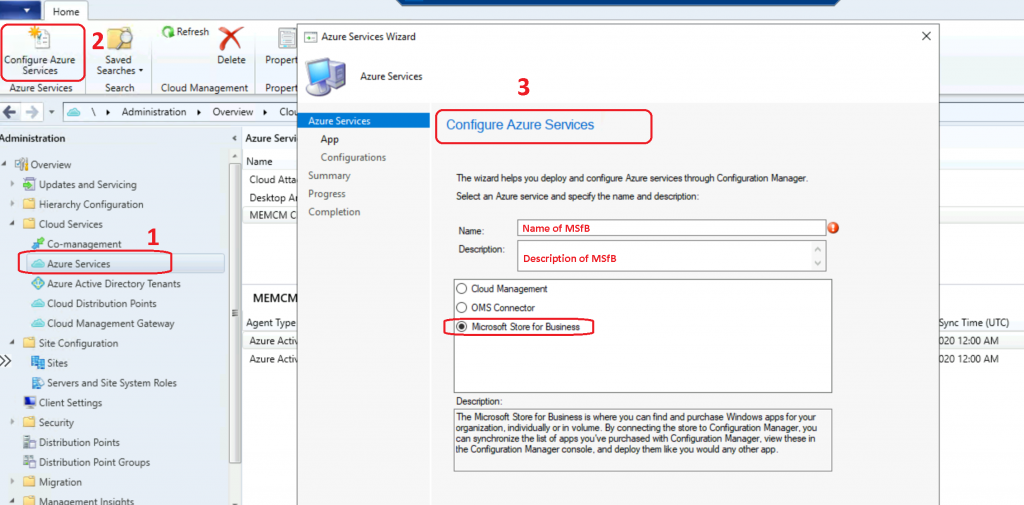
- Navigate to \Administration\Overview\Cloud Services\Azure Services
- Click on the Create Configure Azure Services button from the ribbon
- Enter the name of Azure Service -> MSfB Azure Service
- Enter the Description -> Description of MSfB Azure services
- Click Next
Click on Browse either to import an existing Azure application or to create a dedicated Azure app
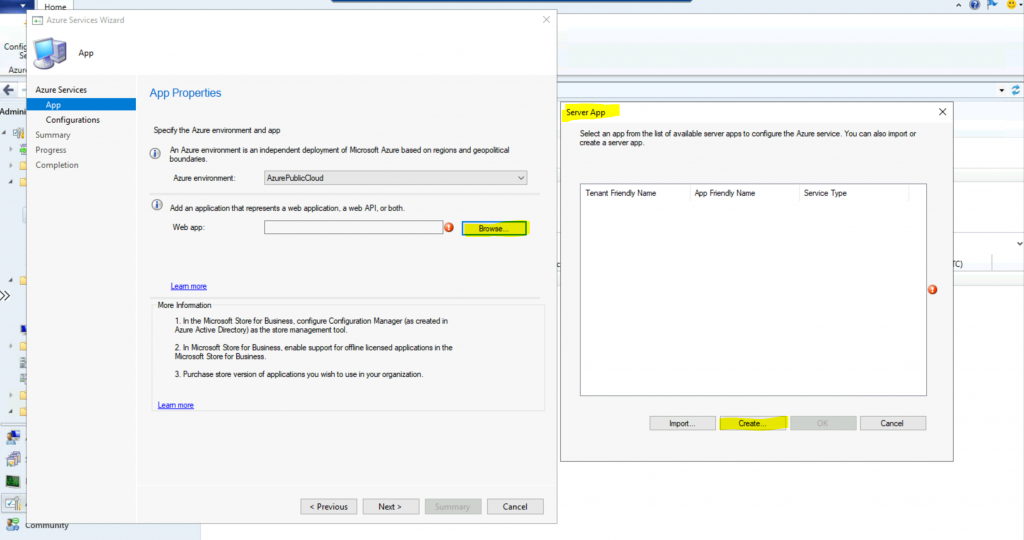
- Opted to create a dedicated Azure App. Click on the Create button.
- Application Name: ConfigMgrService_MSfB
- Home Page URL: https://ConfigMgrServiceMSfB
- App ID URI: https://ConfigMgrServiceMSfB
- Secret Key validity period: 1 Year
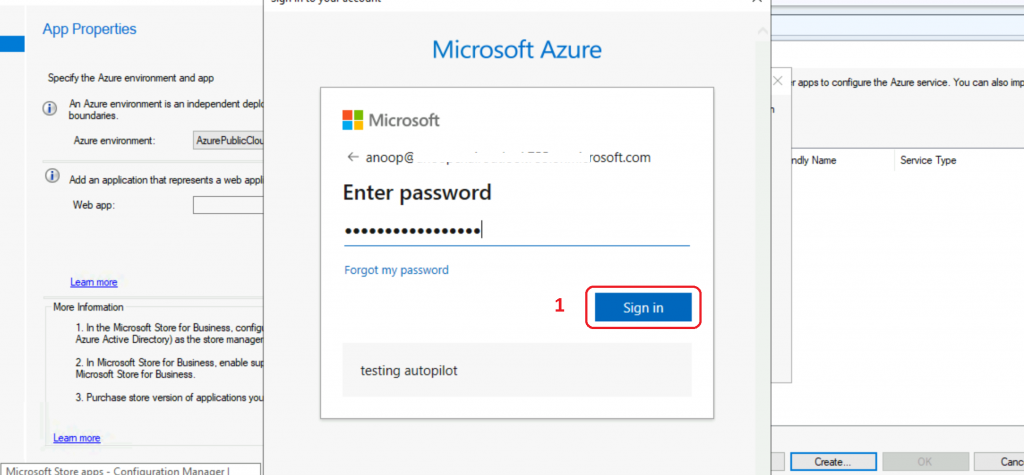
Sign in with an Azure AD admin account to create an Azure Enterprise App.
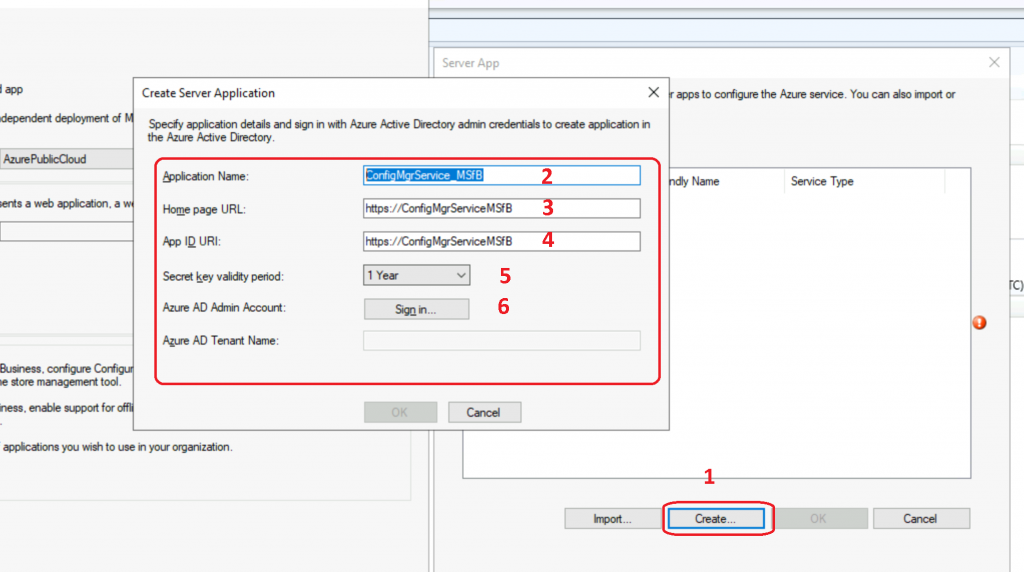
Enter the User Name and Password to create the Azure AD app for MSfB.
Successfully sign In and Click on the OK button to continue.
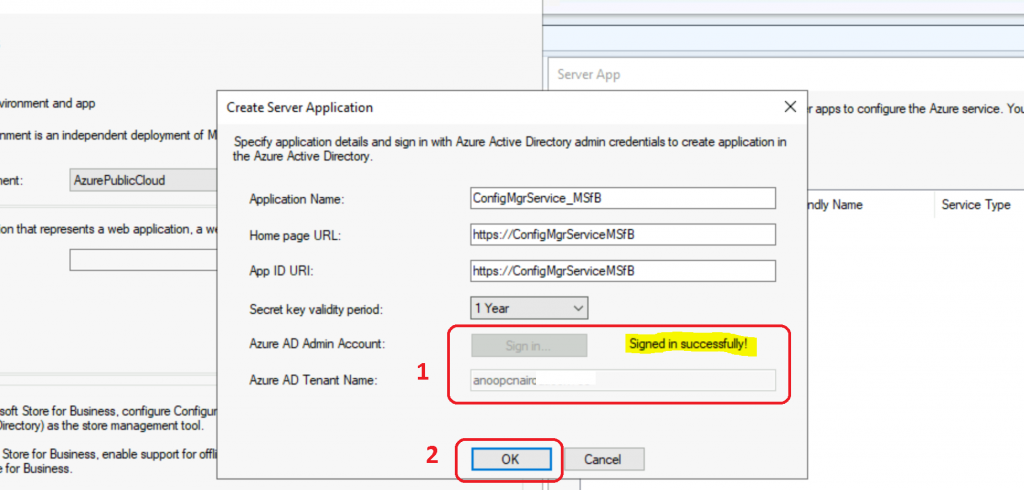
Click OK to continue.
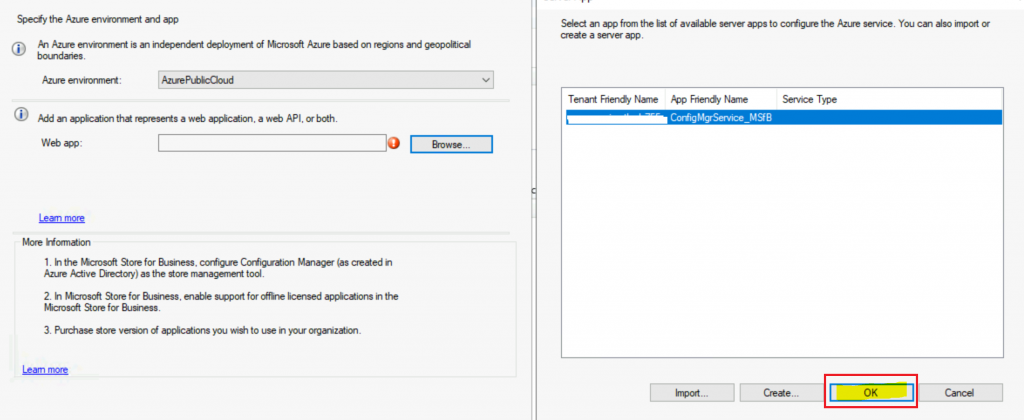
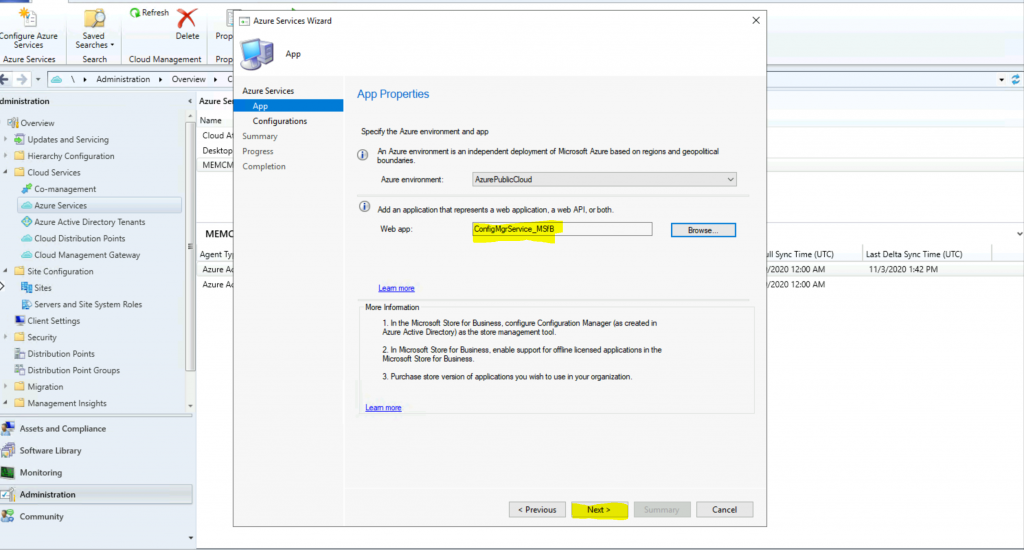
Now, you can see the Azure application (Web App) name. Click on the Next button to continue.
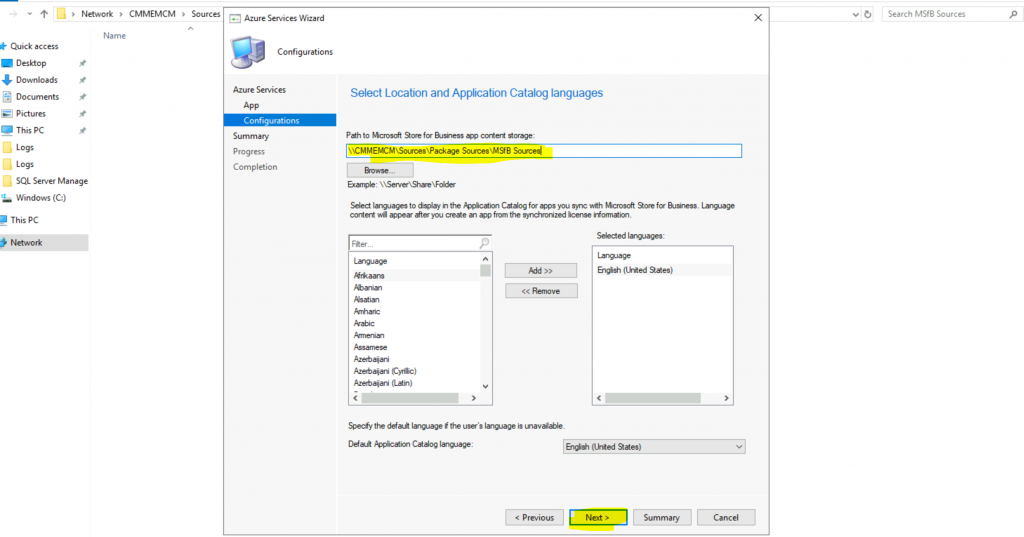
- Enter the source file location for Microsoft Store for Business content
- \CMMEMCM\Sources\Package Sources\MSfB Sources
Select the language to display in the application catalog for apps you sync with MSfB. Language content will appear after an app is created using the synchronized license information.
I think it’s the software Center instead of the application catalog. I have not changed as I don’t have any non-English clients. Click on Next to continue.
- Click Next, Next, and Close from the Summary page
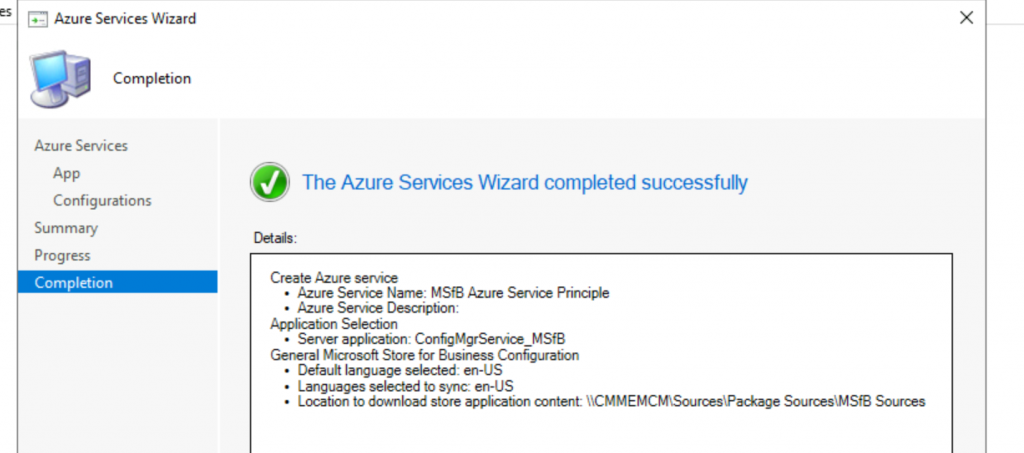
Create Azure service
• Azure Service Name: MSfB Azure Service Principle
• Azure Service Description:
Application Selection
• Server application: ConfigMgrService_MSfB
General Microsoft Store for Business Configuration
• Default language selected: en-US
• Languages selected to sync: en-US
• Location to download store application content: \CMMEMCM\Sources\Package Sources\MSfB Sources
MSfB Side Configuration for SCCM Deployment
Let’s log in to the Microsoft Store for Business.
- Login to MSfB with Azure AD admin account: https://businessstore.microsoft.com/
- Navigate to Manage -> Settings -> Distribute
- Go to the Management Tools section
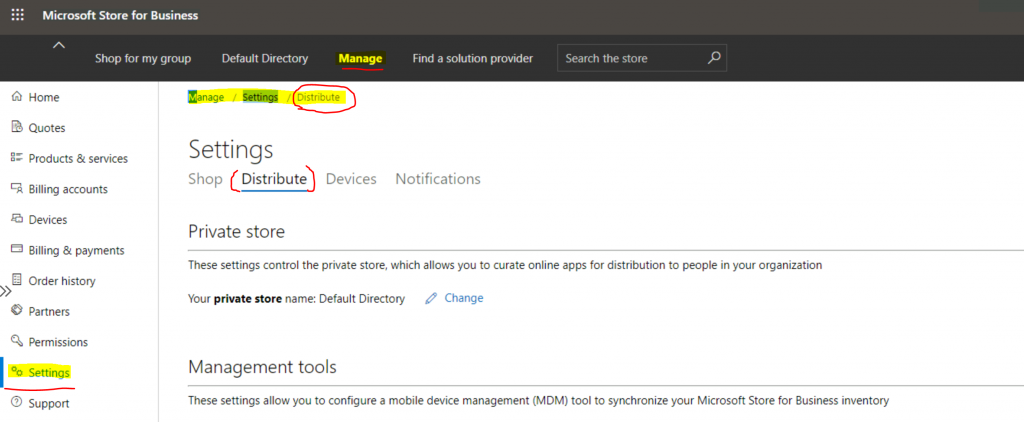
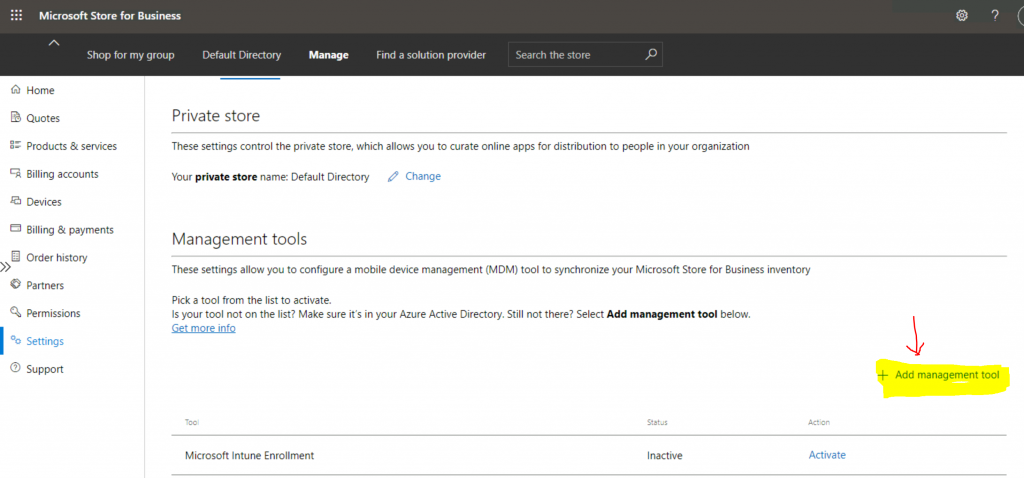
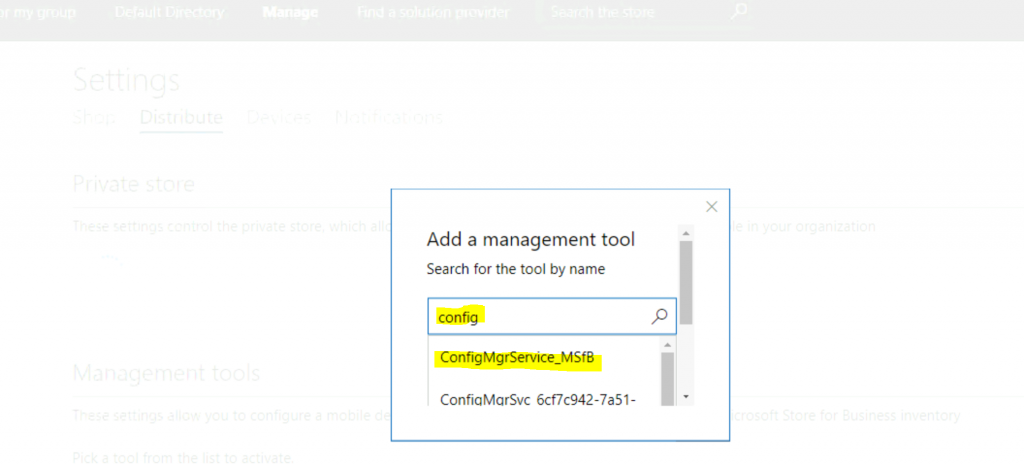
Click on + Add Management tool.
Search for the Management Tool by name in the search box.
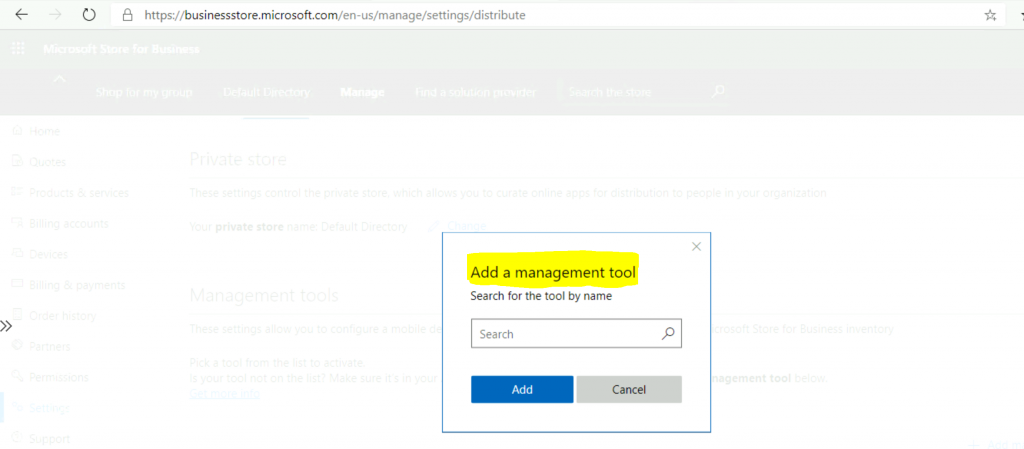
Enter the search word ConfigMgr (Or enter the name of the Azure Enterprise application). Select Azure Enterprise application from the list – ConfigMgrService_MSfB.
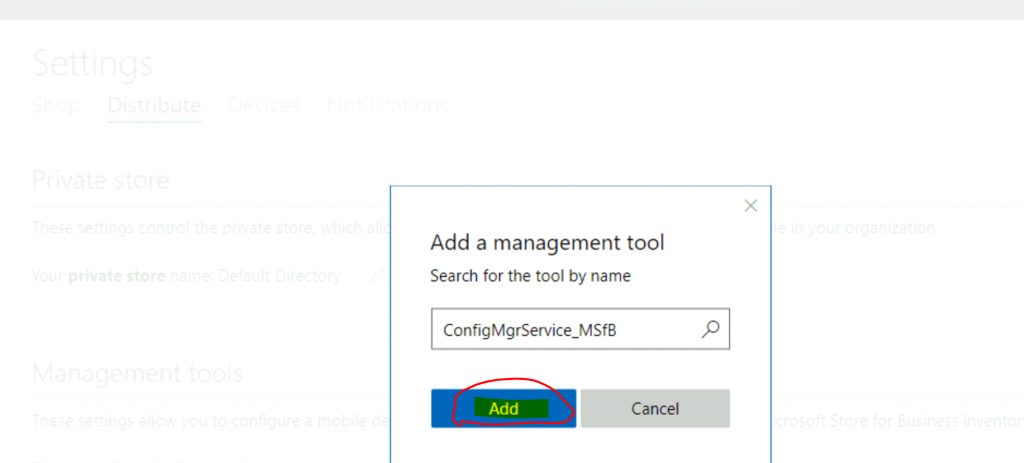
Click on the Add button.
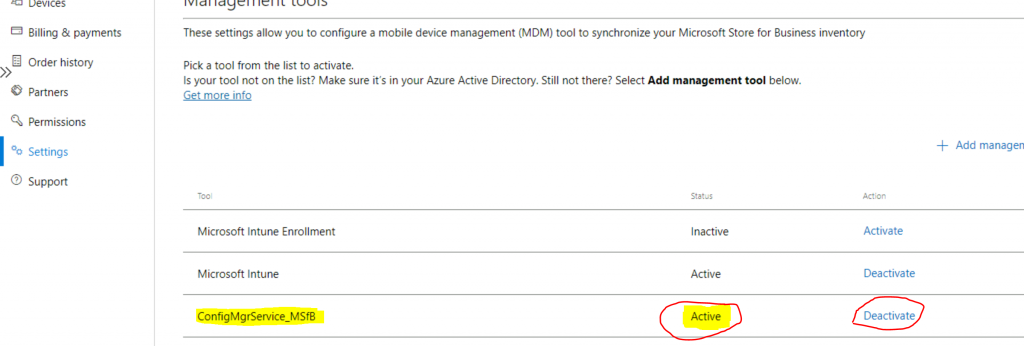
Click on the Activate button.

Now, check the status, and you will see that the management tool is activated.
Sync from Microsoft Store for Business with SCCM Console
Since you have connected MSfB with SCCM, let’s try to sync the store and SCCM using the following method.
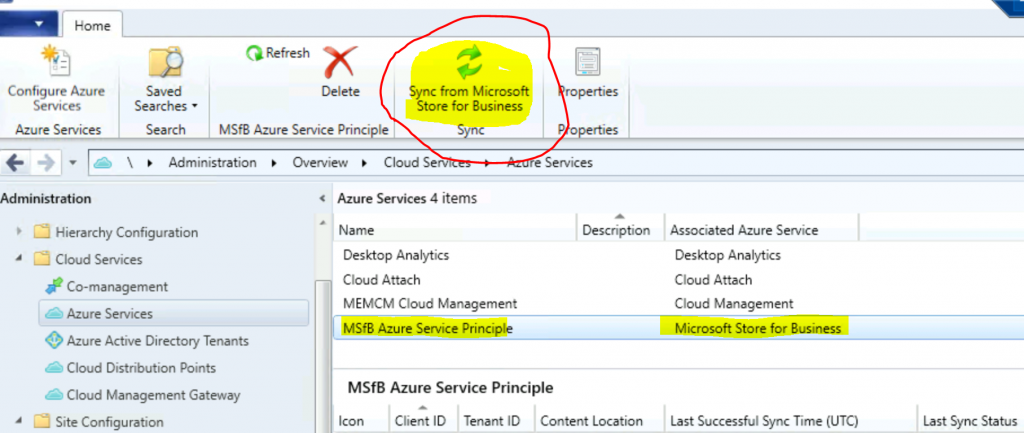
- Navigate to \Administration\Overview\Cloud Services\Azure Services
- Select the Azure Service that you created for MSfB
- Click on Sync from Microsoft Store for Business from the ribbon menu
Results
Ensure the MSfB sync is successful with Configuration Manager from the Azure Services node of the SCCM admin console.
- \Administration\Overview\Cloud Services\Azure Services
- Click on MSfB associated Azure Service
- Check the Last Successful Sync Time
NOTE! – Synchronize app data to Configuration Manager (synchronization occurs every 24 hours). There is no custom sync option for MSfB and SCCM.
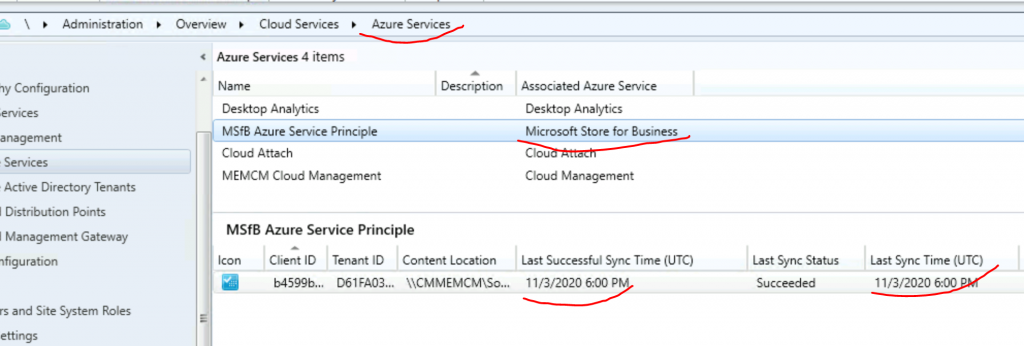
NOTE! – I will share the steps (in the next blog post) to add Online and Offline store applications to the Microsoft store for business. Once you add the apps to the private store for your organization, you can sync this with SCCM with this Sync operation.
Navigate to \Software Library\Overview\Application Management\License Information for Store Apps. As you can see below, all the synced applications are available in the License Information for Store Apps.

Resources
- Prerequisites for Microsoft Store for Business and Education
- How to Deploy Windows Store Apps via Intune to Windows 10 Devices
We are on WhatsApp. To get the latest step-by-step guides and news updates, Join our Channel. Click here –HTMD WhatsApp.
Author
Anoop C Nair is Microsoft MVP! He is a Device Management Admin with more than 20 years of experience (calculation done in 2021) in IT. He is a Blogger, Speaker, and Local User Group HTMD Community leader. His primary focus is Device Management technologies like SCCM 2012, Current Branch, and Intune. He writes about ConfigMgr, Windows 11, Windows 10, Azure AD, Microsoft Intune, Windows 365, AVD, etc.

Thanks so much for this amazing guide. Worked like a charm. Well done! Bookmarked!
Such a wonderful and easily to understand guide you have provided …. Awesome Bookmarked!
How does it affect after Store for Business is decommissioned in first quarter for 2023?
I am seeing that this feature is going to be deprecated. I need to be able to deploy apps from the store and don’t have this setup yet. What would be the newest way to be able to deploy apps from the MS store with MECM?
Hi Anoop, I was wondering, would you have a guide on cleaning up SCCM, Azure and MSfB now that integration between MSfB to ConfigMgr is no longer supported? I’m unsure what loose ends can go.
Thanks 🙂
Hi Anoop,
While setting up the MS store in SCCM (latest version), I am not able to find any option with MS store for business under azure service. Can you please help me how to enable it if possible.
As we mentioned in the 3rd paragraph of the post – This feature is getting deprecated by Microsoft. So this feature won’t be available after the 2022 Nov release of SCCM. More Details https://www.anoopcnair.com/microsoft-store-for-business-education/