Let’s learn how to FIX Windows 11 Version 23H2 Download Error – 0x80246019. Error 0x80246019 is a common issue that many users face. Sometimes, users face challenges in installing updates on Windows 11.
The updates are a service package and are also used to update the drivers for the hardware devices. These updates are very important for the devices to enhance their performance and security.
There are different solutions, but we must select the proper method to fix those issues. There are many factors for this error issue. Time antivirus software or any missing update file can be the reason.
In this article, We will give you the solution for Windows 11 Version 23H2 Download Error – 0x80246019 and how to fix it correctly. This error happens in the installation stage of the 23H2 Windows update. This type of error mainly occurs in any bug in Windows.
What are the Main Reasons for Error 0x80246019?
Error 0x80246019 is a common issue when trying to download or install updates in Windows 11. Any bug or corrupted files may cause these types of issues. There are many reasons for this download error, which are given below.
1. When your device has no sufficient storage space
2. Corrupted System files may be another reason
3. Antivirus may cause this error on your system
4. When the Windows update service is stopped
FIX Windows 11 Version 23H2 Download Error – 0x80246019
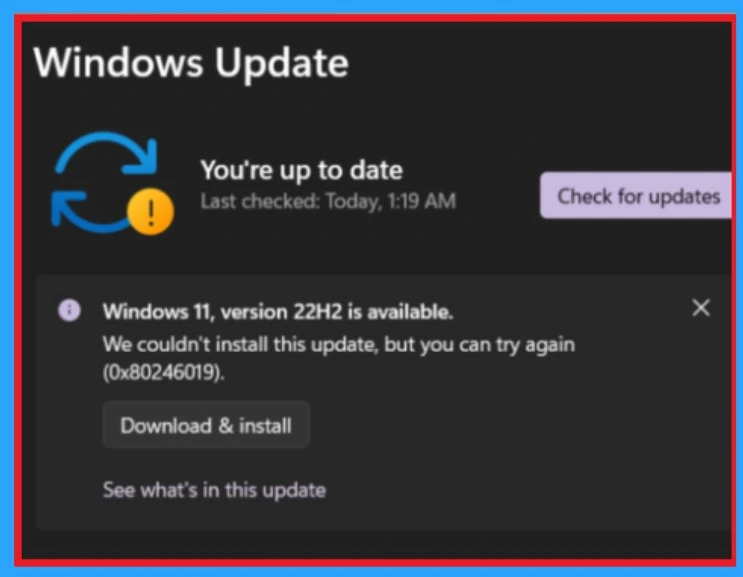
The main issue happens when you notice the following error in the update downloading time. The update shows a Warning symbol with a short message that says, ”We couldn’t install this update, but you can try again(0x80246019).”.
| Numbers | Method |
|---|---|
| 1 | Run the Windows Update Troubleshooter Method |
| 2 | Run the System File Checker (SFC /Scannow )command Method |
| 3 | Install the Update Manually |
| 4 | Use the Disk Clean-Up Method |
1. Run the Windows Update Troubleshooter Method
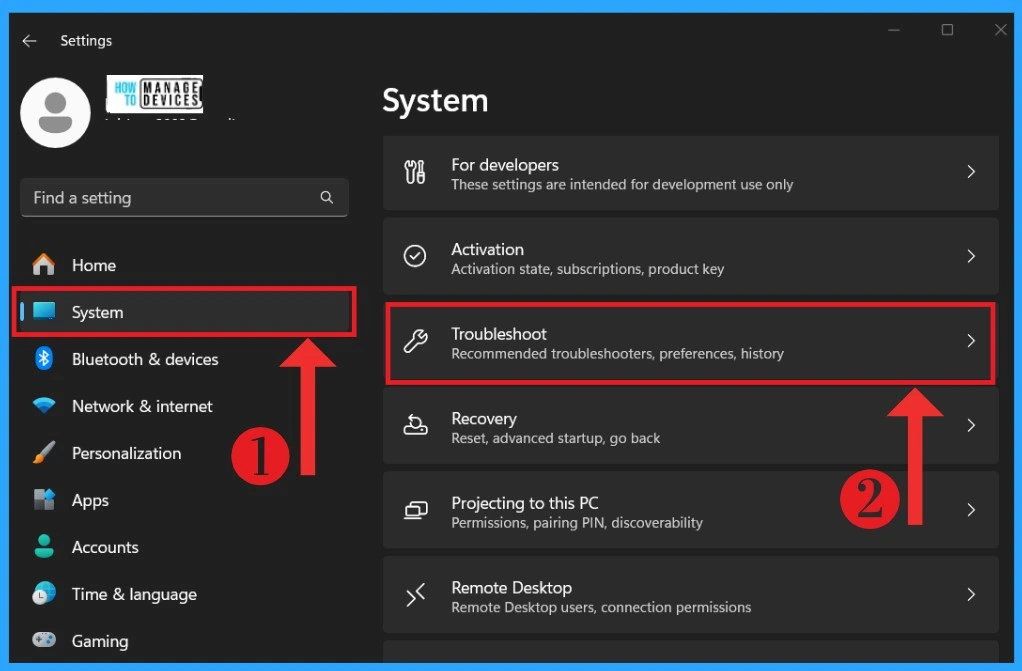
This is the First and easiest method for users to fix the error in the update. Before trying any other advanced method, first try this easy method. For this, Press Win+I or select settings from the start menu.
- Select the system from the settings.
- Select the Troubleshoot option from the system.
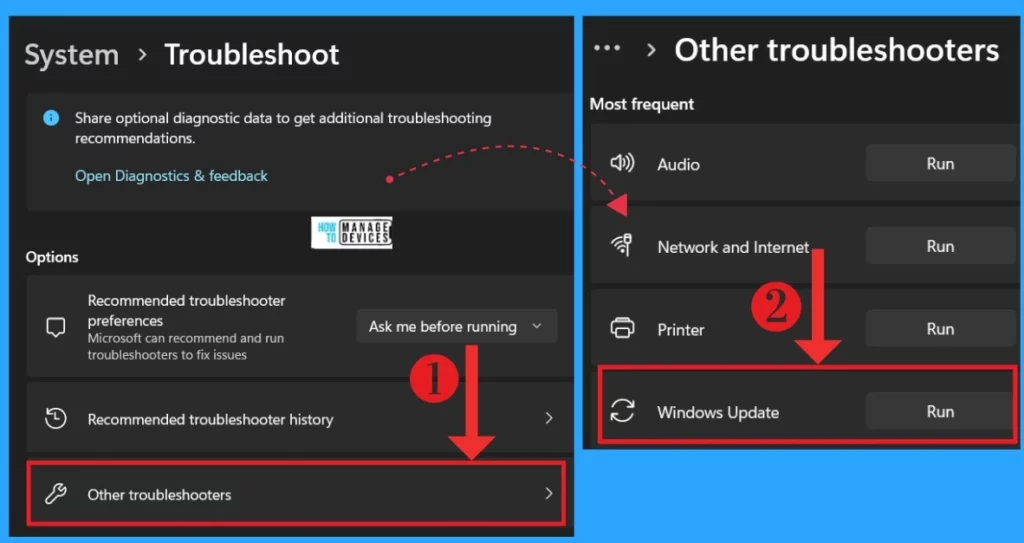
In the other troubleshooting window, click on “Other Troubleshooters” under the Options category. You will then see another troubleshooting window with the Windows update option.
- Click on the Run in the Windows update
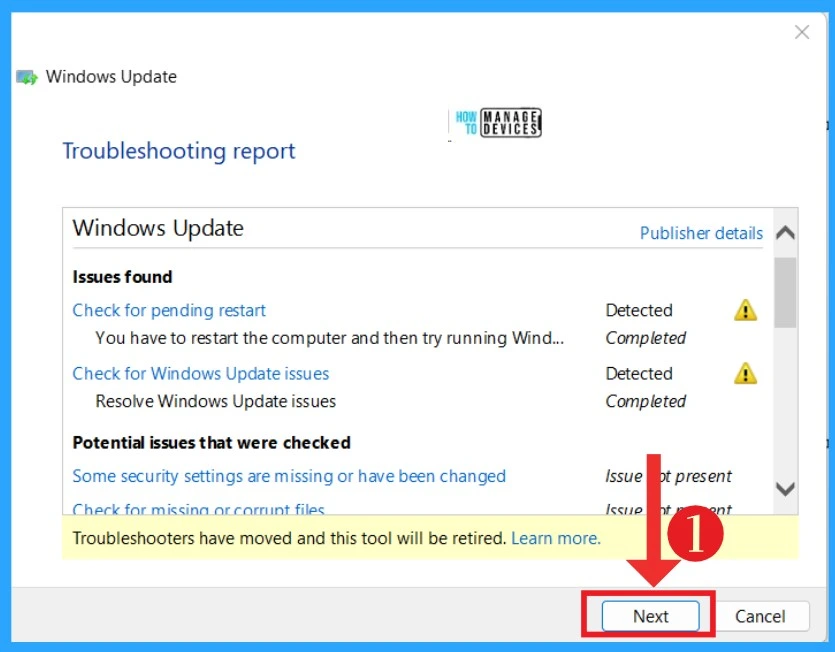
In the troubleshooter, you have to follow the further options mentioned in the window; when any issues are found, they will be mentioned in this window. You have to restart your Device and try running the Windows update.
- Click on the Next
- Ways to Enable and Disable Unwanted Services from Windows 11
- Fixing MS Edge Battery Drain Issue on Windows 11
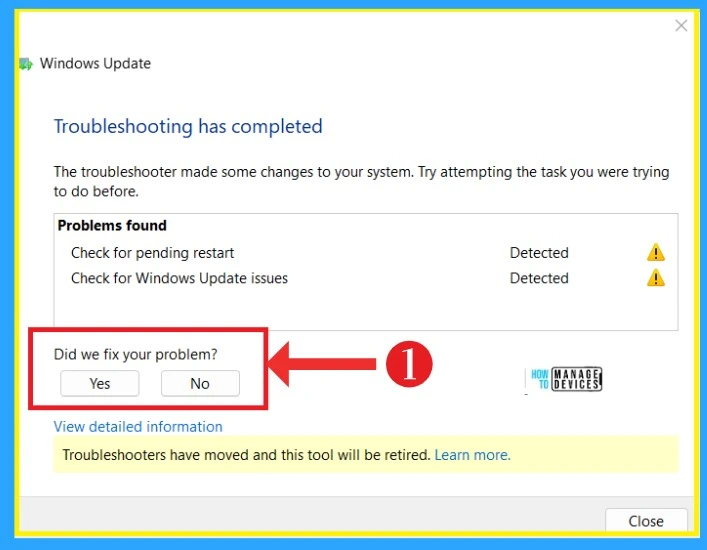
After clicking on Next, the troubleshooter made some changes to your system. It will check the problem and give it as a result in the window. Here, you can see that a check for Windows issues detected is mentioned. In the dialogue box, you must answer whether the issue is fixed.
2. Run the System File Checker (SFC /Scannow )command Method
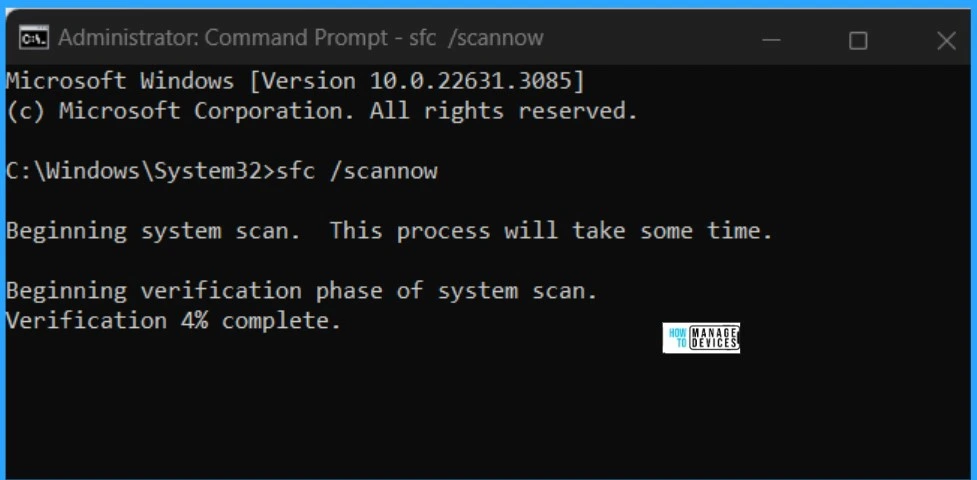
The System File Checker scans and repairs system files in Windows that are missing or corrupted, and it is a tool for this purpose. Open the Command Prompt as an administrator and type the following command.
Copy this: sfc /scannow
After entering the command, it starts the scanning procedure. After the scanning is 100% completed, you can Reboot your device and type DISM /Online /Cleanup-Image /RestoreHealth.
- Press the Enter
- Reset Network Adapters in Windows 11 FIX Connection Issues
- FIX Search Result Issues with Shared Mailbox Outlook Desktop App
3. Install the Update Manually
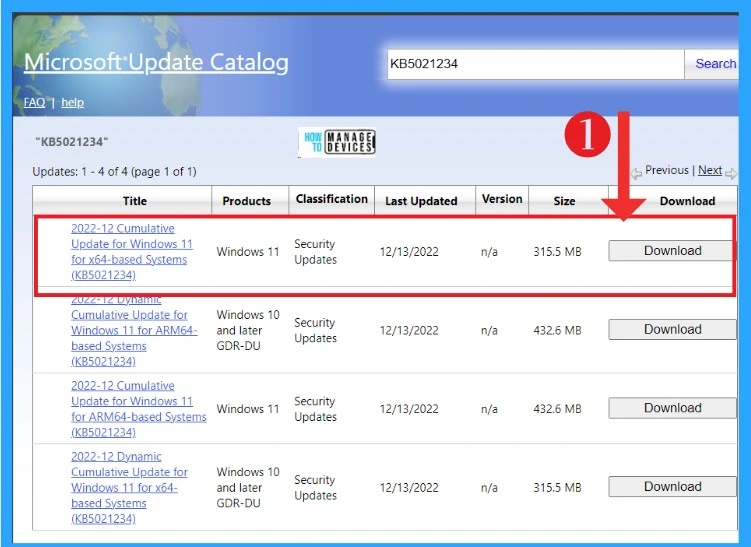
If you face downloading issues and have tried many unsuccessful methods, updating manually is the best option. You can use the Microsoft Update Catalog to download the specific update package you need.
- Open the Microsoft Update Catalog
- In the search box, input the KB (Knowledge Base) code. You can copy the number from the failed update number. Here, I entered KB5021234
- Click on the Search
- Select the Download button to download the update package
4. Use the Disk Clean-Up Method
Another method is using the Disk Clean-Up Method. Disk Cleanup frees up disk space on your PC by removing unnecessary and temporary files. Temporary Windows Update files are stored in the $WINDOWS.~BT folder, which can lead to error 0x80246019. A common solution is to clear the $WINDOWS.~BT folder using Disk Cleanup.
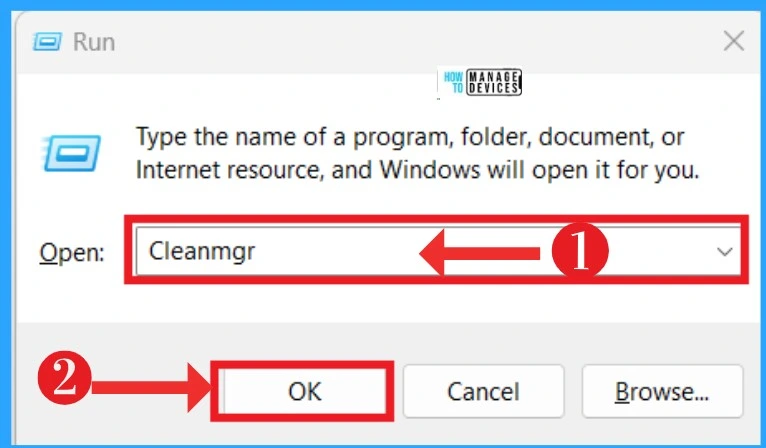
- You can open the Run dialogue by pressing the Win + R keys
- Type cleanmgr.exe
- Press Enter or OK.
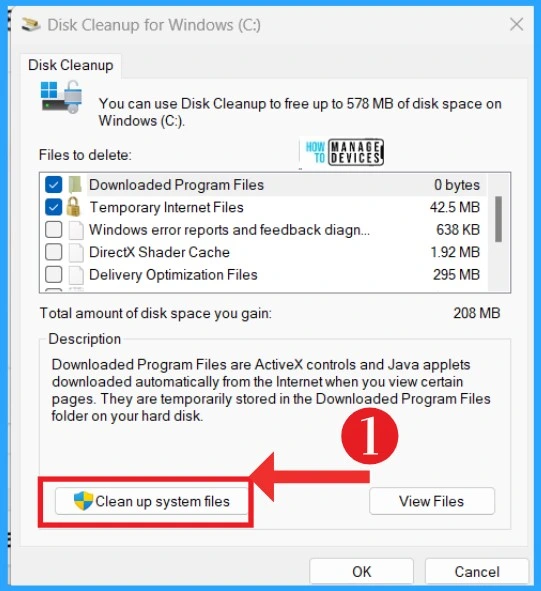
After opening the Disk cleanup, you can see many options. In the description, you will get messages related to the temporary files on your disk. Here, Click on Clean up system files.
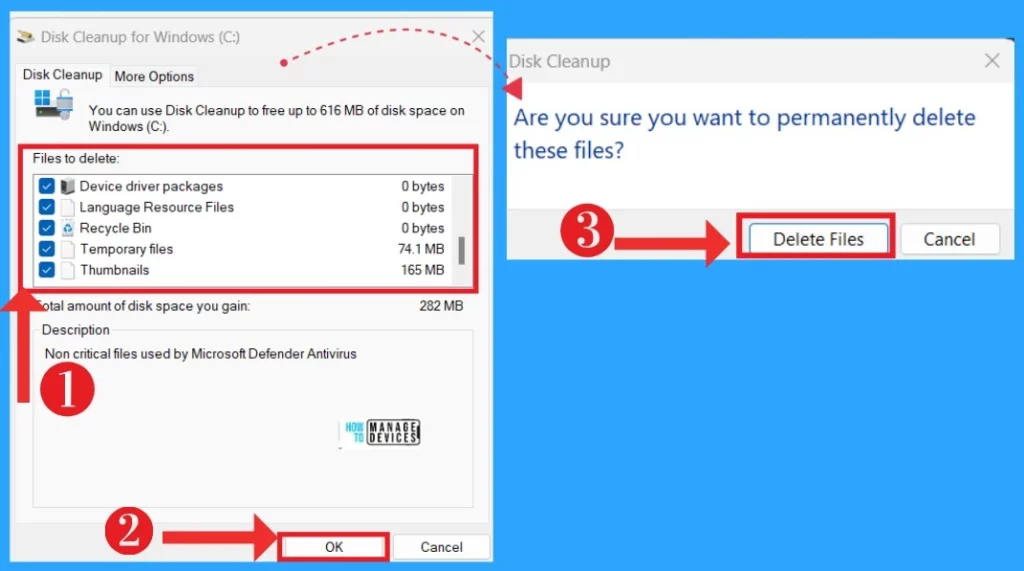
In the below window, you must select all the files you want to delete. The description mentions that Microsoft Defender antivirus does not use critical files. Click on the OK button, and you will get another window to confirm whether you want to delete the file permanently.
Reference
Windows 11, version 23H2 Download error – 0x80246019
We are on WhatsApp now. To get the latest step-by-step guides, news, and updates, Join our Channel. Click here. HTMD WhatsApp.
Author
Krishna. R is a computer enthusiast. She loves writing about Windows 11 and Intune-related technologies. She likes to share her knowledge, quick tips, and tricks with the community about Windows 11 or Windows 10.
