This article is written to take you through implementing the Intune Allow Microsoft Accounts to be Optional Policy. We’ll use Intune’s Settings Catalog to enforce this policy, emphasizing a practical, hands-on approach to make you understand the Allow Microsoft Accounts to be Optional Policy in action with Intune.
This policy setting allows administrators to manage the optional use of Microsoft accounts for Windows Store apps requiring account sign-in. It exclusively impacts Windows Store apps that support this feature. Enabling this policy allows users to sign in with an enterprise account instead of the usual requirement for a Microsoft account on apps that typically demand it.
Conversely, disabling or leaving this policy unconfigured mandates users to sign in with a Microsoft account. The policy is designed to control the requirement of Microsoft accounts for sign-in purposes in Windows Store apps. Windows Store apps that support this policy can be configured to allow users to sign in with either a Microsoft account or an enterprise account.
It’s important to note that this policy setting specifically applies to Windows Store apps that are designed to support this level of account flexibility. The policy does not universally affect all apps but only those that have been developed to honor this particular policy configuration.

Allow Microsoft Accounts to be Optional Policy
To create a Allow Microsoft Accounts to be Optional Policy, follow the steps stated below:
- Sign in to the Intune Admin Center portal https://intune.microsoft.com/.
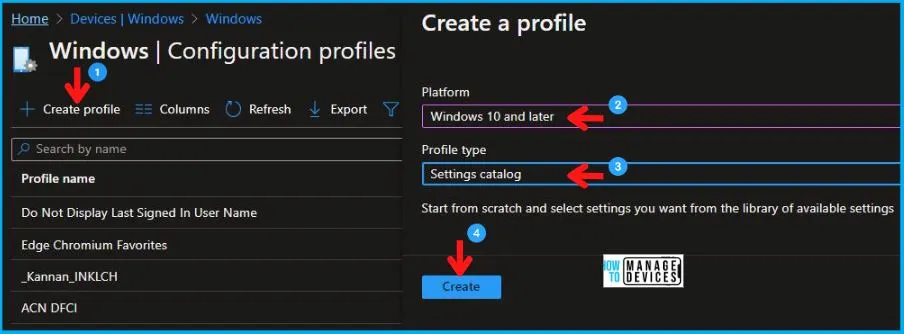
- Select Devices > Windows > Configuration profiles > Create a profile.
In Create Profile, I select Windows 10 and later in Platform, I choose the Profile Type as Settings catalog. Click on the Create button.
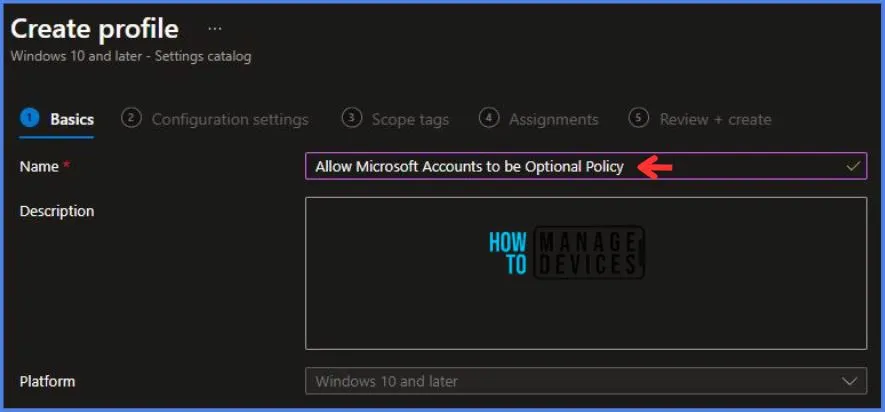
On the Basics tab pane, I provide a name for the policy as “Allow Microsoft Accounts to be Optional Policy.”
- Optionally, if you want, you can enter a policy description and proceed by selecting “Next“.
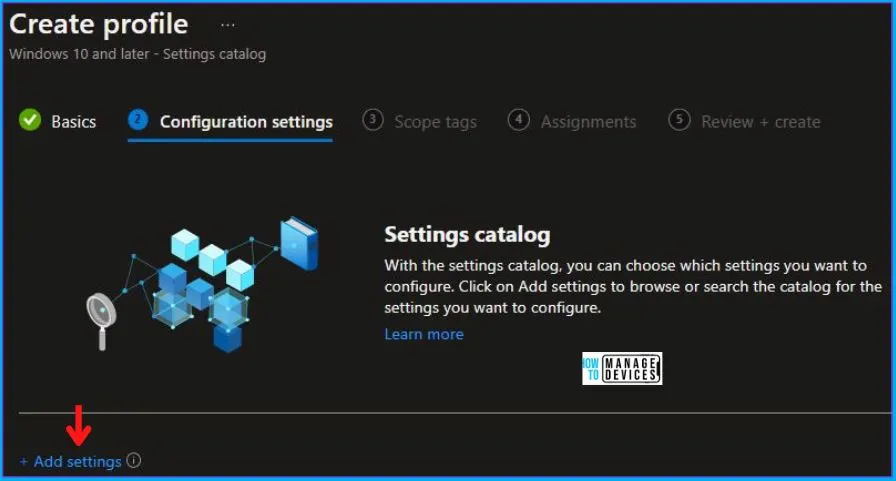
Now, in Configuration Settings, Click Add Settings to browse or search the catalog for the settings I want to configure.
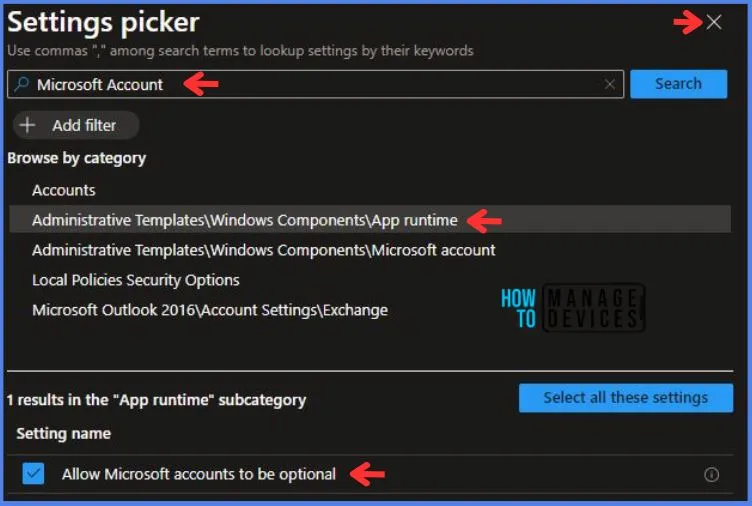
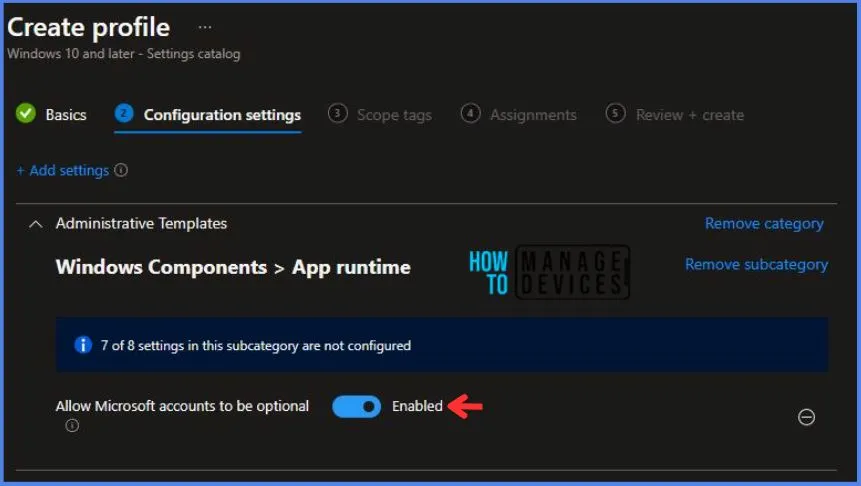
In the Settings Picker windows. I searched for the keyword Microsoft Account. I found the category Administrative Templates\Windows Components\App runtime and selected this.
- I see the sub-category Allow Microsoft accounts to be optional. After selecting that, click the cross mark at the right-hand corner, as shown below.
Here in Administrative Templates, I have set Allow Microsoft accounts to be optional as enabled.
Using Scope tags, you can assign a tag to filter the profile to specific IT groups. One can add scope tags (if required). More details on Intune Scope Tags Implementation Guide.
- Click Next to continue.
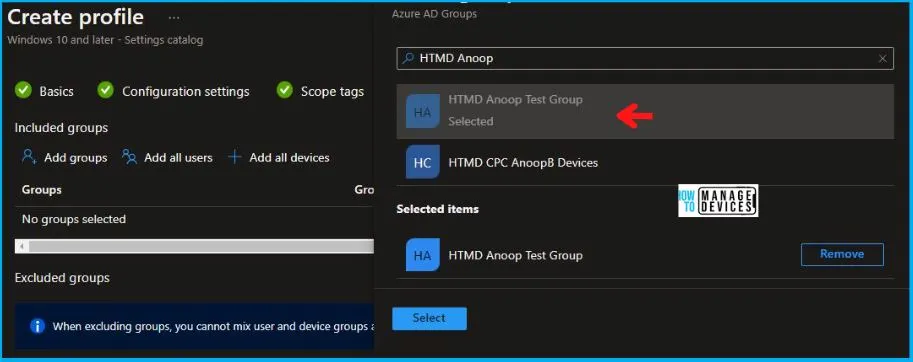
Now in Assignments, in Included Groups, you need to click on Add Groups and choose Select Groups to include one or more groups. Click Next to continue.
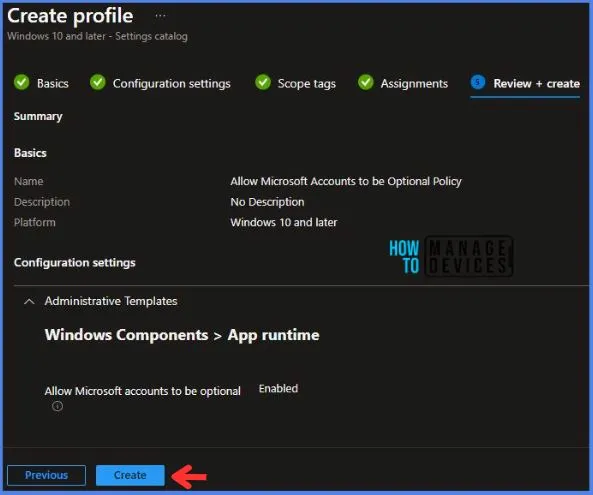
In the Review + Create tab, I review settings. After clicking on Create, changes are saved, and the profile is assigned.
After successfully creating the “Allow Microsoft Accounts to be Optional Policy,” a notification will appear in the top right-hand corner confirming the action. You can also verify the policy’s existence by navigating to the Configuration Profiles list, where it will be prominently displayed.
Your groups will receive your profile settings when the devices check in with the Intune service. The Policy applies to the device.
Intune Report for Allow Microsoft Accounts to be Optional Policy
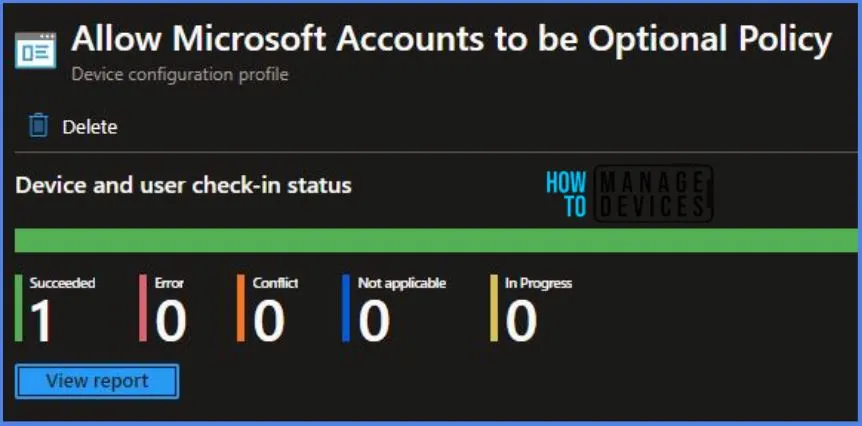
From the Intune Portal, you can view the Intune settings catalog profile report, which provides an overview of device configuration policies and deployment status.
To track the assignment of the policy, you need to select the relevant policy from the Configuration Profiles list, which is the Allow Microsoft Accounts to be Optional Policy. Then, you can review the device and user check-in status to determine whether the policy has been successfully applied.
- If you require more detailed information, you can click on “View Report” to access additional insights.
Registry Key Verification – Allow Microsoft Accounts to be Optional Policy
Now we will verify whether the policy was successfully deployed or not by accessing the registry settings that will hold the group policy configurations on a specific computer. To accomplish this, you can execute “REGEDIT.exe” on the target computer and navigate to the precise registry path mentioned below, where these settings are stored.
Computer\HKEY_LOCAL_MACHINE\SOFTWARE\Microsoft\PolicyManager\providers\5B88AEF1-09E8-43BB-B144-7254ACBBDF3E\default\Device\AppRuntime
When you navigate the above path in the Registry Editor, you will find the registry key named
