Let’s discuss Configure Risk Policies in Azure CA. Azure Conditional Access (CA) provides a centralized platform for managing access to cloud applications and resources. It allows organizations to strengthen security by implementing policies to meet specific requirements.
Automating threat response through configuring and enabling risk policies involves setting up predefined rules and actions that the system can take when it detects potential security threats or risks.
Entra ID Conditional Access is a security guard for your organization’s data and applications in the cloud. With Entra CA, you can create policies based on different factors, including the risk level associated with each sign-in attempt.
Risk-based policies are a type of access control policy that organizations can implement to enhance security when potential risks are detected during user sign-in attempts. These policies adjust access controls based on the risk level associated with a particular sign-in or user activity.

- Auto Rollout of Conditional Access Policy from Microsoft Entra ID Coming Soon
- Filter Application Using Azure AD Conditional Access Policy
- Best Practices for Creating Entra ID Dynamic Groups for Intune
- What is Face Check Feature in Entra
Configure Risk Policies in Azure CA
This post guides you through configuring Azure Conditional Access (CA) risk policies. Risk policies in Azure CA enable organizations to boost their security by automating responses to potential threats. Microsoft Entra Conditional Access has two types of risk policies: Sign-in risk policy and User risk policy.
| Risk Policies in Azure CA |
|---|
| Sign-in risk |
| User risk |
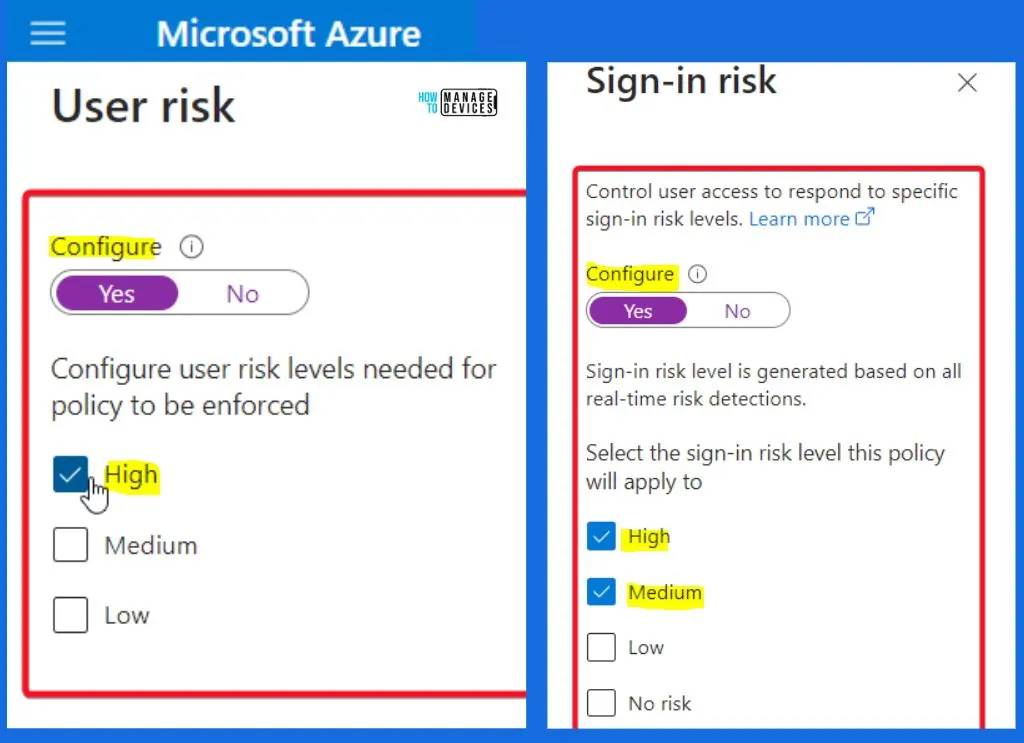
Microsoft Recommended Risk Policy Configurations
Microsoft recommends configuring risk policies to protect your organization’s assets effectively. They are as follows.
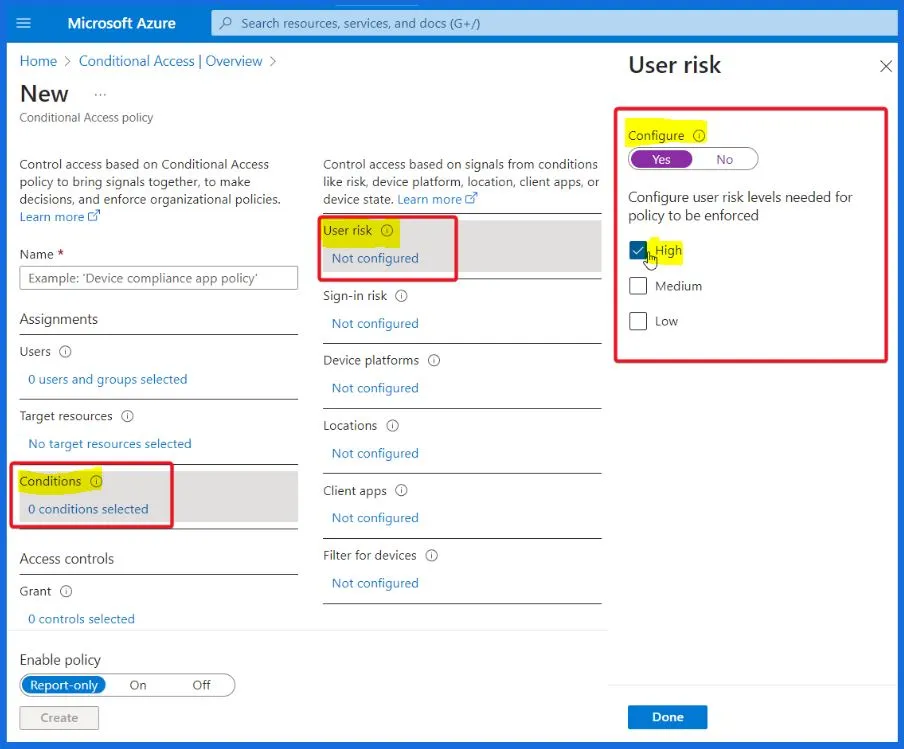
User Risk Policy – Secure Password Change
When there is a high-risk level for a user, Microsoft suggests they change their password securely with an extra layer of authentication, ensuring only they can do it. This helps keep their account safe from potential threats.
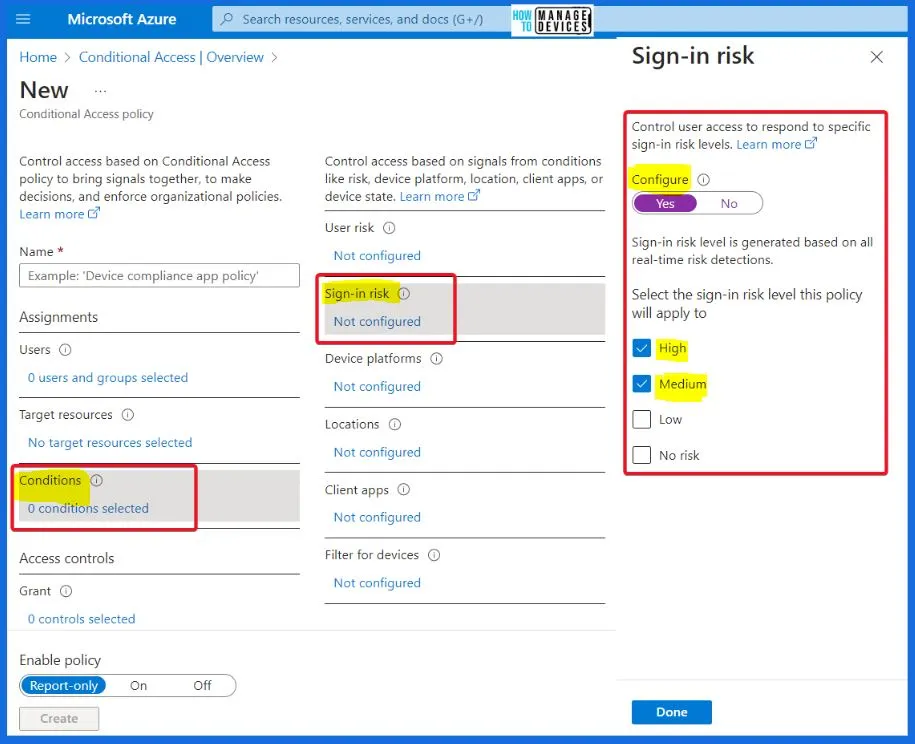
Sign-in Risk Policy – Multifactor Authentication
Microsoft recommends using multifactor authentication when there is a medium or high-risk level for a sign-in. This extra layer of security helps ensure only the right people can access their accounts, protecting them from potential risks.
Process of Setting up User Risk Policy in Conditional Access
Let’s discuss setting up a user risk policy in Conditional Access. Setting up a user risk policy in Conditional Access involves steps to enhance security measures.
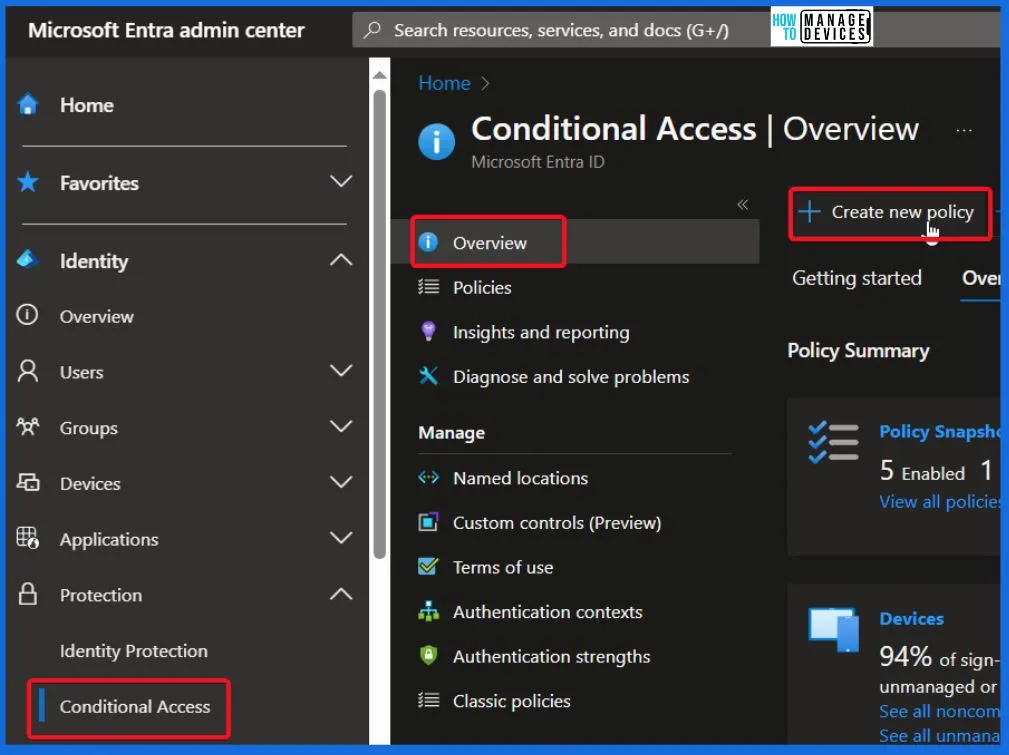
- Sign in to Microsoft Entra Admin Center – Log in as a Conditional Access Administrator.
- Go to “Protection” and then Select Conditional Access.
- Click on “New policy” to start creating a new policy.
Choose a meaningful name for your policy. Under Assignments, select Users or workload identities. Cloud Apps or Actions – Include all cloud apps to apply the policy universally.
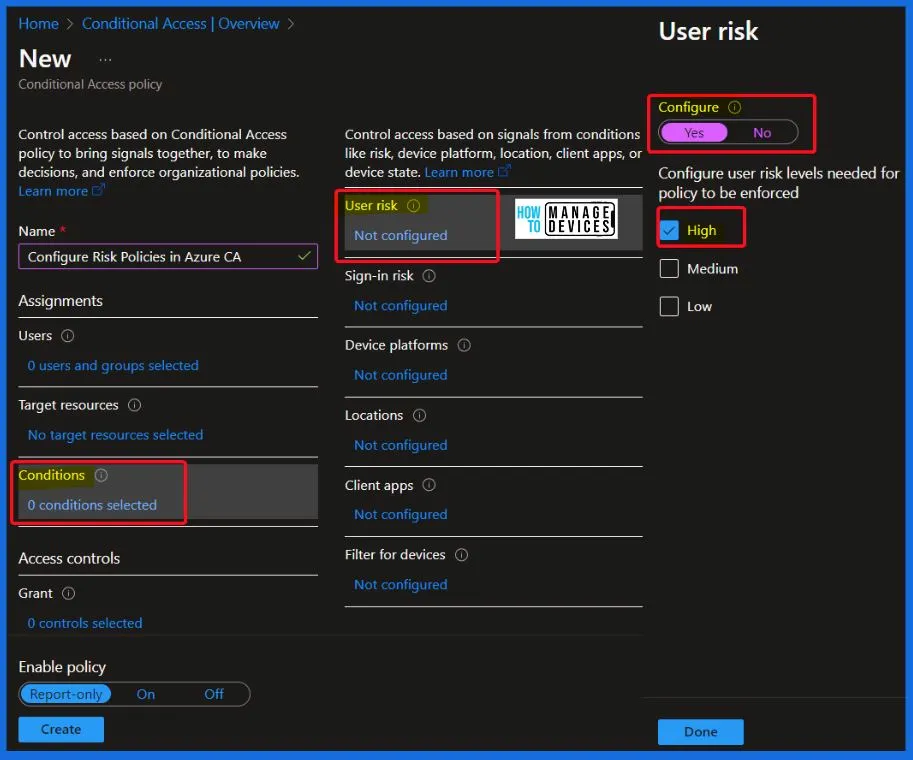
- Conditions
- Under User risk, set Configure to “Yes.”
- Set the “User risk levels needed for the policy to be enforced” to “High.”
- Choose Grant access and select both “Require multifactor authentication” and “Require password change.”
- Under Session.
- Select Sign-in frequency.
- Ensure Every time is selected.
- Confirm your settings and set the Enable policy to Report-only.
- Select Create to enable your policy.
Process of Setting up Sign-in Risk Policy in Conditional Access
Let’s discuss setting up a sign-in risk policy in Conditional Access. Follow these steps to set up a sign-in risk policy in Conditional Access.
- Sign in to Microsoft Entra Admin Center and Log in with at least Conditional Access Administrator privileges.
- Go to Protection and then Conditional Access.
- Click on “New policy” to create a new policy
- Give your policy a descriptive name for easy identification
- Choose “Users or workload identities” under Assignments
- Include all users but exclude emergency or break-glass accounts to ensure specialized treatment.
- Include all cloud apps to apply the policy universally.
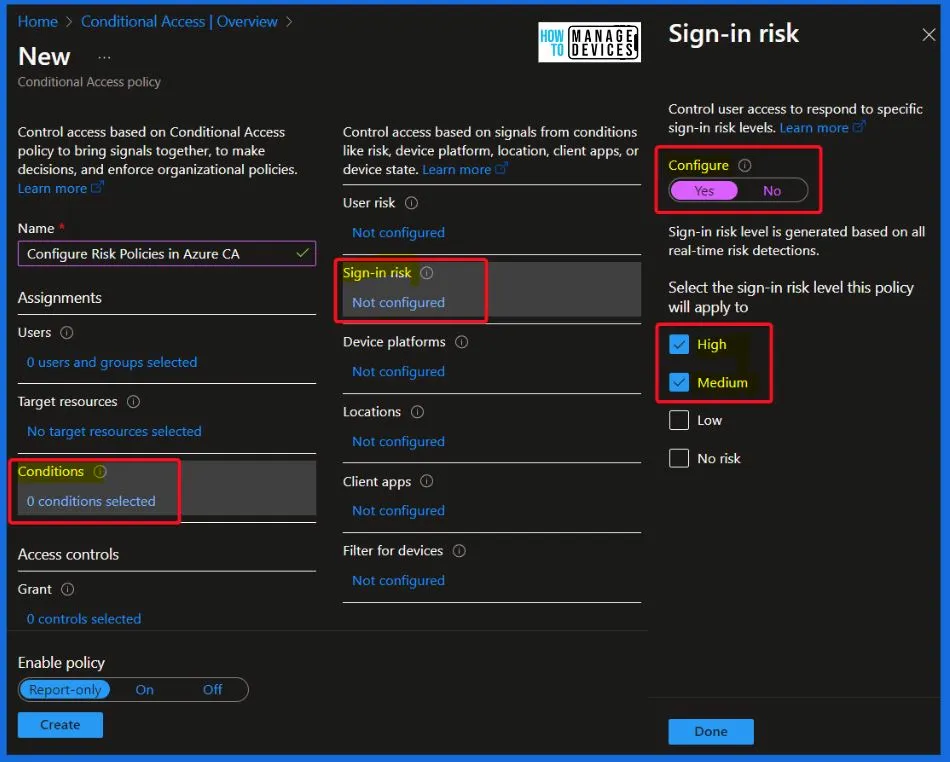
- Conditions
- Under Sign-in risk, set Configure to “Yes.”
- Select both High and Medium risk levels for this policy to apply to.
- Access Controls
- Choose Grant access and select “Require multifactor authentication.”
- Session
- Select Sign-in frequency and ensure Every time is chosen.
- Confirm your settings and set the policy to “Report-only” mode initially.
- Select Create to enable your policy.
Resources
Risk policies – Microsoft Entra ID Protection | Microsoft Learn
We are on WhatsApp now. To get the latest step-by-step guides, news, and updates, Join our Channel. Click here. HTMD WhatsApp.
Author
About the Author – Vidya is a computer enthusiast. She is here to share quick tips and tricks with Windows 11 or Windows 10 users. She loves writing on Windows 11 and related technologies. She is also keen to find solutions and write about day-to-day tech problems.
