Let’s learn how to create different shortcuts to Check for Windows Updates in Windows 11. Users can decide when and how to get the latest updates to keep their devices running smoothly and securely. Creating shortcuts for this event makes a difference.
In Windows 11, when a device is up to date, the user gets the latest fixes and security improvements, helping the device run efficiently with active protection from malware. Most of the time, the update procedure is completed successfully by restarting the device.
During the update process, ensure your device is plugged in, which helps. Windows Updates should be checked and installed regularly when they are available. To speed up the manual checking process for updates, you can create shortcuts to achieve this.
Update history is an essential part of the Windows 11 Operating System. We always do our updates automatically or manually, but we don’t know about the past updates in our system, learn how to view update history in Windows 11.

Procedure to Create Different Shortcuts to Check for Windows Updates
As we all know, Windows provides many facilities to the users that they can modify to create using some techniques. Here, users can create shortcuts to Check for Windows Updates using various shortcut types. The types of shortcuts are listed below.
- Create a Shortcut for Windows Updates and Check for Updates
- Create a Shortcut for Windows Updates Only
- Create a Shortcut for Automatically Checking Windows Updates
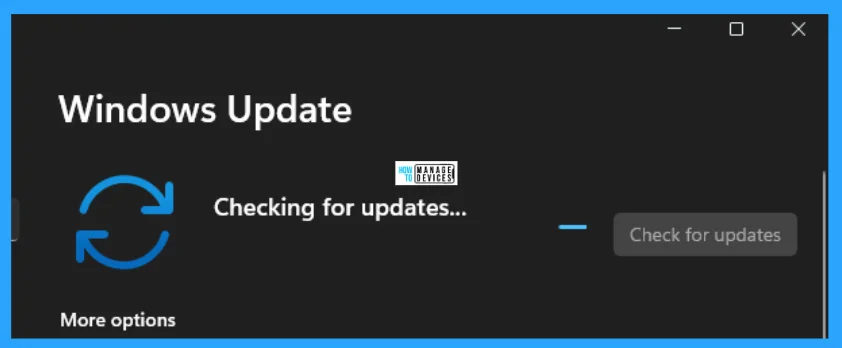
Create a Shortcut for Windows Updates and Check for Updates
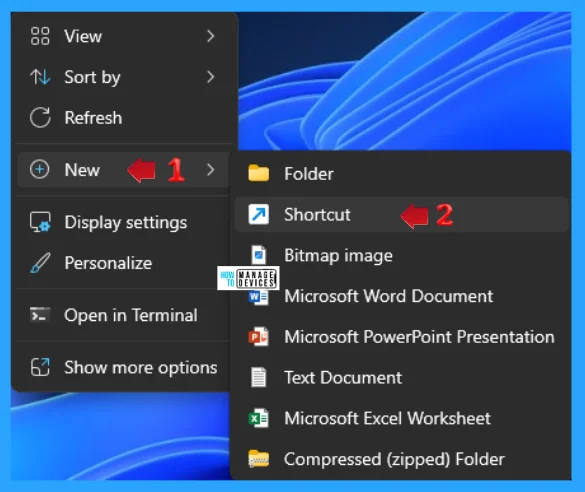
To create a shortcut for Windows Updates and Check for Updates, you have to right-click on the blank space on your desktop. Select the New, then select Shortcut.
The Create Shortcut window opens, asking, ‘What item would you like to create a shortcut for?’ This wizard helps you create shortcuts to local or network programs, files, folders, computers, or Internet addresses. Now type/copy and paste the following address, and press Next to continue.
cmd /s /c USOClient StartInteractiveScan & start ms-settings:windowsupdate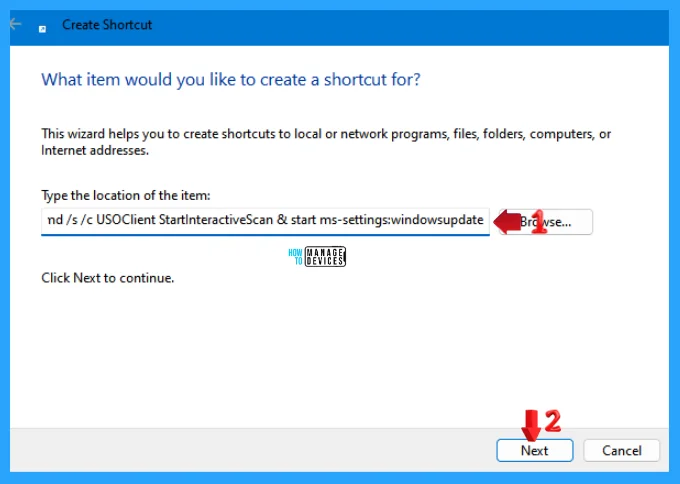
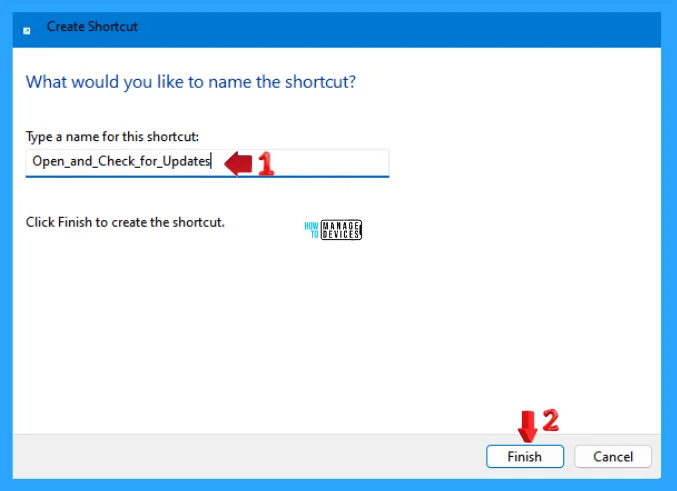
The next window asks, ‘What would you like to name the shortcut?’ Type a name for the shortcut according to your choice and click Finish to create it. Your shortcut for Windows Updates and Check for Updates is now created successfully.
Create a Shortcut for Windows Updates Only
To create a shortcut for Windows Updates only, right-click on the blank space on your desktop. Select New, then select Shortcut, as shown in Fig.3 above.
The Create Shortcut window opens, asking, ‘What item would you like to create a shortcut for?’ This wizard helps you create shortcuts to local or network programs, files, folders, computers, or Internet addresses. Now type/copy and paste the following address, and press Next to continue.
explorer ms-settings:windowsupdate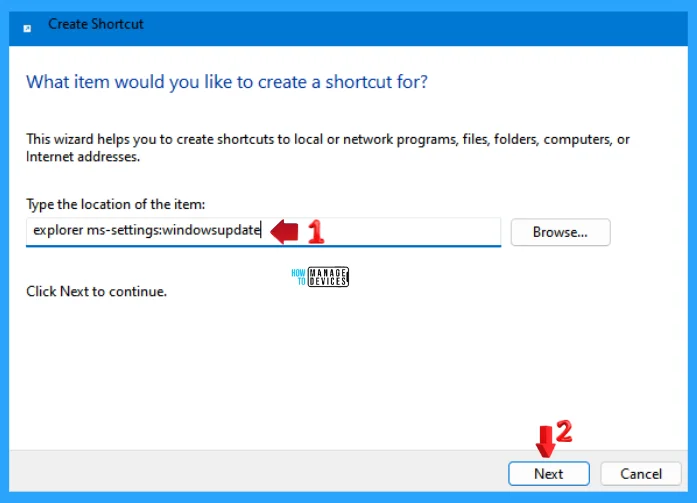
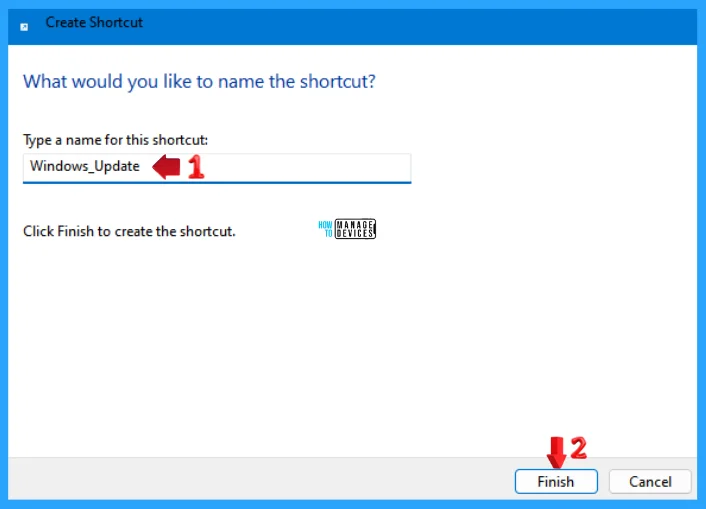
The next window asks, ‘What would you like to name the shortcut?’ Type a name for the shortcut according to your choice and click Finish to create it. Your shortcut for Windows Updates and Check for Updates is now created successfully.
Create a Shortcut for Automatically Checking Windows Updates
To create a shortcut for Automatically Checking Windows Updates, right-click on the blank space on your desktop. Select New, then select Shortcut, as shown in Fig.3 above.
The Create Shortcut window opens, asking, ‘What item would you like to create a shortcut for?’ This wizard helps you create shortcuts to local or network programs, files, folders, computers, or Internet addresses. Now type/copy and paste the following address, and press Next to continue.
%windir%\explorer.exe ms-settings:windowsupdate-action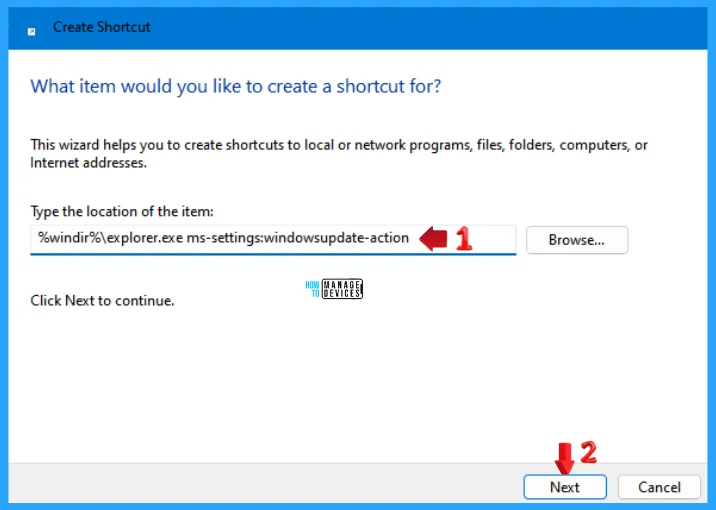
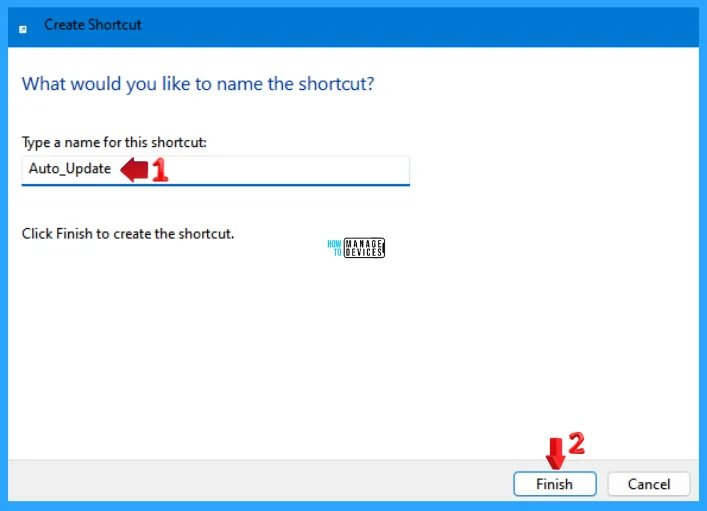
The next window asks, ‘What would you like to name the shortcut?’ Type a name for the shortcut according to your choice and click Finish to create it. Your shortcut for Windows Updates and Check for Updates is now created successfully.
Additional Tips
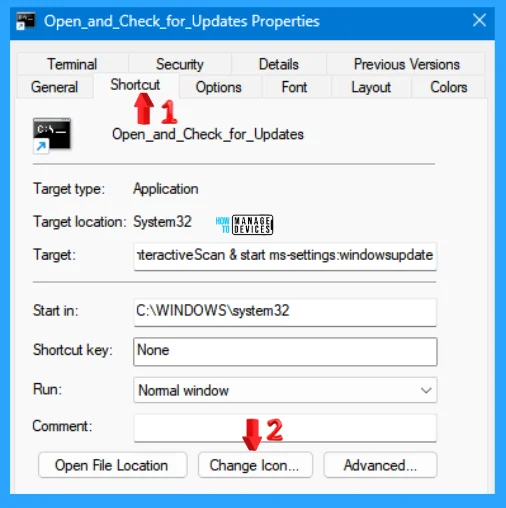
If you want to change the recently created shortcut icon using the above processes, right-click on the original shortcut and select Properties.
When the Properties window opens, then click on the Shortcut tab. Some options are available in the shortcut tab; click on the Change Icon…. button.
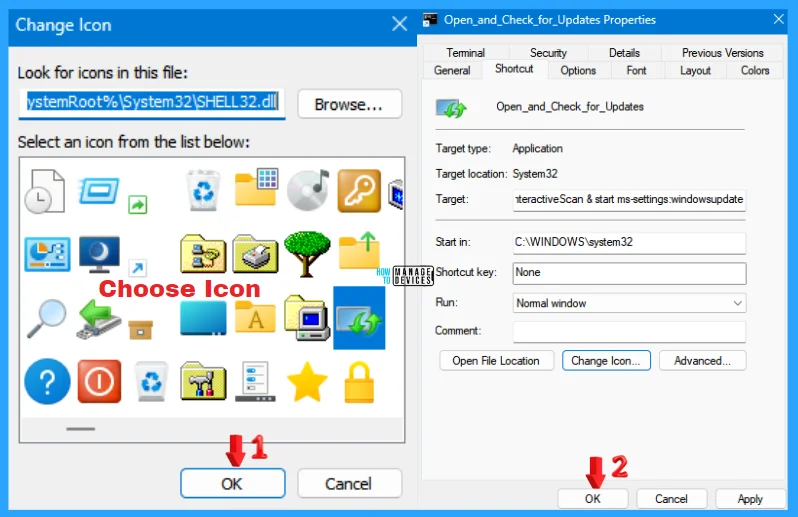
The Change Icon wizard is open now. Here, you can select an icon from the list provided by Microsoft by default or choose another icon by using the browse option and clicking on OK; it returns to the Properties window. Now, click the OK button again to complete the process.
NOTE! If the changes are not working, reboot your device and try the shortcuts.
I hope the information on How to Create Different Shortcuts to Check for Windows Updates in Windows 11 is helpful. Please follow us on the HTMD Community and visit our website, HTMD Forum, if you like our content. Suggest improvements, if any, and we’d love to know which topic you want us to explore next.
We are on WhatsApp. To get the latest step-by-step guides and news updates, Join our Channel. Click here – HTMD WhatsApp.
Author
Alok is a Master of Computer Applications (MCA) graduate. He loves writing on Windows 11 and related technologies. He likes to share his knowledge, quick tips, and tricks with Windows 11 or Windows 10 with the community.
