This article focuses on how to Turn off Data Execution Prevention for Explorer Using Intune. We will explore how to apply this policy using Intune’s Configuration Profiles. Our purpose here is to gain understanding and hands-on experience in effectively configuring and turning off Data Execution Prevention for Explorer Using Intune.
When you Turn off Data Execution Prevention for Explorer, it opens up the possibility for certain older plug-in applications to operate smoothly without causing Explorer to terminate. Data execution prevention (DEP) is a security feature that helps prevent malicious code from running in memory.
However, some legacy plug-ins, which are older software components, may not be compatible with DEP and can trigger the termination of Explorer, which is the Windows shell responsible for displaying the desktop and managing file operations.
Disabling DEP removes this compatibility barrier, allowing these legacy plug-in applications to function without causing Explorer to terminate. This can be beneficial for users who rely on these specific plug-ins to perform tasks or access certain functionalities that are not available in newer alternatives.
It’s important to note, though, that disabling DEP also removes a layer of security protection, so it should only be done with caution and for trusted applications that require it. Disabling data execution prevention (DEP) entails turning off a security feature that guards against malicious code execution in memory.
Windows CSP Details TurnOffDataExecutionPreventionForExplorer
We will see Windows CSP Details for this Policy setting TurnOffDataExecutionPreventionForExplorer. Data execution prevention is designed to enhance system security by preventing the execution of potentially harmful code. However, certain legacy plug-ins may not be compatible with DEP and can trigger the termination of Explorer when attempting to run. This can be problematic for users who rely on these plug-ins to carry out specific tasks or access particular functionalities that are not available through newer alternatives.
CSP URI – ./Device/Vendor/MSFT/Policy/Config/FileExplorer/TurnOffDataExecutionPreventionForExplorer

Turn off Data Execution Prevention for Explorer Using Intune
To Turn off Data Execution Prevention for Explorer Using Intune, follow the steps stated below:
- Sign in to the Intune Admin Center portal https://intune.microsoft.com/.
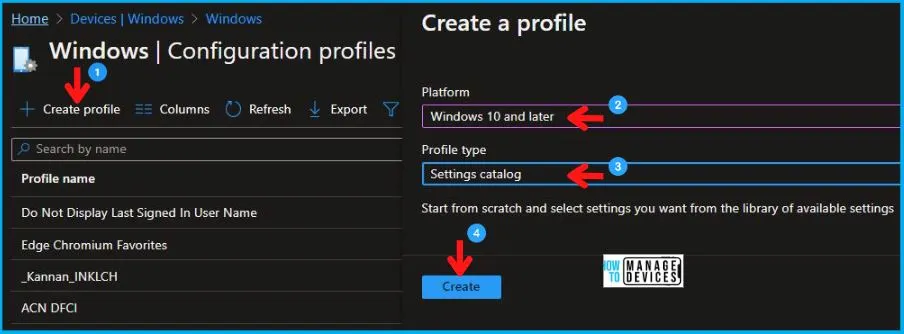
- Select Devices > Windows > Configuration profiles > Create a profile.
In Create Profile, Select Windows 10 and later in Platform, and Select Profile Type as Settings catalog. Click on Create button.
| Platform | Profile Type |
|---|---|
| Windows 10 and later | Settings Catalog |
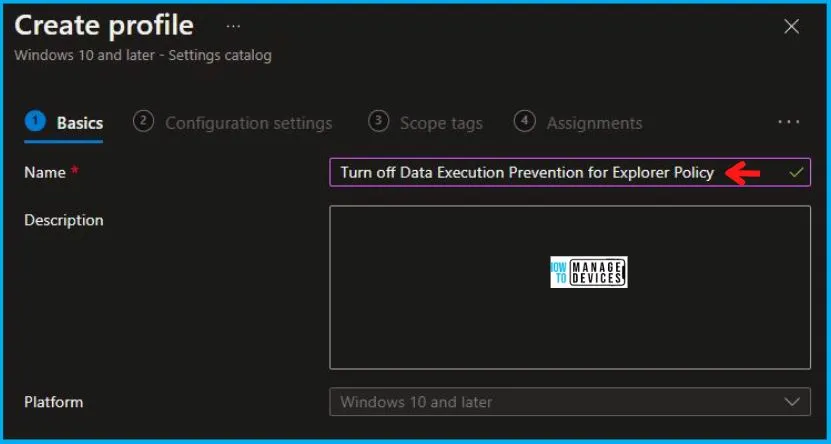
On the Basics tab pane, provide a name for the policy as “Turn off Data Execution Prevention for Explorer Policy.” Optionally, you can enter a description for the policy and then proceed by selecting “Next“.
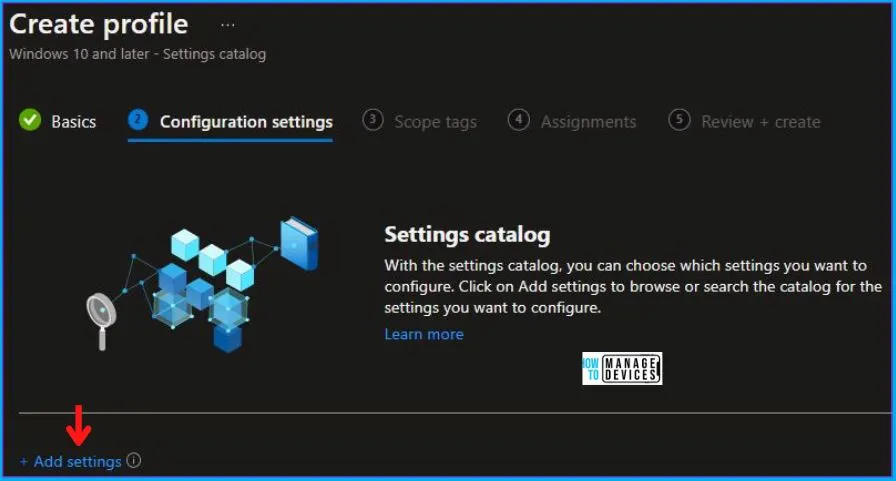
Now in Configuration Settings, click Add Settings to browse or search the catalog for the settings you want to configure.
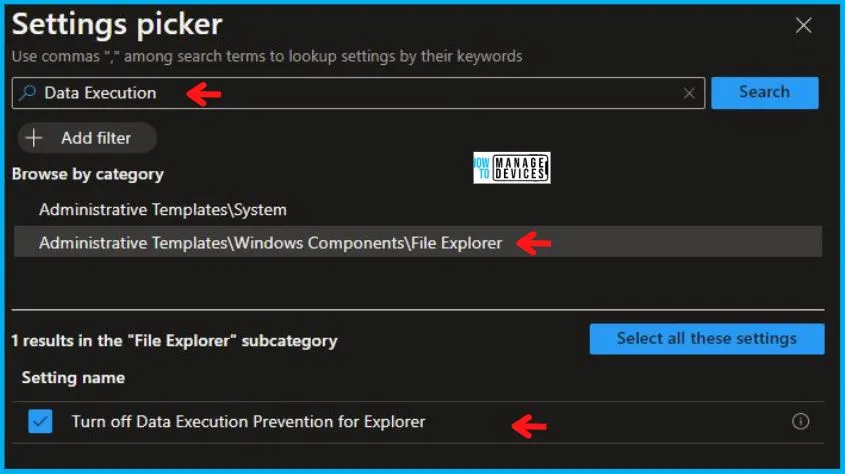
In the Settings Picker windows, search by the keyword Data Execution, you’ll get two categories, one is Administrative Templates\Windows Components\File Explorer, and select this.
When you select the option as stated above, you will see one option, Turn off Data Execution Prevention for Explorer. After selecting your setting, click the cross mark in the right-hand corner.
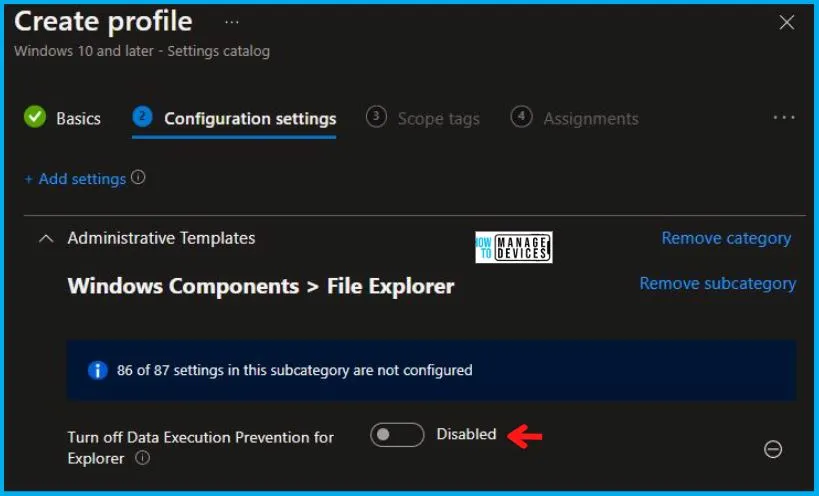
Now, in the Administrative Templates, set Turn off Data Execution Prevention for Explorer to Disabled, as shown below in the image.
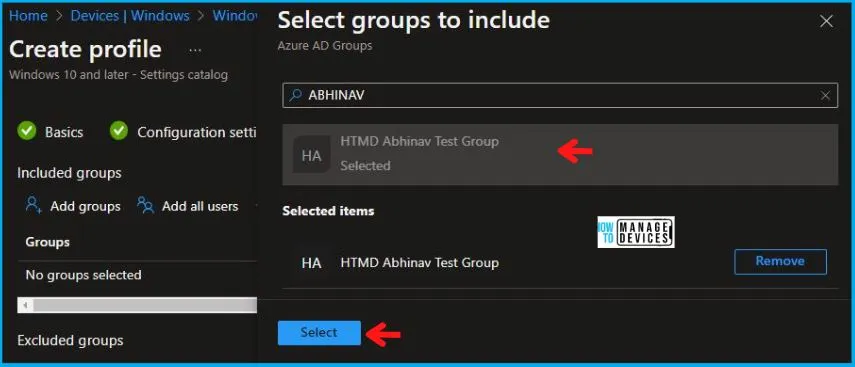
Using Scope tags, you can assign a tag to filter the profile to specific IT groups. One can add scope tags (if required) and click Next to continue. Now in Assignments, in Included Groups, you need to click on Add Groups, choose Select Groups to include one or more groups, and click Next to continue.
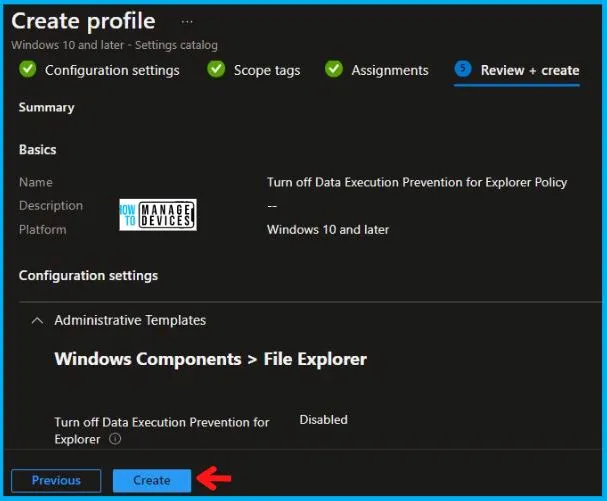
In the Review + Create tab, you need to review your settings. After clicking on Create, your changes are saved, and the profile is assigned.
Upon successfully creating the “Turn off Data Execution Prevention for Explorer Policy,” notification will appear in the top right-hand corner, confirming the action. You can also verify the policy’s existence by navigating to the Configuration Profiles list, where it will be prominently displayed.
Your groups will receive your profile settings when the devices check in with the Intune service. The Policy applies to the device.
Intune Report for Turn off Data Execution Prevention for Explorer Policy
From Intune Portal, you can view the Intune settings catalog profile report, which provides an overview of device configuration policies and deployment status.
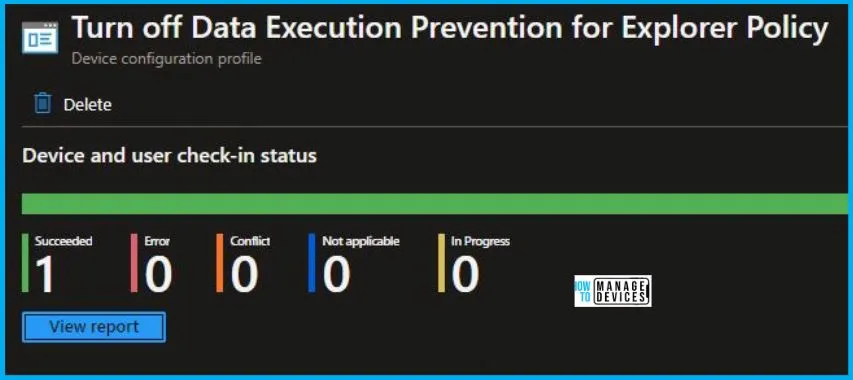
To track the assignment of the policy, you need to select the relevant policy from the Configuration Profiles list. By reviewing the device and user check-in status, you can determine if the policy has been successfully applied. If you require more detailed information, you can click on “View Report” to access additional insights.
Registry Key Entry
To access the registry settings that hold the group policy configurations on a specific computer, you can execute “REGEDIT.exe” on the target computer and navigate to the precise registry path where these settings are stored.
- Computer\HKEY_LOCAL_MACHINE\SOFTWARE\Microsoft\PolicyManager\providers\4009A089-4FBA-482B-9D17-9E5A8428CB98\default\Device\FileExplorer
When you navigate to the above path in the Registry Editor, you will find the registry key with the name TurnOffDataExecutionPreventionForExplorer. Refer to the table and image below.
| Registry Name | Data |
|---|---|
| TurnOffDataExecutionPreventionForExplorer | Disabled |

Author
Abhinav Rana is working as an SCCM Admin. He loves to help the community by sharing his knowledge. He is a B.Tech graduate in Information Technology.
