Let’s learn how to Schedule a chat message in Microsoft Teams for the Windows platform. This post explains scheduling a chat message to be sent automatically in Microsoft Teams. You can easily do this feature by logging in when you install the app under Workflow.
Using this feature, You can Delay the delivery of Microsoft Teams chat messages. The chat message will arrive at its destination when you schedule. To do this feature, you must ensure that the teams and flow connectors have access to your account.
You can send out a chat message at a time that is convenient to you, and the Teams chat message will arrive at its destination at the time you scheduled. Microsoft Teams is a collaboration app developed by Microsoft; by using this app, you and your team stay informed, organized, and connected in one place.
You first need to navigate to the chat with the Recipient whom you like to see the scheduled Message. Schedule message in Microsoft Teams helps you to send messages before you forget and also allows you to avoid disturbing people before they start working.
- Deploy Microsoft 365 Apps MS Teams Using Intune MEM
- Best Option to Deploy MS Teams MSI Using SCCM | ConfigMgr
- Best option to Disable or Enable Read Receipts in Microsoft Teams

What are the Advantages of Delayed Scheduled Chat Messages in Microsoft Teams?
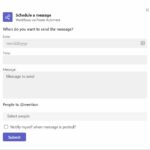
You can easily delay or schedule a chat message in Microsoft Teams. Microsoft offers a much better way of handling workplace communication. The advantages of scheduled chat messages in Microsoft Teams are as follows.
1. Allows efficient and timely distribution of information to relevant users
2. Helps you to avoid disturbing people before they start working
3. Helps to send messages at a date and time of your choice
4. Helps you to send messages before you forget
5. Minimizes the manual intervention
Is it possible to delay or schedule messages using the Microsoft Teams iOS app?

No, this feature is not yet rolled out for non-Windows platforms. Delayed delivery of Teams chat message and scheduled delivery is applicable only for the Desktop (Windows) platform at this point in time.
How to Delay or Schedule a Chat Message
You can easily delay or schedule a chat message in Teams. The feature of scheduling chat messages in Teams helps you to send messages before you forget. The following are the steps to schedule a chat message in Microsoft Teams.
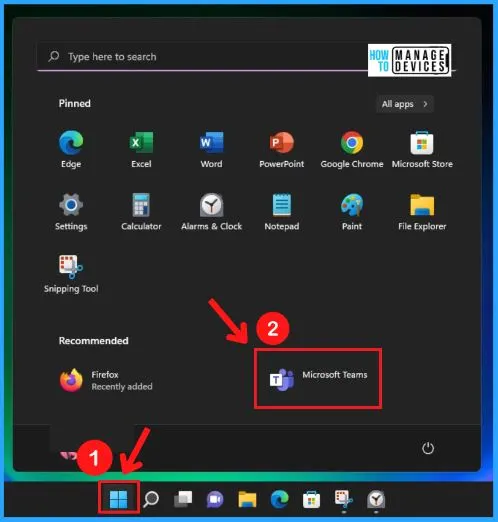
- Select Microsoft Teams from Start Menu
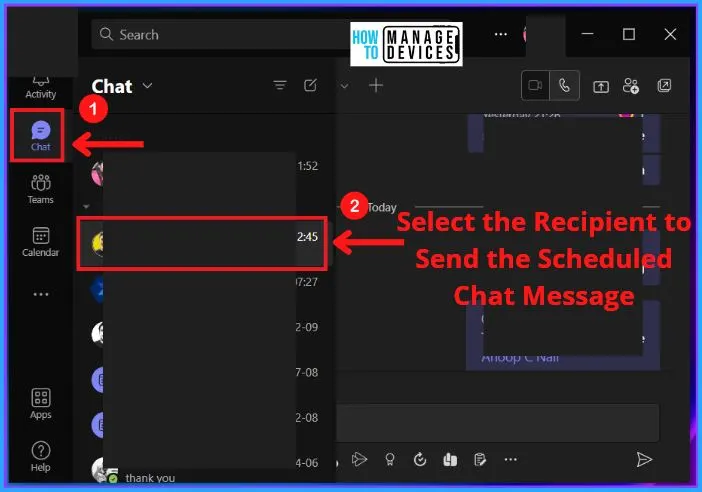
Click the Chat section on the left side of Teams and select the Recipient to send the scheduled chat message. Selection of Recipient is an important thing in this feature. The Scheduled chat message work only in one on one chat.
Note! – Scheduled chat messages in MS Teams work only in one on one chat.
- Click the Chat section on the left side of Microsoft Teams
- Select the Recipient to send the scheduled chat message
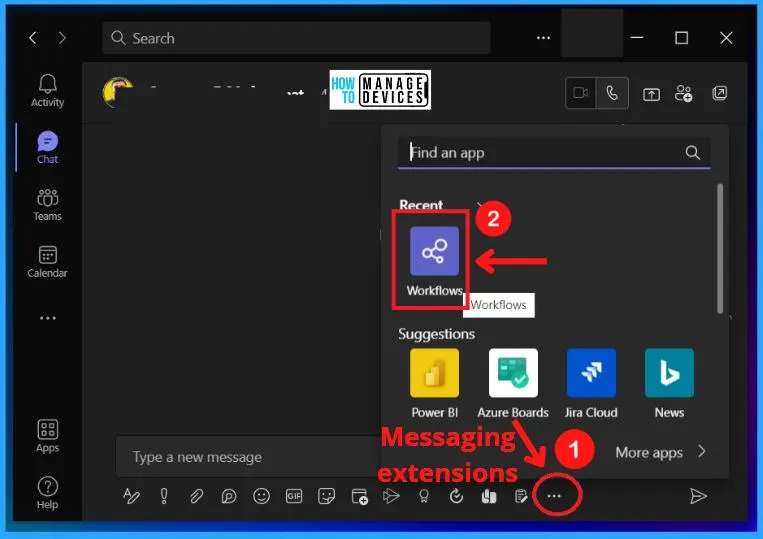
Select the Messaging extensions (3 dots) from the Compose box, search for the Workflows app and click on the workflow app icon from the screenshot below.
- Select Messaging extensions (3 dots) from the Compose box
- Click on the Workflows app icon from the below screenshot
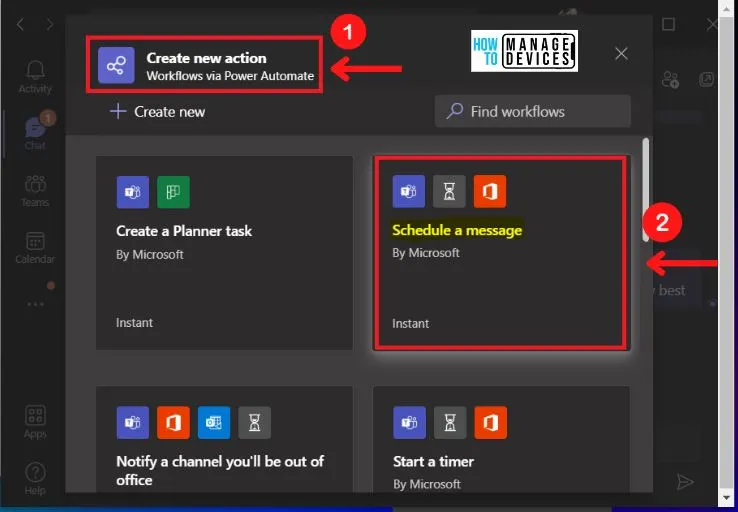
Click the “Create new action” from the below screenshot. A list of templated flows will appear: Create a planner task, Schedule a message, Notify a channel you will be out of the office, Start a timer, Create an Asana task, etc. Select the “Schedule a message” option from the list of templates.
- Select “Create new action” from the below screenshot
- Select the “Schedule a message” template from the list of templates
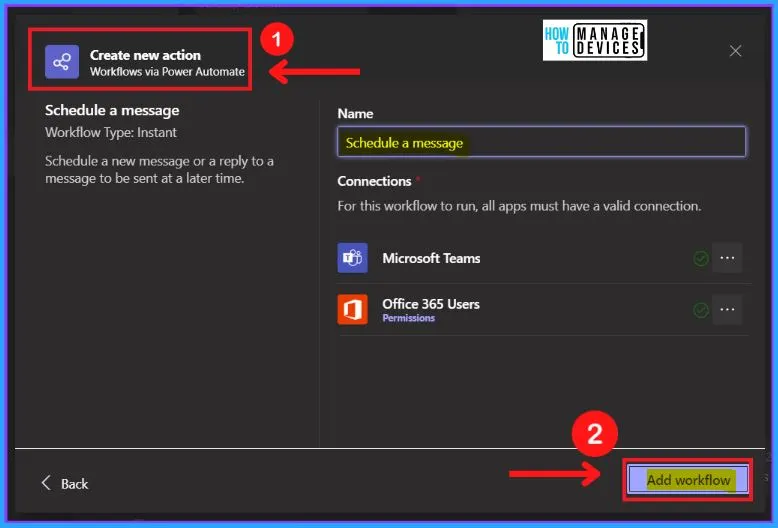
Click the Add workflow option from the screenshot below to help you add the workflow app in your Microsoft Teams to Schedule a new message or reply to a message to be sent later.
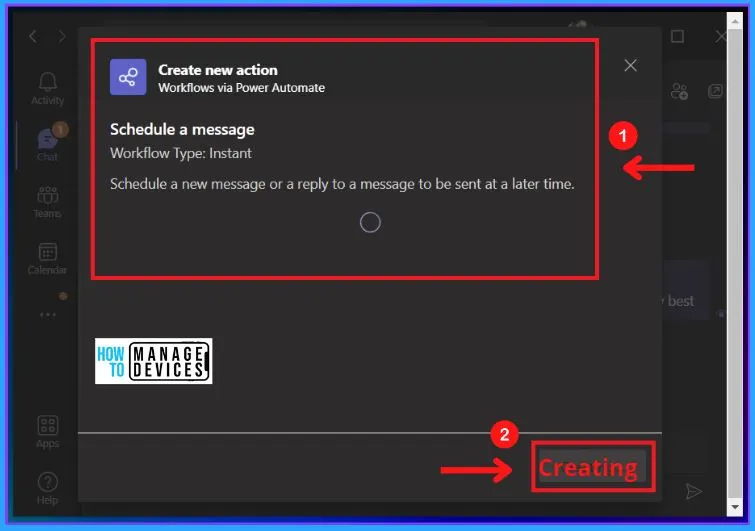
The screenshot below shows that Scheduling a new message or a reply to a message to be sent later is trying to create. After creating Scheduling a message in Microsoft Teams, Power Automate will send a card to run the flow.
The Workflow is added successfully in Microsoft Teams. It also shows guidelines for using this Workflow and gives a notification message that Power Automate sent a card. You will be able to run this Workflow by using the Workflows app when you go to write a message.
- Workflow added successfully and also gives the guidelines to use the Workflow app, such as
- Select the Workflow below where you type a message
- Select Schedule a message
- Follow the steps from there
- Select the Run flow button
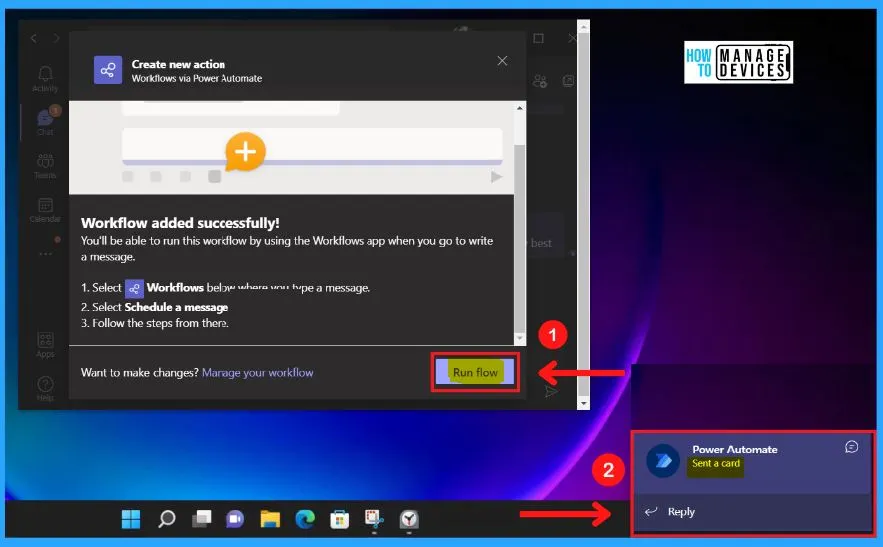
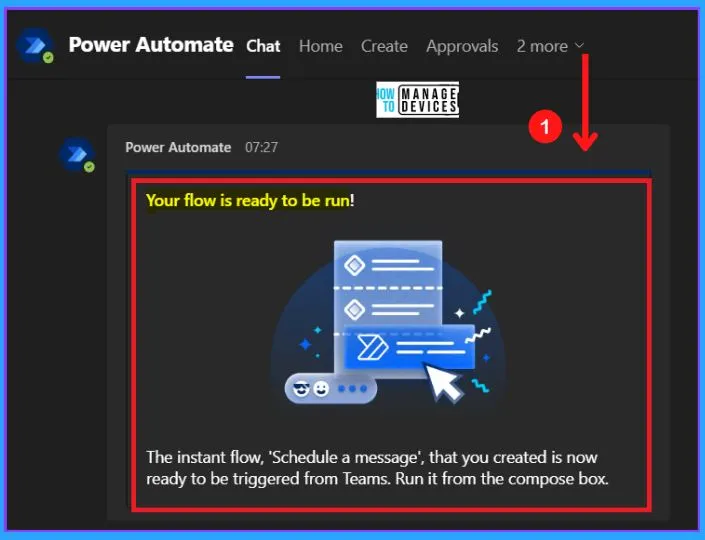
The Power Automate sends a Card to you that the instant flow Scheduled Message you created is ready to be triggered from Teams. You can Run it from the compose box, and the below screenshot shows that your flow is ready to be run.
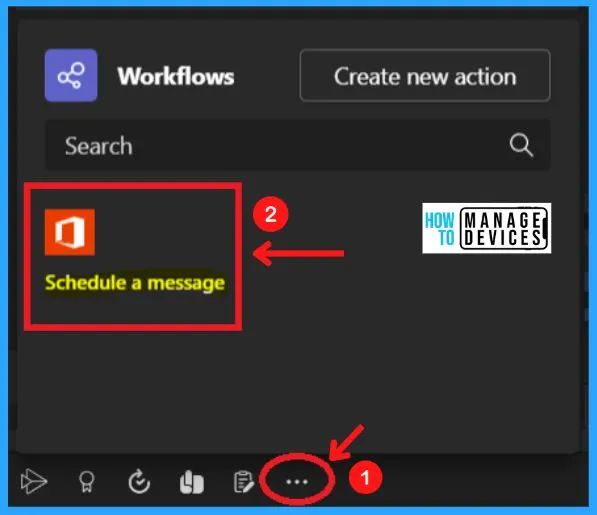
Select Messaging extension from the compose box and select the Schedule a message option from the below screenshot.
- Select Messaging extension from the compose box
- Select the “Schedule a message” option from the below screenshot
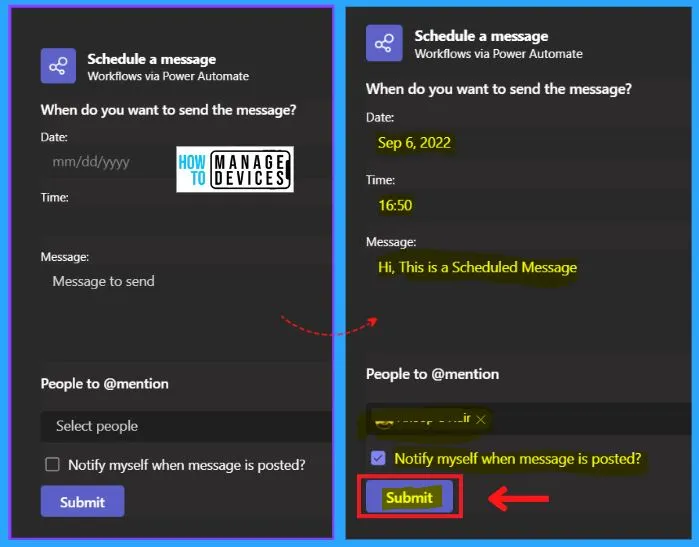
You can easily Schedule a message by entering the Date of the Message, Time of the Message, and Content of the Message. You can also have the option of mentioning an individual or Recipient to send the Message.
If you want to get a Notification when a message is posted, Check the “Notify myself when a message is posted?” square box and click the submit button.
- Select the Date of the Message
- Select the Time of the Message
- Type the Content of the Message
- Select or mention an individual or Recipient to send the Message
- If you want to get a Notification when a message is posted, Check the “Notify myself when a message is posted?” square box
- Click the Submit button from the below screenshot
Notification for the Delayed Scheduled Teams Chat Message
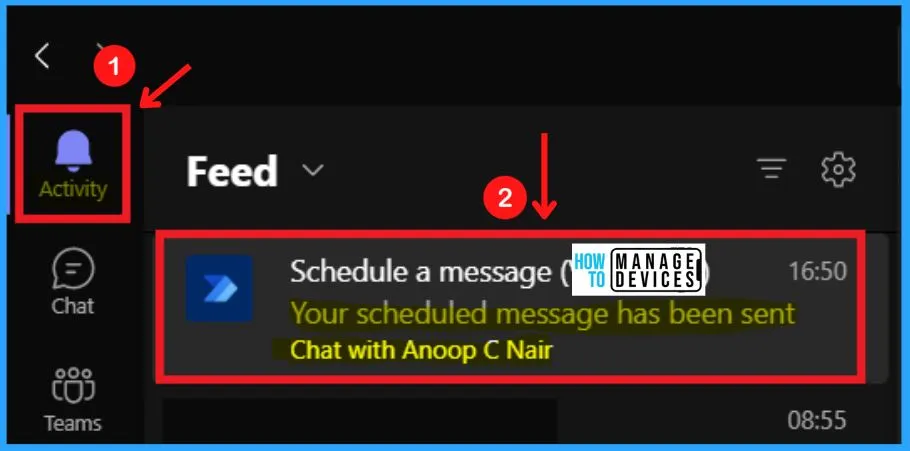
The below screenshot shows the Notification for the scheduled Message. The notification section in the Scheduled Message helps you to get notified when the scheduled Message is sent to the Recipient.
All notifications are shown in the Activity Feed of Microsoft Teams. The number of notifications is shown in the Activity bell icon as numbers 1, 2, etc. (See the below screenshot). The following are the steps to see the Notifications in MS Teams.
- Start Menu > MS Teams
- Click the Activity bell icon on the top left corner of MS Teams
- All unread messages, @mentions, replies, likes, and other activities are shown in the Activity bell icon
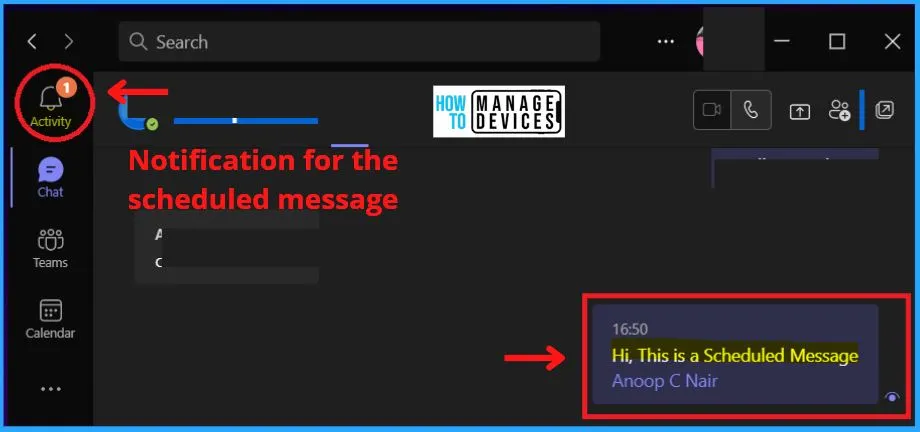
The Activity Feed section in Microsoft teams also helps you get notified when the Message is sent to the Recipient and shows that your scheduled Message has been sent. The Activity Feed in Microsoft Teams allows you to show the Unread messages, @mentions, replies, likes, other activities, etc.
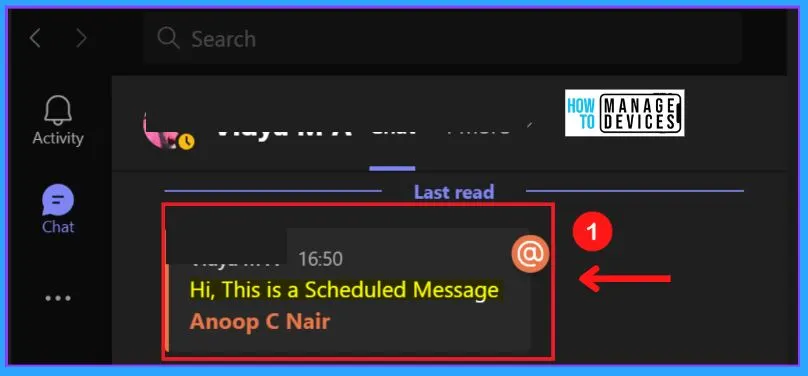
The Recipient side of the delayed or scheduled Teams Chat Message is shown in the below screenshot. The scheduled Message is sent to the Recipient on the scheduled date and time; the Scheduled Message helps both the sender and the Recipient.
You can see here the scheduled Message was sent and the text that Hi, This is a scheduled message and the Recipient’s name in the screenshot below.
Microsoft Teams Flows in Scheduled Messages
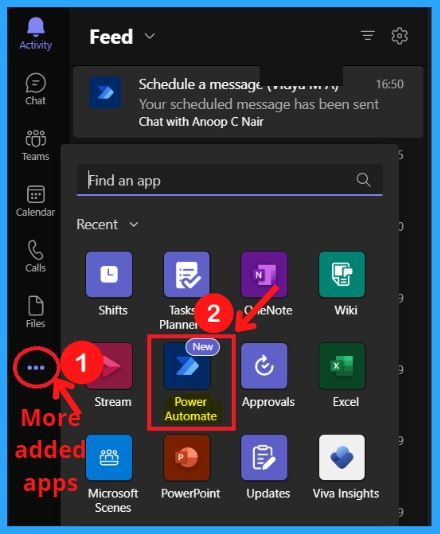
Microsoft Teams flows help you to show the Scheduled Message Flows that you have Enabled or created in Teams. To see the MS Flows in the Scheduled Message, you must select the “More added apps” on the bottom left of Teams and Select Power Automate.
- Select the “More added apps” on the bottom left of MS Teams
- Select the Power Automate app from the list of apps
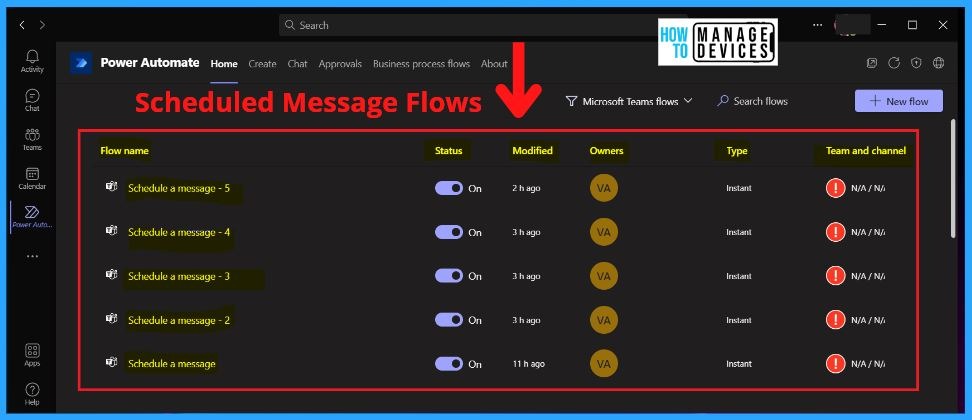
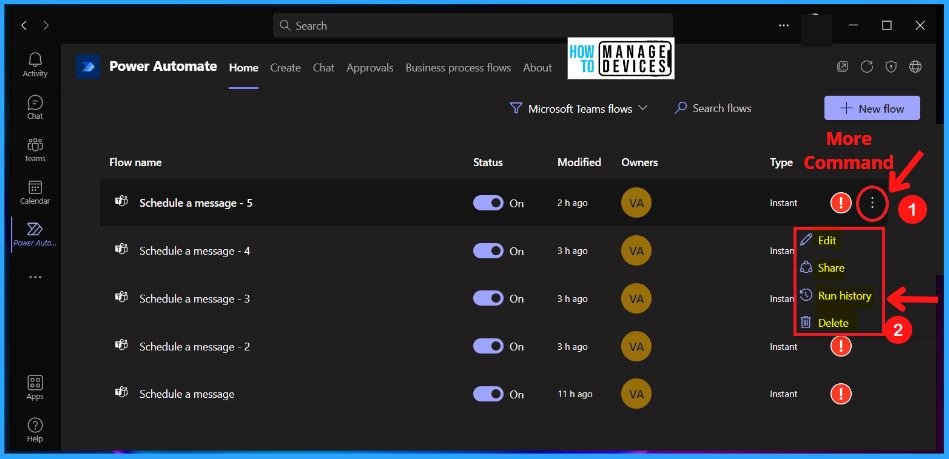
The Scheduled message flows show the status of the scheduled Message, the Last-Modified time of the scheduled Message, the Owner of the scheduled Message, the Type, and “Teams and channel” of the scheduled Message.
The screenshot below, “Scheduled a message” – 5, shows that the Status of the scheduled Message is Turned on, the Last Modified was 2 hours ago, the Owner is VA, and the Message Type is instant. The below screenshot shows the Scheduled Message flows in MS Teams.
You can easily Edit, Share, and Delete the Scheduled Message from the More Command (3 dots) in MS Teams. The More command is shown in the below screenshot; if you want to edit the scheduled Message, click the More command (3 dots) and select the Edit option.
- More added apps > Power Automate
- Click the More Command (3 dots) in the below screenshot
- Select the options like Edit, Share, Delete, whichever you want
Run History of the Scheduled Message
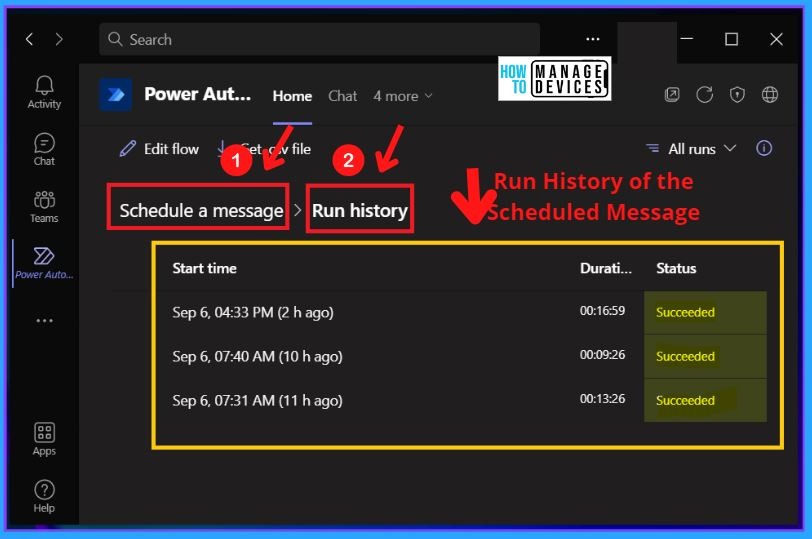
The Run history of the scheduled Message shows the History of the scheduled Message. The Run history shows the Start time, Duration, and Status of the scheduled Message.
- More added apps > Power Automate > More command > Run History
- Run history of the Scheduled Message shows the History of the scheduled Message
- Shows the Date and Time of the scheduled Message, i.e., Sep, 6,04:33 (2 hours ago)
- Shows the Duration of the scheduled Message, i.e., 00:16:59
- Shows the Status of the scheduled Message, i.e., succeeded
The below table shows the Run history of the following scheduled messages.
| Scheduled Message | Date | Time | Duration | Status |
|---|---|---|---|---|
| Scheduled Message 1 | Sep 6 | 04:33 PM | 00:16:59 | Succeeded |
| Scheduled Message 2 | Sep 6 | 07:40 AM | 00:09:26 | Succeeded |
| Scheduled Message 3 | Sep 6 | 07:31 AM | 00:13:26 | Succeeded |
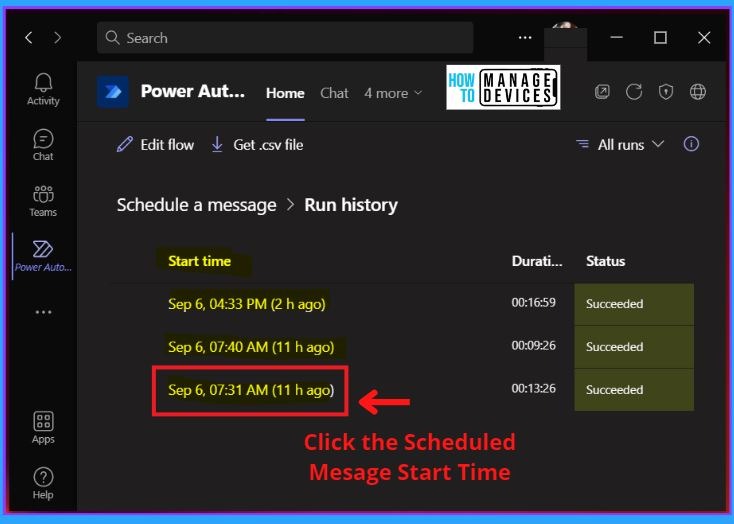
Click one of the Start times of the scheduled Message to open the Run history of that Scheduled Message. Run history also shows whether your flow ran success or not.
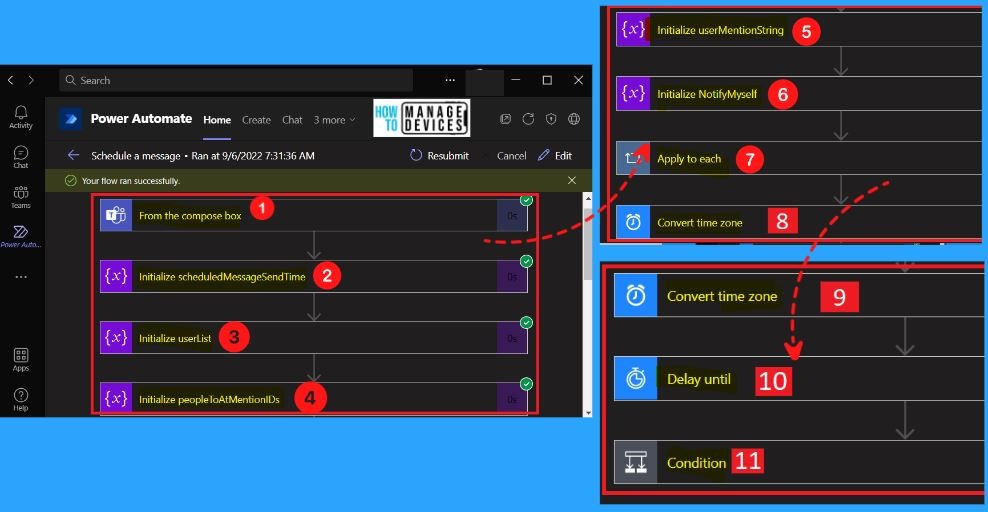
The Power Automate app of the delayed or scheduled Teams Chat Message shows whether your flow ran success or not. The scheduled Message on 9/6/2022, 7:31:36 AM, ran successfully, as shown in the screenshot below. The screenshot also shows the MS Teams flow of the scheduled Message.
Author
About Author – Vidya is a computer enthusiast. She is here to share quick tips and tricks with Windows 11 or Windows 10 users. She is also keen to find solutions to day-to-day tech problems and write about them.
