Let’s discuss how to Disable the Allow Use of Camera Setting Policy using Intune. Control over the use of cameras on a computer is essential, especially in places where there is a need for extra security or dealing with sensitive information.
When you set the ‘Allow Use of Camera‘ to disabled, it helps you to put a strong lock on the camera function. This policy enables you to prevent anyone from accessing sensitive visual data without permission. It also allows you to reduce the chances of security issues and protect confidential information.
This policy helps you show whether camera device use on a machine is allowed or restricted. The recommended state for this setting is Disabled. Disabled camera setting policy adds an extra layer of protection, particularly when data sensitivity and security are significant.
You can easily Disable the Lock Screen Camera Policy using Intune. This policy helps you deactivate the toggle switch for the lock screen camera in PC Settings and blocks camera activation on the lock screen.
- Allow Camera Access on Windows 365 Cloud PC
- Enable Disable Hidden Camera Privacy Indicator in Windows
- Prevent Enabling Lock Screen Camera Using Intune
Why is the ‘Allow Use of Camera’ Setting Recommended to be Disabled in High-Security Environments?
Cameras in high-security environments can present severe risks to privacy and data security. Turning off the use of cameras is essential for protecting the unauthorized access.
What is the Impact of Setting ‘Allow Use of Camera’ to Disabled?
Users will not be able to utilize the camera functionality on the system.
Disable Allow Use of Camera Setting Policy using Intune
This post will give you essential information about the ‘Allow Use of Camera’ policy. The policy setting “Allow Use of Camera” determines whether the use of camera devices on a machine is permitted or restricted.
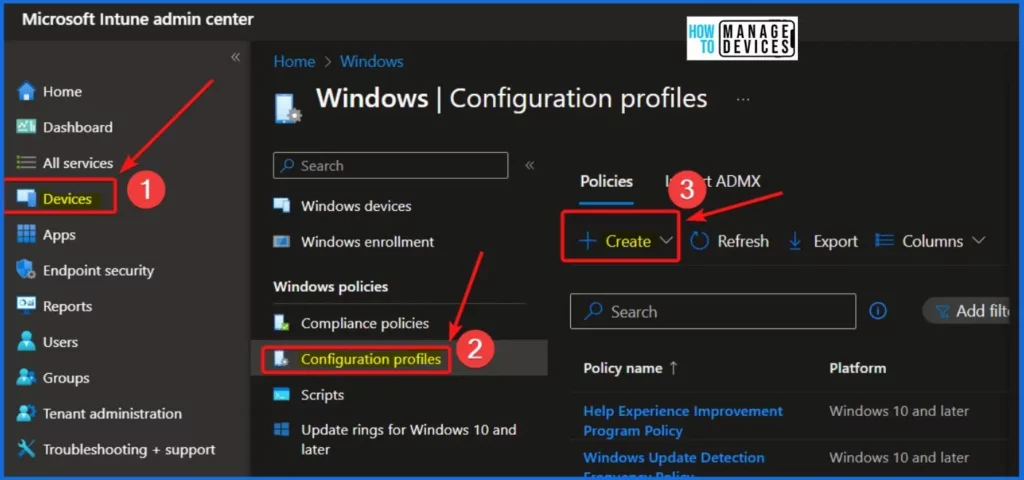
- Sign in to the Intune Admin Center portal. Select Devices > Windows > Configuration profiles > Create a profile.
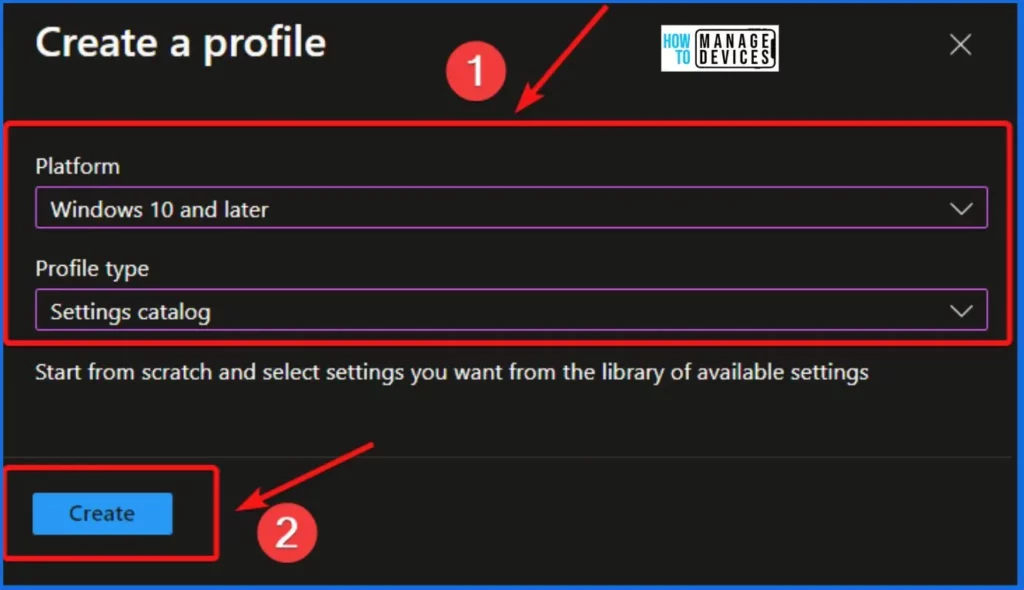
From the Create a profile window, select the Platform as Windows 10 and later and select the profile type as Settings catalog. Settings catalog helps you to open a library of available settings. Select the Create button from the below window.
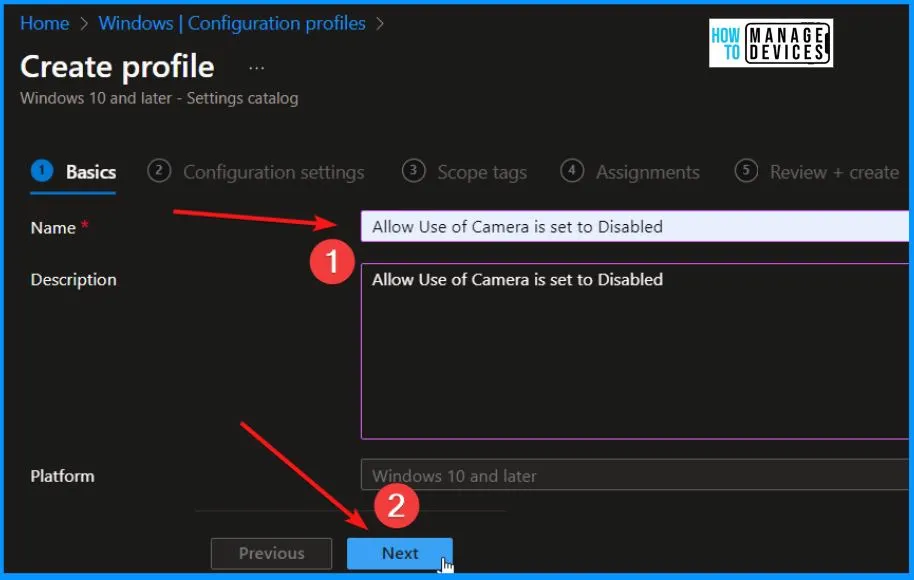
In the Basic tab, you should enter the Name Allow use of Camera, which is set to Disabled, and you should also give a description related to the Allow use of Camera, which is set to Disabled. The Platform is automatically selected. After entering all the details, select the Next button from the below window.
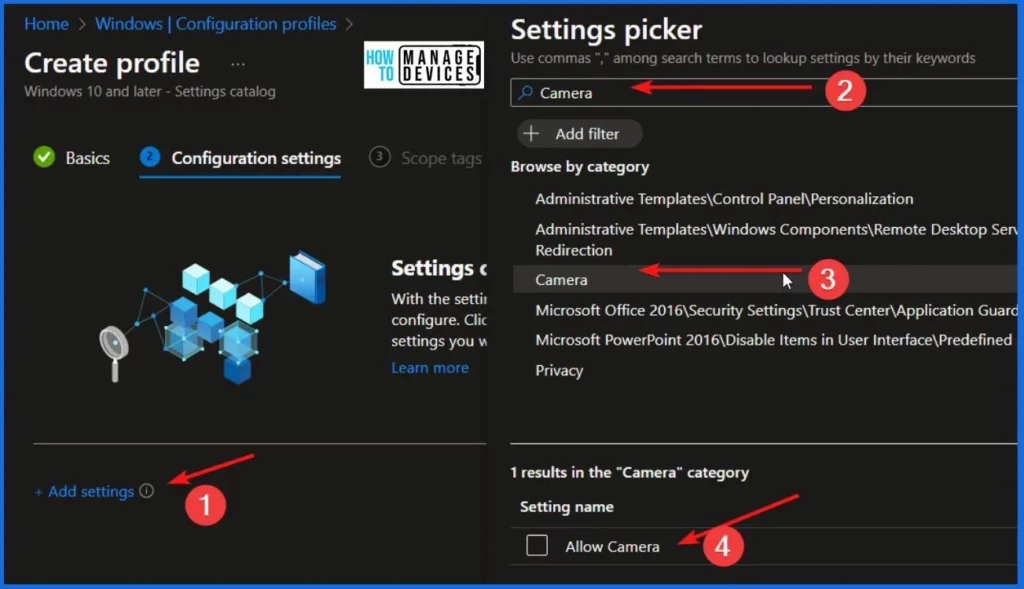
Now, in Configuration Settings, click Add Settings to browse or search the catalog for the settings you want to configure. In the Settings Picker windows, search by the keyword Camera. The window below helps you show the Camera category and the sub-category option as Allow Camera.
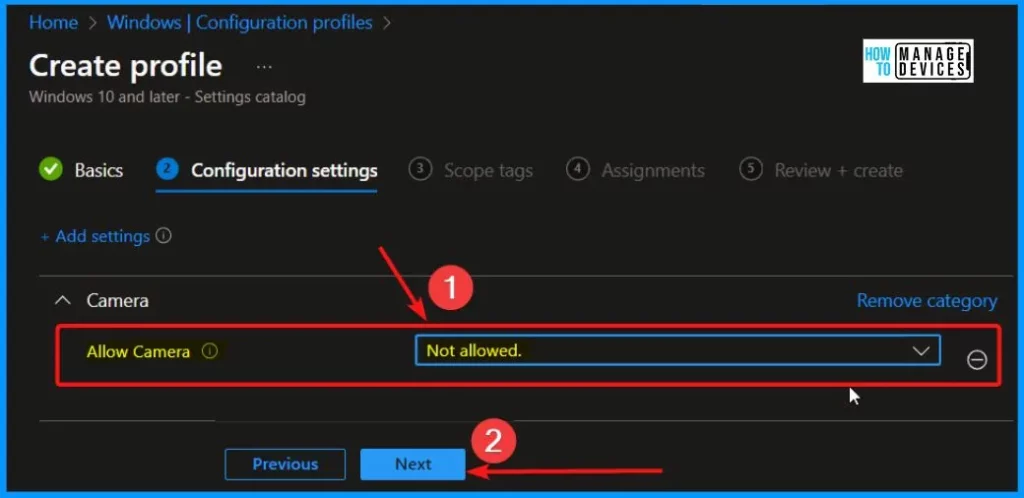
Disable or enable the Camera. The most restrictive value is Block. Select the Not allowed option from the dropdown arrow and select the Next button.
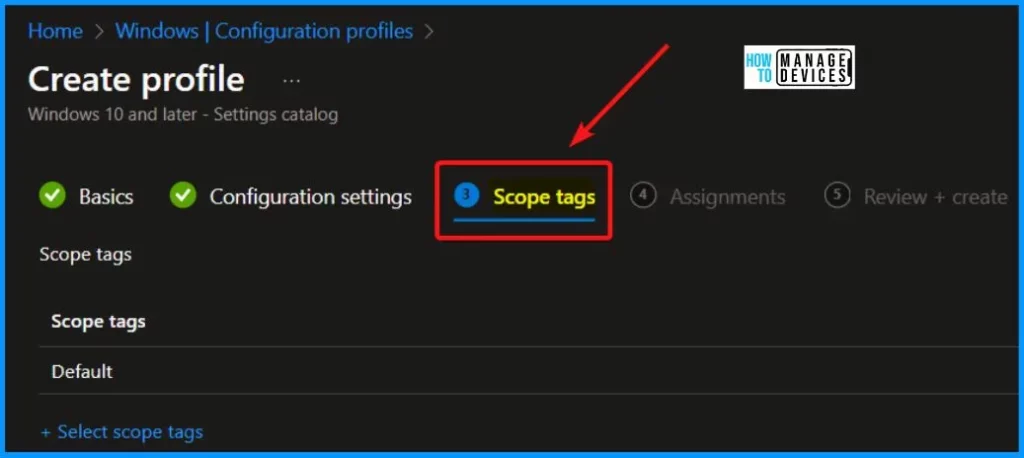
The scope tag section helps you add the scope tags and click “Next” to proceed with the configuration. Once you added the scope tag, select the Next button to proceed with the configuration.
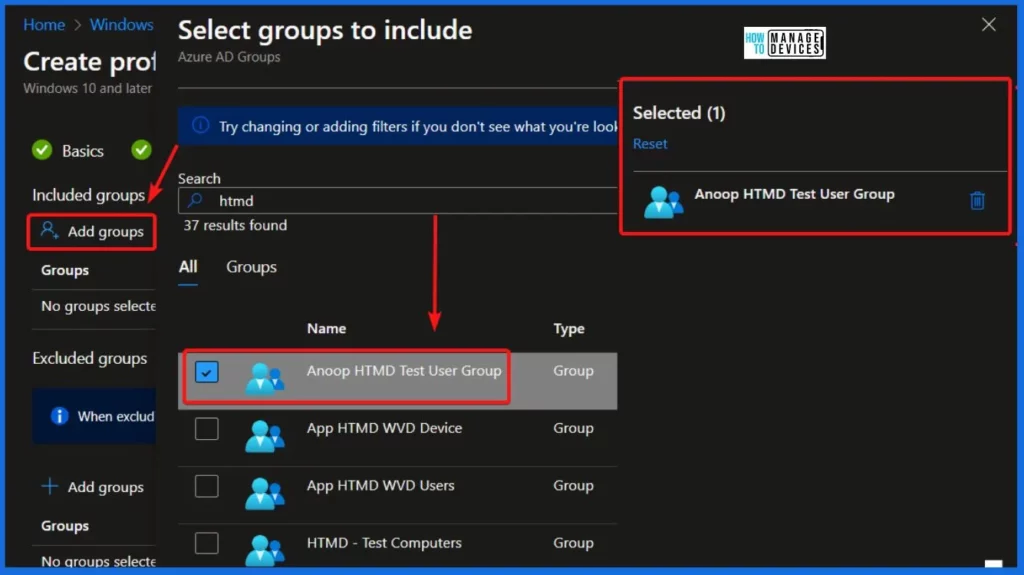
The assignment section helps you add and remove groups. Assignments show the Included groups and Excluded groups. Select the Add Groups button to include groups. Select Groups to include one or more groups, and click Next to continue.
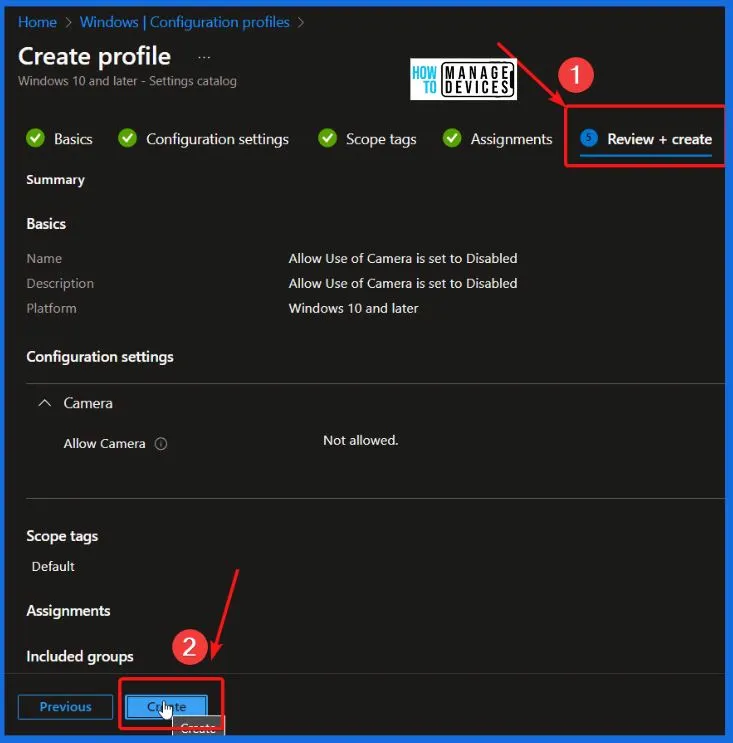
The last tab is the Review + Create tab, where you can quickly review your settings. After clicking Create, your changes are saved, and the profile is assigned.
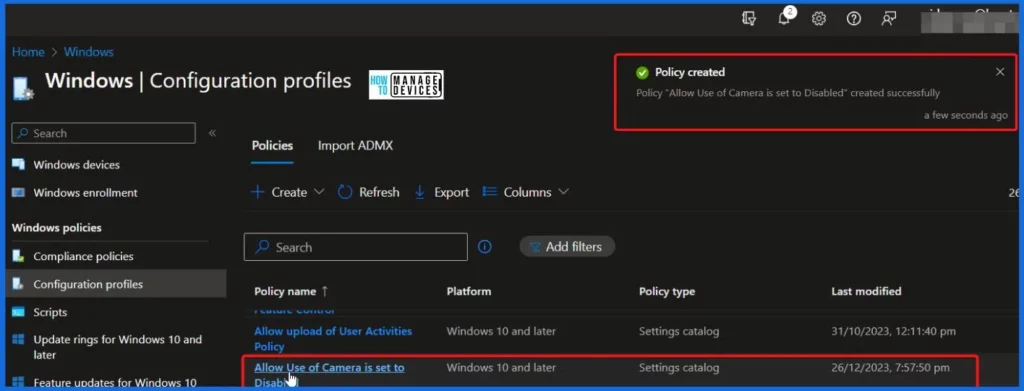
The screenshot below shows that the Allow Use of Camera is set to Disable policy, which was created successfully. The table below shows more details related to the policy.
| Policy Name | Platform | Policy Type | Last modified |
|---|---|---|---|
| Allow use of Camera is set to Disabled | Windows 10 and later | Settings Catalog | Show the last modified date |
Intune Report for Disable Allow Use of Camera Setting Policy
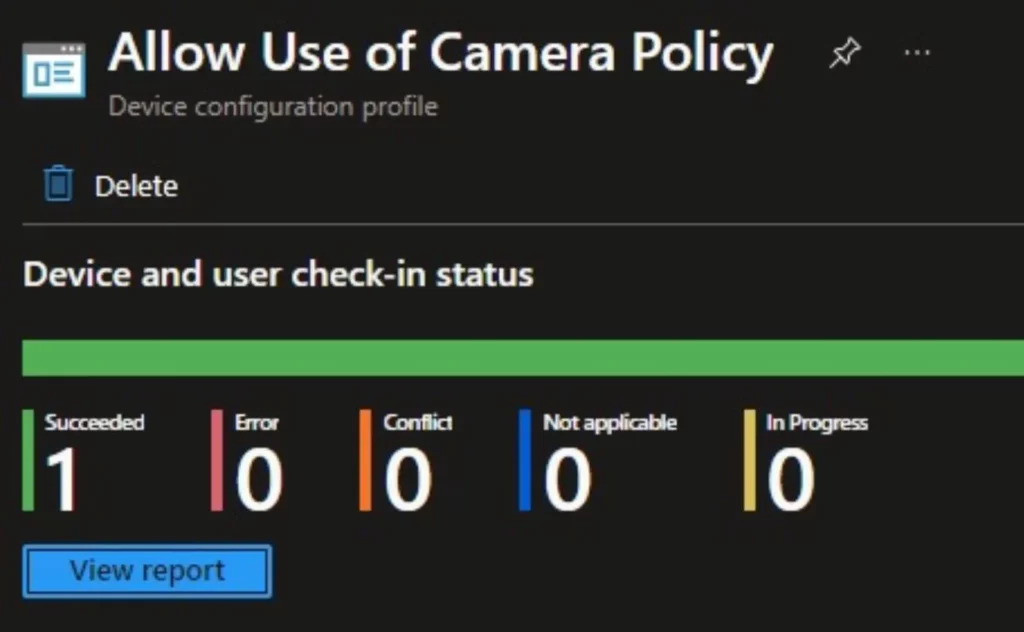
In the Intune Portal, you can check the Intune settings catalog profile report to see an overview of your device configuration policies and their deployment status. The Device and user check-in status shows the success is one.
You can easily click on “View Report” to get additional insights. This allows you to dive deeper into the details of the policy’s impact and ensure everything is working as intended.
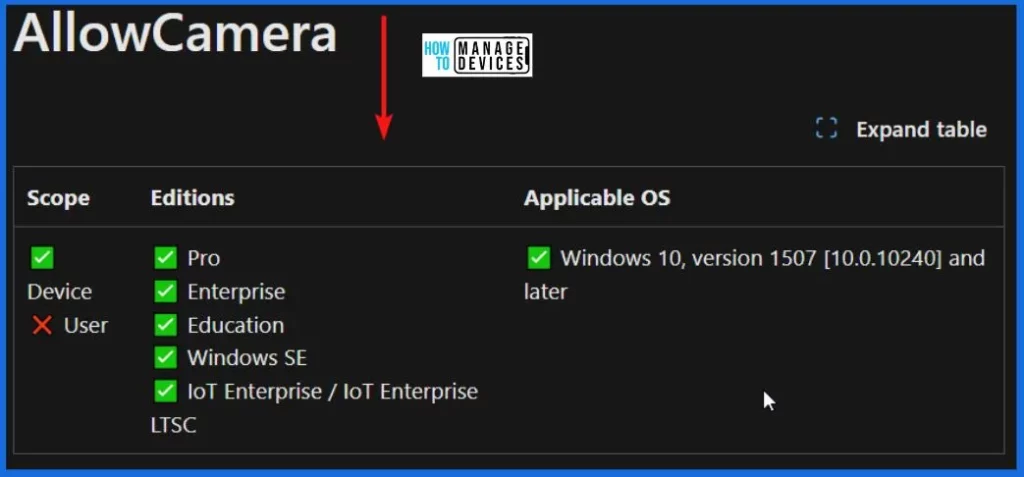
Windows CSP Details AllowCamera
Let’s see the Windows CSP Details for the AllowCamera Policy setting. This policy setting determines whether the use of camera devices on the machine is allowed. If you enable or leave this policy setting unconfigured, camera devices will be enabled, permitting users to utilize them.
On the other hand, if you Turn off this policy setting, camera devices will be disabled, restricting users from accessing and using the camera functionalities on the machine.
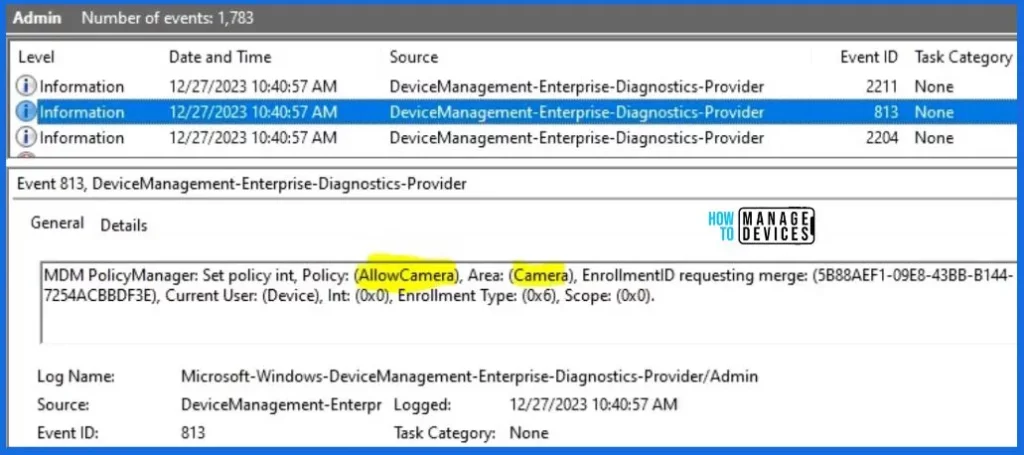
Intune MDM Event Log – AllowCamera
By analyzing these event IDs, you can gain a clear understanding of the policy’s application status and the corresponding value associated with it on the devices in question.
MDM PolicyManager: Set policy int, Policy: (AllowCamera), Area: (Camera), EnrollmentID requesting merge: (5B88AEF1-09E8-43BB-B144-7254ACBBDF3E), Current User: (Device), Int: (0x0), Enrollment Type: (0x6), Scope: (0x0).
When you navigate the path below in the Registry Editor, you will find the registry key named AllowCamera. Also, when I was guided to the path below, we saw that the Registry Key was created successfully.
Computer\HKEY_LOCAL_MACHINE\SOFTWARE\Microsoft\PolicyManager\providers\5B88AEF1-09E8-43BB-B144-7254ACBBDF3E\default\Device\Camera

Author
About the Author – Vidya is a computer enthusiast. She is here to share quick tips and tricks with Windows 11 or Windows 10 users. She loves writing on Windows 11 and related technologies. She is also keen to find solutions and write about day-to-day tech problems.
