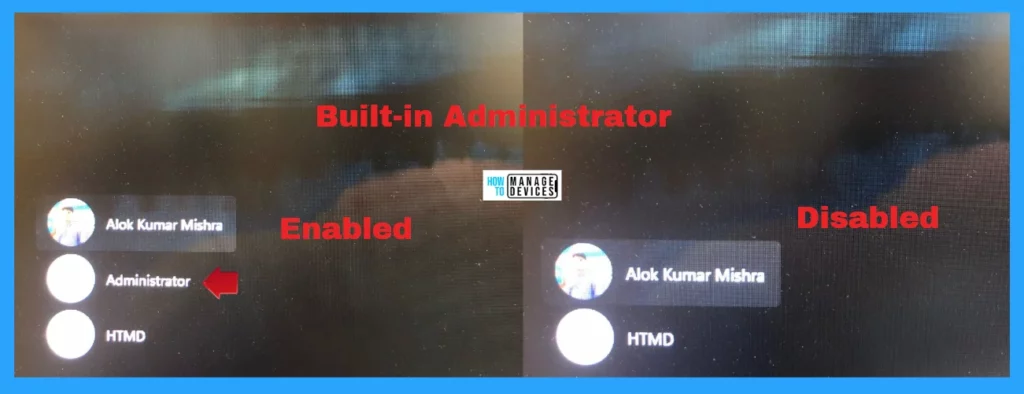
Let’s learn the Various Ways to Enable or Disable the Built-in Administrator in Windows 11. The built-in local Administrator account is a user account for system administration. Every computer has an Administrator account (SID S-1-5-domain-500, display name Administrator).
The Administrator account is the first account created during the Windows installation. It controls the local device’s files, directories, services, and other resources. It can create other local users, assign user rights, and assign permissions. Microsoft recommends LAPS for managing local admin passwords on Windows 11 devices.
The Administrator account can also take control of local resources at any time by changing the user rights and permissions. The default Administrator account can not be deleted or locked out but can be renamed or disabled.
Windows setup disables the built-in Administrator account and creates another local account that is a member of the Administrators group. A password does not protect the built-in Administrator by default, but you can add one to help prevent unauthorized users from signing in.
Table of Contents

How to Turn On and Off the Airplane Mode Flight Mode
In Windows 11, you can Enable or Disable the built-in Administrator. The methods for changing the settings are listed below.
- Elevated Command Prompt
- Elevated PowerShell
- Local Users and Groups
- Local Security Policy
- Deploy Intune Run All Administrators in Admin Approval Mode Policy
- Enable Local Admin Access for Windows 365 Business Edition
- Create Local Admin Account on MacOS using Intune
Elevated Command Prompt
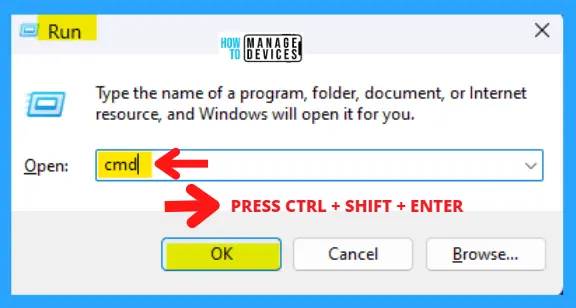
Users can use the Command Prompt in Admin mode to enable or disable the built-in Administrator account. To open the Elevated Command Prompt, press Win Key + R simultaneously to open the run dialogue box, and follow the below steps. The Run window said to type the name of a program, folder, document, or internet resource, and Windows will open it for you.
- Press Win Key + R
- Type cmd for the command prompt
- Press Ctrl + Shift + Enter
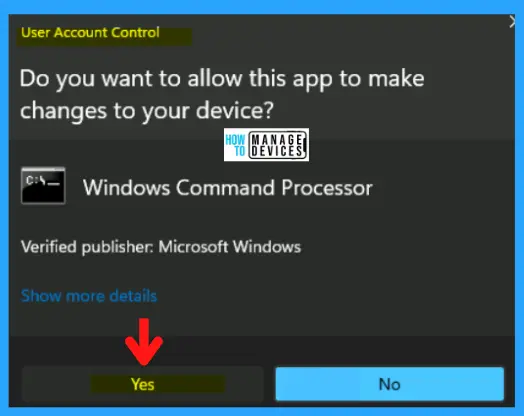
The next window appears as User Account Control, which asks you, “Do you want to allow this app to make changes to your device?”, for Windows Command Processor, press YES to continue. This window is an administrative approval to perform some tasks.
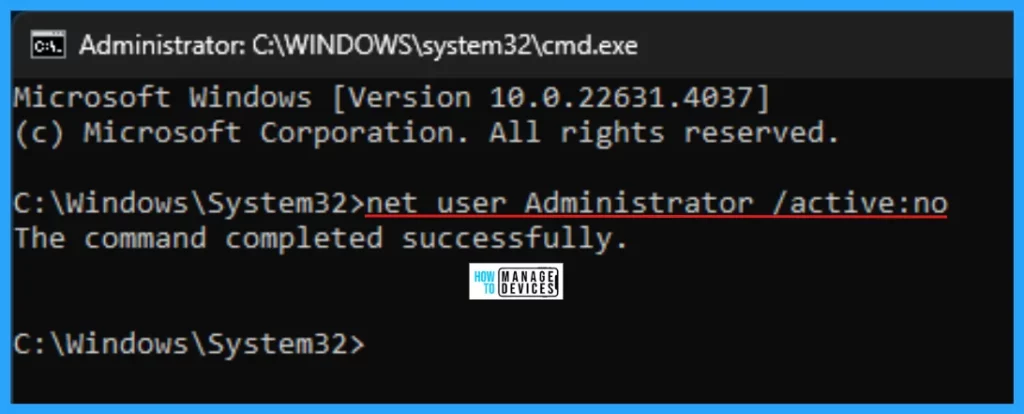
The Elevated Command Prompt window opens, and you can run some administrative commands. This window is represented as “Administrator: C:\WINDOWS\system32\cmd.exe“. Now type the following command (copy and paste) and press Enter to run the command successfully. This command Enables the built-in Administration account.
net user Administrator /active:yes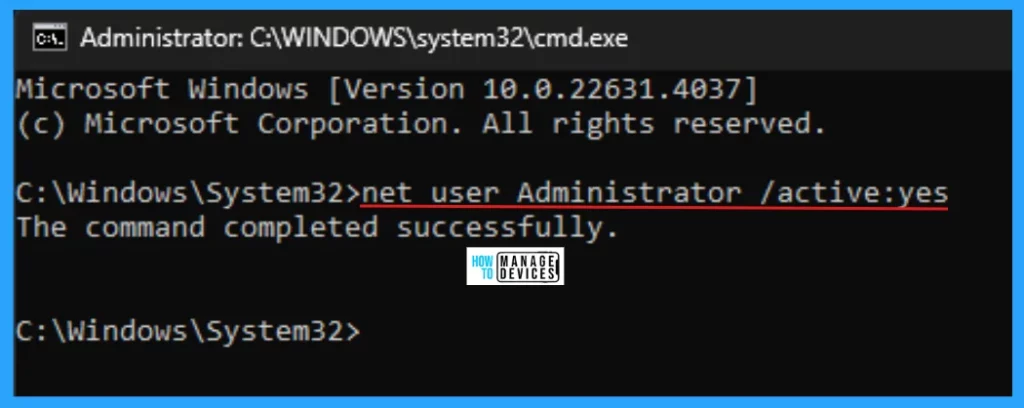
This is disabled by default; if enabled, run the following command (copy and paste) and press Enter to run it successfully. This command Disables the built-in Administration account.
Elevated PowerShell
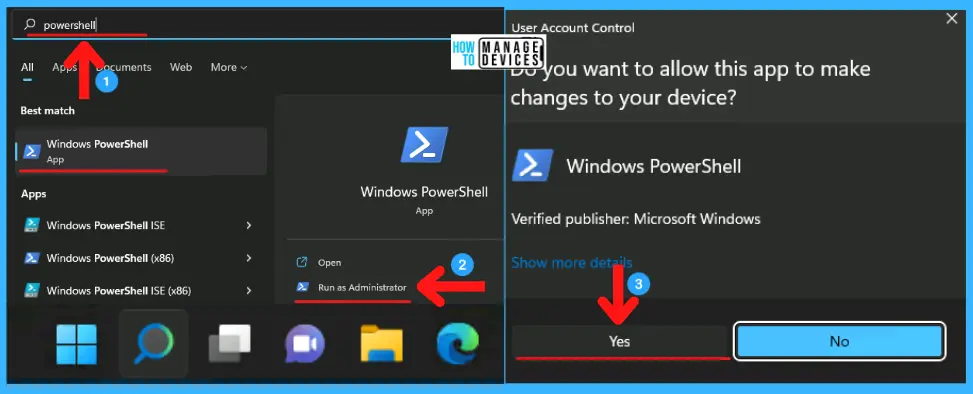
You can enable or disable the built-in Administrator account using PowerShell (Admin). Launch the search box by clicking the Search icon on the taskbar or pressing the Windows key + S hotkey. Now, type Windows PowerShell. When the PowerShell app appears, click on it and select Run as Administrator. It will then ask permission to run; click on Yes to continue.
The Elevated PowerShell window opens, and you can run some administrative commands. This window is represented as “Administrator: Windows PowerShell“. Now type the following command (copy and paste) and press Enter to run the command successfully. This command Enables the built-in Administration account.
Enable-LocalUser -Name "Administrator"
The Elevated PowerShell window opens, and you can run some administrative commands. This window is represented as “Administrator: Windows PowerShell“. Now type the following command (copy and paste) and press Enter to run the command successfully. This command Disables the built-in Administration account.
Disable-LocalUser -Name "Administrator"
Local Users and Groups
Users can use the Local Users and Groups option to enable or disable the built-in Administrator account. To open the Local Users and Groups option, press Win Key + R simultaneously to open the run dialogue box, and follow the below steps. The Run window said to type the name of a program, folder, document, or internet resource, and Windows will open it for you.
- Press Win Key + R
- Type lusrmmgr.msc
- Press Enter
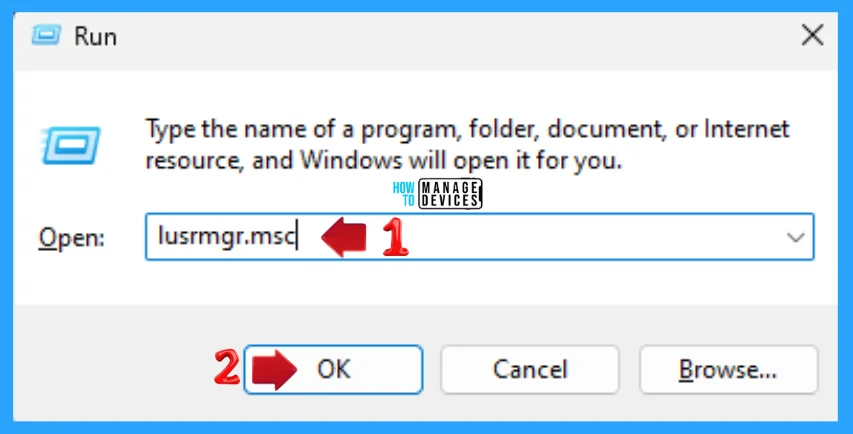
As you can see, when the lusrmgr – [Local Users and Groups (Local)\Users] pop-up appear. Now, under the Local Users and Groups (Local), click on the Users in the left pane. The names of the accounts appear in the right pane; here, double-click on Administrator.

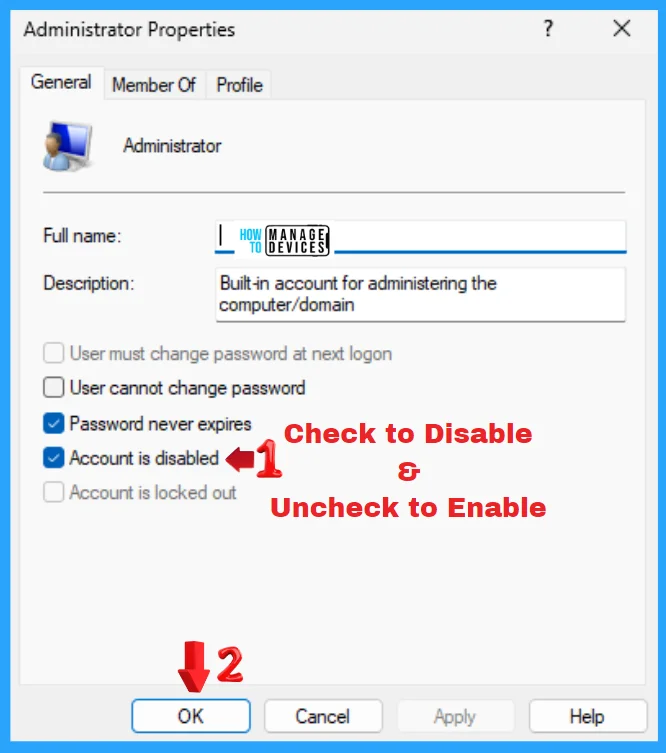
When you double-click on Administrator, the Administrator Properties window opens. This is a built-in account for administering the computer/domain. The Account is disabled and is checked by default, which means the built-in Administrator is disabled. Uncheck it to enable the built-in Administrator account.
Local Security Policy
Users can use the Local Security Policy option to enable or disable the built-in Administrator account. To open the Local Security Policy option, press Win Key + R simultaneously to open the run dialogue box, and follow the below steps. The Run window said to type the name of a program, folder, document, or internet resource, and Windows will open it for you.
- Press Win Key + R
- Type secpol.msc
- Press Enter
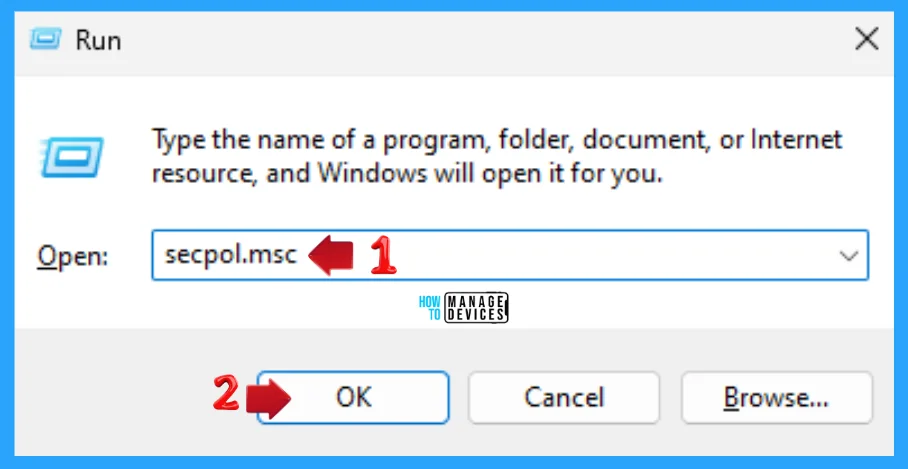
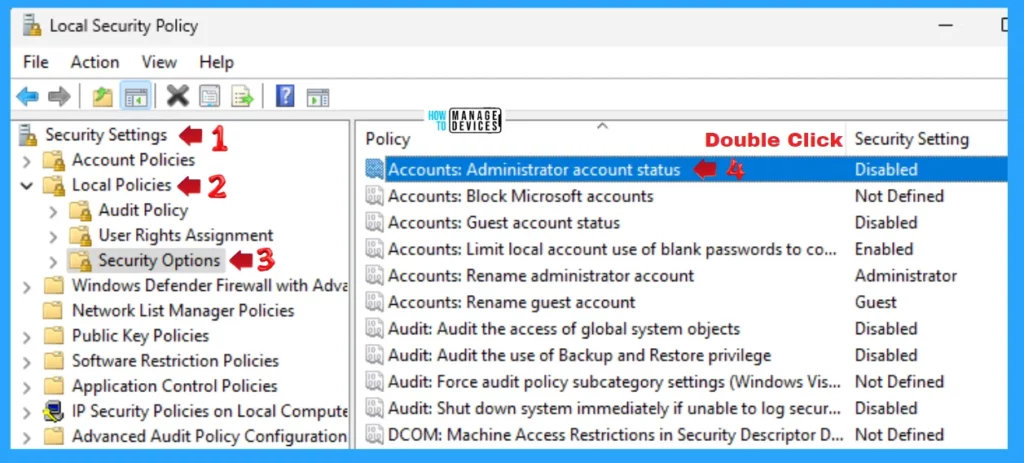
The Local Security Policy window opens; under Security Settings, click on Local Policies in the left pane to expand it. Under Local Policies, click on Security Options, then double-click on Accounts: Administrator account status that is disabled by default.
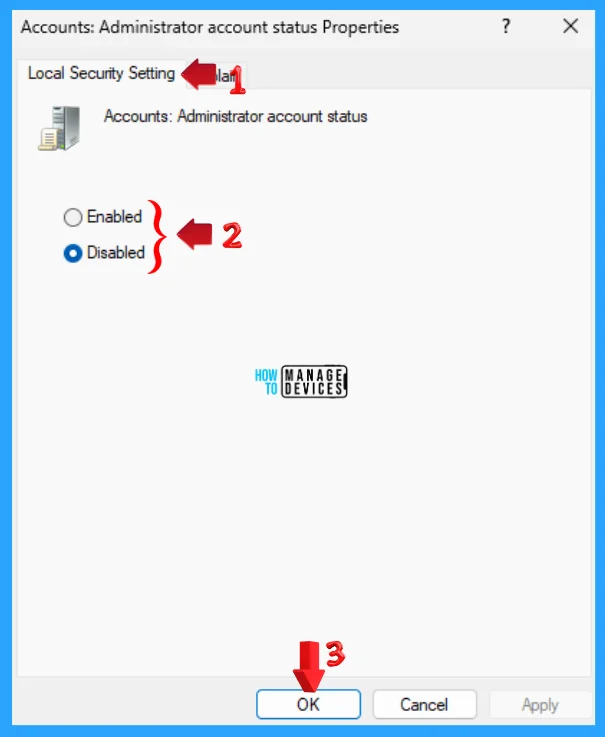
The Accounts: Administrator account status Properties windows open; here, you can see there are two options: Enabled and Disabled. Check Enabled to enable the built-in Administrator account, or check Disabled (which is by default) to disable it.
I hope the information on the Best Ways to Enable or Disable Built-in Administrator in Windows 11 is helpful. Please follow us on the HTMD Community and visit our website, HTMD Forum, if you like our content. Suggest improvements, if any, and we would love to know which topic you want us to explore next.
Intune Policy
You can create an Intune policy to disable the built-in admin account on Windows devices or use Intune Settings Catalog policies to disable it.
Another option is to manage local admin passwords on Windows devices using the Microsoft LAPs solution. Microsoft recommends LAPS for managing local admin passwords.
Accounts Enable Administrator Account Status is another option to disable the local admin password using Intune Settings Catalog policies. The following video and screenshot provide more details – Rename Administrator Account Policy Using Intune.
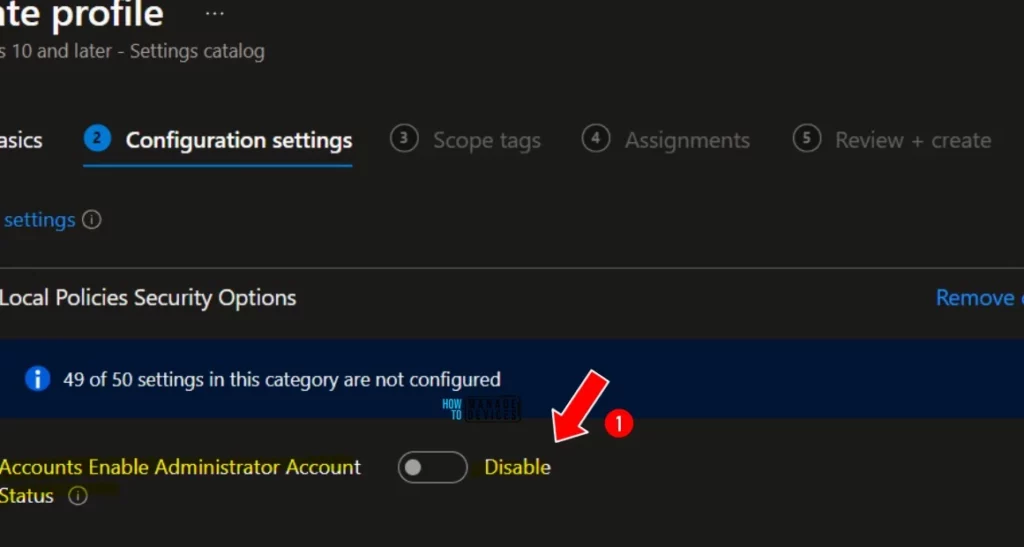
The following video will show how to rename and disable administrator accounts using Intune Security Policies. How can we disable the Administrator Account Status using Intune security policy CSP?
Accounts_EnableAdministratorAccountStatus is the policy to Disable the Administrator Account status. This security setting helps to Disable the Admin Account status to Disable. The default Value is Disable (int = 0). ./Device/Vendor/MSFT/Policy/Config/LocalPoliciesSecurityOptions/Accounts_EnableAdministratorAccountStatus
Sources:
- Enable and disable the built-in administrator account
- Accounts: Administrator account status
- Local Accounts
We are on WhatsApp. To get the latest step-by-step guides and news updates, Join our Channel. Click here – HTMD WhatsApp.
Author
Alok graduated with a Master of Computer Applications (MCA) degree. He loves writing on Windows 11 and related technologies. He likes to share his knowledge, quick tips, and tricks with Windows 11 or Windows 10 with the community.
