Let’s learn How to Enable Disable Automatic Screenshots for Web Pages on Microsoft Edge. A user can enable or disable an option to save screenshots of the sites you visit, which appear as thumbnail previews in the History tab.
In the latest preview of the browser available in the Canary Channel or Dev Channel, Microsoft is testing a new feature that allows Edge to capture screenshots of the websites you visit and is available as preview thumbnails when you hover the mouse over the link in the History tab.
This feature makes it very easy for the users to identify the page you want to visit again. The Microsoft Edge web browser included in Windows 11 is based on the Chromium interface and was released on 15 January 2020. It is compatible with versions of Windows and macOS. Also, it is compatible with Android and iOS.
It also has speed, performance, and best-in-class compatibility for websites and extensions with built-in privacy and security features. In this post, the details of Automatic screenshots for web pages are described in detail.

Enable Disable Automatic Screenshots for Web Pages on Microsoft Edge
Taking screenshots on a phone or a tablet is easier as compared to a PC. The latest Windows PC has built-in tools (snipping tool) for the purpose. Web browsers also have such tools. It was quite technical for other web browsers.
If you want a quick method, use the Microsoft Edge web capture tool. The automatic screenshots can be only available on Microsoft Edge Canary Channel & Dev Channel.
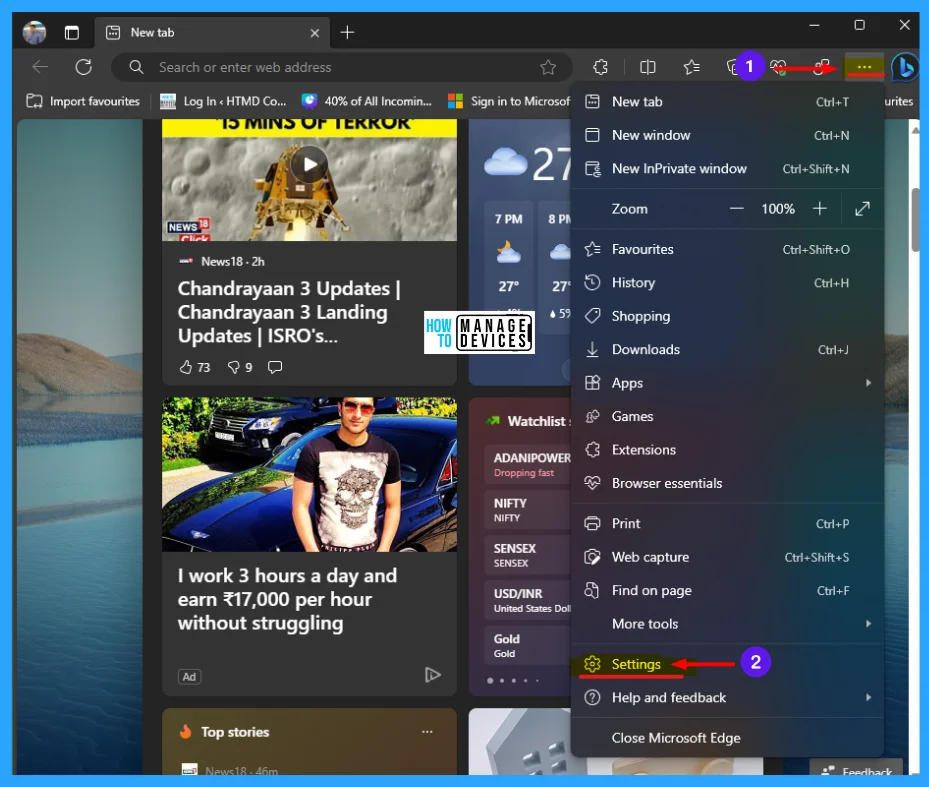
To enable or disable automatic screenshots, you have to open Microsoft Edge Canary Channel or Dev Channel. Click on the three-dot menu situated in the right upper corner of the edge browser. Then click on settings.
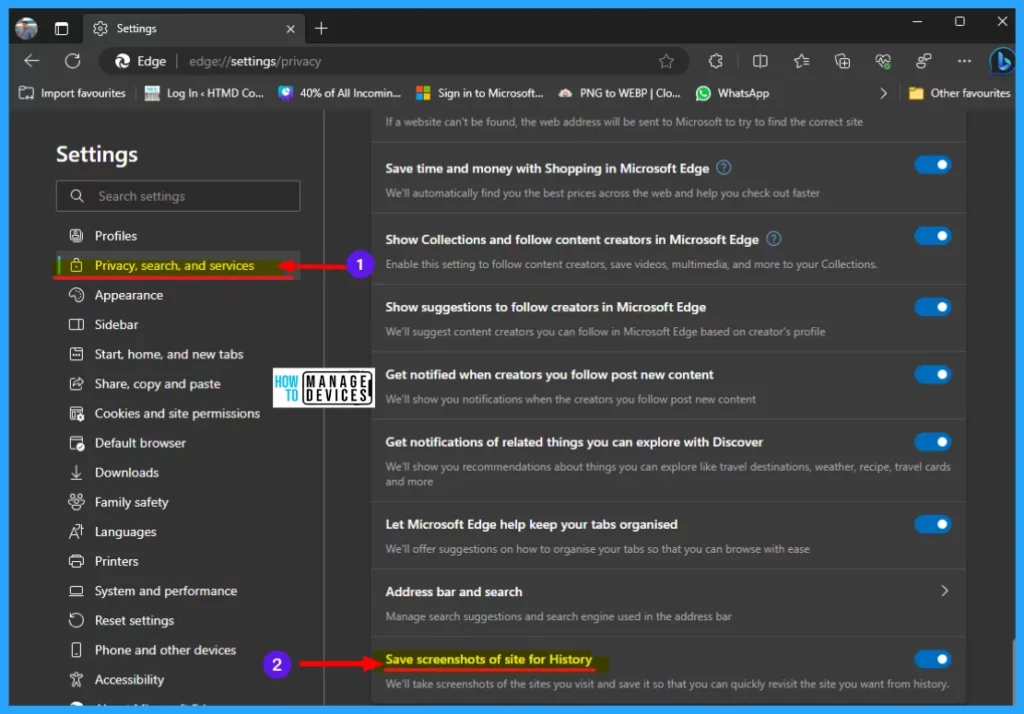
Now the settings window is open, click on the Privacy, Search, and Services in the left panel, and its options will appear in the right panel. Scroll down to find the Save screenshots of site for History option in the right panel. Use the toggle key to enable or disable the automatic screenshots.
The Save screenshots of site for History says “we will take screenshots of the sites you visit and save it so that you can quickly revisit the site you want from history.”
There are another ways to capture screenshots from the web page. Some can be handled manually and some used to activate manually.
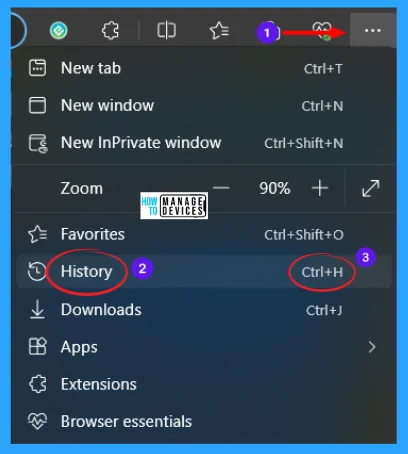
Another way to enable web page images by hovering the mouse over web links store in history. To do so, press Ctrl + H to open History or you can click on the three-dot menu on the upper right corner, and click on History option.
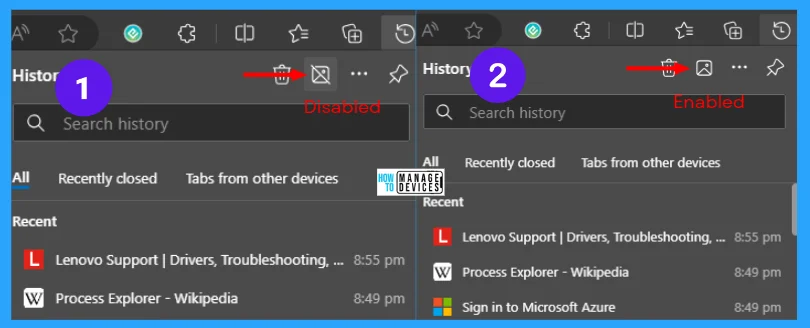
When the History window open there is a picture icon near the delete icon. Click on to enable show images by hovering mouse on it. picture one shows the disabled option and picture two shows the enable option.
Manual Process to Take Screenshots in Microsoft Edge Using Web Capture
To capture images in Microsoft Edge and edit manually you can simply use Win Key + Shift + S. You can also select three-dot menu shown in right upper corner of the browser, then select Web Capture.
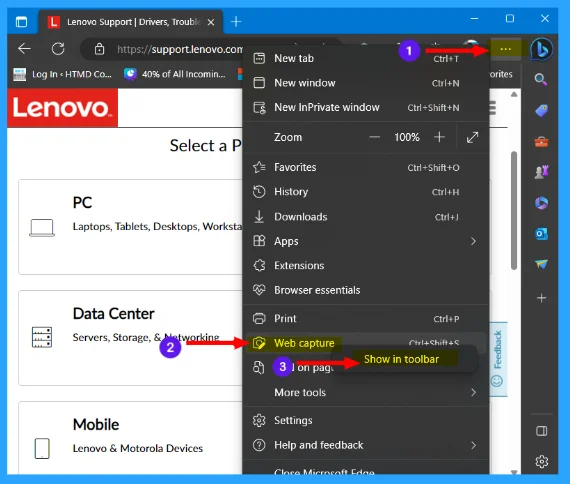
Bonus tip you can create a shortcut for it by right-clicking on Web Capture and select Show in toolbar as shown in the image above. The shortcut created in the browser toolbar as illustrated below.

By clicking on the shortcut you created as shown above or trying the method mentioned above you are able to take screenshots manually. When you click on the shortcut there are three options available and listed below.
- Capture area: Capture part of the page.
- Capture full page: Capture the entire page.
- Web select: Copy content with formatting.
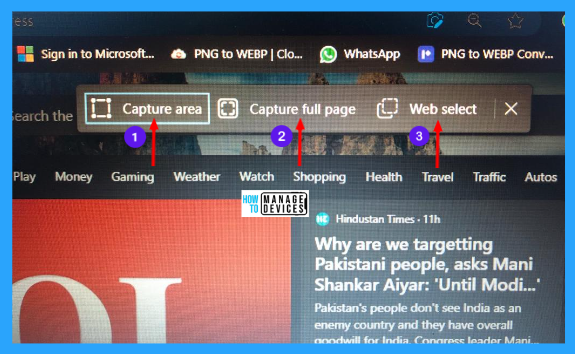
Capture Area
When you choose this option, it enable you to select the part of the page you want to take screenshot. So you can select and drag the required area which you want to capture. And you have some options are there regarding the selected image.
- Copy: Copy the images.
- Markup Capture: Edit the image as shown in Fig. 10 below.
- Visual Search: Search the related content.

Capture Full Page
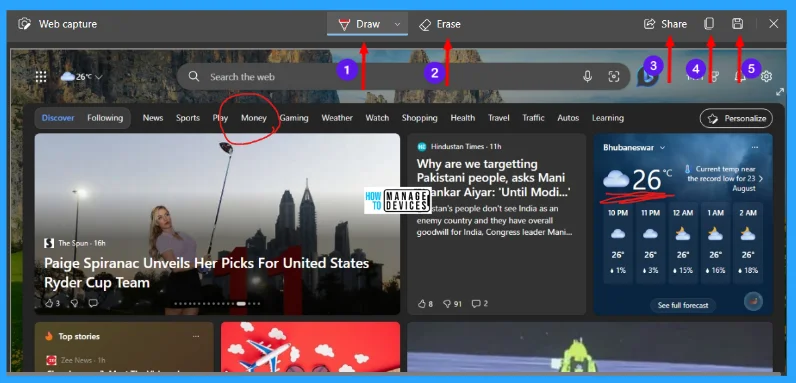
This is used to take the full screenshot of the current web page, and it allow you to edit the image as required. There are some options are allowed in this image to edit it.
- Draw: You can draw anything.
- Erase: You can erase if you draw something wrong.
- Share: You can share with anyone.
- Copy: Copy the current image.
- Save: You can save the image where you desire to store it.
Web Select
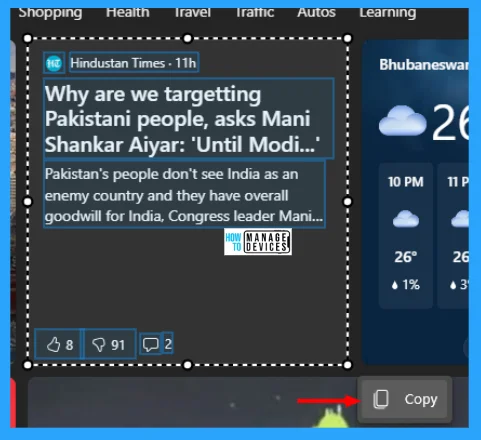
This option is used to select a particular content. After you selecting the content it copies all the information available in this screenshot, as shown in the image below.
I hope the information on How to Enable Disable Automatic Screenshots for Web Pages on Microsoft Edge is helpful. Please follow us on HTMD Community and visit our website HTMD Forum if you like our content. Suggest improvements, if any, and we love to know which topic you want us to explore next.
Author
Alok is a Master of Computer Applications (MCA) graduate. He loves writing on Windows 11 and related technologies. He likes to share his knowledge, quick tips, and tricks with Windows 11 or Windows 10 with the community.
