Let’s see the easiest method to Export Backup SCCM Boundaries and Boundary Groups. I have had experience with the Recovery of Boundaries and Boundary Groups because of the accidental deletion of boundaries by an admin.
James Bannan‘s PowerShell Script (published back in 2014) to automatically recover the SCCM Boundaries and Boundary Groups helped recover the SCCM Boundaries and Boundary Groups. I think James stopped the blog, but I have a copy of the script documented in Recovery of Boundaries and Boundary Groups.
I have also seen the details post (one-liner PS code) from Jason Sandys on the same topic (published in 2019). Marius A. Skovli published another PowerShell script to help the community using the IP range details from the DHCP Server (referenced in the recovery of the SCCM boundary post).
You can use the SCCM console to export SCCM Boundaries and Boundary Groups by using the easiest way without using any PowerShell Script. I have seen many SCCM admins (including me) struggling to load the Configuration Manager PowerShell module because of various reasons.
Different Options – Export Backup SCCM Boundaries and Boundary Groups
Various options are available to Export or Backup SCCM Boundaries and Boundary Groups. I know some of you are PowerShell guys to make things happen faster. Some others are like me, who wanted to learn the GUI way first and understand how this works, and then think about automation.
You can export SCCM boundaries and boundary groups using the SCCM admin console, and this would be the manual way that I’m going to cover in this post. Importing the boundaries and boundary groups into SCCM is already explained in the How To Create Boundaries and Boundary Groups post.
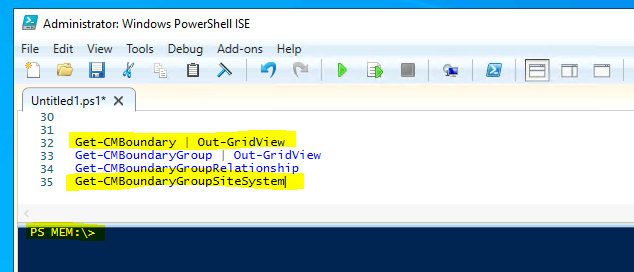
You have different options, such as Manual and PowerShell, to take backup of SCCM boundaries and boundary groups. There are ConfigMgr PowerShell command-lets available to help you with automation. Following are some of the PS commands to help you out.
- Get-CMBoundary
- Get-CMBoundaryGroup
- Get-CMBoundaryGroupRelationship
- Get-CMBoundaryGroupSiteSystem
Export Backup SCCM Boundaries using Admin Console
Let’s see how to Backup or Export SCCM Boundaries using the SCCM Console in this section of the post. It’s pretty straightforward; even a level 1 team can perform this action if they have read-only permissions. Follow the steps mentioned below to export all the SCCM boundaries.
- Navigate to \Administration\Overview\Hierarchy Configuration\Boundaries.
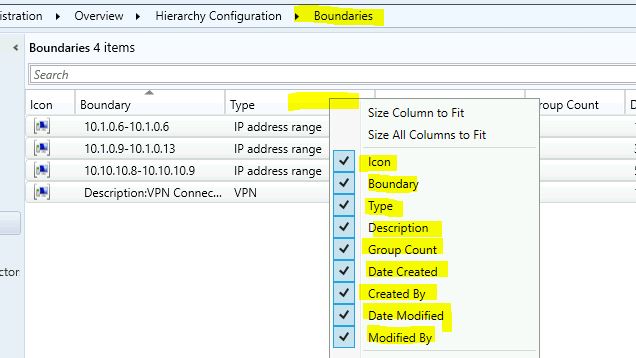
- Add all the Columns from SCCM Boundaries node so that all the columns data will be export or copied to the clipboard.
I have selected all the columns available for SCCM boundaries to take the backup of all the available information.
It’s time to select all the boundaries you want to backup or export. If you are expecting CTRL + A to work for the select-all option, will work fine if You select the right pane in the console before pressing CRTL + A.
More Details on SCCM console keyboard shortcuts post
- You need to select the right pane in the console before pressing CRTL + A.
- Select all objects by using CTRL + A buttons.
- Or Select the Boundaries that you want to backup or export.
- Press CTRL + C buttons on the keyboard to copy all the SCCM boundaries from admin console to clipboard.
NOTE! – Don’t try to right-click and check for the Copy option! There are no copy or export options available.
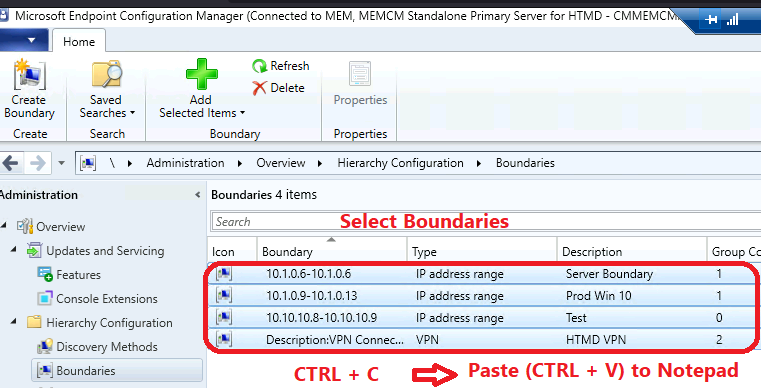
Now, you can open an Excel or Notepad to paste the copied information from the Clipboard.

Export | Backup SCCM Boundary Groups using Admin Console
Let’s try to export or backup SCCM Boundary Groups using Admin Console. This is the easiest manual method to export the SCCM boundary groups into the Excel app in CSV format. Once you have the boundary group details in CSV, you can use that info to import or restore SCCM boundary groups using the PowerShell scripts.
Follow the steps to copy the SCCM boundary groups to the clipboard and paste it into Excel.
- Navigate to \Administration\Overview\Hierarchy Configuration\Boundary Groups.
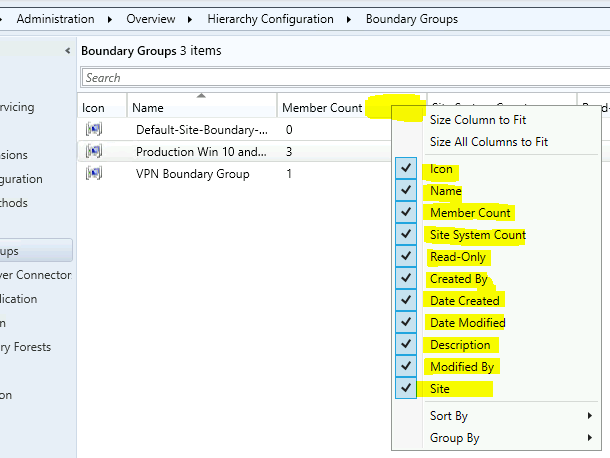
- Add all the Columns from SCCM Boundary Groups node so that all the columns data will be export or copied to the clipboard.
NOTE! – I recommend selecting all columns from the Boundary Groups node so that you can backup or export all those details into a CSV file.
Again, as I mentioned in the above section, CTRL + A to select all the boundary groups doesn’t work in the SCCM console scenario. You will need to choose one Boundary Group and use the SHIFT + UP or DOWN arrow from the keyboard to select all the other boundary groups from the list.
- Select one Boundary Group and use the SHIFT + UP or DOWN arrow from the keyboard to select all the other boundary groups from the list.
- Select All the Boundaries that you want to backup or export.
- Press CTRL + C buttons on the keyboard to copy all the SCCM Boundary Groups from the admin console to the clipboard.
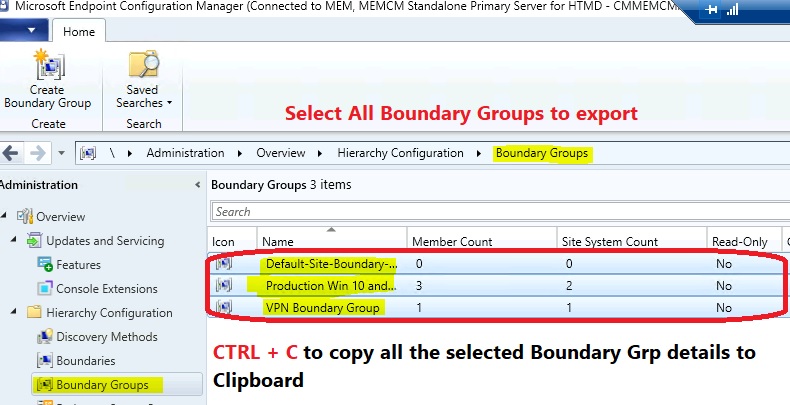
Now, you can open an Excel or Notepad and paste the details of SCCM boundary groups from the Clipboard.

Create SCCM Boundaries Using PowerShell | Import | Restore Boundaries
Let’s see how to Create SCCM Boundaries Using PowerShell. You can use the following command to create SCCM boundaries. If you have a backup (CSV file), you can use that file to create SCCM boundaries and restore it using one-liner codes available.
One of the Sample scripts is given here – Recovery of Boundaries and Boundary Groups.
New-CMBoundary -DisplayName "HTMDIPRangeBoundary02" -BoundaryType IPRange -Value "10.255.255.6-10.255.255.6"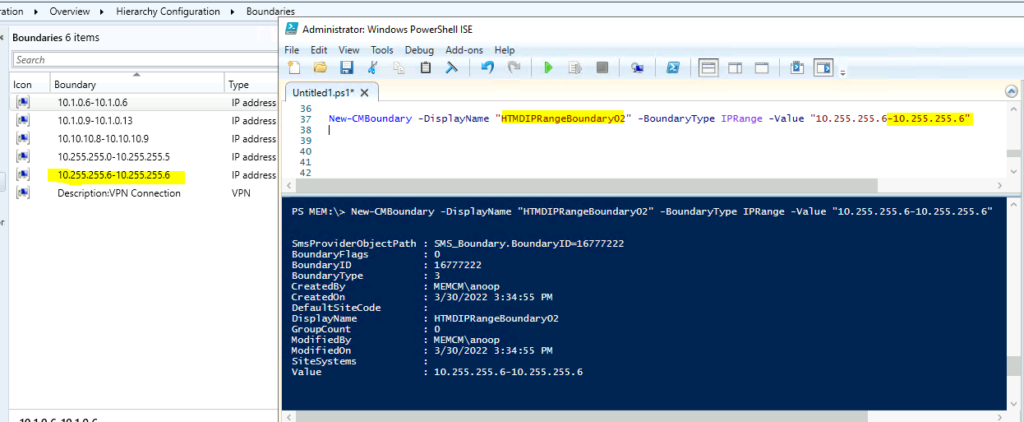
Create SCCM Boundary Group Using PowerShell | Import | Restore Boundary Group
You can use the following PowerShell command to create SCCM Boundary Groups. As explained in the recovery post, the same can be used to import or restore boundary groups using loop and variables.
The following command helps you to create the new Boundary Group.
New-CMBoundaryGroup -Name 'HTMD Boundary Import 3' -Description 'HTMD Test SCCM Boundary Import 3' -DefaultSiteCode 'MEM'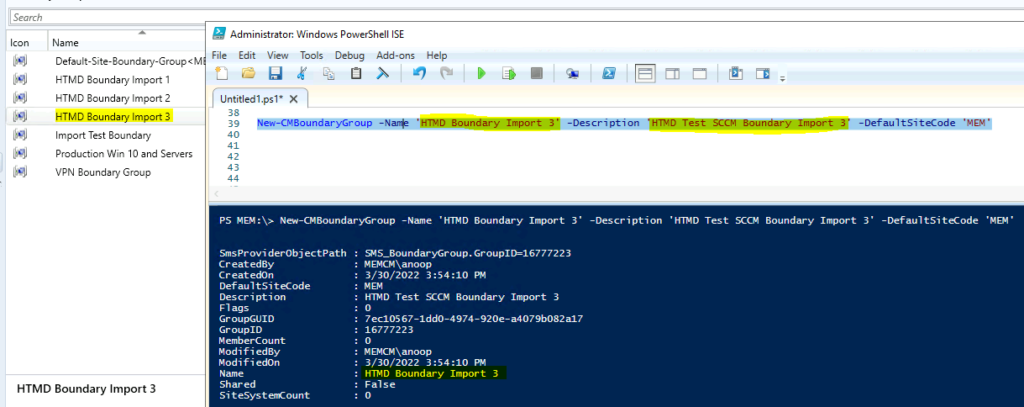
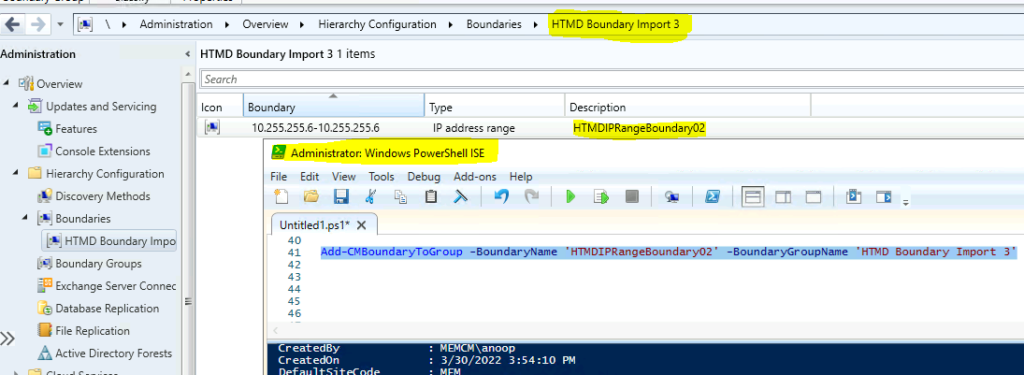
Add boundaries to the Boundary group using the following PowerShell command. I have added the boundary created above to the new boundary group using PowerShell.
Add-CMBoundaryToGroup -BoundaryName 'HTMDIPRangeBoundary02' -BoundaryGroupName 'HTMD Boundary Import 3'