Let’s learn How to Install and Use DISKSPD in Windows 11. This topic guides how to use DISKSPD to test workload storage performance. You have an Azure Stack HCI cluster set up, and it’s ready. Great, but how do you know if you’re getting the promised performance metrics: latency, throughput, or IOPS? This is when you may want to turn to DISKSPD.
DISKSPD is an I/O generating, command-line tool for micro-benchmarking. Great, so what do all these terms mean? Anyone who sets up an Azure Stack HCI cluster or physical server has a reason. It could be to set up a web hosting environment or run virtual desktops for employees.
Whatever the real-world use, you likely want to simulate a test before deploying the application. However, testing your application in a real scenario is often difficult – this is where DISKSPD comes in. Now you know what DISKSPD is, but when should you use it? DISKSPD has a difficult time emulating complex workloads.
However, DISKSP excellent great a single-threaded file copy does not closely approximate your workload copy, and you need a simple tool that produces acceptable baseline results. After reading this topic, you’ll know how to run DISKSPD, understand a subset of parameters, interpret output, and gain a general understanding of the variables that affect workload storage performance.

- New BitLocker Disk Encryption Policy for Intune Endpoint Security
- How to Configure Microsoft Edge Favorites using Intune Configuration Profile Step-by-Step Guide
What is DISKSPD?
DISKSPD is a tool for simulating synthetic workloads and testing your application before deployment. It allows you to configure and tweak the parameters to create a specific scenario that resembles your workload. DISKSPD can give you a glimpse into what your system is capable of before deployment. At its core, DISKSPD issues a bunch of read-and-write operations.
How to Download and Install DISKSPD
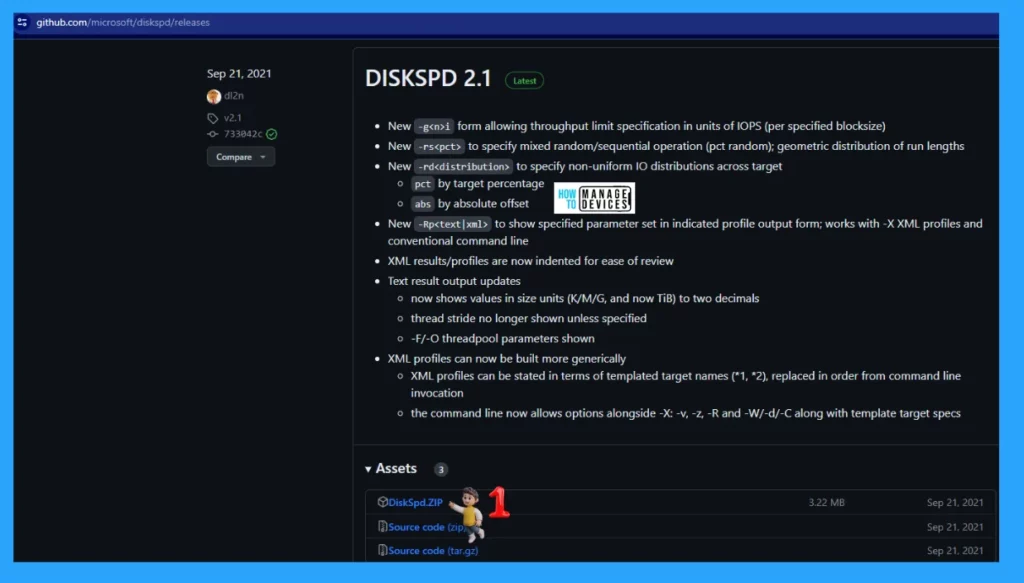
First, you need to download the DISKSPD from the GitHub download page. When the DISKSPD GitHub download page opens, under the Releases section, click the DiskSpd.zip option to save the file on your device, as shown in the image below.
When it downloads, go to the default download folder, click the DiskSpd.zip file, and then click on the Extract All option, as shown in the image below.

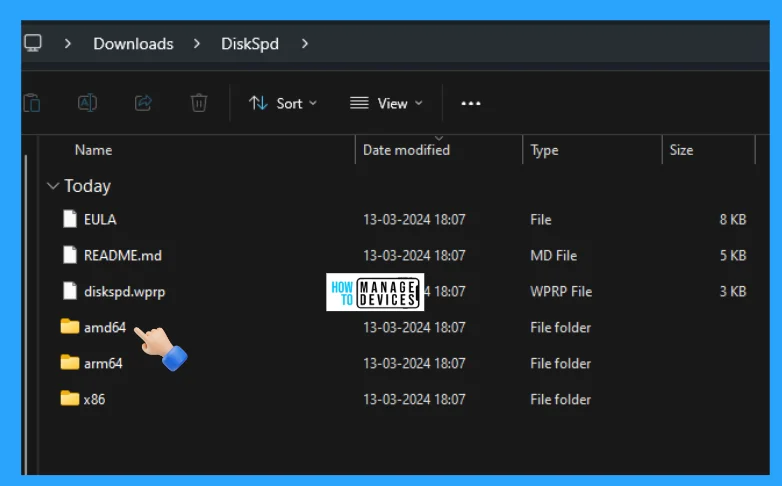
Now you can see the DiskSpd extracted folder as shown below. The files are EULA (End User Licence & Agreement), README.md, & diskspd.wprp and folders as amd64, arm64, & x86.
How to Use DISKSPD in Windows 11
Before proceeding with the performance test, it is strongly recommended that you close all running applications and ensure the storage health is in good condition. Now, open the command prompt window with administrative privileges. Click here to learn how to open Elevated Command Prompt.
Type C: [Path] and press Enter when the Command prompt opens as Administrator. Here, the path represents the extracted folder that contains the diskspd path. All the information regarding the command is shown.
C: \User\mishr\Downloads\DiskSpd\amd64\diskspd replace with C: [Path]
NOTE! To know your system type, Go to Settings > System > About, under the Device specifications section.
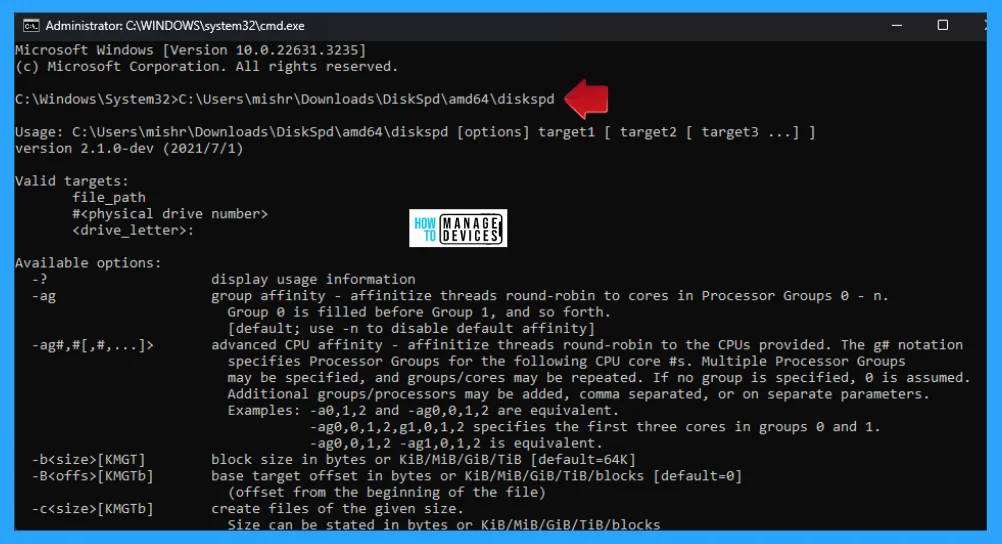
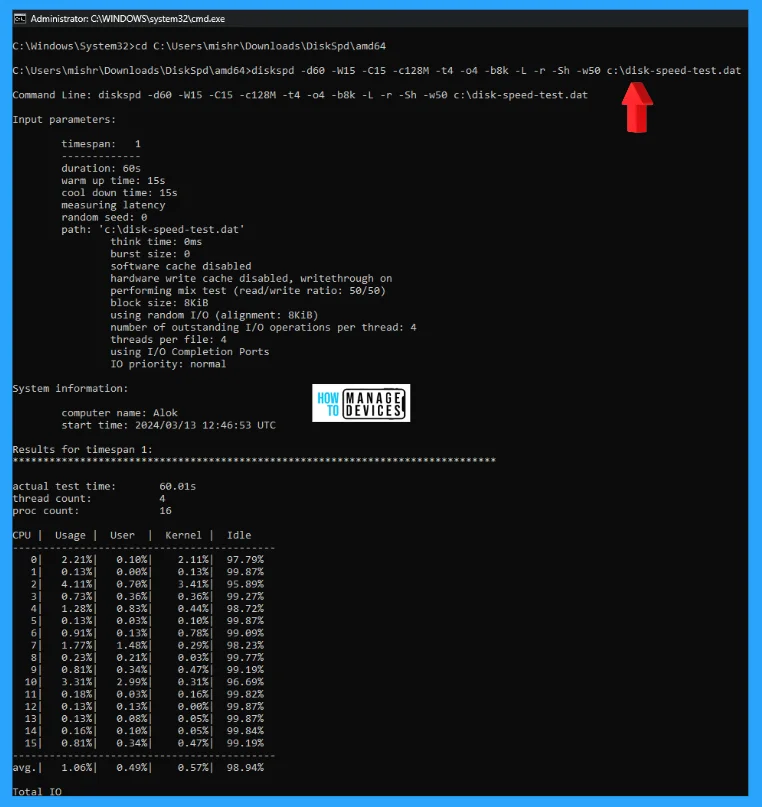
Type the command below to run DiskSpd, which tests a local hard drive’s read and write performance on Windows 11, then press Enter.
diskspd -d60 -W15 -C15 -c128M -t4 -o4 -b8k -L -r -Sh -w50 c:\disk-speed-test.dat
Whenever you complete the steps, the DiskSpd tool will test the hard drive’s performance based on the parameters specified in the command. The Parameters are case-sensitive.
| Parameter | Description |
|---|---|
| -d60 | It indicates how long the command will stress the hard drive in seconds. |
| -W15 | It sets the warm-up time before the test begins. |
| -C15 | It set the cool-down time after the test. |
| -c128M | It customizes the file size to create testing. |
| -t4 | It indicates the number of threads to use. Usually, you can use one per available core in the processor. |
| -o4 | It specifies the number of outstanding I/O requests per target per thread. |
| -b8k | It defines the size of the block (default is 64K). |
| -L | It measures latency statistics. |
| -r | It produces random I/O. You can override this with the -s option. |
| -Sh | It disables software and hardware write caching. |
| -w50 | It specifies the percentage of write and read requests. Using the 100 number means the command will write 100 % of the time during the test. Using the 0 number means the command will only perform 100 % reads. For instance, -W50 will perform 50 % writing and 50 % reading. This is a balanced test, that can be changed the number to adjust the test to fit your situation later. |
| c:\disk-speed-test.dat | This is the path to store the target file for the test |
Type the following command to run the command to export the results to a text file, and press Enter. In the command, update the path and filename for the target data file and the file to store the results. Note that you cannot see any results on the screen when outputting the results to a text file. Instead, the test results will be written in the text file.
diskspd -d60 -W15 -C15 -c128M -t4 -o4 -b8k -L -r -Sh -w50 c:\disk-speed-test.dat > c:\drive-test-results.txt

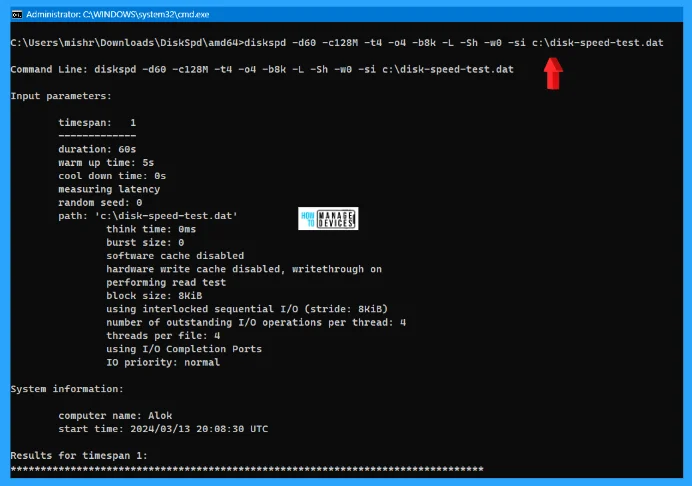
Type diskspd -d60 -c128M -t4 -o4 -b8k -L -Sh -w0 -si c:\disk-speed-test.dat to test sequential reads and press Enter.
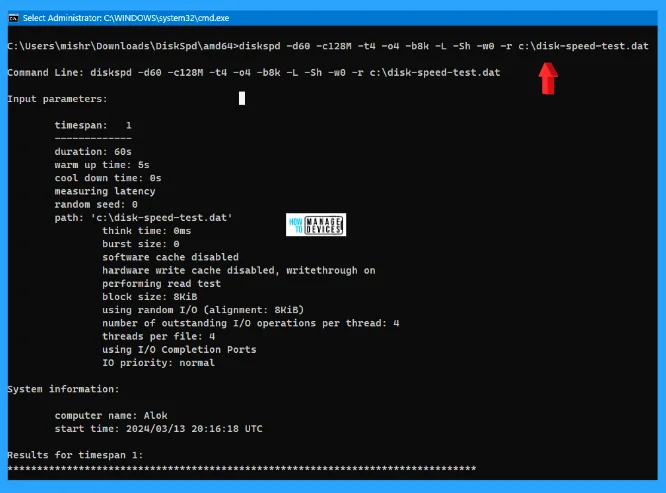
Type diskspd -d60 -c128M -t4 -o4 -b8k -L -Sh -w0 -r c:\disk-speed-test.dat to test random reads and press Enter.
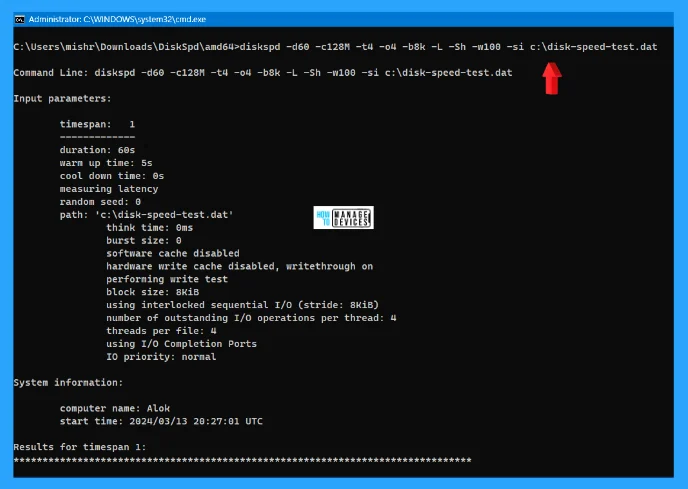
Type diskspd -d60 -c128M -t4 -o4 -b8k -L -Sh -w100 -si c:\disk-speed-test.dat to test sequential writes and press Enter.
Type diskspd -d60 -c128M -t4 -o4 -b8k -L -Sh -w100 -r c:\disk-speed-test.dat to test random writes and press Enter.
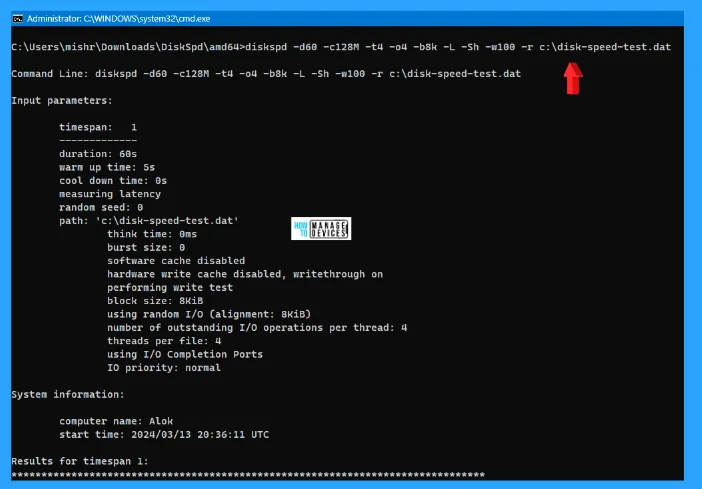
Specify key Parameters to Install and Use DISKSPD
You can tinker with various parameters, and it can get specific. However, we used the following set of baseline parameters.
Note! DISKSPD parameters are case-sensitive.
| Parameters | Description |
|---|---|
| -t2 | This indicates the number of threads per target/test file. This number is often based on the number of CPU cores. In this case, two threads were used to stress all of the CPU cores. |
| -o32 | This indicates the number of outstanding I/O requests per target per thread. This is also known as the queue depth, and in this case, 32 were used to stress the CPU. |
| -b4K | This indicates the block size in bytes, KiB, MiB, or GiB. In this case, 4K block size was used to simulate a random I/O test. |
| -r4K | This indicates the random I/O aligned to the specified size in bytes, KiB, MiB, Gib, or blocks (Overrides the -s parameter). The common 4K byte size was used to properly align with the block size. |
| -w0 | This specifies the percentage of operations that are write requests (-w0 is equivalent to 100% read). In this case, 0% writes were used for the purpose of a simple test. |
| -d120 | This specifies the duration of the test, not including cool-down or warm-up. The default value is 10 seconds, but we recommend using at least 60 seconds for any serious workload. In this case, 120 seconds were used to minimize any outliers. |
| -Suw | Disables software and hardware write caching (equivalent to -Sh). |
| -D | This indicates the block size in bytes, KiB, MiB, or GiB. In this case, a 4K block size was used to simulate a random I/O test. |
| -L | Measures latency statistics. |
| -c5g | Sets the sample file size used in the test. It can be set in bytes, KiB, MiB, GiB, or blocks. In this case, a 5 GB target file was used. |
Things to Consider
Now that you’ve started using DISKSPD, you need to consider several things to get real-world test results. These include paying close attention to the parameters you set, storage space health and variables, CSV ownership, and the difference between DISKSPD and file copy.
DISKSPD vs. real-world
DISKSPD’s artificial test gives you relatively comparable results for your real workload. However, you must pay close attention to your set parameters and whether they match your real scenario. It’s important to understand that synthetic workloads will never perfectly represent your application’s real workload during deployment.
Preparation
Before running a DISKSPD test, there are a few recommended actions. These include verifying the health of the storage space, checking your resource usage so that another program doesn’t interfere with the test, and preparing a performance manager if you want to collect additional data. However, because this topic aims to quickly get DISKSPD running, it doesn’t dive into the specifics of these actions.
Variables that affect performance
Storage performance is a delicate thing. Meaning that many variables can affect performance. And so, it’s likely you may encounter a number that is inconsistent with your expectations. The following highlights some of the variables that affect performance, although it’s not a comprehensive list:
- Network bandwidth
- Resiliency choice
- Storage disk configuration: NVME, SSD, HDD
- I/O buffer
- Cache
- RAID configuration
- Network hops
- Hard drive spindle speeds
File copy vs. DISKSPD
Some people believe they can “test storage performance” by copying and pasting a gigantic file and measuring how long that process takes. The main reason behind this approach is most likely because it’s simple and fast. The idea is not wrong in the sense that it tests a specific workload, but it’s difficult to categorize this method as “testing storage performance.”
If your real-world goal is to test file copy performance, this may be a valid reason to use this method. However, if your goal is to measure storage performance, we recommend against using this method. You can think of the file copy process as using a different set of “parameters” (such as queue, parallelization, and so on) that are specific to file services.
The following short summary explains why using file copy to measure storage performance may not provide the results that you’re looking for:
- File copies might not be optimized. Two levels of parallelism occur, one internal and the other external. Internally, if the file copy is headed for a remote target, the CopyFileEx engine does apply some parallelization. Externally, there are different ways of invoking the CopyFileEx engine. For example, copies from File Explorer are single-threaded, but Robocopy is multi-threaded. For these reasons, it’s important to understand whether the implications of the test are what you are looking for.
- Every copy has two sides. You may use the source and destination disks when copying and pasting a file. If one is slower than the other, you essentially measure the performance of the slower disk. In other cases, the communication between the source, destination, and copy engine may uniquely affect the performance.
I hope the guide on How to Install and Use DISKSPD in Windows 11 is helpful. Please follow us on the HTMD Community and visit our website HTMD Forum, if you like our content. Suggest improvements, if any, and we would love to know which topic you want us to explore next.
We are on WhatsApp. To get the latest step-by-step guides and news updates, Join our Channel. Click here –HTMD WhatsApp.
Author
Alok is a Master of Computer Applications (MCA) graduate. He loves writing on Windows 11 and related technologies. He likes to share his knowledge, quick tips, and tricks with Windows 11 or Windows 10 with the community.
