Let’s learn how to remove Start backup in File Explorer of Windows 11. This is a new feature provided by Microsoft. File Explorer helps you access, view and manage all the files stored on your computer.
This feature backs up your data to OneDrive. Microsoft adds the Windows backup app to your device. This app can back up your data on onedrive. Backup is essential because it creates a copy of data that can be recovered when the primary data fails.
The Start backup option is directly related to OneDrive. When you open a specific library folder such as documents, pictures, music etc, protect your files and photos by ensuring they’re safely backed up. Removing the backup option on your PC can save more free space; it helps to work your PC quickly.
This is the new option that is very easy to learn and understand. This starts backup button is one of the methods to enable the app or feature. This blog post will help you how to remove the start backup option in File Explorer.
- New Update on File Explorer in Windows 11
- OneDrive Status Icon from File Explorer on Windows 11
- Windows 11 File Explorer Tabs Experience is Enabled
What are the Features of Start Backup in File Explorer?
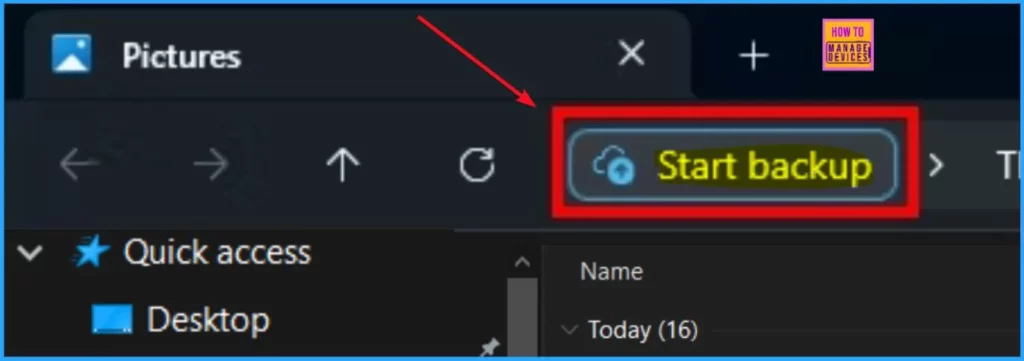
Microsoft added a Backup app to your device. It can back up your data to One Drive. Some important features are given below.
1. It helps to ensure your data is safely stored in the cloud
2. It is used to access your content across multiple devices easily
3. It helps to recover files is easy and instant
How to Remove Start Backup in File Explorer of Windows11
You can remove Start Backup in File Explorer in 3 ways, for example, using Close OneDrive app, Using Onedrive settings and using Registry.
| Different Methods for Removing Start Backup in File Explorer |
|---|
| Close OneDrive App |
| Using Onedrive settings |
| Using registry editors |
1. Close OneDrive App
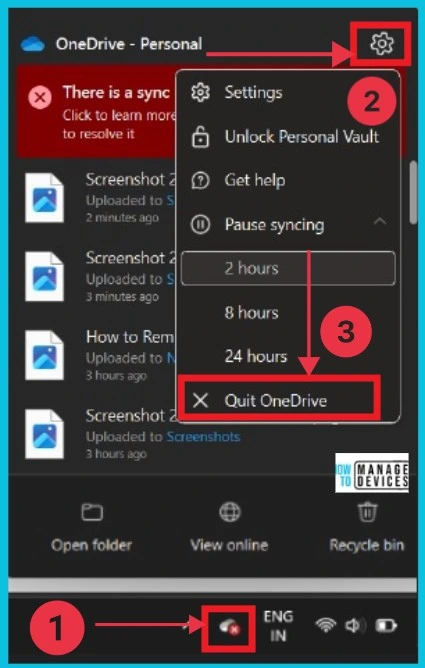
This is the first and easiest option to remove the start backup in File Explorer. To close the Onedrive app, select the OneDrive icon in the taskbar and select settings. Click the drop-down arrow of pause syncing in the settings window. Then click Quit Onedrive to remove or disable the option.
2. Using OneDrive Settings
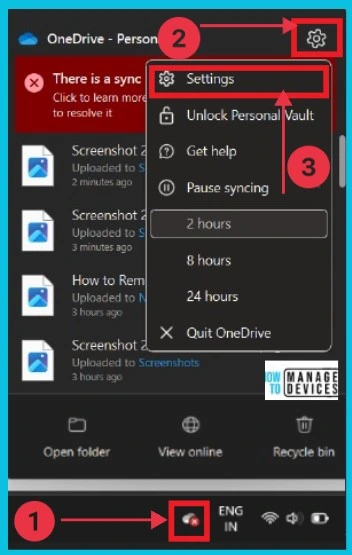
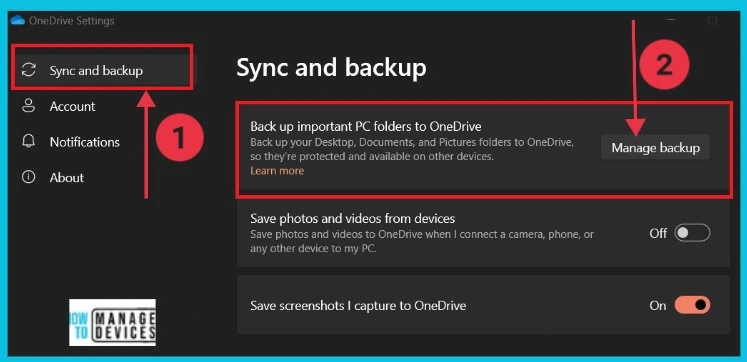
The following method is using Onedrive Settings. First, select the OneDrive icon from the taskbar. Click the Settings icon. Then, a new window appears; click the settings option to continue.
Here, a new window is opened; select Sync and backup option. Click the Manage Backup option on the right side. This option helps to back your desktop, documents, and picture folders to OneDrive so they are protected and available on other devices.
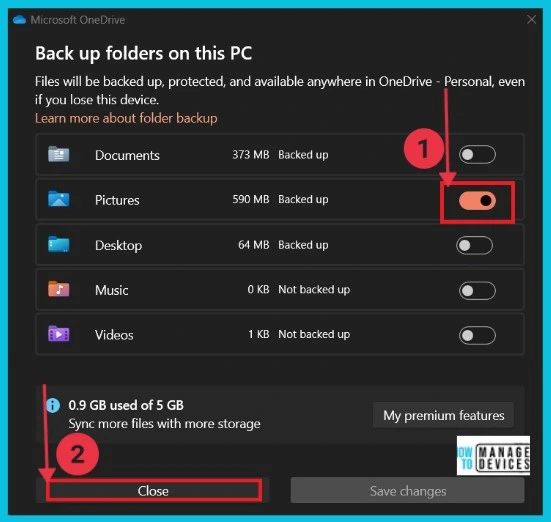
The screenshot below gives the details of the Backup folders on your PC. You can toggle on the options one by one. It manages onedrive PC folder backup.
3. Use Registry Editors
You can remove the start backup using Registry. To do this, follow the steps. Click Windows + R; now you can get a window, as seen in the screenshot.
- Type regedit in the box, then click Ok
- Now, you can see a user control window. Click yes to continue

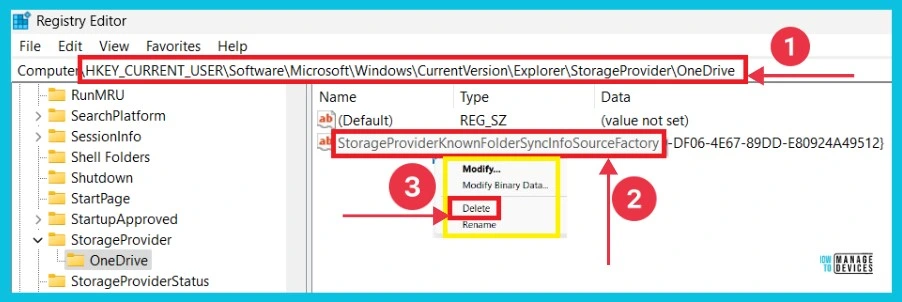
Here, it opens the registry editor window; now, you can give the commands to remove the start backup in File Explorer.
- HKEY_CURRENT_USER\Software\Microsoft\Windows\CurrentVersion\Explorer\StorageProvider\OneDrive
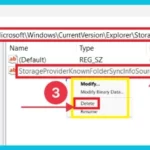
- Right-click the option StorageProviderKnownFolderSyncInfoSourceFactory on the right side
- Click the delete option
Then you can get a confirmation window, click yes and restart your computer.
We are on WhatsApp now. To get the latest step-by-step guides, news, and updates, Join our Channel. Click here. HTMD WhatsApp.
Author
Sumitha was introduced to the world of computers when she was very young. She loves to help users with their Windows 11 and related queries. She is here to share quick news, tips and tricks with Windows security.
