Exciting News! Microsoft has Introduced HTML Formatting in Noncompliance Email Notifications in Intune. We all know that Microsoft released new features and enhancements in the Intune 2403 version. With these new features, Intune users can improve their work lives.
The new features in Intune allow users to securely and effectively manage their organization. So device and data management is very easy in Intune. With Intune’s new features, device management is better for end users.
Now Microsoft supports HTML Formatting in Noncompliance Email Notifications in Intune. Intune allows users to create a notification management template for sending emails to users. Now we can create notification management templates with HTML formatting.
Users can easily find HTML Formatting in Noncompliance Email Notifications in the Notification blade of the Intune admin centre. This blog post explains how to create HTML Formatting in Noncompliance Email Notifications in Intune.
- Send Notifications For Noncompliant Devices In Intune
- Microsoft is Working to Fix Intune 23H2 Security Baselines Issue
Microsoft Introduces HTML Formatting in Noncompliance Email Notifications in Intune
Microsoft Intune allows users to send emails to your users, create a notification message template and associate that to your compliance policy as an action for noncompliance. Then, when a device is non-compliant, the details you enter in the template are shown in the email sent to your users.
| Steps for HTML Formatting in Noncompliance Email Notifications in Intune |
|---|
| Sign in to the Microsoft Intune admin center |
| Select Endpoint security and click on Device compliance |
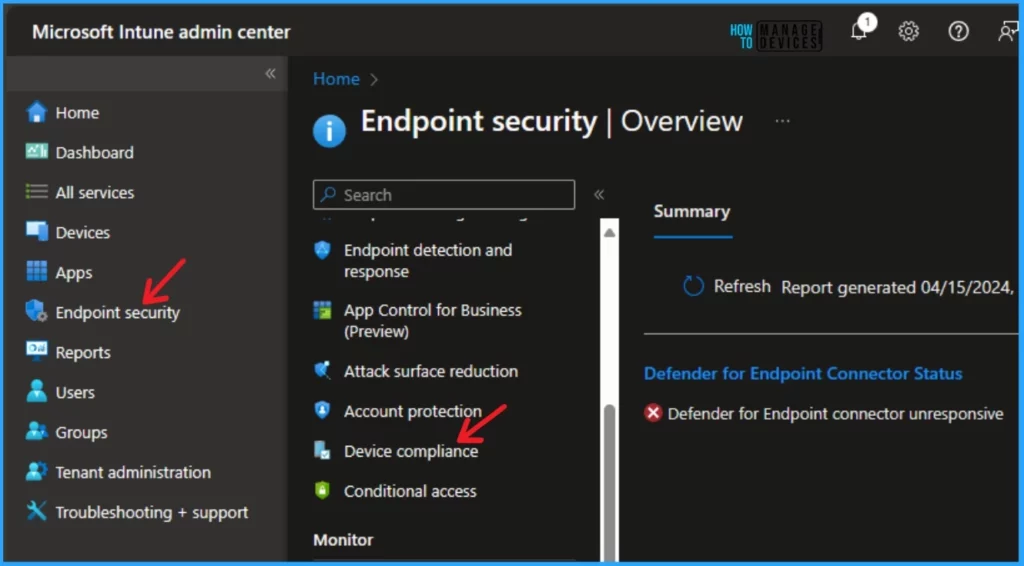
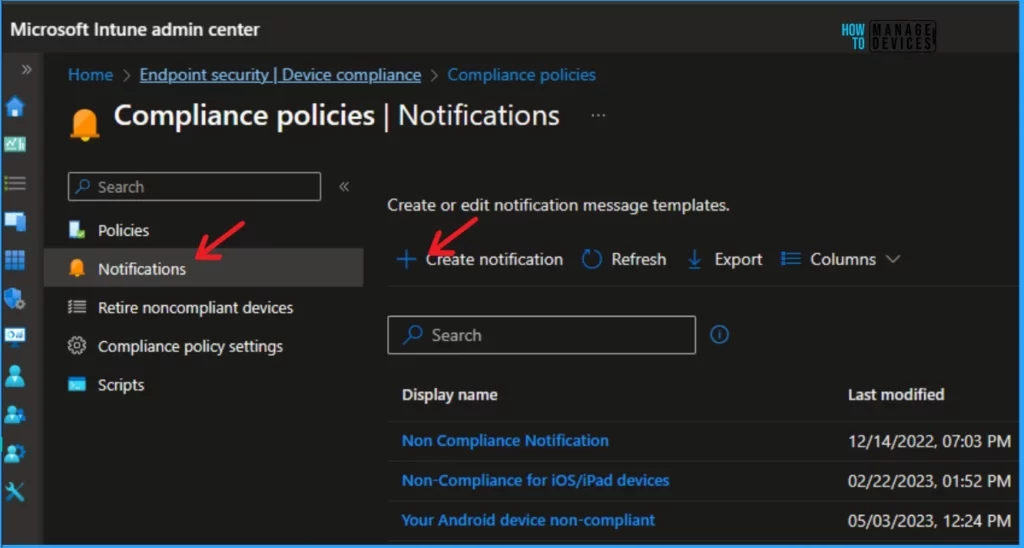
In the Compliance policies, you can see several options. Select the Notifications option on the left of the window. Then click on the +Create notification option from the window below.
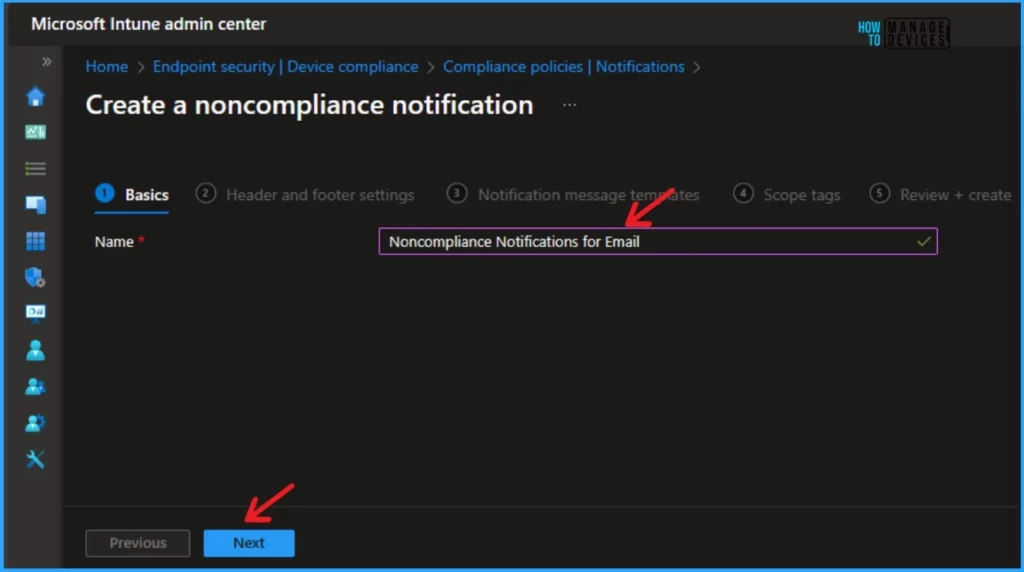
The Basic section is in the Create a Noncompliance notification window. Here, you can give the item a friendly name to help you identify it. Then click on the Next button in the window below.
- Configure Android Shared Devices using Intune
- Install New Outlook for Windows with Microsoft Store App from Intune
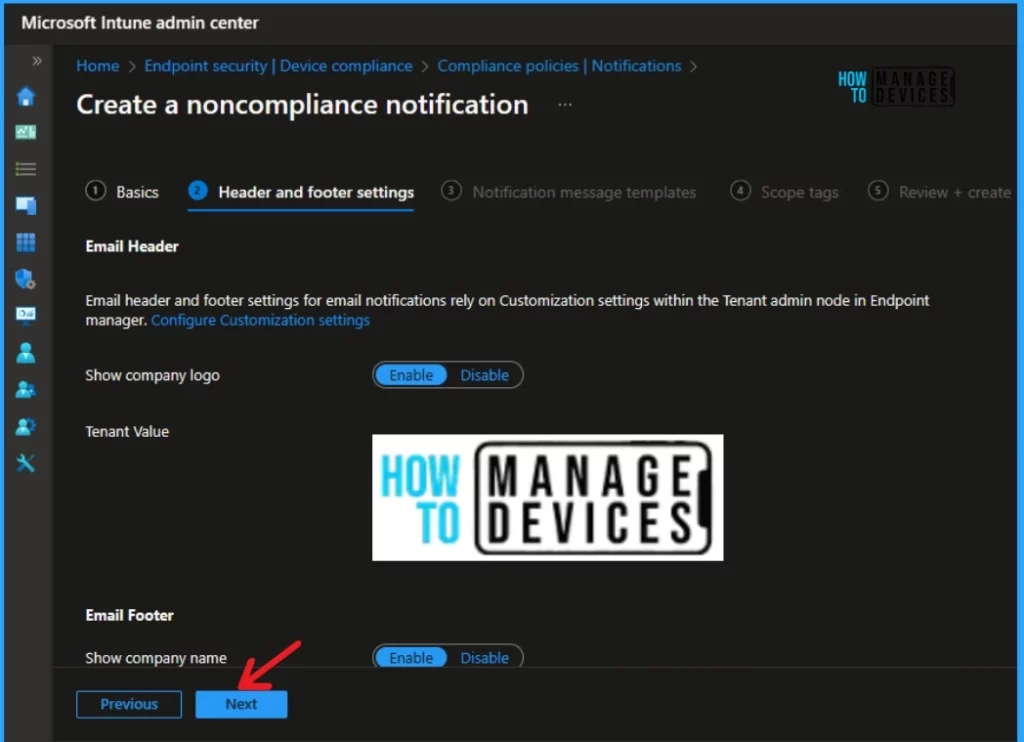
The next window is the Header and footer settings. Enable the following options as your preference. It includes Email Header, Email Footer etc.
- Email Header – It includes options such as Show company logo and Tenant Value
- Show Company Logo – You can Upload a logo to add your organization’s branding to the email templates. By default, this option is enabled.
- Tenant Value – The tenant value shows your company’s logo after you enable the Show Company Logo option.
- Email Footer – The email Footer shows options such as Show Company name, Tenant value, Show Company Portal Website lint, and Tenant value.
- Show Company name – Enable this setting to show your company name in the email. See Tenant Value to review the company name on record.
- Show Contact Information – You can enable this setting to show your organization’s contact information, such as name, phone number, and email address, in the email. See Tenant Value to review the contact information on record.
- Show Company Portal Website – Users can easily Enable this setting to include a link to the Company Portal website in the email. See Tenant Value to review the website link shown to users. By default, this option is disabled.
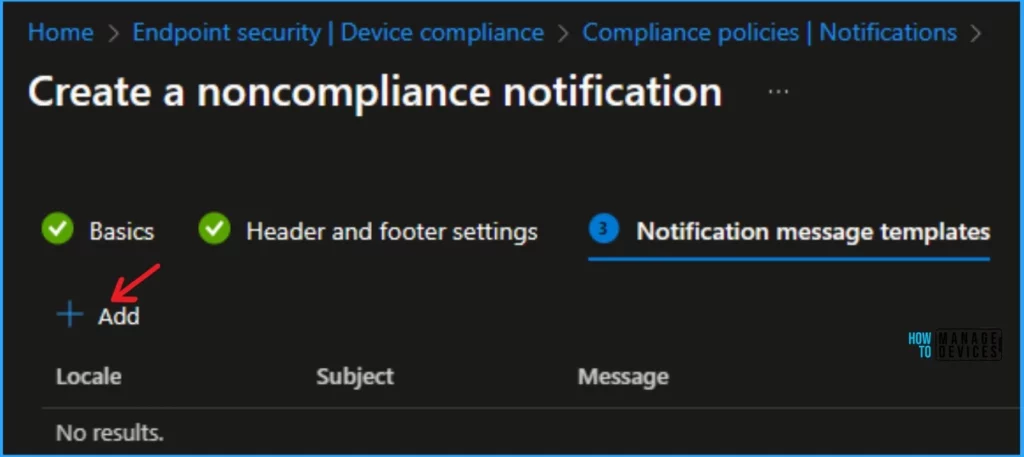
After that, click on the + Add option on the Notification message templates. Then, you can see the next steps.
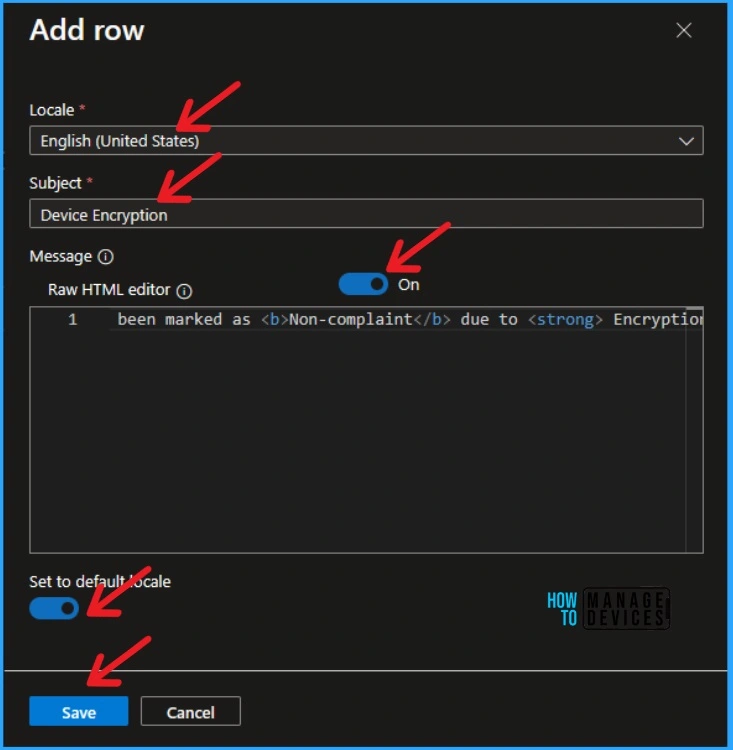
After clicking on the +Add option, you will get another window. You can add a row from this window. Some options shown in the below window include Locale, Subject, Message, etc. Fill these options according to your preference.
- Locale – Select a language according to the device user’s locale
- Subject – Add the subject line for the email. You can enter up to 78 characters.
- Raw HTML editor – Enable this option to get suggestions while adding HTML formatting and links to your message.
- Message – Create a message explaining the reason for noncompliance. You can enter up to 2000 characters.
After that, enable the set to default locale and click on the Save option. The below screenshot shows the details.
Supported HTML Tages include <a>, <strong>, <b>, <u>, <ol>, <ul>, <li>, <p>, <br>, <code>, <table>, <tbody>, <tr>, <td>, <thead>, <th>.
- Install Microsoft PowerToys with Intune Enterprise App Catalog App
- Best Guide to Turn on PowerShell Transcription with Intune
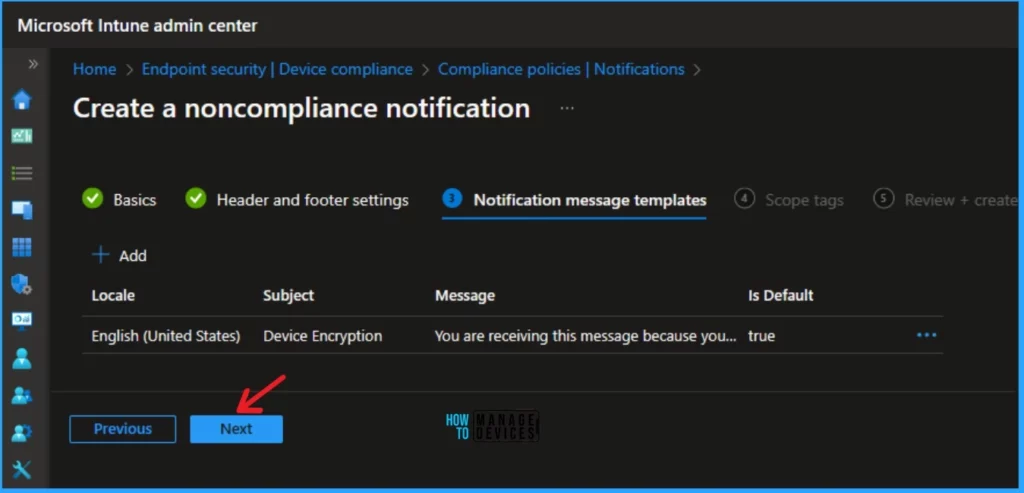
After filling in the above options, you can click on the Next button from the below window. Then you can go to the next window.
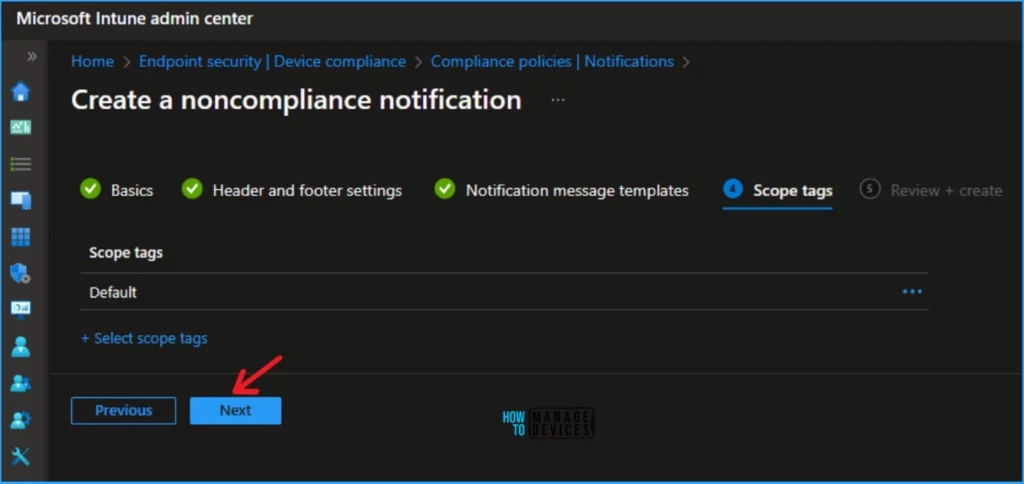
The Scope tag section is not mandatory. You can skip this section or complete the steps according to your preference. I skipped this section and Clicked on the Next button.
Then Review + create is the final step for completing the Noncompliance Email Notifications creation. In this window, you can verify all the previous steps. After that click on the Next button from the below window.
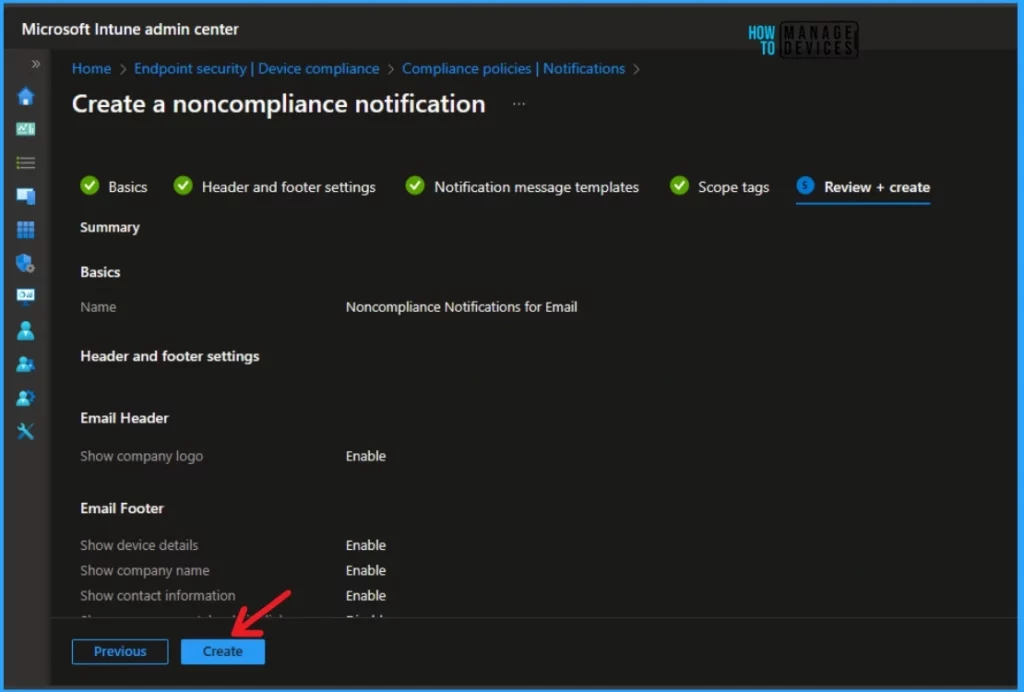
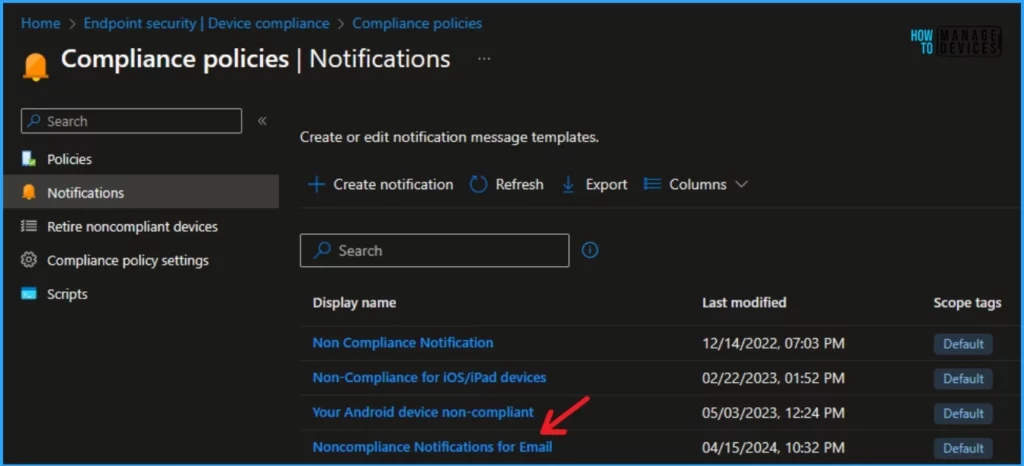
After creating the Noncompliance Email Notifications, you can see the created notification on the Notification blad of Complain Policies in Intune. Intune also allows you to edit the created notification anytime.
- Best Guide to Run Intune Device Query with Microsoft Graph API
- 2403 Microsoft Intune New Features March Update
We are on WhatsApp. To get the latest step-by-step guides and news updates, Join our Channel. Click here –HTMD WhatsApp.
Author
Gopika S Nair is a computer enthusiast. She loves writing on Windows 11 and related technologies. She is here to share quick tips and tricks with Windows 11 or Windows 10 users. She is Post Graduate Diploma Holder in Computer Science.
