Let’s check how you can configure and send Notifications for Noncompliant Devices in Intune. In this post, you will also learn how to create notifications in Intune Admin portal for Noncompliant Devices.
Compliance policy configuration is an important design decision while managing devices with Intune. Intune compliance policies are the first step of the protection before providing access to corporate applications, along with Conditional Access policies.
By default, when Intune detects a device that isn’t compliant, Intune immediately marks the device as noncompliant. Azure AD Conditional Access then blocks the device. When a device isn’t compliant, Intune allows you to add actions for noncompliance, which gives you the flexibility to decide what to do
Intune Compliance Policy for device help to protect company data; the organization needs to make sure that the devices used to access company apps and data comply with certain rules. The default compliance policy rules include password/PIN, Encryption, and more.
Starting with Intune Service release 2209, IT admins can create a custom message and include information in the notification about how to report an unrecognized device. Intune delivers enrollment notifications via email or push notifications, Configure Device Enrollment Notifications In Intune.
- Send Custom Notifications To Users Using Intune MEM Portal
- Intune Win32 App Deployment Toast Notification | User Experience
Send Notifications for Noncompliant Devices in Intune
The following steps provide you with details on how to create notifications for Noncompliant devices in Intune. To create an enrollment notification, you must be a Global Administrator or Intune Administrator.
- Sign in to the Microsoft Intune admin center https://intune.microsoft.com/
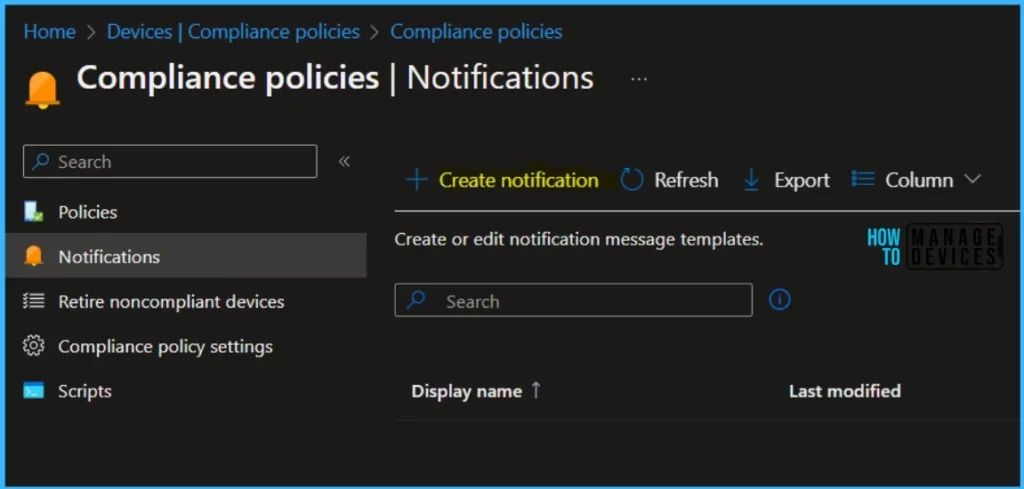
- Select Endpoint security > Device compliance > Notifications > Create notification.
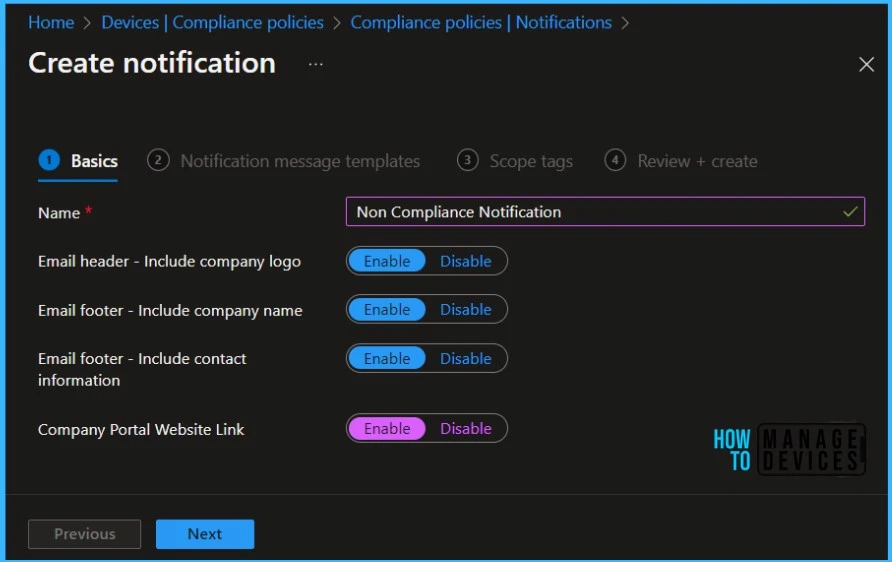
In Basics, configure the appropriate Name for the notification and provide the following settings and click Next to proceed.
- Email header – Include company logo (default = Enable) – The logo you upload as part of the Company Portal branding is used for email templates.
- Email footer – Include company name (default = Enable)
- Email footer – Include contact information (default = Enable)
- Company Portal Website Link (default = Disable) – When set to Enable, the email includes a link to the Company Portal website.
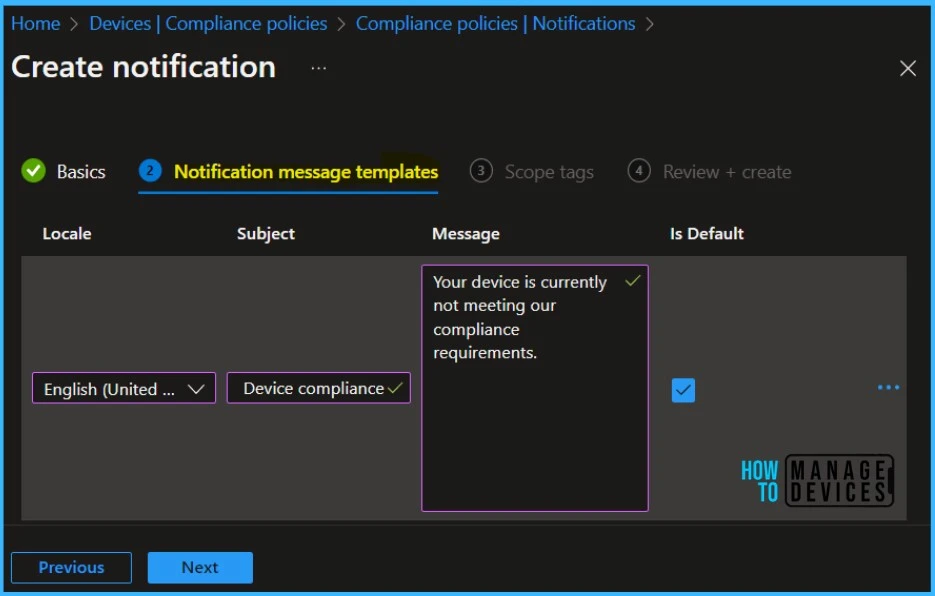
On the Notification message templates page, configure one or more messages. Before continuing, you must select the checkbox for Is Default for one of the messages. For each message, specify the following details:
- Locale
- Subject – The maximum number of characters for the Subject is 78.
- Message body text – The maximum number of characters for the message body text is 2000.
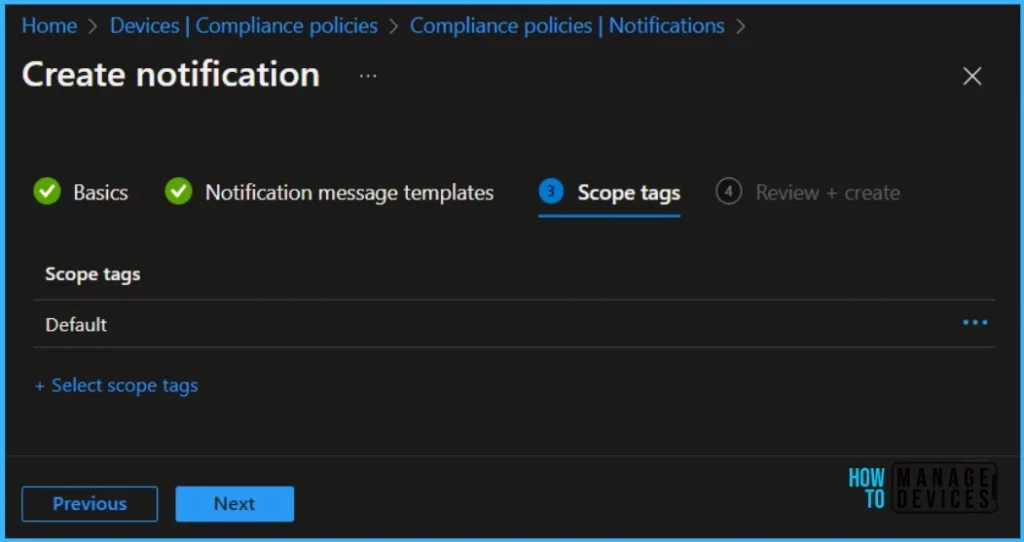
Scope tags are filtering options provided in Intune to ease the admin jobs. In the scope tag section, you will get an option to configure scope tags for the rules. Click on Next.
Under Review + create, review your configurations to ensure the notification message template is ready to use. Select Create to complete the creation of the notification.
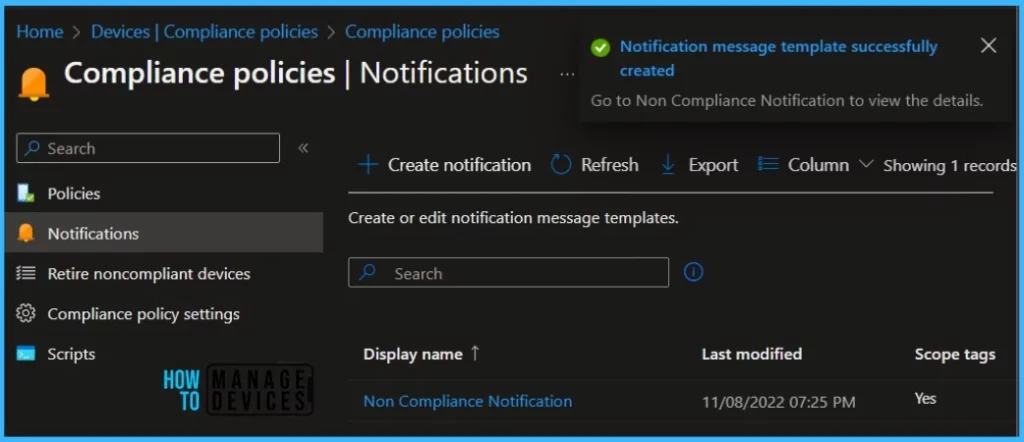
A notification will appear automatically in the top right-hand corner with a message. You can see that the Notification message template successfully created. The template is displayed in the list of Compliance policies Notifications.
You can start creating compliance policies from the Intune admin center portal. The Devices Node and from the Endpoint Security node. The following steps will Create Intune Compliance Policy for Windows.
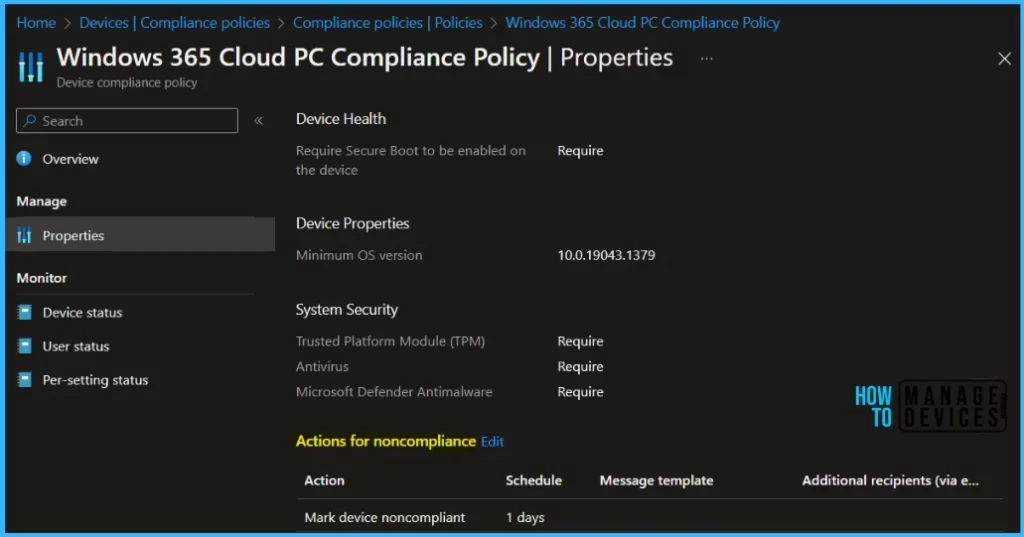
After you have created a noncompliance policy, you can set an action to take place with the device is out of compliance. Select your Windows compliance policy from the list.
In the Windows compliance policy overview pane, select Properties. Next to the Action for noncompliance section, click Edit.
This section of the compliance policy settings for Windows devices and Cloud PC + Azure Virtual Desktop persistent single session devices. The default value I put in is 1 day, but you can change it to 4 hours or 5 days as per your requirement.
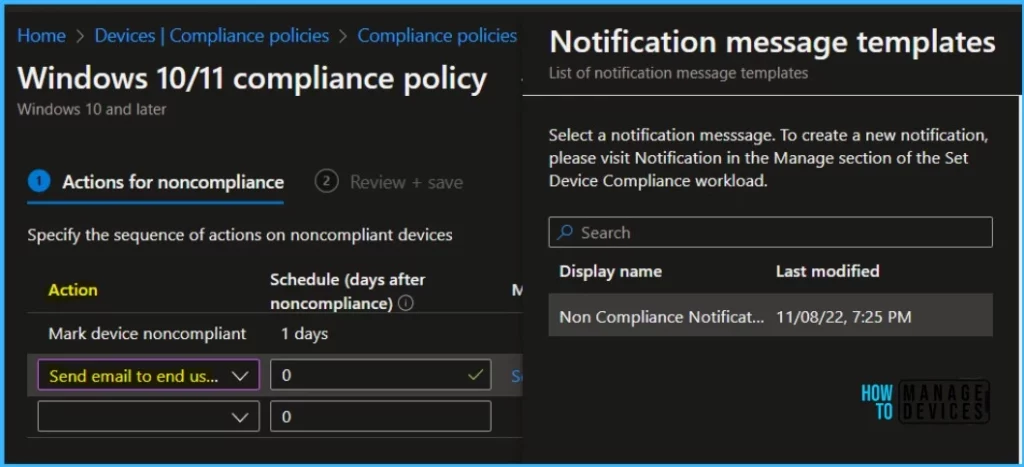
In the Action drop-down box, select Send email to end users. In the Schedule (days after noncompliance drop-down box, select 0. Under Message template, click None selected to display the Notification message templates pane.
Click the template you created earlier in this topic, and then click Select to select the message template. Click Review + save to save your compliance policy.
The following shows an example email sent when the device is non-compliant. Emails sent from Microsoft to added recipients from the following sender email address:
- Email address: microsoft-noreply@microsoft.com
- Display name: Microsoft
These emails include a Microsoft Endpoint Manager prefix in the subject line. Here’s an example: Microsoft Endpoint Manager: Your device is non-compliant. You can also edit a Notification template that was previously created.

The following blog will help you make it more flexible using MS Graph and PS script. We already have a blog post from Mark Thomas to guide you through quickly enforcing the Intune compliance policy rules on Windows Devices, including Cloud PCs and AVDs.

does this work for anyone? because I do not receive any email with the “email preview” button or or devices registered with my email
The added email recipients receive notification automatically once they click on Email Preview. It may take some time to deliver the emails.
Hi Jitesh – Is it possible to send email notification to Admin instead of the END users?
Hi Ravi, You can specify the email ID of Admins whom you want to be part of email recipients. The end users will receive an email when you configure the option, along with Admins.
Hello,
how often will user receive the email notification?
Maybe every couple days, for example?
Does it depend on how long computer is online?
Thanks