Let’s learn Hyper-V Backup Step-by-Step Installation Configuration Video Guide Altaro Backup Guide. This post will show the details of the Hyper-V backup step-by-step installation and configuration guide. I have to build a hyper-v server 2016 with three VMs.
This is my new SCCM CB lab, and Altaro VM backup has been installed and configured on that server to take backup of my hyper-v VMs.
A future blog post will cover the restoration process of Hyper-v VMs from Altaro VM Backup. This blog post will cover the installation, configuration, VM backup, backup retention, and VM backup health check.
Recently, Altaro released Altaro VM Backup v7 with vSphere 6.5 and Windows Server 2016 support, concurrency update, and the new Cloud Management Console; more details. They have included other features into the latest Altaro VM backup v7 boot VM from Backup and Augmented Inline Deduplication. The new Unlimited Plus Edition also comes with a new online console.
- List of Issues Fixed with SCCM 2403 KB26186448
- SCCM Life Cycle – End of Support Dates for SCCM CB Current Branch
- New Key Features of SCCM 2309 | Top Improvements
- SCCM 2403 New Key Features and Improvements
- Free SCCM Training 37 Hours of Latest Technical Content Lab Setup
Table of Contents
Hyper-V Backup Step by Step Installation Configuration Video Guide Altaro Backup Guide
This version generally provides considerably increased backup concurrency per Hypervisor. With Altaro’s inline deduplication technology, the user can benefit from huge storage space savings and much better backup speeds.
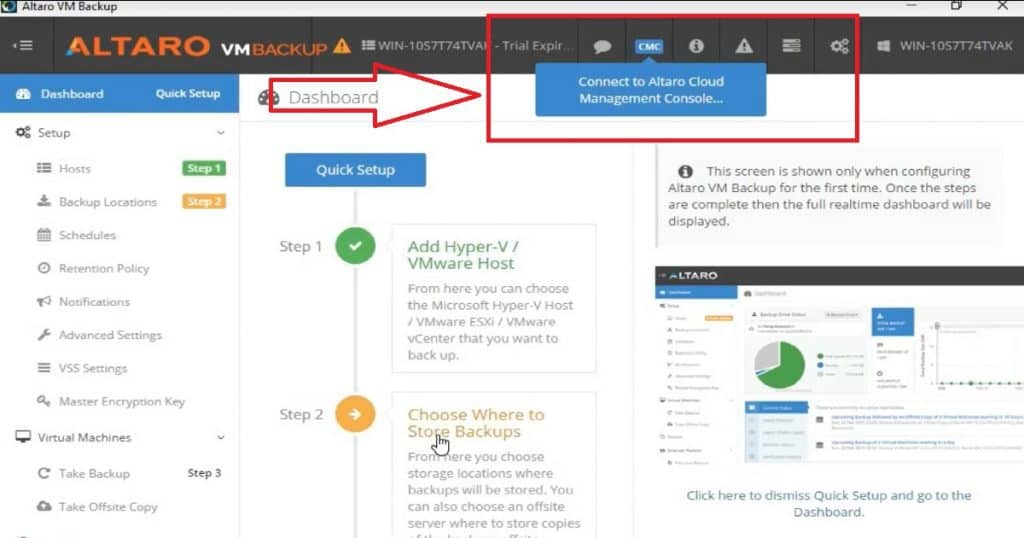
Step1 – Connecting to Hyper-V and Discovering VMS
Hosts—This is the step where the Hyper-V machines were discovered via Altaro VM backup. I have an SCCM infrastructure setup with this Hyper-V lab, so Altaro was able to find the 3 VMs as part of the STEP 1 discovery.
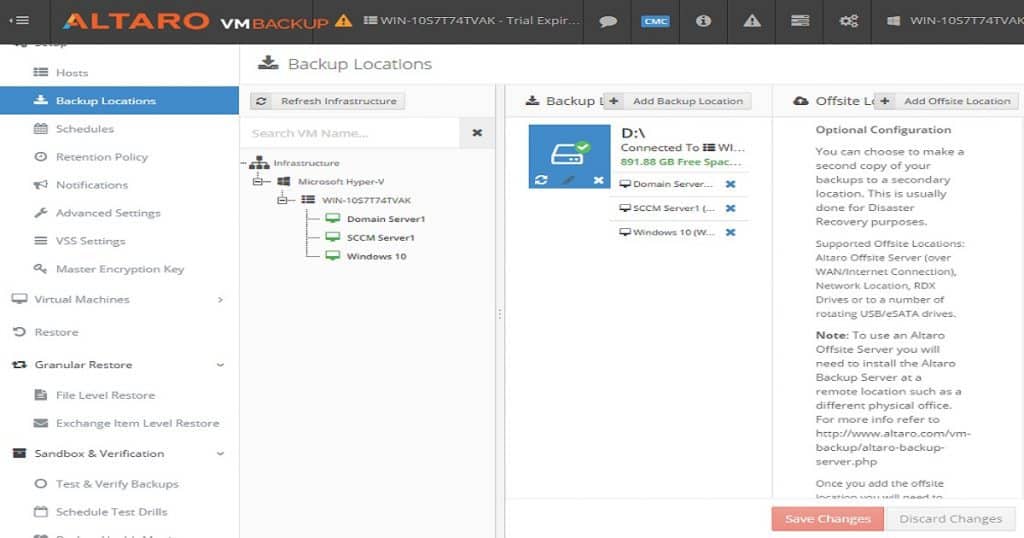
STEP 2 – Setting up Backup locations for VM backups
Backup Locations—This is where we set up a backup location for each Hyper-V VM. You can provide a network location and external hard disk. Setting up a backup site is easy. Altaro backup automatically discovers the external hard disk or USBs connected to your Hyper-V server. You can drag and drop your VMs to a particular backup location, and that is it!
Scheduling backup tasks for Hyper-V VMs via Altaro Hyper-V backup is very easy. You can also set up a retention policy for Hyper-V VM backups according to your organizational requirements.
Advanced settings allow you to customize and skip IOS files from Hyper-V VM backups. If your organization requires encryption while backing up VMs, Altaro has an out-of-the-box setting to configure the encryption of VMs.
STEP 3 – Hyper-V VM Backup, Retention Schedules, and Reports
Step 3 is the last stage I will cover in this post. It involves backing up Hyper-V VMs using the Altaro backup solution. When you click on the “+” symbol on the right side of your VM and click on the “Take Backup” button, Altaro will send the instructions to the hypervisor. You can also schedule the Hyper-V VM backups to automate the backup process.
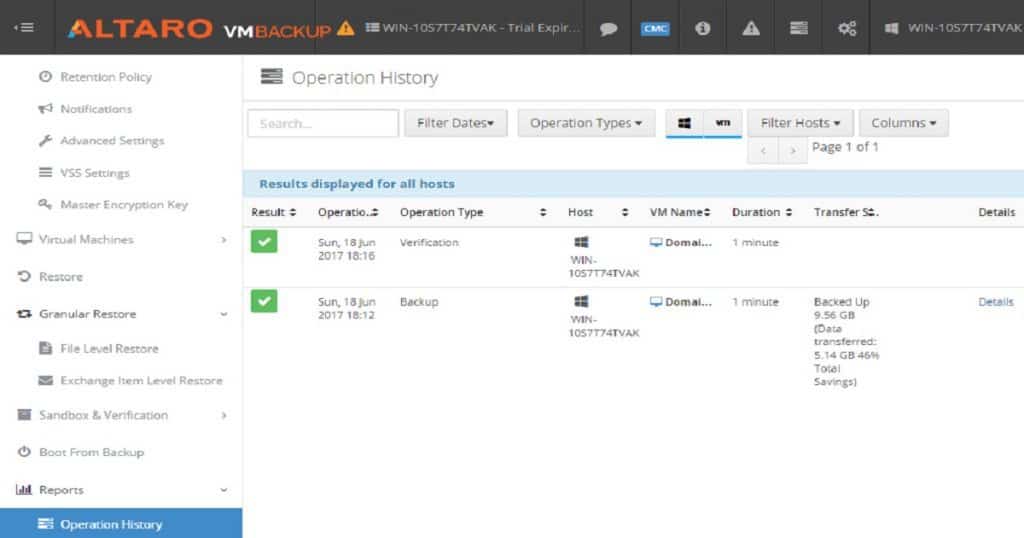
You can also check and verify the backup that has already been completed. The Schedule Test Drills and Test – Verify Backups options automate the validation of Hyper-V VM backups. Some helpful out-of-box reports will provide details about the Altaro Backup jobs completed.
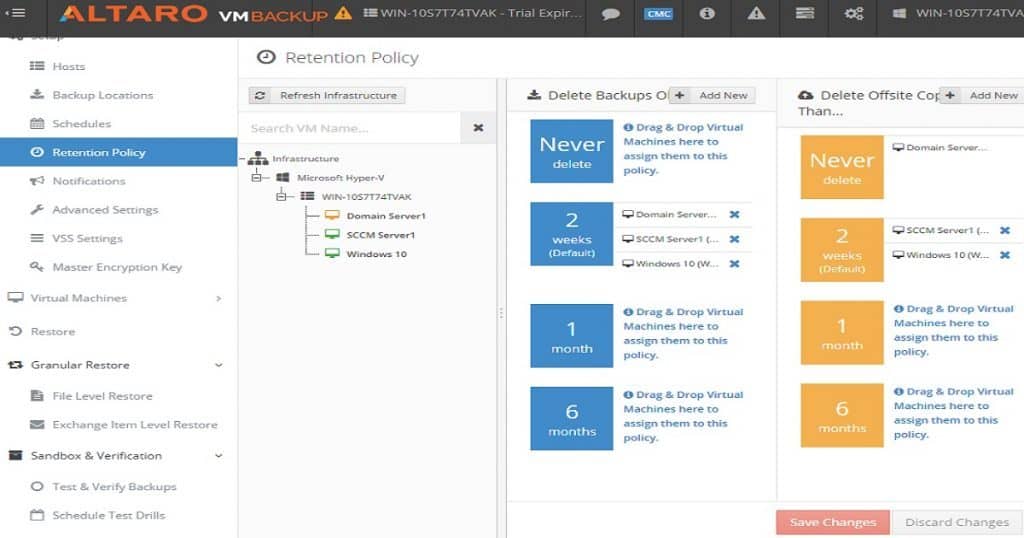
Retention policies help automate deleting old Hyper-V VM backups on a particular schedule. In my testing, this is very useful for better storage management. Watch the video tutorial to learn more about Altaro services and file systems. Eight Altaro Services are running on the Hyper-V server.
Conclusion:-
This post covered installation, configuration, VM backup, backup retention, and VM backup health check. In a later post, I will cover the recovery options of the Altaro VM Backup solution in detail. Overall, I had a great user experience with the installation, configuration, and VM backup of Altaro VM Backup. The drag-and-drop options for VMs are my favorite option in Altaro VM backup. Stay tuned for the next post-restore topic.
We are on WhatsApp now. To get the latest step-by-step guides, news, and updates, Join our Channel. Click here. HTMD WhatsApp.
Author
Anoop C Nair is Microsoft MVP! He is a Device Management Admin with more than 20 years of experience (calculation done in 2021) in IT. He is a Blogger, Speaker, and Local User Group HTMD Community leader. His main focus is on Device Management technologies like SCCM 2012, Current Branch, and Intune. He writes about ConfigMgr, Windows 11, Windows 10, Azure AD, Microsoft Intune, Windows 365, AVD, etc.


