Hello All, we are presenting this post for the successful deployment of the Turn On E-Mail Scanning Policy using Intune. We are making use of the Settings Catalog of Configuration Profiles from Intune to deploy Turn On E-Mail Scanning Policy.
Turn On E-Mail Scanning Policy policy setting provides the ability to customize email scanning. The email scanning policy setting is a crucial aspect of antivirus or security software configurations, influencing how the software interacts with and analyzes email content.
When email scanning is activated, the engine will examine the mailbox and mail files, parsing them based on their respective formats to analyze both mail bodies and attachments. Various email formats are currently supported, including, but not limited to, pst (Outlook), dbx, mbx, mime (Outlook Express), and binhex (Mac).
Enabling this setting will activate email scanning, while disabling or leaving it unconfigured will deactivate email scanning. Email scanning plays a crucial role in safeguarding users against malicious attachments. By analyzing both email bodies and attachments, the antivirus solution can identify and block potential threats before they reach the user’s system.
The policy setting allows administrators to configure email scanning based on the specific needs of their organization. This reconfigurability ensures that organizations can tailor their security measures to align with their email usage patterns and potential threats.

Windows CSP Details Scan_DisableEmailScanning
We will see Windows CSP Details for this Policy setting Scan_DisableEmailScanning. The email scanning policy setting is a vital component of email security measures. It offers organizations the flexibility to tailor their approach to email protection while providing a proactive defense against potential threats delivered through email channels.
CSP URI – ./Device/Vendor/MSFT/Policy/Config/ADMX_MicrosoftDefenderAntivirus/Scan_DisableEmailScanning

Intune Deploy Turn On E-Mail Scanning Policy
Below are the steps to create a Turn On E-Mail Scanning Policy:
- First, we must sign in to the Intune Admin Center portal using the link – https://intune.microsoft.com/.
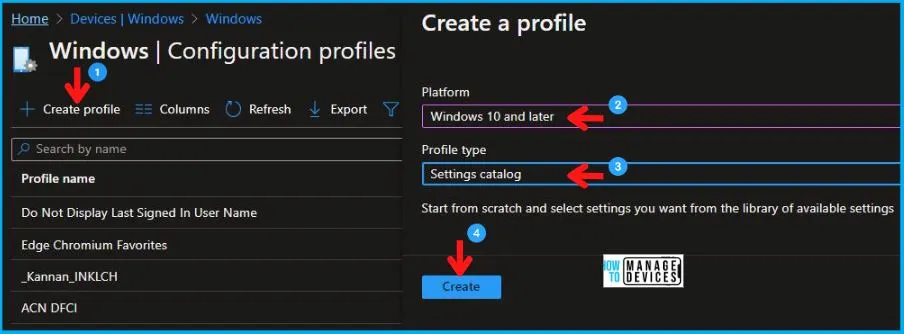
- Now Navigate to Devices > Windows > Configuration profiles > Create a profile.
Here, in the Create a Profile section, select the values as shown below in the table and click on Create.
| Platform | Profile Type |
|---|---|
| Windows 10 and later | Settings catalog |
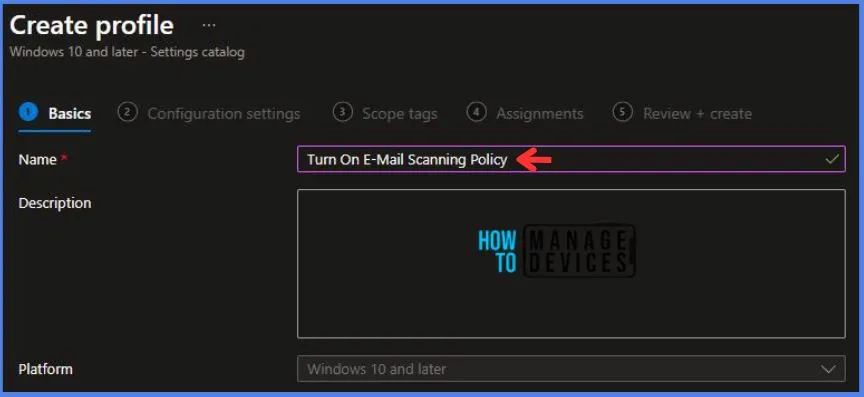
After this, in the Basics tab, I provide a name for the policy “Turn On E-Mail Scanning Policy.”
- Optionally, if you want, you can enter a policy description and proceed by selecting “Next“.
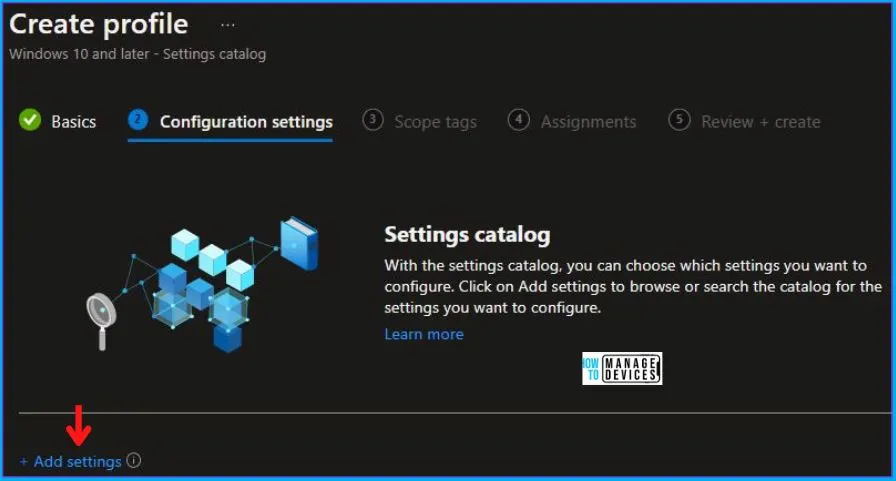
Now in Configuration Settings, Click Add Settings to browse or search the catalog for the settings I want to configure.
In the Settings Picker windows, on searching with the keyword Scan, I found the category Administrative Templates\Windows Components\ Microsoft Defender Antivirus\ Scan. And we need to select this.
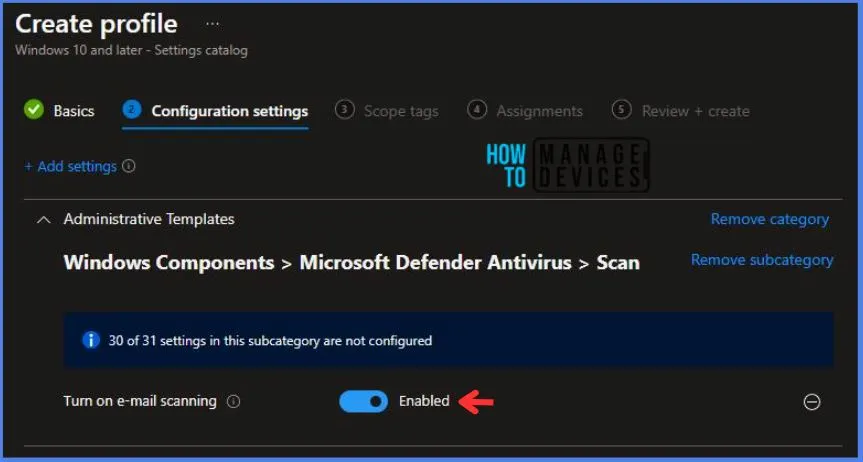
- After selecting the above-stated option, I see the sub-category Turn on e-mail scanning. After selecting that, click the cross mark at the right-hand corner, as shown below.
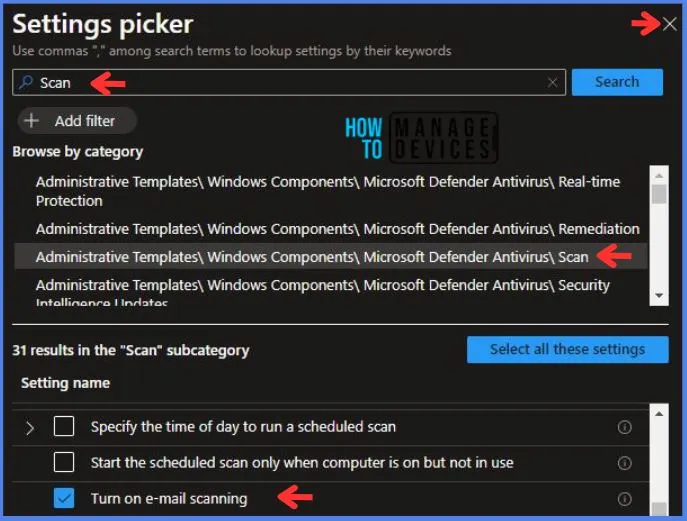
Here in Administrative Templates, I have Enabled the Turn on e-mail scanning as this is the recommended state considering the digital security importance.
Using Scope tags, you can assign a tag to filter the profile to specific IT groups. One can add scope tags (if required). More details on Intune Scope Tags Implementation Guide.
- Click Next to continue.
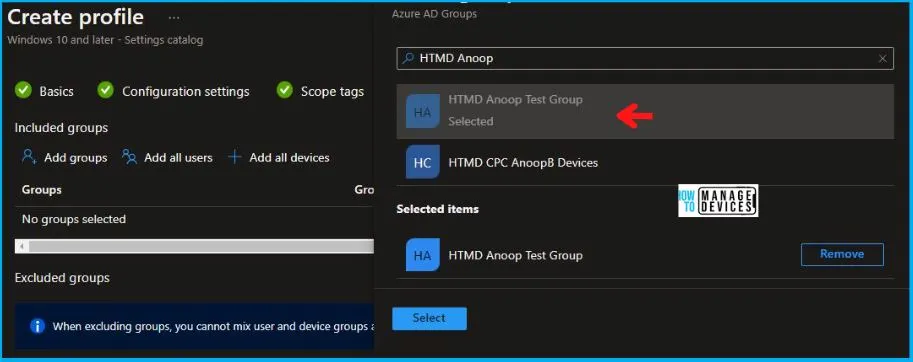
Now in Assignments, in Included Groups, you need to click on Add Groups and choose Select Groups to include one or more groups. Click Next to continue.
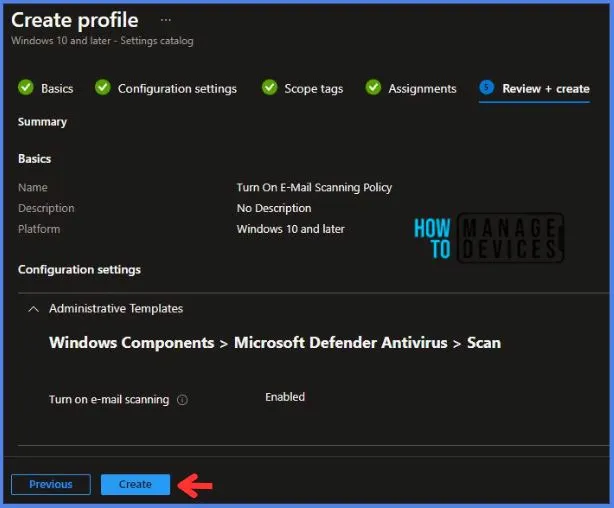
In the Review + Create tab, I review settings. After clicking on Create, changes are saved, and the profile is assigned.
After successfully creating the “Turn On E-Mail Scanning Policy,” a notification will appear in the top right-hand corner confirming the action. You can also verify the policy’s existence by navigating to the Configuration Profiles list, where it will be prominently displayed.
Your groups will receive your profile settings when the devices check in with the Intune service. The Policy applies to the device.
Intune Report for Turn On E-Mail Scanning Policy
From the Intune Portal, you can view the Intune settings catalog profile report, which provides an overview of device configuration policies and deployment status.
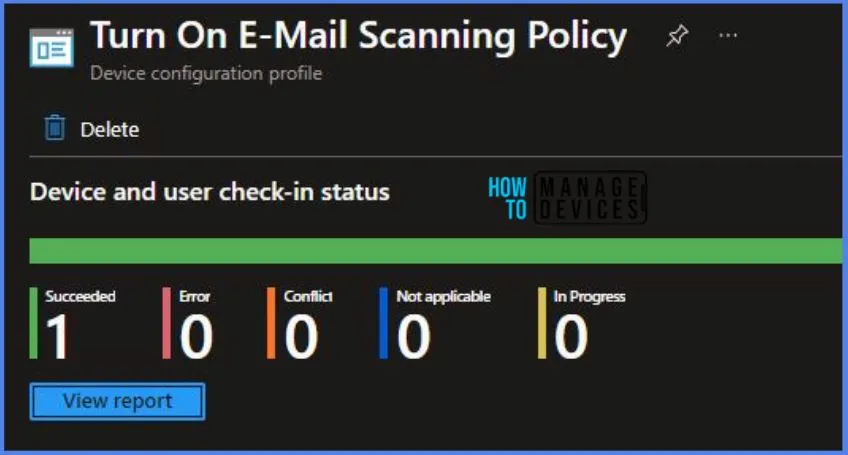
To track the assignment of the policy, you need to select the relevant policy from the Configuration Profiles list, which is the Turn On E-Mail Scanning Policy. Then, you can review the device and user check-in status to determine whether the policy has been successfully applied.
- If you require more detailed information, you can click on “View Report” to access additional insights.
Client Side Verification – Turn On E-Mail Scanning Policy
You can leverage event IDs 813 and 814 to verify the successful implementation of String or integer policies for the Turn On E-Mail Scanning Policy on Windows 10 or 11 devices through Intune.
These event IDs provide valuable insights into the Turn On E-Mail Scanning Policy’s application status and the specific value assigned to the policy on those devices. In the case of this particular policy, the value is String and is linked to the event ID 814.
By analyzing these event IDs, you can clearly understand the policy’s application status and the corresponding value associated with it on the devices in question.
To confirm this, you can check the Event log path – Applications and Services Logs – Microsoft – Windows – Devicemanagement-Enterprise-Diagnostics-Provider – Admin.
MDM PolicyManager: Set policy string, Policy: (
