This post will help you create the Intune Turn Off Heap Termination on Corruption Policy. We are using Intune’s Settings Catalog to install Turn Off Heap Termination on Corruption Policy and using Intune’s Configuration Profiles to create it.
The policy Turn Off Heap Termination on Corruption refers to the configuration option that controls whether heap termination is initiated in the event of corruption.
It’s crucial to carefully consider the implications of this policy. While it can provide temporary support for legacy applications, the recommended and more secure state is typically to have heap termination on corruption enabled, preventing potential issues and ensuring the system’s stability.
If heap termination on corruption is not enabled, legacy plug-in applications might persist in operation even when a File Explorer session has experienced corruption. Activating heap termination on corruption is essential to prevent such occurrences. The recommended configuration for this setting is to keep it disabled.
By disabling heap termination on corruption, some legacy plug-in applications may continue to operate without causing an immediate termination of Explorer. However, it’s important to note that Explorer might still terminate unexpectedly at a later point.
- Prevent the Use of Security Questions for Local Accounts using Intune Policy
- Intune Allow Microsoft Accounts to be Optional Policy

Turn Off Heap Termination on Corruption Policy
To create Turn Off Heap Termination on Corruption Policy, follow the steps stated below:
- Sign in to the Intune Admin Center portal https://intune.microsoft.com/.
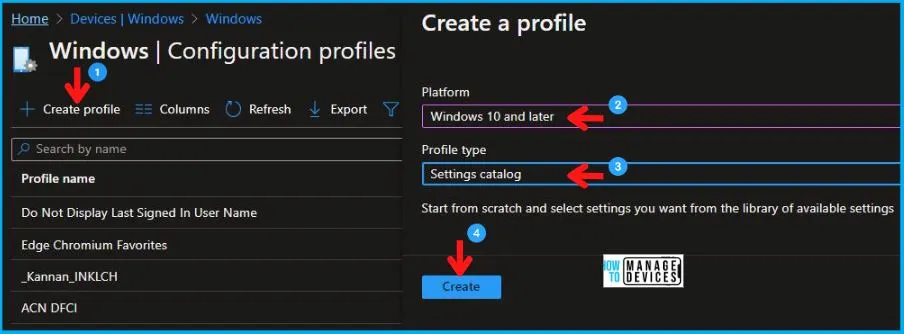
- Select Devices > Windows > Configuration profiles > Create a profile.
In Create Profile, I select Windows 10 and later in Platform, I choose the Profile Type as Settings catalog. Click on the Create button.
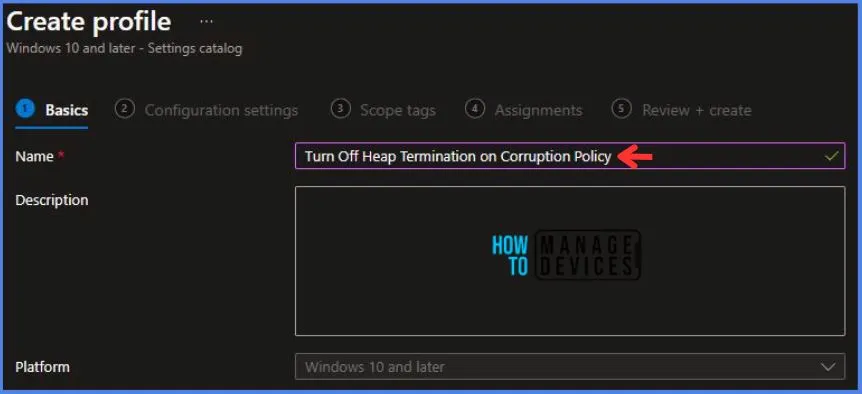
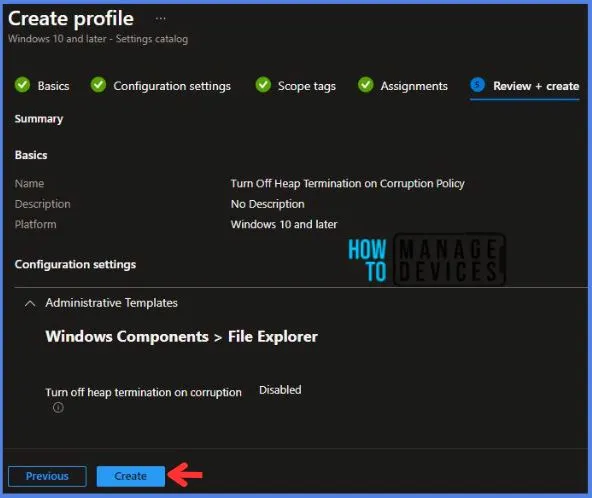
On the Basics tab pane, I provide a name for the policy as “Turn Off Heap Termination on Corruption Policy.”
- Optionally, if you want, you can enter a policy description and proceed by selecting “Next“.
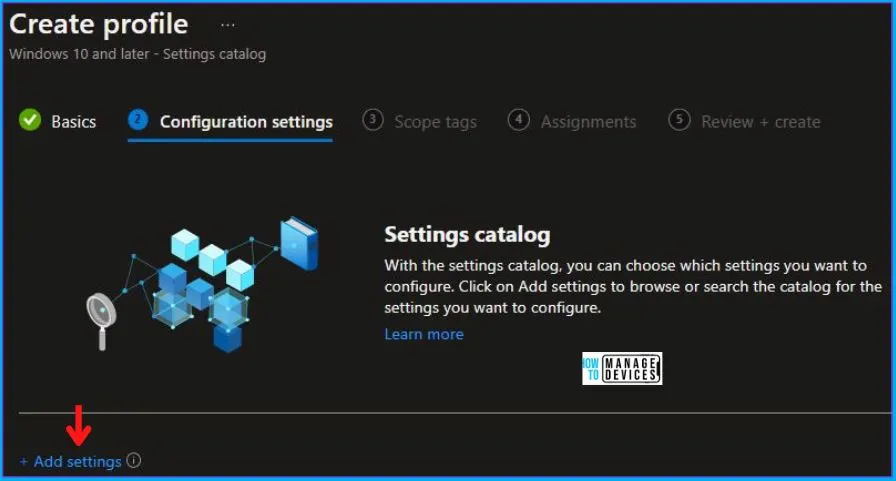
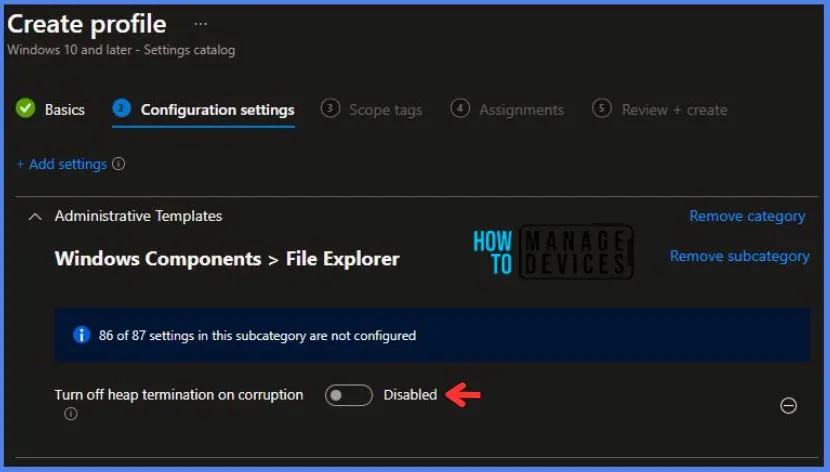
Now, in Configuration Settings, Click Add Settings to browse or search the catalog for the settings I want to configure.
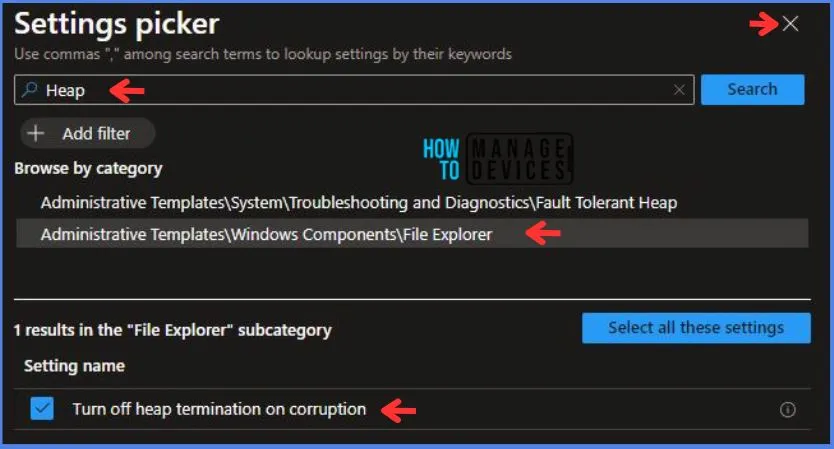
In the Settings Picker windows. I searched for the keyword Heap. I found the category Administrative Templates\Windows Components\File Explorer and selected this.
- I see the sub-category Turn off heap termination on corruption. After selecting that, click the cross mark at the right-hand corner, as shown below.
Here in Administrative Templates, i have set Turn off heap termination on corruption to Disabled.
Using Scope tags, you can assign a tag to filter the profile to specific IT groups. One can add scope tags (if required). More details on Intune Scope Tags Implementation Guide.
- Click Next to continue.
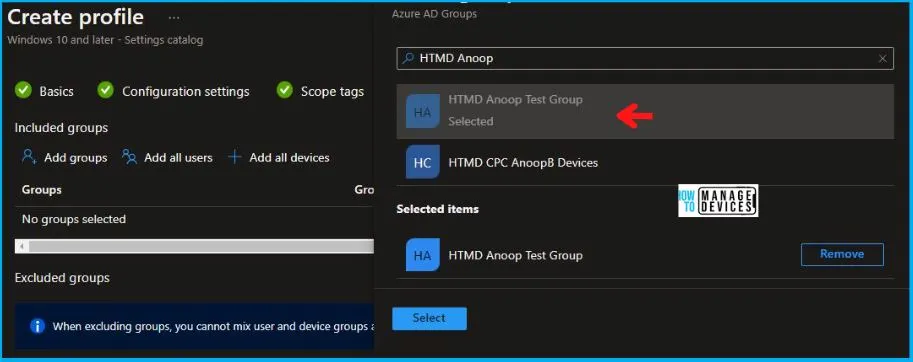
Now in Assignments, in Included Groups, you need to click on Add Groups and choose Select Groups to include one or more groups. Click Next to continue.
In the Review + Create tab, I review settings. After clicking on Create, changes are saved, and the profile is assigned.
After successfully creating the “Turn Off Heap Termination on Corruption Policy,” a notification will appear in the top right-hand corner confirming the action. You can also verify the policy’s existence by navigating to the Configuration Profiles list, where it will be prominently displayed.
Your groups will receive your profile settings when the devices check in with the Intune service. The Policy applies to the device.
Intune Report for Turn Off Heap Termination on Corruption Policy
From the Intune Portal, you can view the Intune settings catalog profile report, which provides an overview of device configuration policies and deployment status.
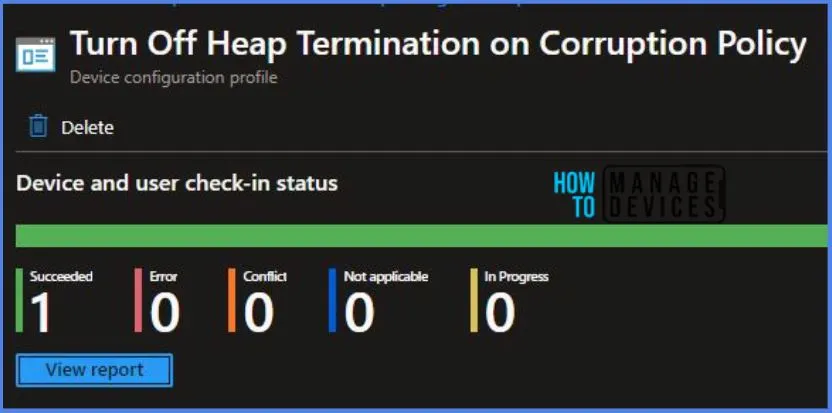
To track the policy’s assignment, you need to select the relevant policy from the Configuration Profiles list, which is the Turn Off Heap Termination on Corruption Policy. Then, you can review the device and user check-in status to determine whether the policy has been successfully applied.
- If you require more detailed information, you can click on “View Report” to access additional insights.
Registry Key Verification – Turn Off Heap Termination on Corruption Policy
Now we will verify whether the policy was successfully deployed or not by accessing the registry settings that will hold the group policy configurations on a specific computer. To accomplish this, you can execute “REGEDIT.exe” on the target computer and navigate to the precise registry path mentioned below, where these settings are stored.
Computer\HKEY_LOCAL_MACHINE\SOFTWARE\Microsoft\PolicyManager\providers\5B88AEF1-09E8-43BB-B144-7254ACBBDF3E\default\Device\FileExplorer
When you navigate the above path in the Registry Editor, you will find the registry key named
