Let’s check the MS Defender Advanced Hunting using KQL Queries. There are two types of Threats hunting in the Microsoft 365 Defender world. We will discuss both of those hunting techniques in this article.
In this article, we will explore Microsoft Defender Advanced hunting, what is Advanced hunting, how to perform advanced hunting and what tools you can use for advanced hunting, what are the relation between KQL queries and advanced hunting, and what does the relation between advanced hunting and incidence plus alerts in Microsoft 365 Defender world etc.
We have an article highlighting the Intune Integration with Microsoft Defender for Endpoint to explore the seamless integration between Microsoft Defender for Endpoint and Intune. Another article showing the Latest MDE Architecture Changes to Enhance Onboarding Experience explore two interesting Microsoft Defender for Endpoint (MDE) aspects.
MS Defender Advanced Hunting is a tool for hunting down threats using queries. It lets you look through data from the past 30 days. There are two ways to use it: guided and advanced. Guided mode is helpful if you are new to Kusto Query Language (KQL) or like using a simple query builder. If you are familiar with KQL and want more control, you can use advanced mode to create your queries from the beginning.
- Workgroup Joined Device Enrollment to MDE Defender for Endpoint
- MDE Network Protection Policy Deployment using Intune
- MDE Troubleshooting Tools Explained
What is M365 Defender Advanced Hunting?
Advanced hunting is a query-based threat-hunting tool that lets you explore up to 30 days of raw data. You can proactively inspect events in your network to locate threat indicators and entities. The flexible access to data enables unconstrained hunting for known and potential threats. Advanced hunting supports queries that check a broader data set coming from.
1. Microsoft Defender for Endpoint
2. Microsoft Defender for Office 365
3. Microsoft Defender for Cloud Apps
4. Microsoft Defender for Identity
MS Defender Advanced Hunting using KQL Queries
In this video, you will get all the details about Microsoft Defender Advanced hunting, the basic hunting tools, and the data set schema within Microsoft 365 Defender—all these things you have seen, along with many KQL queries. And you can also get information such as how to get sample queries, edit and customize sample queries, etc.
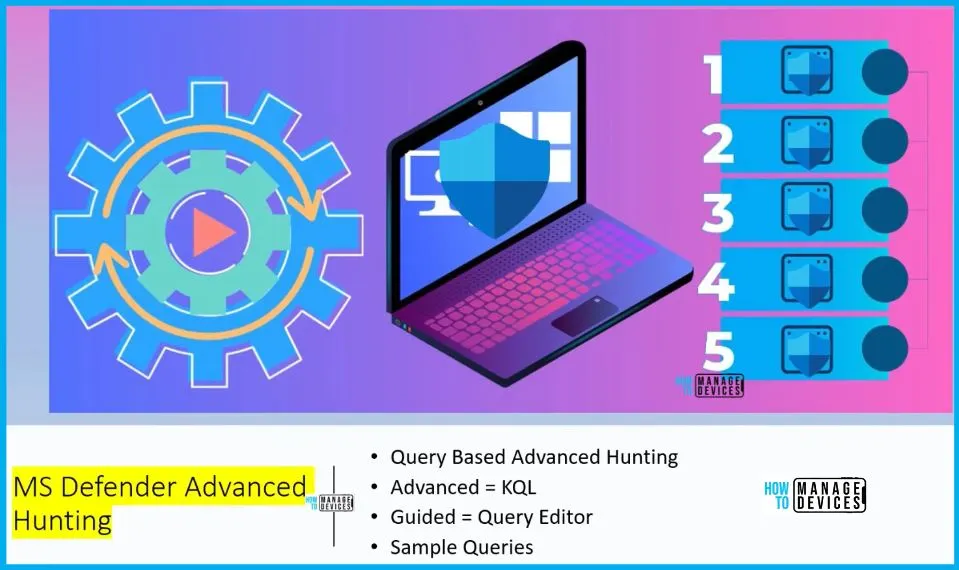
MS Defender Advanced Hunting
In this article, we’ll walk you through the process of using advanced hunting queries for enhanced threat detection. We’ll start by explaining how to perform query-based advanced hunting, and then we’ll shift our focus to understanding incidents and alerts, providing you with a high-level overview of their role.
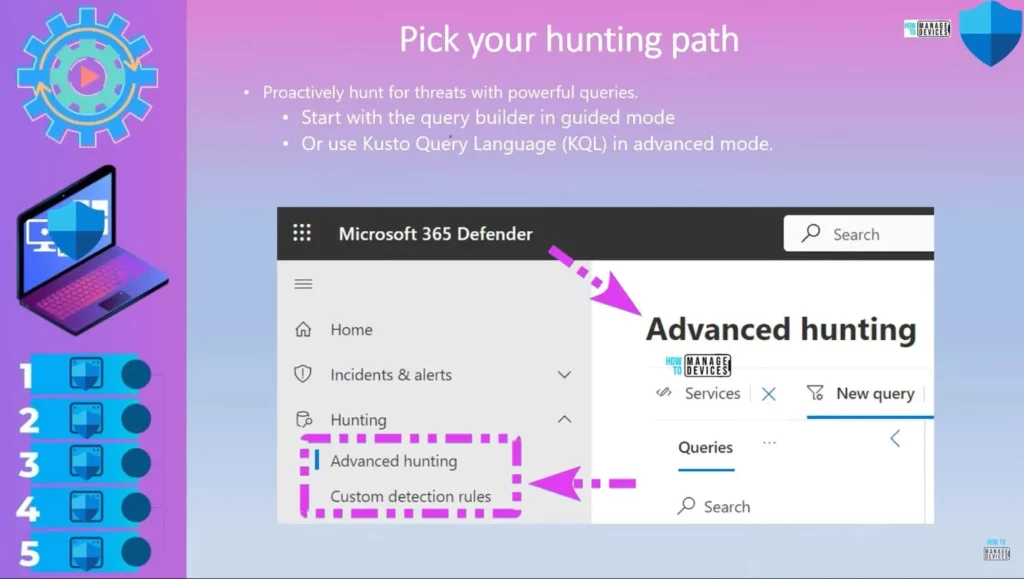
Pick your Hunting Path
There are different hunting paths. You can use advanced mode if familiar with the custom query language KQL. Otherwise, you can start with the query builder. Proactively hunt for threats with powerful queries.
- Start with the query builder in guided mode
- Or use Kusto Query Language (KQL) in advanced mode.
| Hunting |
|---|
| Advanced Hunting |
| Custom Detection Rules |
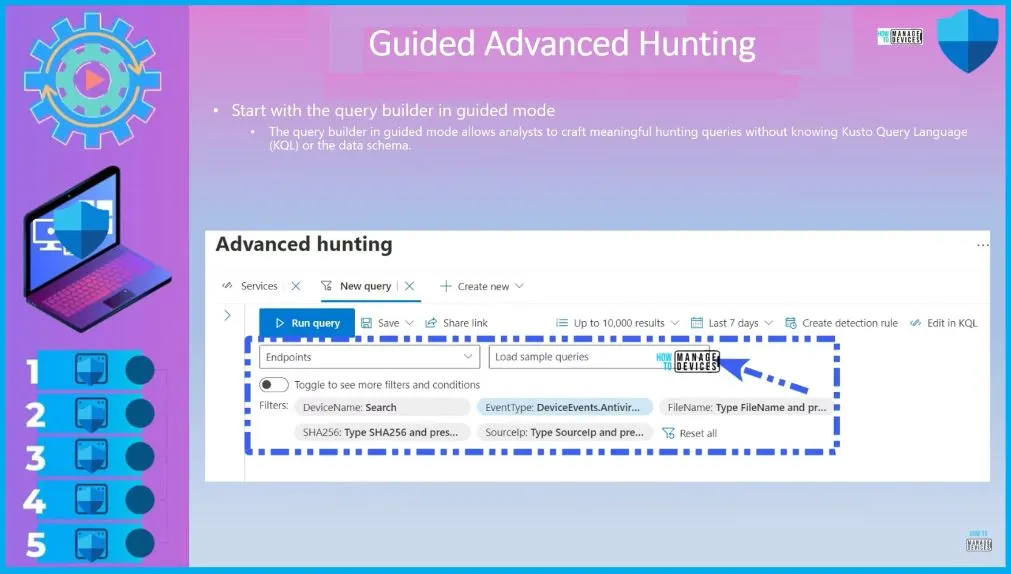
Guided Advanced Hunting
Start with the query builder in guided mode. The query builder in guided mode allows analysts to craft meaningful hunting queries without knowing Kusto Query Language (KQL) or the data schema.
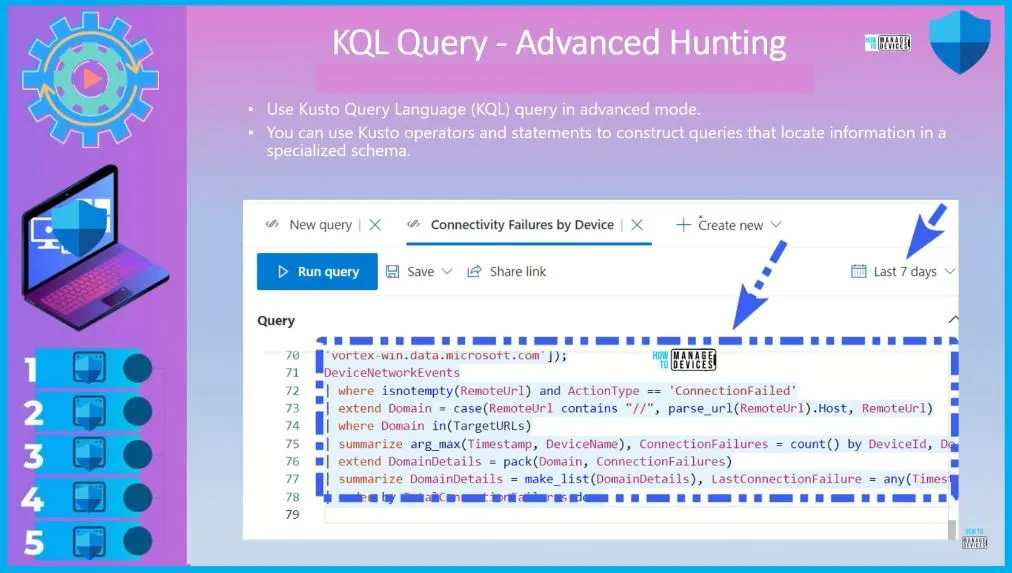
KQL Query – Advanced Hunting
Use Kusto Query Language (KQL) query in advanced mode. You can use Kusto operators and statements to construct queries that locate information in a specialized schema. The below window shows the KQL Query advanced hunting scenario. If you are familiar with this type of KQL query, you can go ahead with this type of hunting. It takes some time.
- We have an article highlighting the KQL query-related stuff in Intune scenarios.
- KQL is the common query language used across Azure for Defender and most products.
- If you want to troubleshoot any of the Microsoft product SaaS solutions, the KQL query is usually used in Intune scenarios, AVD Virtual desktop scenarios, etc.
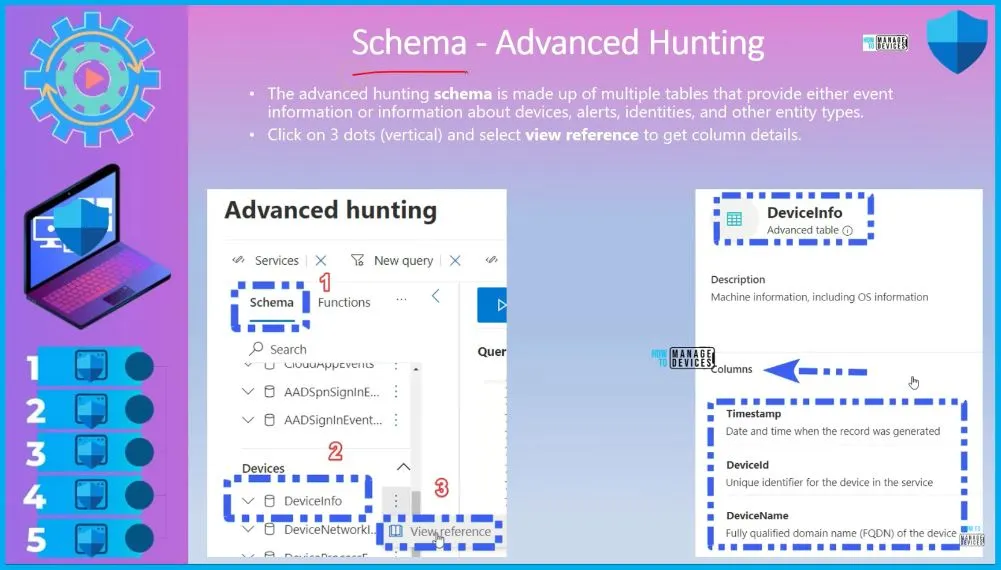
Schema Advanced Hunting
The advanced hunting schema comprises multiple tables that provide either event information or information about devices, alerts, identities, and other entity types. Click on 3 dots (vertical) and select view reference to get column details.
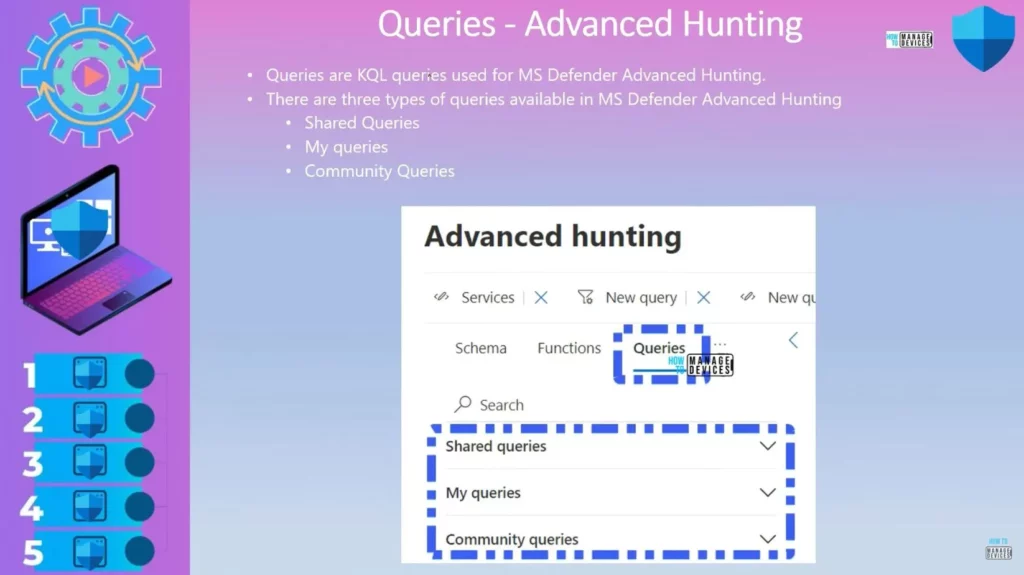
Queries Advanced Hunting
Queries are KQL queries used for MS Defender Advanced Hunting. There are 3 types of queries available in MS Defender Advanced Hunting Shared Queries, My queries and Community Queries. These queries are very useful for troubleshooting common issues to help you perform advanced hunting, etc.
Advanced Hunting Options in MDE
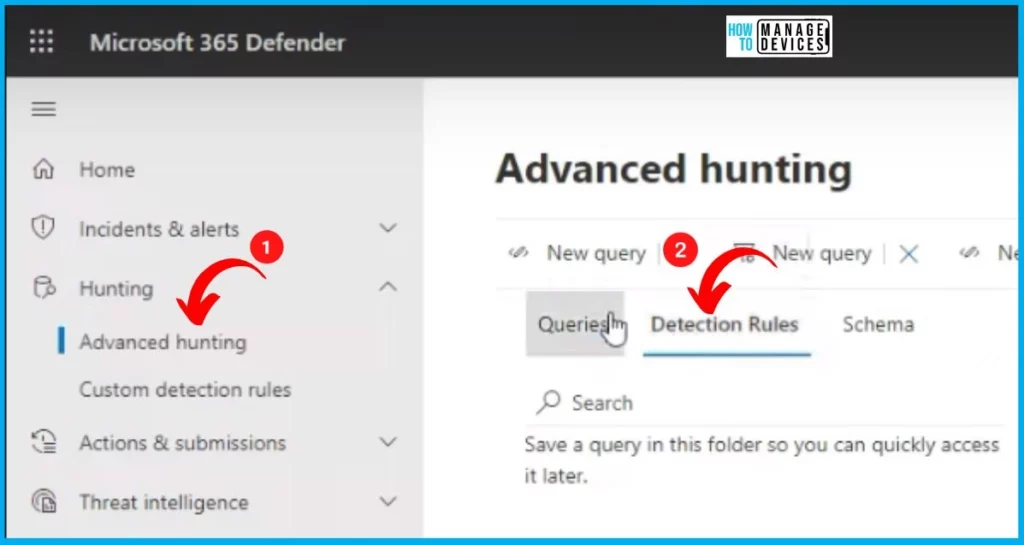
Look into advanced hunting options in MDE(Microsoft Defender for Endpoint). Open Microsoft 365 Defender portal – security.microsoft.com and sign in using your admin account. You can see the Hunting option on the left side of the portal. Select Advanced hunting from hunting. In advanced hunting, you can see the options such as Queries, Detection Rules, and Schema.
- Schema
- Queries
- Detection Rules
Schema
A schema is a group of tables, and that table contains columns and values for each column. The schema in the advanced hunting world consists of tables containing event details, devices, alerts, identity, and other entity information. It’s essential to grasp the tables and their columns within the advanced hunting schema to create powerful queries across these tables.
- Advanced Hunting > Schema
- To access the schema reference, follow these steps
- Next to the table name in the schema representation, click on the “View reference” action.
- Schema shows different sections such as Alert & behaviours, Apps & identities, Devices etc.
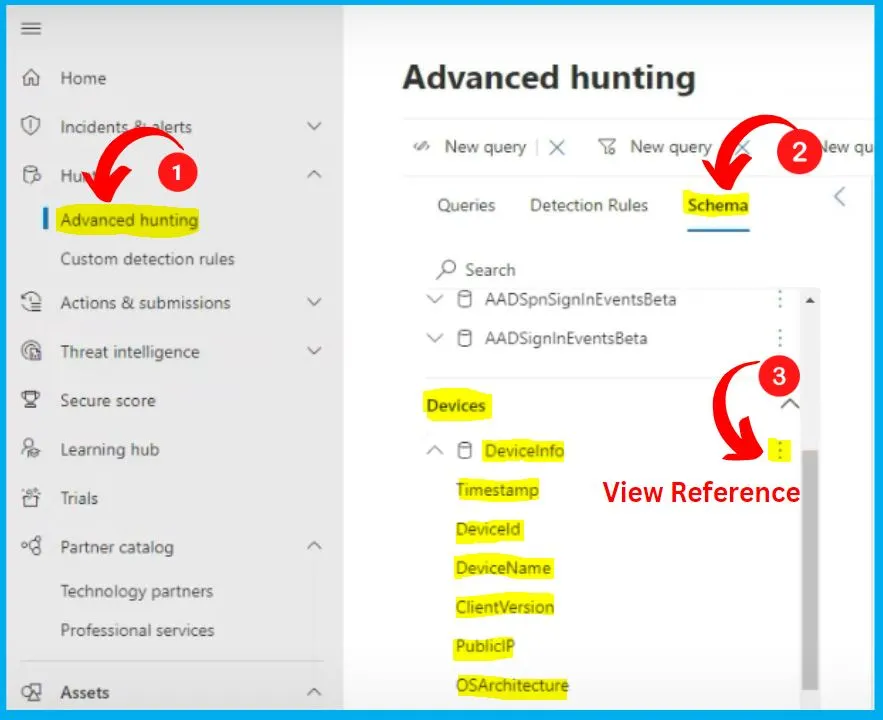
View Reference Option
After clicking the 3 dots and get the View reference. It will describe the table, column names, sample queries, etc. Schema is the full information of tables, columns etc., related to Advanced hunting.

Queries in Advanced Hunting
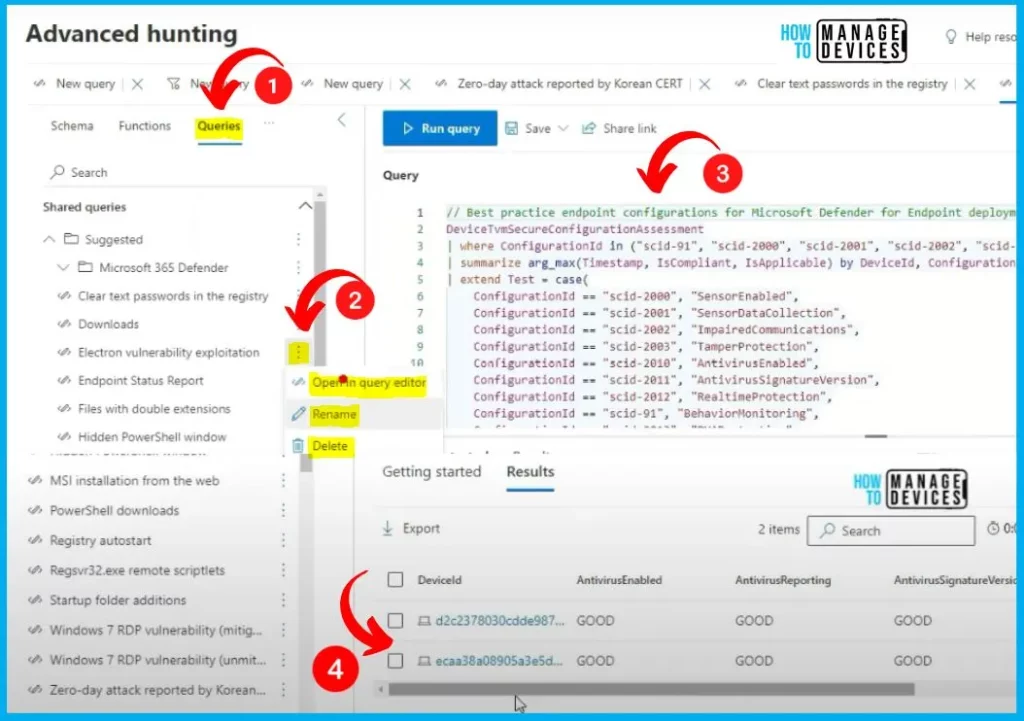
Let’s check the Queries detail in Advanced Hunting. There are different Queries in the Advanced hunting, such as shared queries, my queries etc. You can easily run the Query by right-clicking on the 3 dots, and it shows the options such as Open in the query editor, Rename and Delete. Select Open in the query editor. It will show the query details. Click the Run Query button it will show different results.
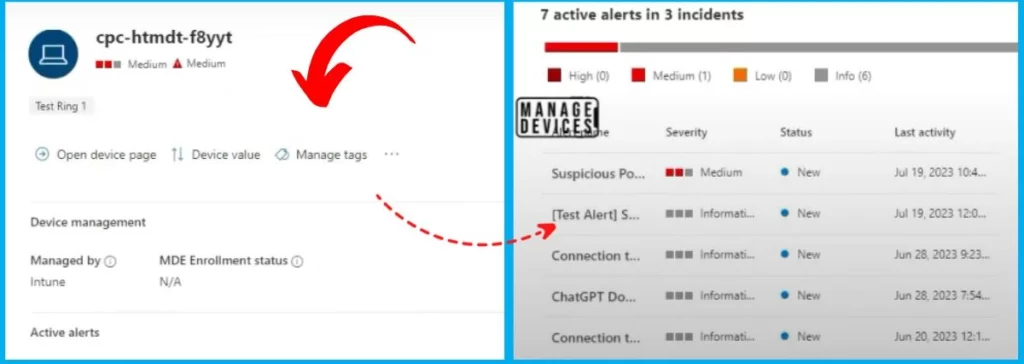
After clicking one of the Results from a Query window, you will get all the details, such as Device Management, Active alert, and alert incidents. In the alert incident, you can access all the details related to that device if you go in. You have your custom queries.
Detection Rules
Custom detection rules help you to design and tweak using advanced hunting queries. These rules help you proactively monitor various events and system states, including suspected breach activity and misconfigured endpoints.
Advanced Hunting Query Builder
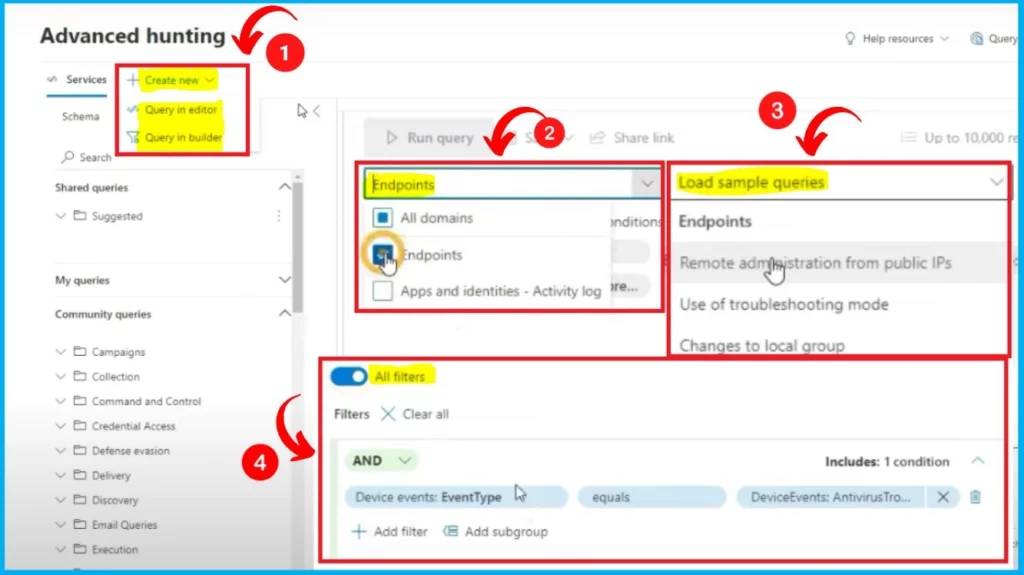
Advanced Hunting Query Builder is nothing but a KQL query builder. In the Create a new section, you can see 2 options “Query in editor” and “Query in builder“. Query in the builder is one option if you are unfamiliar with KQL queries. First, you must select the Domains, including All domains, Endpoints, Apps and identities – Active log.
- Then you would select the sample queries.
- Filter option is also available in the Query in the builder.
- Enable the “All filters” option by toggling the pane to the right side
- Add filter options and Run the Query
How to Edit in KQL
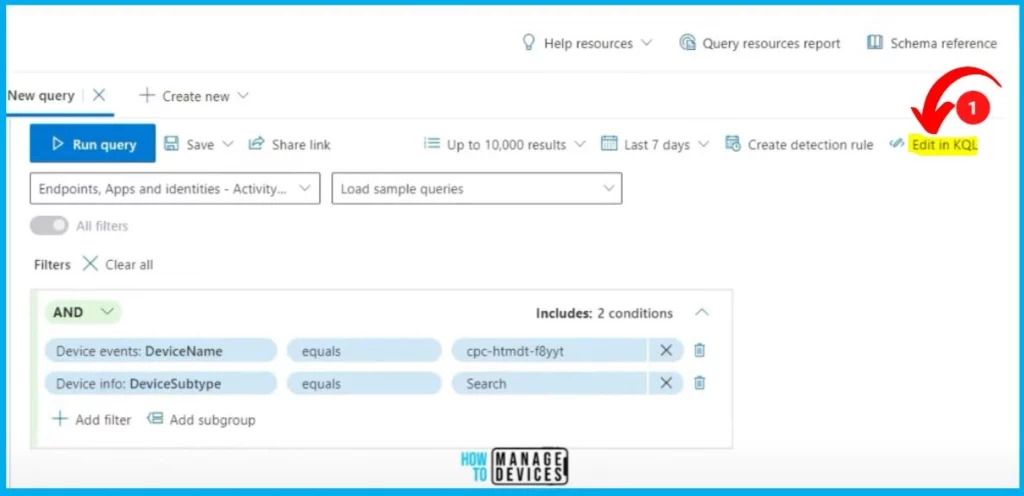
Editing in KQL (Kusto Query Language) involves changing or modifying existing queries. You should first open the KQL query and click the Edit in KQL option from the below window. Run the Query and see the results in the result section.
Understand the KQL Query
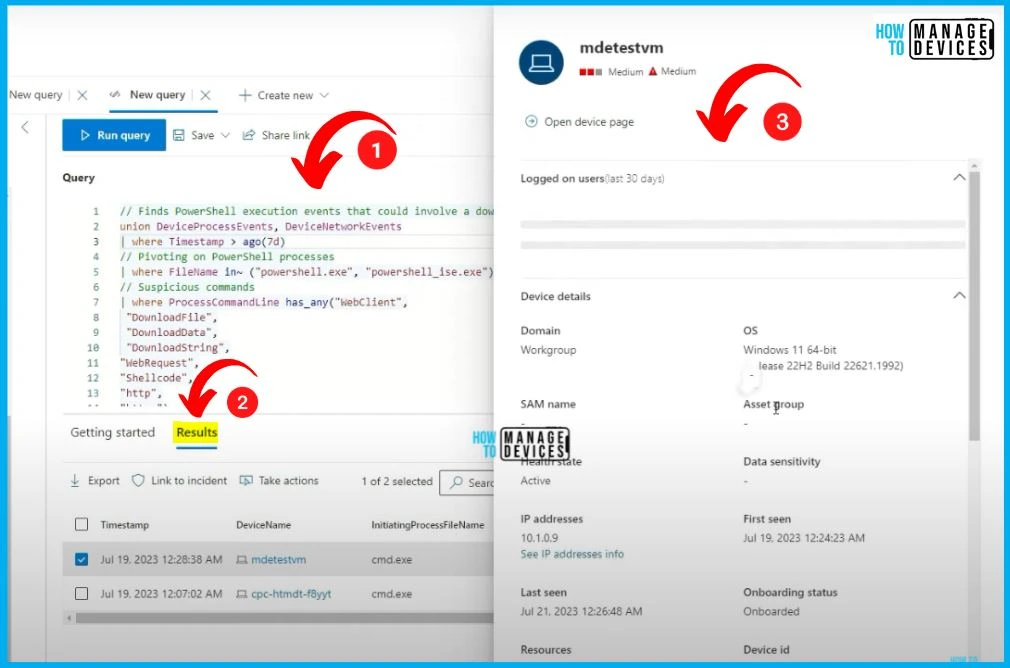
Let’s understand the KQL query; there is a timestamp, which filters on processes. All those details are available in the Query. So in the results, you can see the timestamp, device name, initiating process, file name etc. If you click on one of the devices from the result, you will be again able to see all the details, alerts, incidents etc.
Save Queries
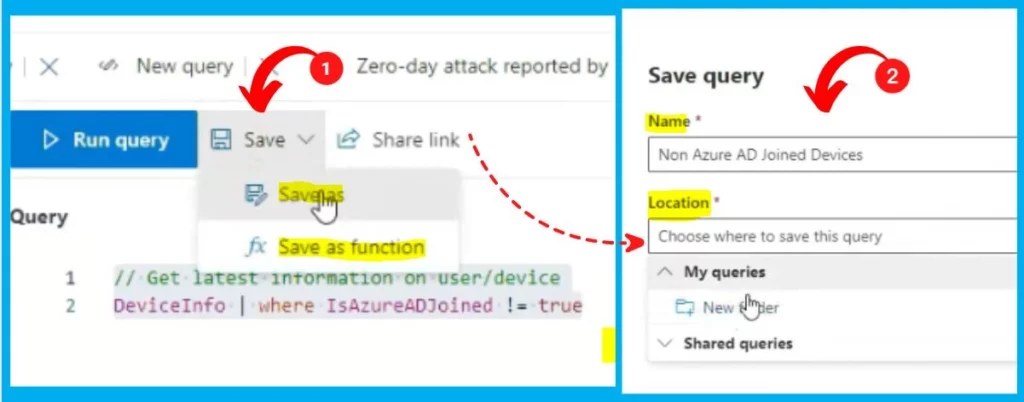
Let’s check how to Save some of the queries. Click the Save button and select the “Save as” option from Save. In the pop-up window, you would provide a Name for the Query and give a Location for the Query. Click the Save button.
Learn the advanced hunting query language in Microsoft 365 Defender | Microsoft Learn
Author
About Author – Vidya is a computer enthusiast. She is here to share quick tips and tricks with Windows 11 or Windows 10 users. She loves writing on Windows 11 and related technologies. She is also keen to find solutions and write about day-to-day tech problems.
