Let’s learn how to Reset Local Security Policy Settings to Default in Windows 11, a new feature provided by Windows. This feature is beneficial for users to maintain Windows Security. It administers the system and its security policy.
Local security policy is a powerful feature that helps users control the security of a computer on a local network. It will enable you to restrict certain features or allow only particular users to access them. It plays an important part in keeping the agent and the system in which the agent is installed secure.
Resetting your security policy settings in Windows 11 is quick and straightforward. If you have changed your security policy and no longer want it, use Command Prompt to do this. This policy works by giving users access rights and permissions.
This blog post will help if your policy has been changed or you want to set up a fresh one. This new feature is very easy to learn and understand.
- Windows 11 Account Lockout Policy Settings Group Policy and Intune options
- Privacy And Security Settings In Windows 11
What are the Features of Local Security Policy?
It is a set of information about the security of a local computer. Security policies are vital because they protect an organization’s physical and digital assets. Some important features are given below.
1. It helps against virus and threat protection
2. It is used for account protection
3. It helps to administer the system
Reset Local Security Policy Settings to Default in Windows 11
The security policy defines what you want to protect and what you expect of your system users. Local security policy administers the system and its security policy. To reset security policy settings, follow the following steps. There are 2 methods for resetting local security policy settings described below.
| Methods |
|---|
| Using Windows PowerShell |
| Using Command Prompt |
Using Windows PowerShell
This is the first method for resetting the security policy. Powershell is commonly used for automating system management. The steps below are used to reset the security policy in PowerShell.
- Right-click the Start button
- Click Terminal(Admin)
- Select Yes from the next, which shows a message: “Do you want to allow this app to make changes to your device?”
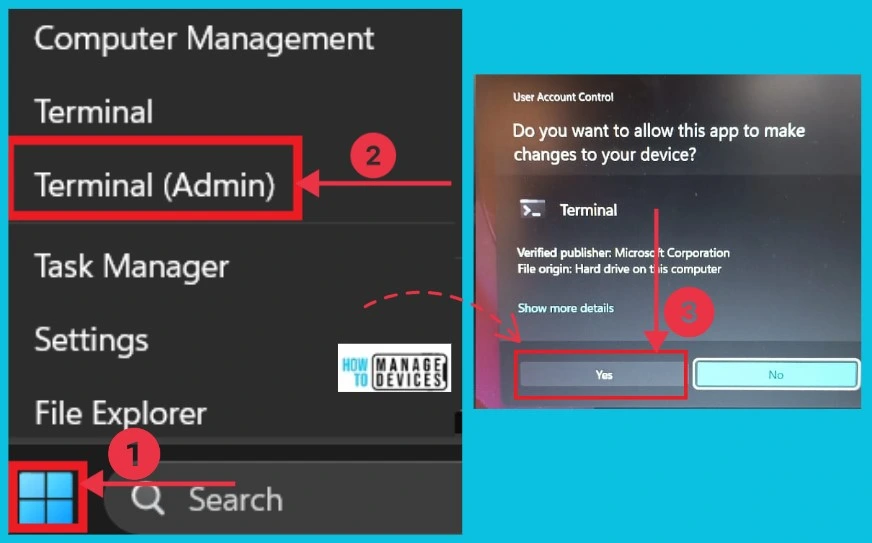
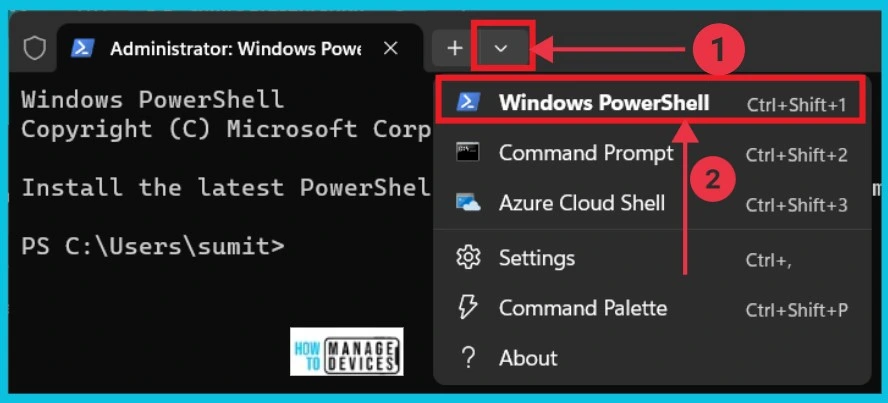
After you click the Yes option, a new page opens; you can see a dropdown arrow on the right side. Click here, and you can see different options; Select Windows Powershell from it.
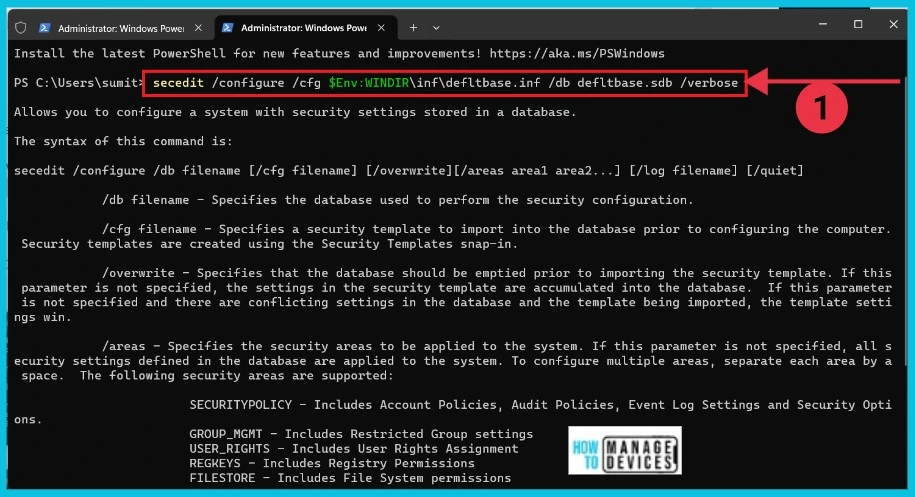
After that, the Windows administrator page opens. Here, you can give the commands to reset. The screenshot below gives the details and shows the results.secedit /configure /cfg $Env:WINDIR\inf\defltbase.inf /db defltbase.sdb /verbose. Then close the window and restart your computer.
2. Using Command Prompt
Resetting security features is very helpful for users. The second method for resetting local security policy is using the Command Prompt.
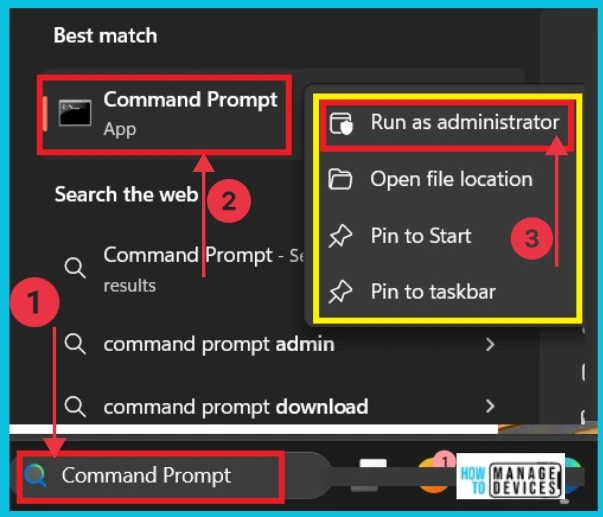
- Search Command Prompt in the search option in the taskbar
- Right-click and Choose Run as administrator
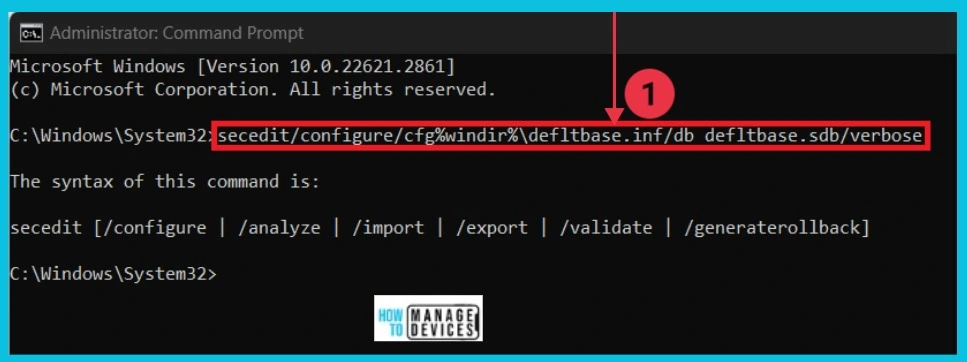
A new page opens as an administrator command prompt. Here, you can give the commands to reset the local security policy, and you can see the results. The commands are given below. secedit /configure /cfg %windir%\inf\defltbase.inf /db defltbase.sdb /verbose. Close the window and restart your computer.
We are on WhatsApp now. To get the latest step-by-step guides, news, and updates, Join our Channel. Click here. HTMD WhatsApp.
Author
Sumitha was introduced to the world of computers when she was very young. She loves to help users with their Windows 11 and related queries. She is here to share quick news, tips and tricks with Windows security
