Let’s learn how to Resize Azure VM Disk Storage Without Downtime. Resizing a disk on Azure can provide more storage capacity and better performance for your applications and meet the user’s needs. Resizing is important for users that need more powerful VMs to run CPU intensive applications and more disk space for file storing.
When you create a new virtual machine (VM) in a resource group by deploying an image from Azure Marketplace, the default operating system (OS) disk is usually 127 GB. However, you can add data disks to your VM.
You can use the live resize feature in preview to dynamically increase the size of your disks without any downtime to your application. You can start with smaller disks to keep costs down and increase the size of your disks without any downtime as your data footprint grows.
You may need to expand the OS disk if you’re supporting a legacy application that installs components on the OS disk or if you’re migrating a physical PC or VM from on-premises with a larger OS disk. This article covers expanding either OS disks or data disks.
You can also check how to Improve VM Network Performance Using Azure Proximity Placement Groups, and This is useful for workloads where low latency is a requirement. Once you have configured this Azure proximity solution, you can decrease the inter-VM network latency associated with your applications.
- Reboot the VM from Azure Portal Vs Operating System
- Use Managed Identities for Azure Resources | How to Guide
- Azure Bastion Locales keyboard Layout Connection Settings
Requirements to Expand Disk Without Downtime
You can now expand your data disks without deallocating your VM. After expanding the disks, you need to expand the volume in the operating system to take advantage of the larger disk.
The preview has the following limitations –
- They are only supported for data disks.
- Not supported for Ultra disks, shared disks.
- If a disk is 4 TB or less, you can’t expand it beyond 4 TB without deallocating the VM. If a disk is already greater than 4 TB, you can expand it without deallocating the VM.
Let’s follow the steps to register the LiveResize feature –
To validate your registration, use the following command to check the status. Here you can see the RegistrationState column showing Not Registered.
Get-AzProviderFeature -FeatureName "LiveResize" -ProviderNamespace "Microsoft.Compute"
To register for the feature, Copy and paste the following command and Press Enter.
Register-AzProviderFeature -FeatureName "LiveResize" -ProviderNamespace "Microsoft.Compute"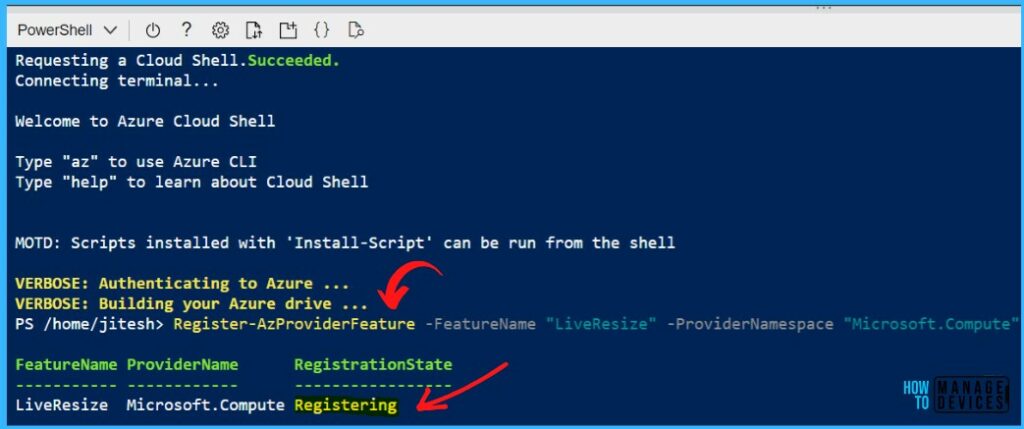
It may take a few minutes for registration to complete. Here you can see the RegistrationState column showing Registered. To confirm that you’ve registered, use the following command:
Get-AzProviderFeature -FeatureName "LiveResize" -ProviderNamespace "Microsoft.Compute"
Resize Managed Disk for VM in Azure Portal
If you have enabled LiveResize and your disk meets the requirements, you can skip the deallocation or stopping of VMs.
- In the Azure portal https://portal.azure.com/, Navigate to the Virtual Machine where you want to expand the disk. Select Stop to deallocate the VM.
- Under Settings, select Disks. Under the Disk name, select the disk you want to expand.
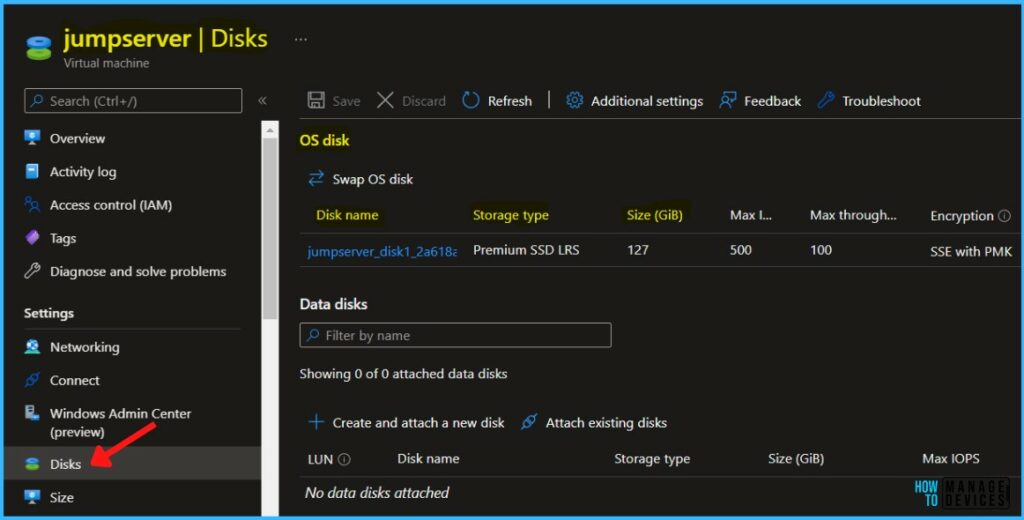
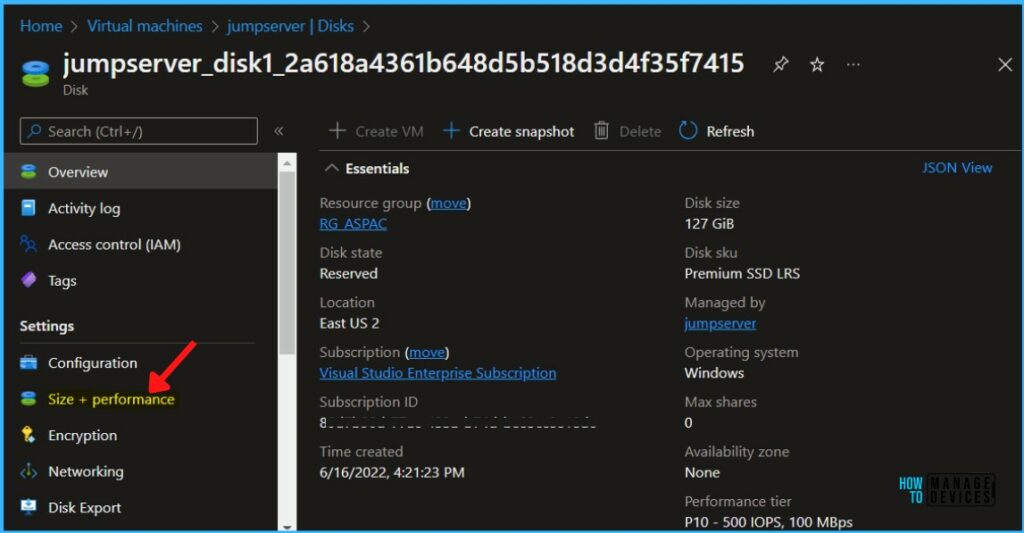
Under Disk Settings, select Size + performance to select the disk size you want.
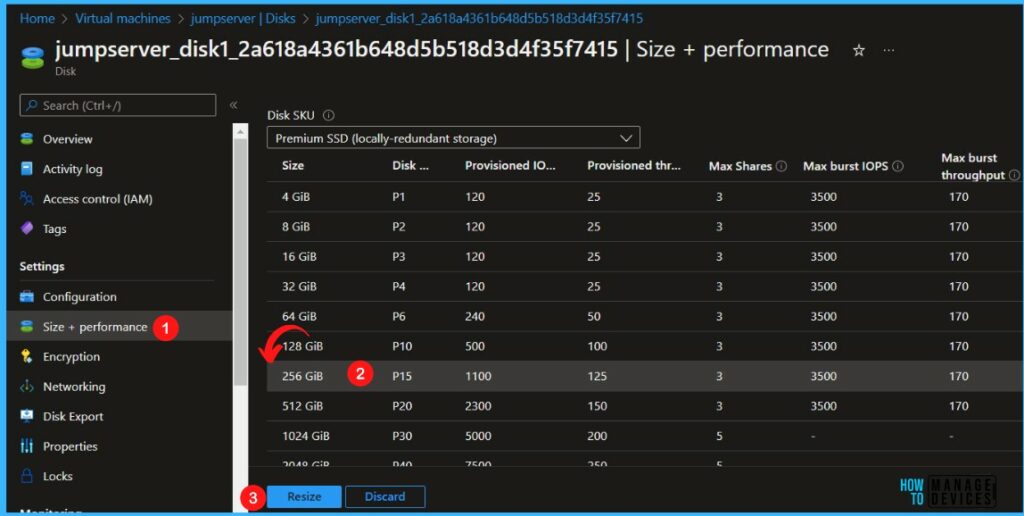
Select disk size based on your requirements from the list and click on Resize.
The new size should be greater than the existing disk size. The maximum allowed is 4,095 GB for OS disks. (It’s possible to expand the VHD blob beyond that size, but the OS works only with the first 4,095 GB of space.)
Note – You may experience the message “Changes to the disk size can be made only when the disk is unattached, or the managing virtual machine(s) are deallocated (Stopped)”
A notification will appear automatically in the top right-hand corner with a message. You can see that the Successfully updated disk.
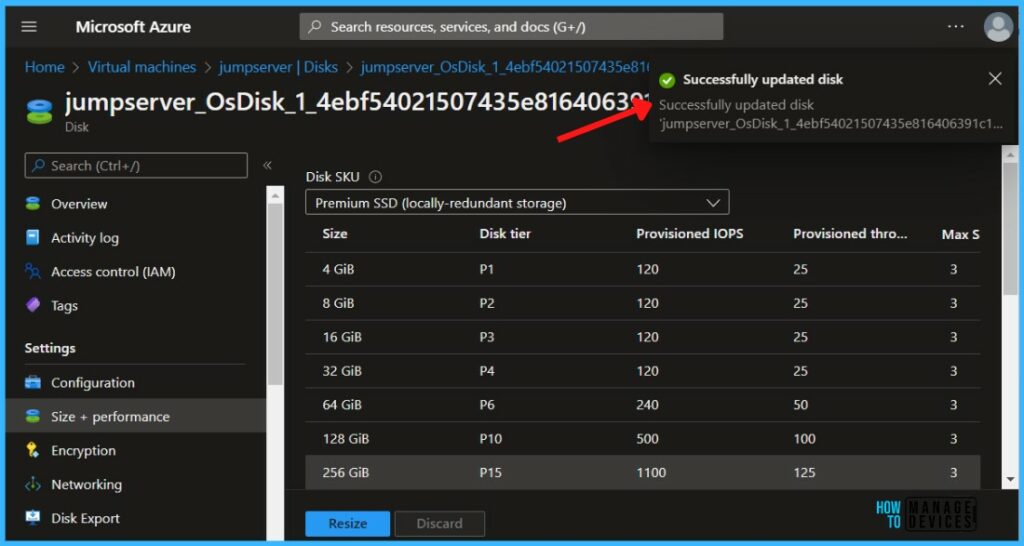
Under Settings, select Disks. Under the Disk name, You can see the updated disk Size changed to 256 GB.

Expand Volume in the Operating System
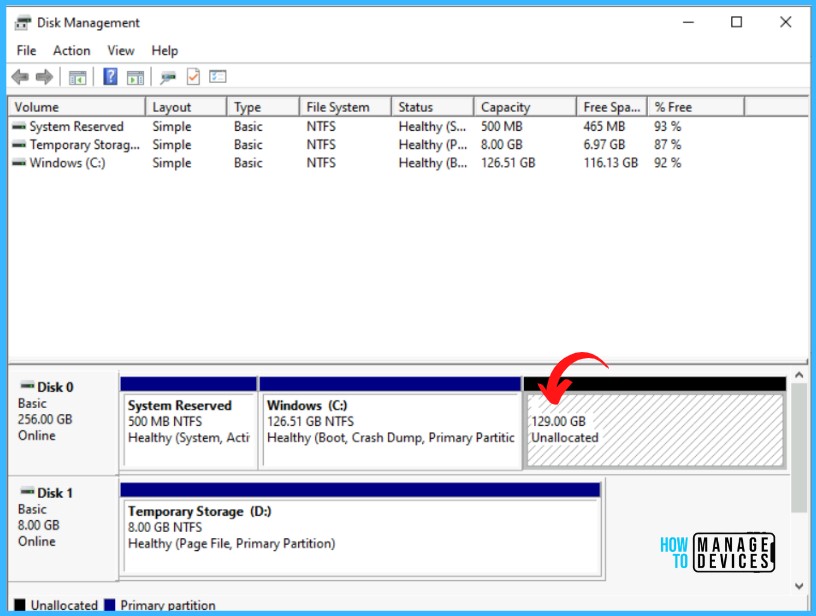
When you have expanded the disk for the VM, you need to go into the OS and expand the volume to encompass the new space. There are several methods for expanding a partition.
You can connect to the VM using an RDP connection to expand the partition using Diskpart or Disk Manager.
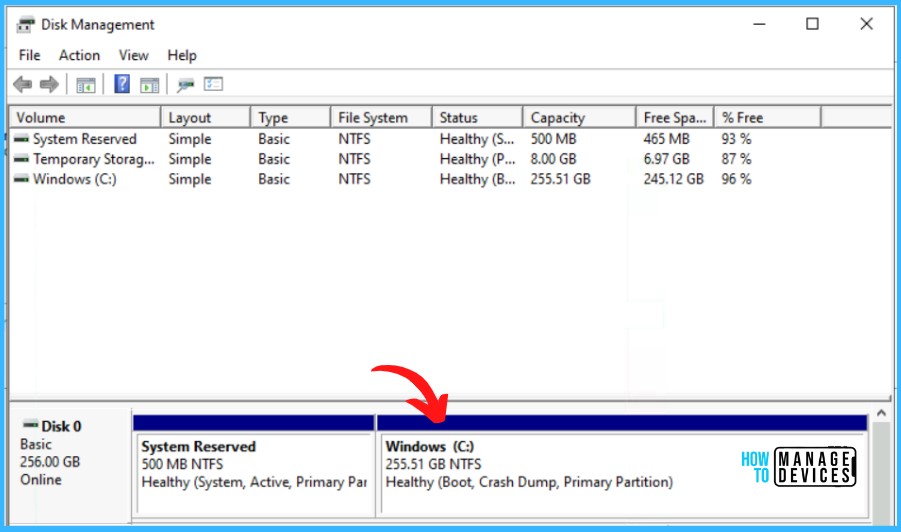
In Disk Management, you can see the unallocated space. Right-click on existing C: drive partition -> Extend Volume and complete the steps. You can also create a separate drive if you want.
Once you complete the steps, you should be able to see the disk capacity with the added size.

Your title mention that everything will happen without DOWNTIME. In the article you suggest to “Stop to deallocate the VM”. Where is the solution? Probably I’m to tired to understand Microsoft Azure principle
Hi Andrei, If you have enabled LiveResize and your disk meets the requirements. You can perform the scenarios without deallocating VMs. It’s mentioned in the post, hope that helps you..
Attempting to register for the live resize results in ‘Forbidden’ status code.
Any Ideas?