Let’s learn how to Turn On Diagnostic Data Viewer in Windows 11. The diagnostic data viewer is a Windows app. It is a handy tool that lets you view all your diagnostic data on your Windows PC.
The Diagnostic Data Viewer is a Windows app designed for users to review the diagnostic data their devices are sending to Microsoft. It categorizes the information into simple groups based on how Microsoft utilizes it, providing users with transparency and control over their data sharing.
The Diagnostic Data Viewer provides many features to view and filter your device’s diagnostic data. It is a specific data type used to investigate and diagnose IT system problems, errors, etc. It lets you see everything from mistakes to crashes to even battery life.
Microsoft uses diagnostic data to keep Windows secure and up-to-date, troubleshoot problems, and make product improvements. Turning the diagnostic data viewer on or off is easy to learn and understand. This is the best feature only available in Windows. This blog post will help you to know how to activate this very clearly.
- Hide or Show Filmstrip in Photos App in Windows 11
- How to Remove and Replace Background using Windows Photos
What are the Features of a Diagnostic Data Viewer?

Diagnostic Data Viewer is a Microsoft app that helps you see what information is collected from your Windows computer. Some features are given below.
1. It helps to view your Windows diagnostic events
2. It is used to search your diagnostic events
3. It helps to filter your diagnostic event categories
4. It helps to make your Windows experience better
Turn On Diagnostic Data Viewer in Windows 11
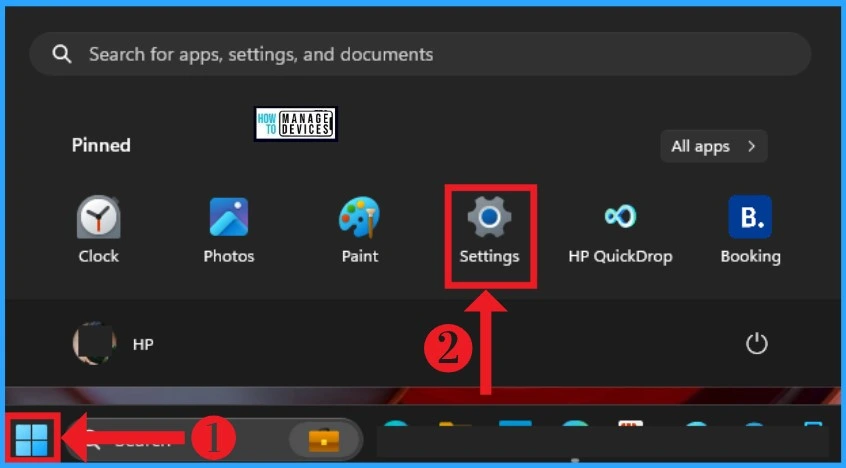
You can easily enable the Diagnostic Data Viewer feature on your PC. After this, you can view the diagnostic data on the Diagnostic Data Viewer application. To help with this feature, you can follow the following steps. To facilitate this, first, open the settings app.
- Select Settings app from the Start button
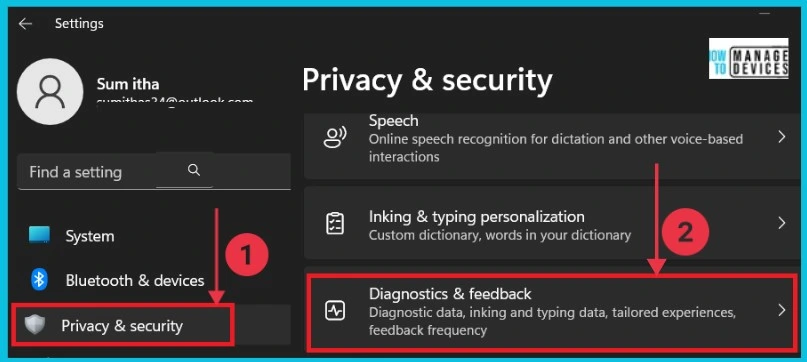
Here, you can click Privacy & Security from the settings app. Then click the Diagnostics and Feedback option from the right side.
- Enable Disable Settings Homepage in Windows 11
- Enable Disable Website Typo Protection in Edge Browser
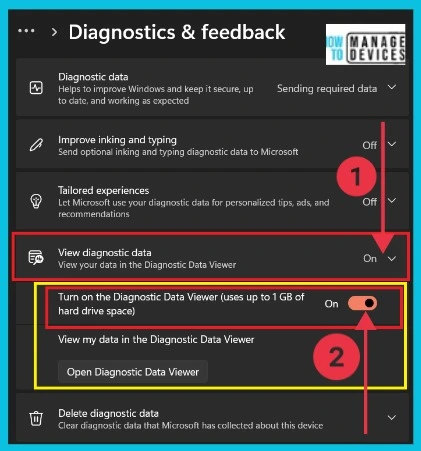
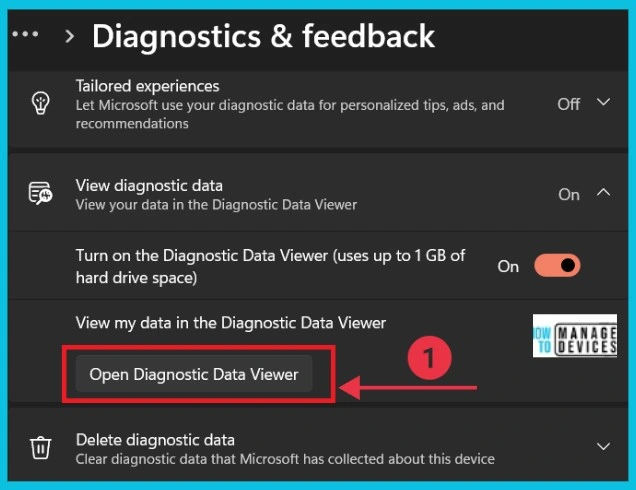
You can see the View diagnostic data option. It helps you view your data in the diagnostic data viewer. You can click the drop-down arrow to see the enabling option. Turn on this option to view the data in the diagnostic data viewer.
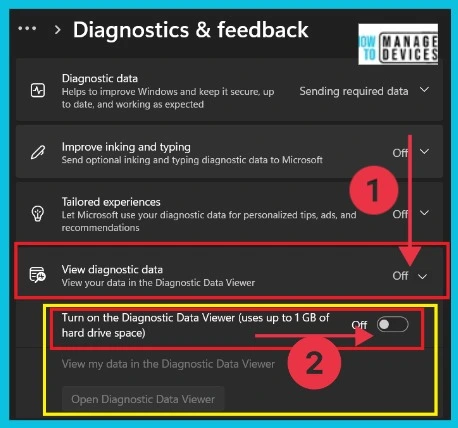
You can disable the Diagnostic data viewer from the screenshot below by toggling the pane to the left side. After turning it off, you cannot view your data in the diagnostic data viewer.
After turning on the diagnostic data viewer, you can see your data. Click the Open Diagnostic Data Viewer, and the screen directly goes to the Diagnostic Data Viewer app in the Microsoft Store.
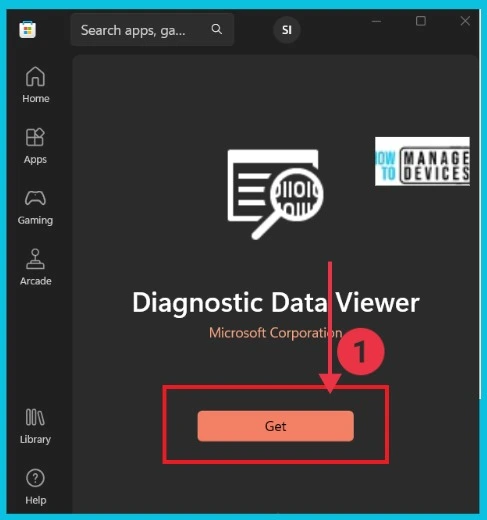
When you click the open diagnostic data viewer, you reach directly to the Microsoft store. You can easily download and install Diagnostic Data Viewer. Click the Get option to complete the process.
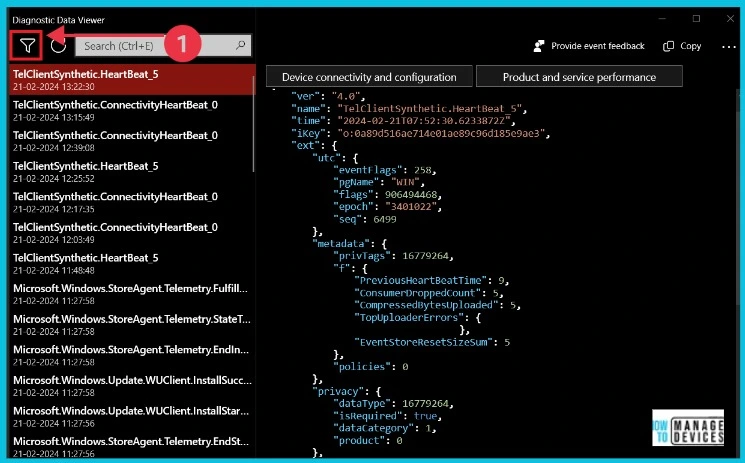
A new window opens, and you can see all the data on the screen with details. You can select each one and get the details of that page. Now, you can click the Event Filter option to get the details in different ways. The screenshot gives the details.
- Turn On or Off Smart Suggestions in the New Outlook App on Windows
- Turn On and Off Location Sharing in Edge
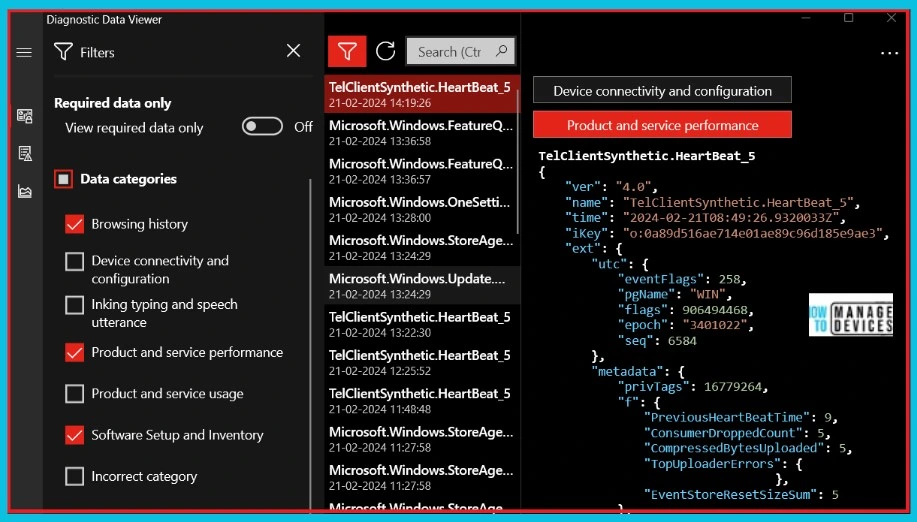
The screenshot and table below show what happens after you click the filter option in the Diagnostic Data Viewer. You can see different data categories and select which one you want. Select one by one, and you can visit the difference.
| Data Categories |
|---|
| Browsing history |
| Device connectivity and configuration |
| Inking typing and speech utterance |
| Product and service performance |
| Product and service usage |
| Software Setup and Inventory |
| Incorrect category |
Modifying the Size of Your Data History
Note: The data will be gradually dropped when the size or time limit is reached first.
View Additional Diagnostic Data in the View Problem Reports tool
Here you can view additional diagnostic data in the problem reports tool. Here there are 2 methods to view problem reports. The below table shows the details.
| Windows Error Reporting |
|---|
| Using Diagnostic Data Viewer |
| Using Control Panel |
1. Using Diagnostic Data Viewer
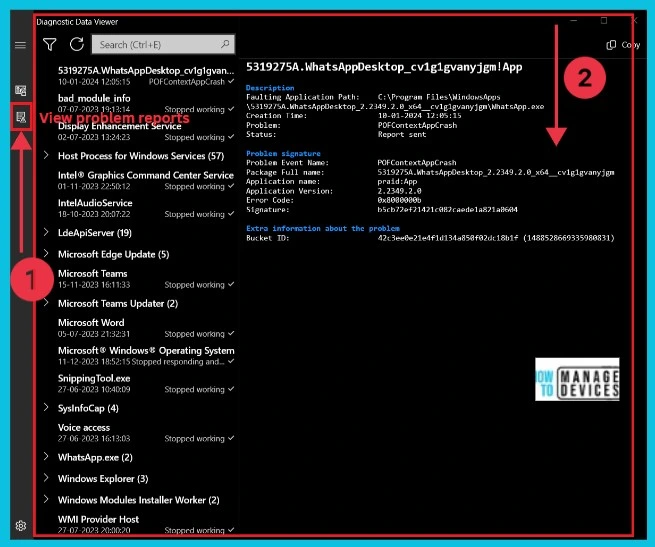
You can review Windows error diagnosing data you see in the view problem reports tool. Open the diagnostic data viewer app, and you can see the view problem reports option on the left side. Click it and see the results. The screenshot below shows it clearly.
2. Using Control Panel
To view your Windows error reporting Diagnostic data using Control Panel. First, you search the Problem reports in the Starts menu.
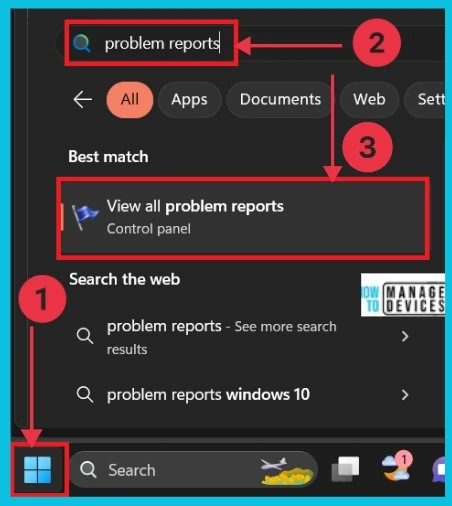
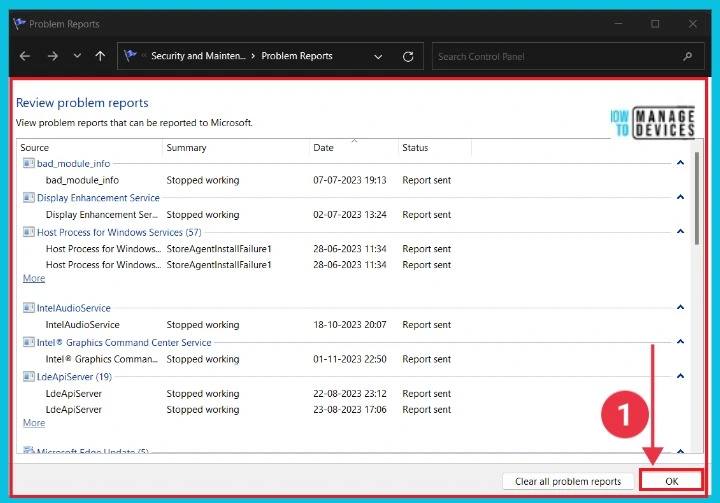
After clicking the View all Problem Reports, you can get a new window to review problem reports. The below screenshot gives the details.
Reference
Enable or Disable Diagnostic Data Viewer in Windows 11
We are on WhatsApp now. To get the latest step-by-step guides, news, and updates, Join our Channel. Click here. HTMD WhatsApp.
Author
Sumitha was introduced to the world of computers when she was very young. She loves to help users with their Windows 11 and related queries. She is here to share quick news, tips and tricks with Windows security.
