
Key Takeaways:
- Block Accessing Local Fonts in Microsoft Edge
- Helps to Mitigating Browser Fingerprinting
- Preventing Corporate De-Anonymization
- Enforcing Zero-Trust and Data Minimization
Let’s discuss Block Accessing Local Fonts in Microsoft Edge Websites from using Intune. Local Fonts Permission policy for Microsoft Edge in Intune helps to manages how websites interact with the fonts installed locally on your operating system via the Local Font Access API. With this policy you can controls whether websites are allowed to see the list of fonts installed on your computer.
Table of Contents
Table of Contents
Block Accessing Local Fonts in Microsoft Edge Websites from using Intune
Modern browsers have a built-in feature that lets websites peek into your computer to see every font installed on it (and read the technical files behind those fonts). Because sharing that font list can put your privacy and company security at risk while still being useful for certain design websites.
IT administrators need a single rule to control which websites are allowed to look and which ones are blocked. This policy bridges the gap between strict endpoint security and legitimate web application functionality.
- Enable Drop Feature in Edge Browser Using Microsoft 365 Admin Center Configuration Policy
- Microsoft Edge Drop to Share files in Windows Android and iOS
- Discover Features in Microsoft Edge Browser
Policy Settings Details
When a website attempts to query your system’s font list, this policy dictates the default browser reaction. The below table shows how the values of this settings affect your device.

| Values | Details |
|---|---|
BlockLocalFonts (2) | Access is strictly denied to all websites by default. Sites are entirely blocked from enumerating or viewing information about the fonts installed on the machine unless explicitly overridden by exception rules (such as LocalFontsAllowedForUrls). |
AskLocalFonts (3) | The browser prompts the user with a permission popup every time an unfamiliar website requests access to local fonts. If the user grants permission, that site can read the font list. |
| Not Configured / Disabled (Default) | By default, browsers typically prompt users upon request, allowing individual users to manage or toggle the setting themselves. |
How to Configure Local Fonts in Microsoft Edge
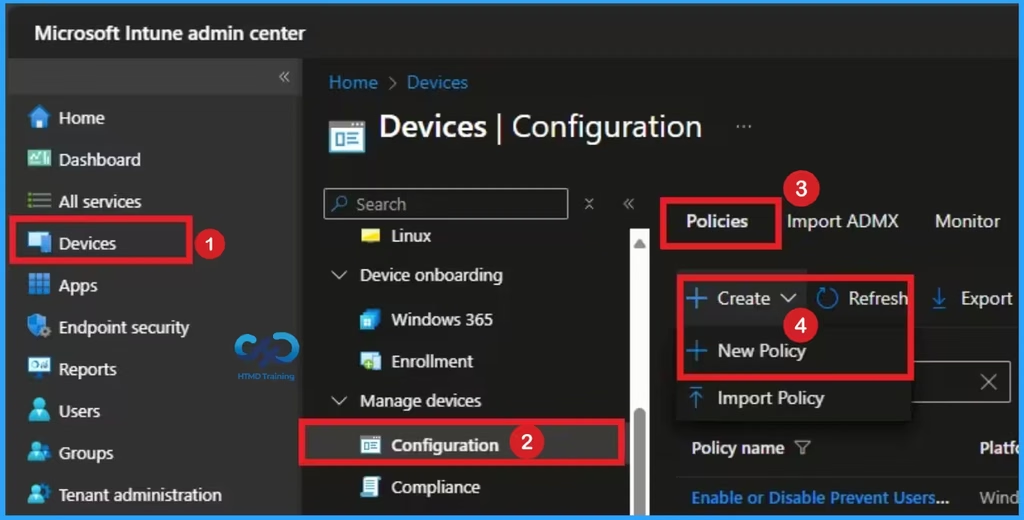
Using Microsoft Intune you can quickly configure Local Fonts in Microsoft Edge. Sign in Intune Admin Center portal. Go to Devices > Windows > Configuration > Create > New Policy.
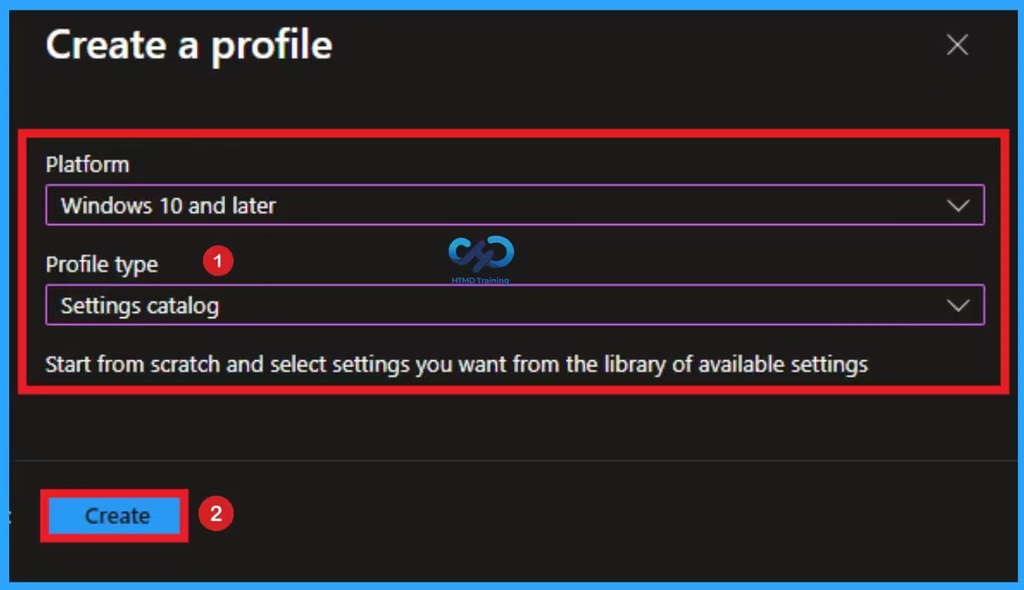
Selecting Profile and Platform
After that, you can Create a Profile for the policy which you want to configure. To create a profile you have to select platform and profile type. Here I selected Windows 10 and later as the Platform and Settings catalog as the profile type. Then click on the Create button.
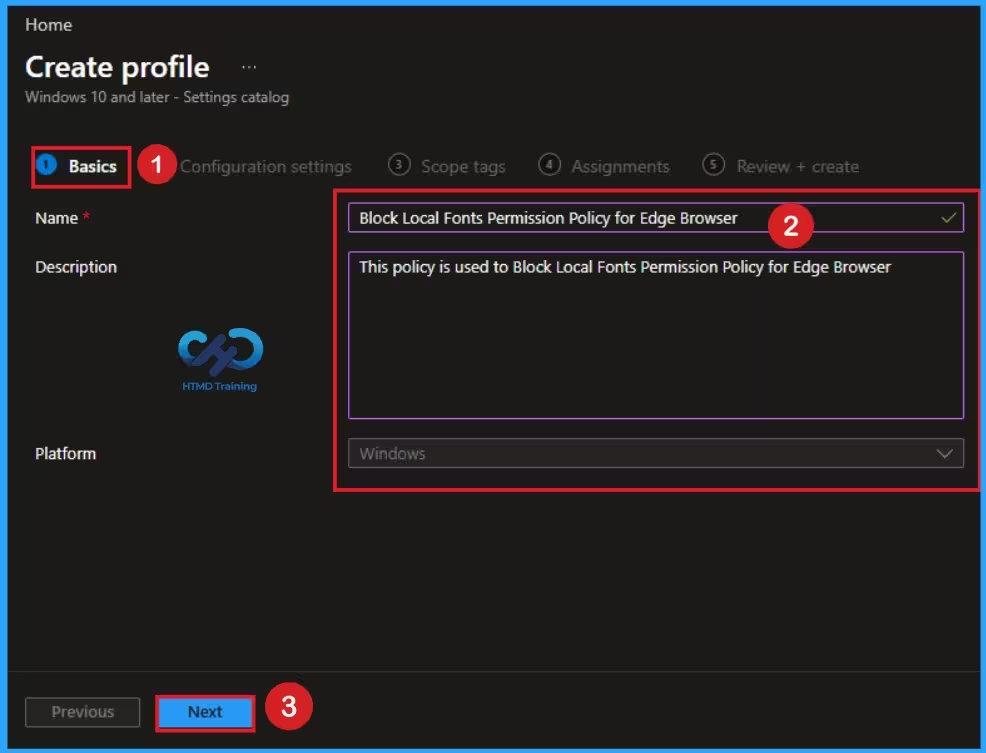
Basic Tab for Naming Policy
Basic Tab is used to give an identity for the policy by adding name and description. Here Name is Mandatory and Description is optional. After adding these details click on the Next button.
Configure Local Fonts Permission from Settings Picker
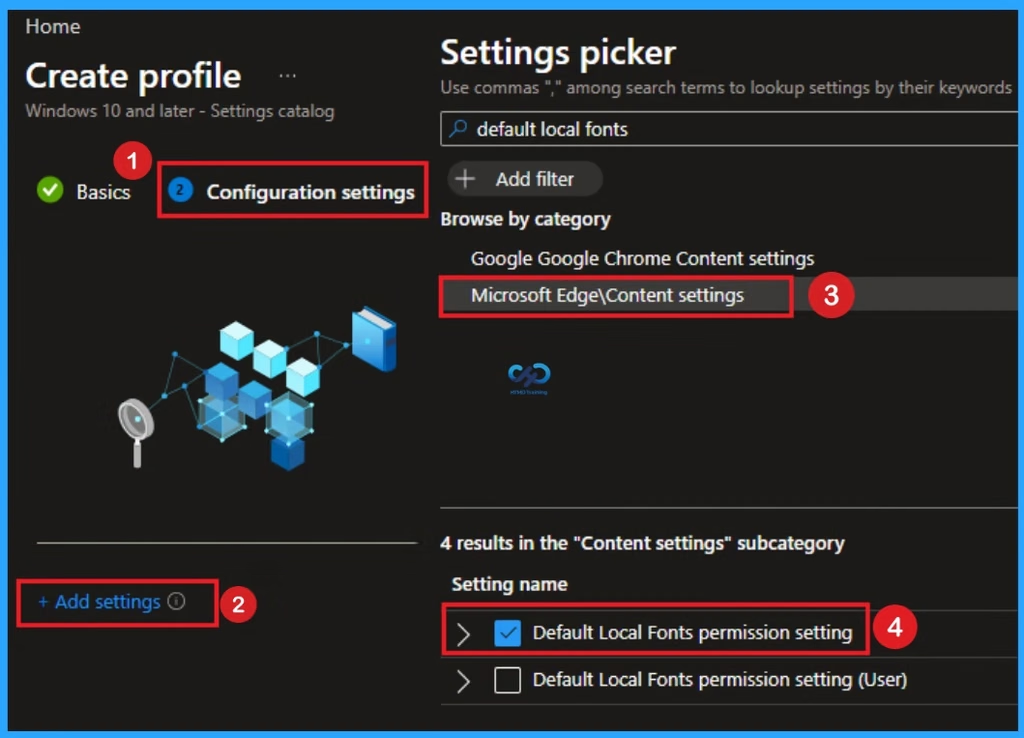
The Configuration settings page is helps to select specific settings to create the policy. The Settings Catalog provides a huge number of settings. To select a settings click on the +Add settings hyperlink. Then you will get Settings Picker. Choose Microsoft Edge > Content Settings >Default Local Fonts permission setting. Then I close the Settings Picker.
Disable Local Fonts in Microsoft Edge
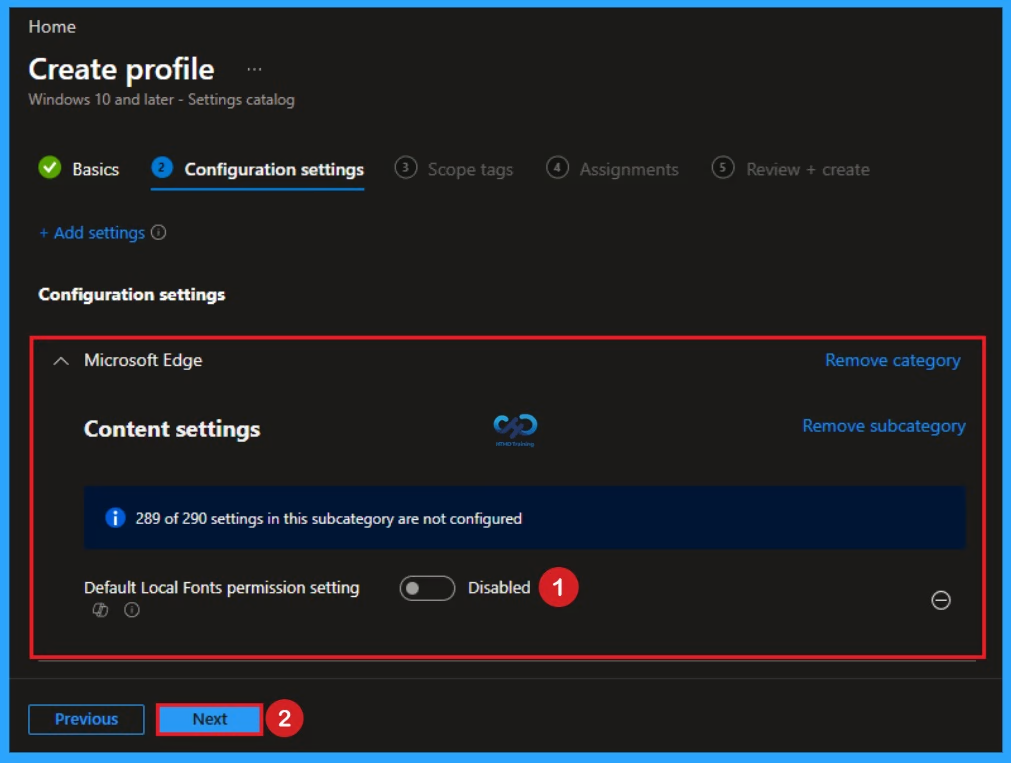
When you choose Disable value for this policy, it falls back to browser default (behaves like 3) prompts the user when a site requests font access). Users can freely change this in browser settings Disable is the default value of this policy. If you like to go with this value, click on the Next button.
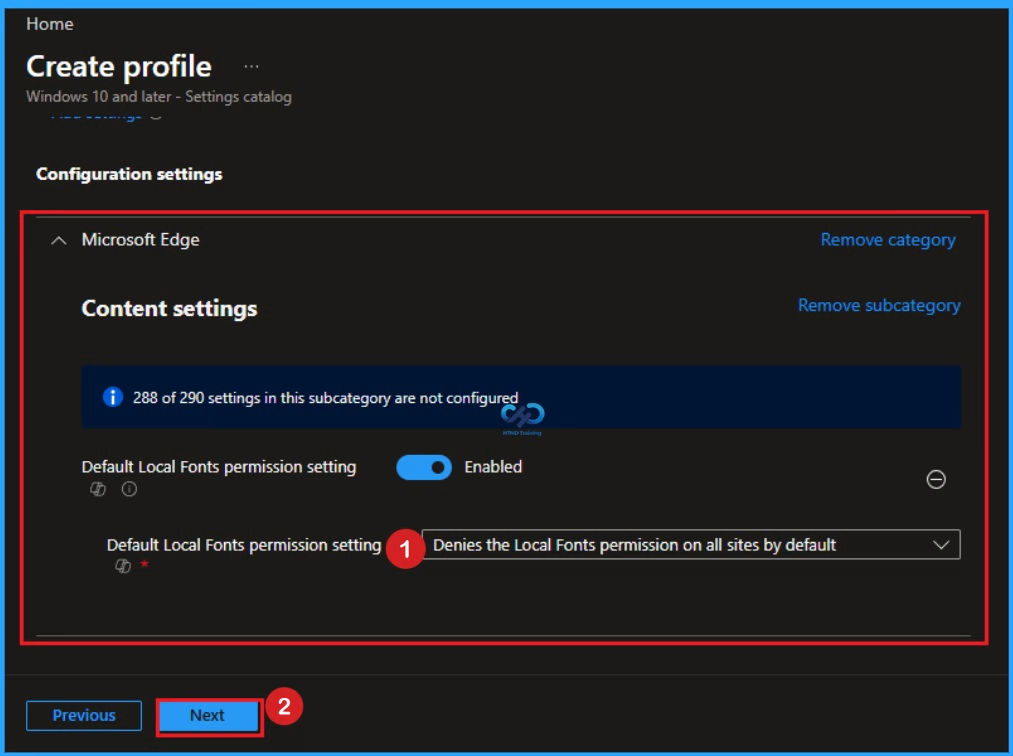
Enabled – 2 (Denies the Local Fonts Permission on All Sites by Default)
By choosing this value, Complete lockdown for websites in Edge Browser. No website is allowed to see your computer’s fonts. This is what most companies choose to protect employee privacy. Users cannot override this setting in browser settings.
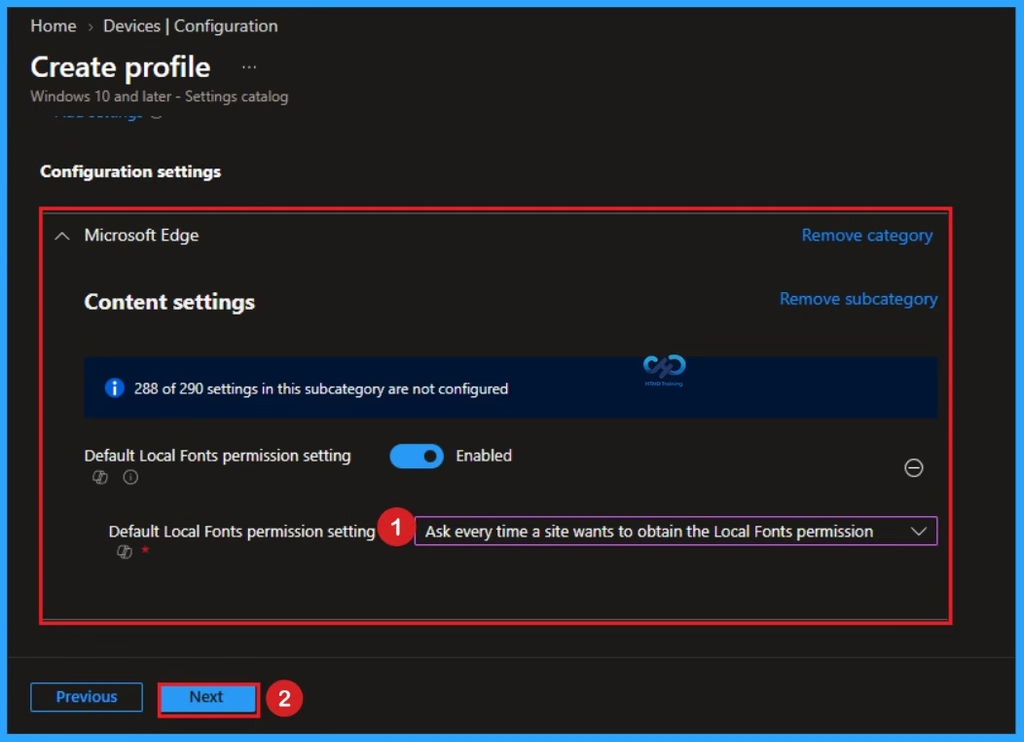
Enabled – 3 (Ask Every Time a Site wants to Obtain the Local Fonts Permission)
By choosing this value, Prompts the user with an “Allow [site] to see your fonts?” pop-up every time a new site requests access. Users cannot change the global default to “Block all“, but they can click Allow/Block on individual site prompts.
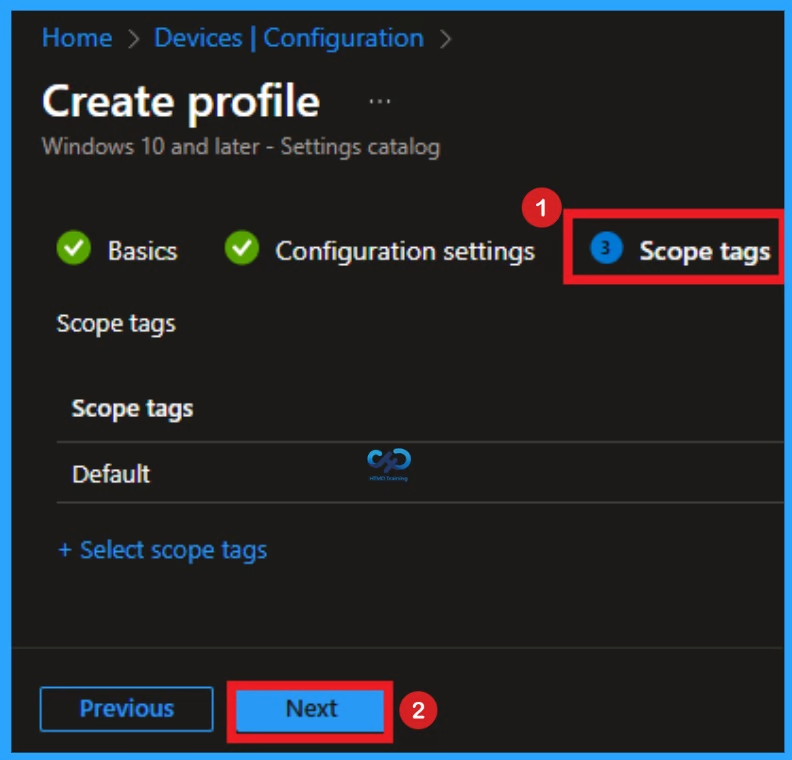
Scope Tags
By using scope tags you can restrict the visibility of Local Font Permission. It is helps to organize resources as well. Here I would like to skip this section, because it is not mandatory. Click on the Next button
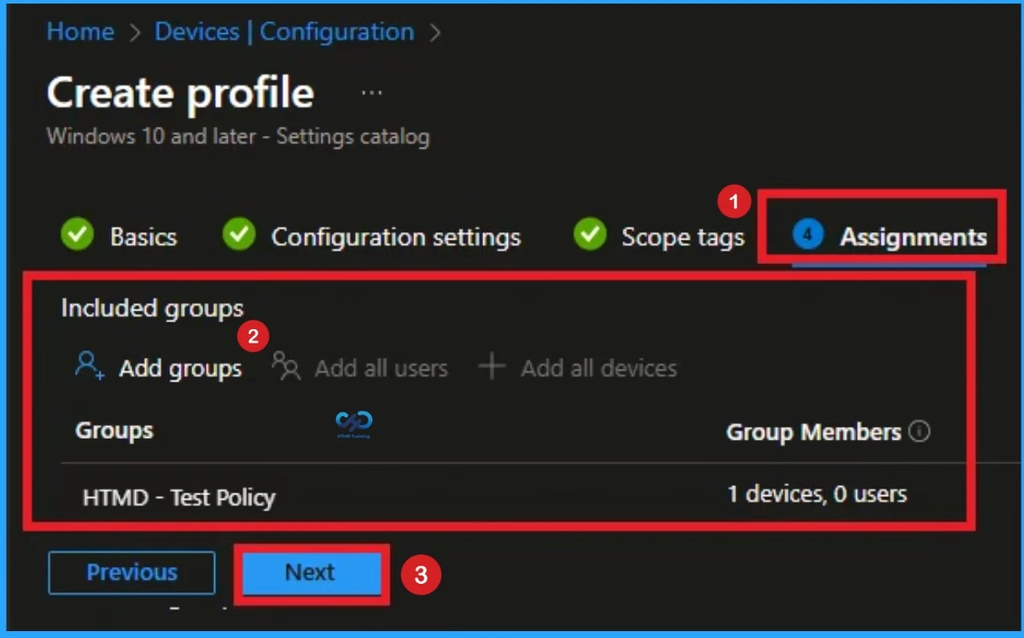
How to Assign Local Fonts Permission Policy to Specific Groups
To assign the policy to specific groups you can use Assignment Tab. Here I click, +Add groups option under Included groups. I choose a group from the list of group and Click on the Select button. Again I click on the Select button to continue.
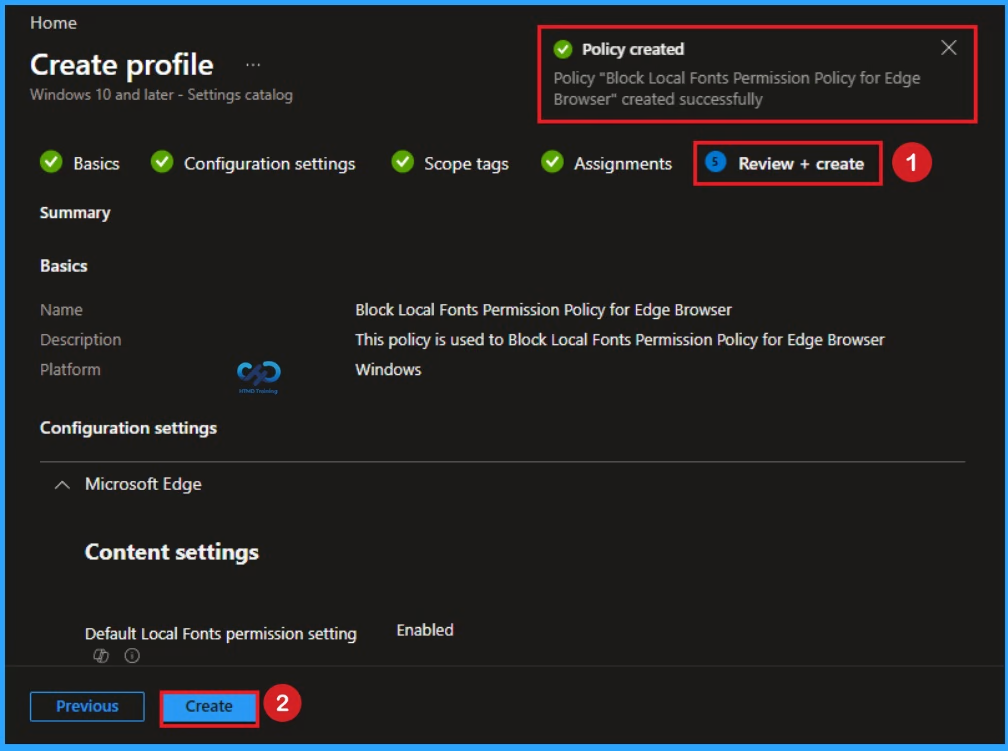
Review Policy Before Creating
To complete the policy creation you can review all the policy details on the Review + create tab. It helps to avoid mistakes and successfully configure the policy. After varifying all the details click on the Create Button. After creating the policy you will get success message.
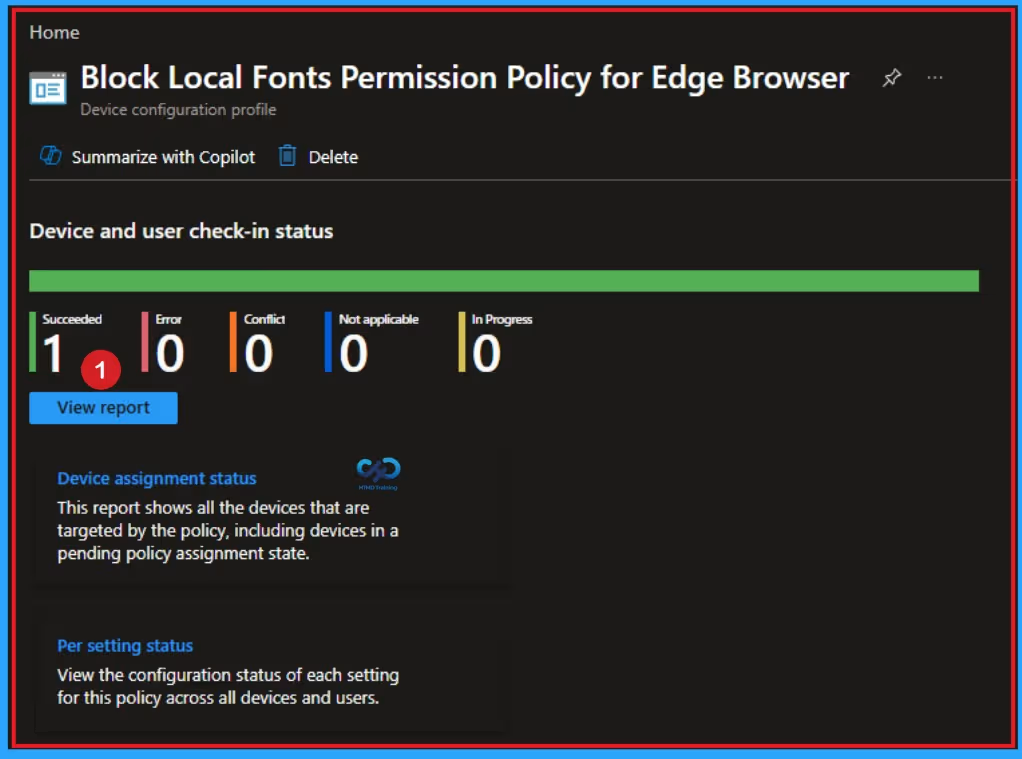
Monitoring Status
The Monitoring Status page shows whether the policy has succeeded or not. To quickly configure the policy and take advantage of the policy sync, the device on the Company Portal, Open the Intune Portal. Go to Devices > Configuration > Search for the Policy. Here, the policy shows as successful.
Client Side Verification with Event Viewer
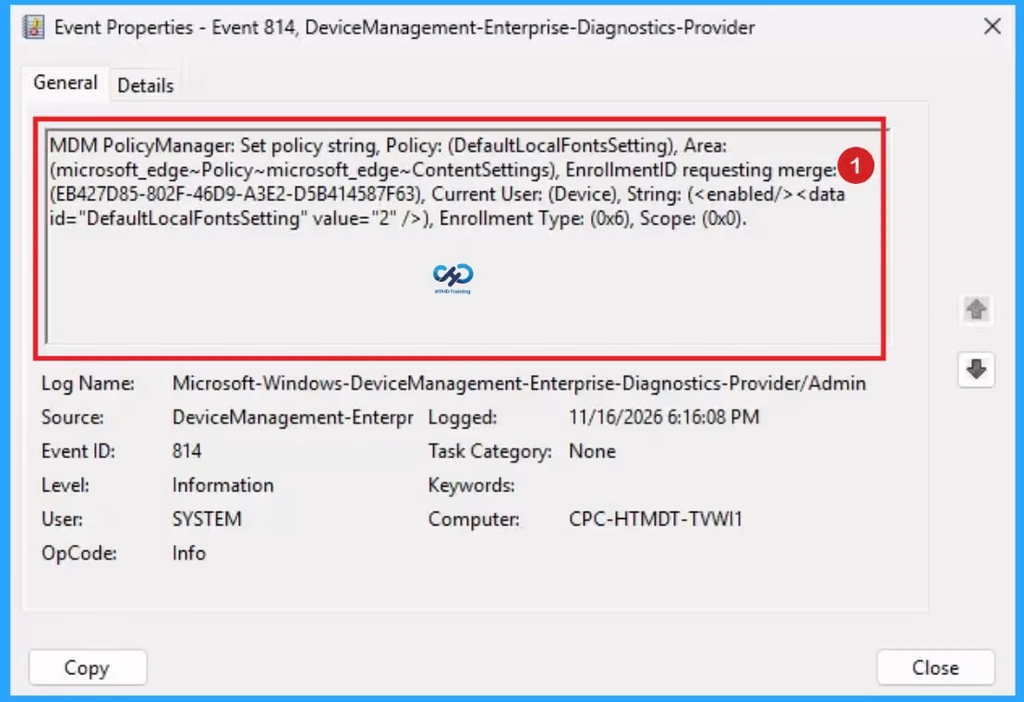
If you get success message, that doesn’t means you will get the policy advantages. To verify the policy successfully configured to client device check the Event Viewer.
Open Event Viewer: Go to Start > Event Viewer. Navigate to Logs: In the left pane, go to Application and Services Logs > Microsoft > Windows > DeviceManagement-Enterprise-Diagnostics-Provider > Admin. Filter for Event ID 814: This will help you quickly find the relevant logs.
| Event ID Details |
|---|
| MDM PolicyManager: Set policy string, Policy: (DefaultLocalFontsSetting), Area: (microsoft_edge~Policymicrosoft_edge~ContentSettings), EnrollmentID requesting merge: (EB427D85-802F-46D9-A3E2-D5B414587F63), Current User: (Device), String: (), Enrollment Type: (0x6), Scope: (0x0). |
Steps for Removing the Assigned Group from this Policy
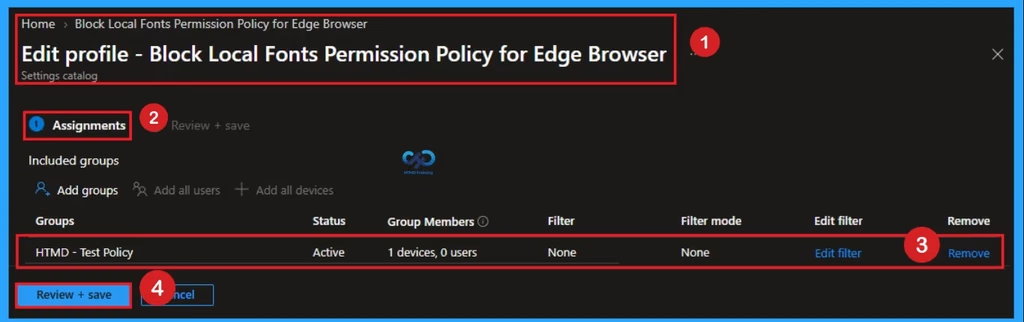
Removing policy is necessary for some situation. If you want to remove the Assigned group from the policy, it is possible from Intune Portal. To do this open the Policy on Intune Portal and Edit the Assignments tab and Remove the Policy.
How to Delete Local Fonts Permission Policy
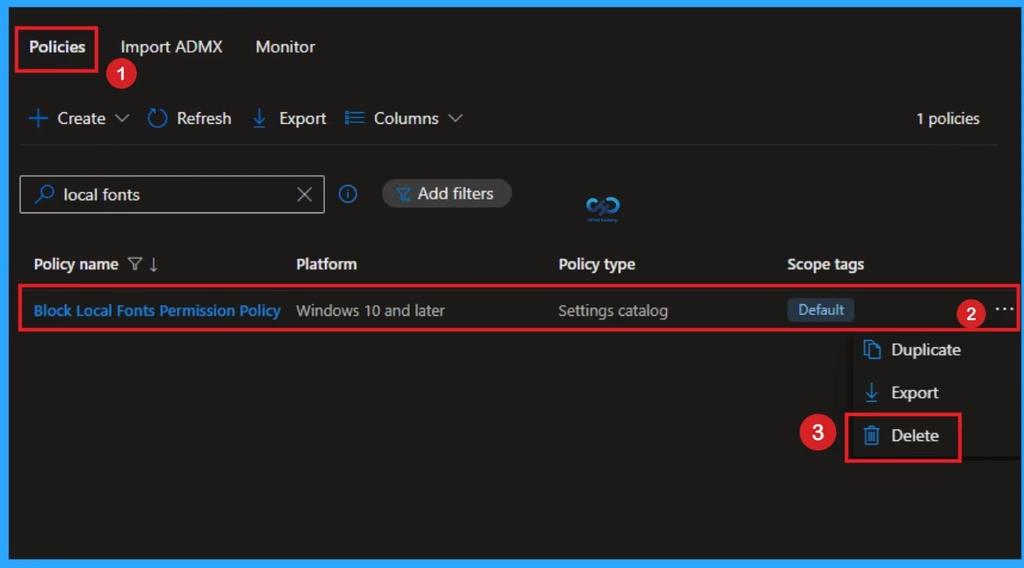
You can easily delete the Policy from Intune Portal. From the Configuration section you can delete the policy. It will completely remove from the client devices.
Need Further Assistance or Have Technical Questions?
Join the LinkedIn Page and Telegram group to get the latest step-by-step guides and news updates. Join our Meetup Page to participate in User group meetings. Also, join the WhatsApp Community and the WhatsApp channel to get the latest news on Microsoft Technologies. We are there on Reddit as well.
Get Windows
Author
Anoop C Nair is Workplace Technology solution architect with 25+ years of experience in global enterprise organizations such as JP Morgan, Capgemini, etc. He is Microsoft Certified Trainer. Microsoft MVP from 2015 onwards for consecutive 11 years! He also conducts Intune and modern workplace tech training for enterprise organizations. He is Blogger, Speaker, and Founder of HTMD Community and HTMD Conference. His focus is on Device Management technologies such as Intune, Windows, Cloud PC. He writes about technologies like Intune, SCCM, Windows, Cloud PC, Windows, Entra, Microsoft Security.