

Key Takeaways
- Microsoft Intune now supports bulk reprovisioning for Windows 365 Cloud PCs that are in grace period.
- Save time and reduce manual effort by reprovisioning multiple Cloud PCs in a single action.
- Restore Cloud PCs to a clean, fresh state while keeping device management simple and efficient.
- Improve IT operations by quickly recovering and reassigning Cloud PCs before they are deprovisioned.
In this article, I’ll explain how to do bulk reprovisioning of Windows 365 Cloud PCs in grace period using Intune. Managing Cloud PCs in the grace period is now easier with the bulk reprovisioning feature. Instead of reprovisioning each Cloud PC individually, administrators can select multiple Cloud PCs that are in the grace period and initiate a single bulk reprovisioning action. This helps quickly restore Cloud PCs to a fresh state, reduces administrative effort, and ensures users can continue working with minimal downtime. The feature is especially useful for IT teams managing Windows 365 environments at scale.
Table of Content
Table of Contents
How to Perform Bulk Reprovisioning of Windows 365 Cloud PCs in Grace Period
To bulk reprovision Windows 365 Cloud PCs in grace period, first log in to the Microsoft Intune Admin Center using your administrator credentials.
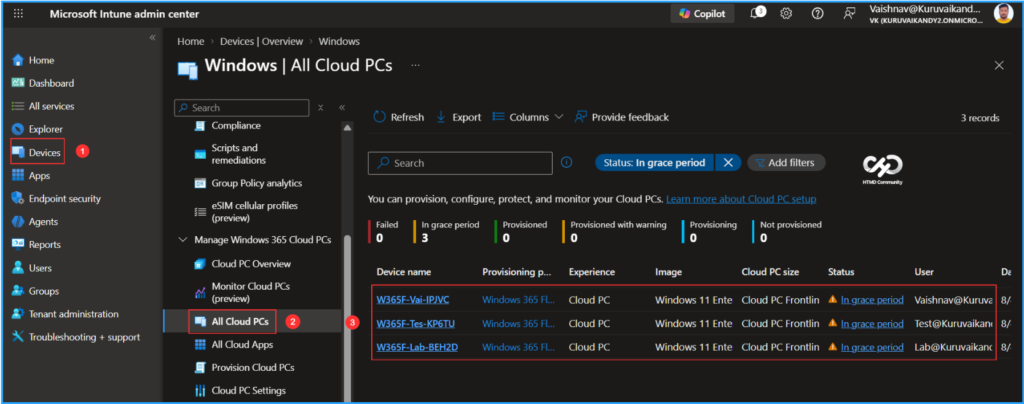
- Navigate to > Devices > Manage Windows 365 Cloud PCs > All Cloud PCs
We have three Cloud PCs in the same provisioning policy, all currently in grace period. Ensure that these PCs are assigned to a valid user group. If they are not assigned, reassign the policy to the correct group and then proceed to the next steps.
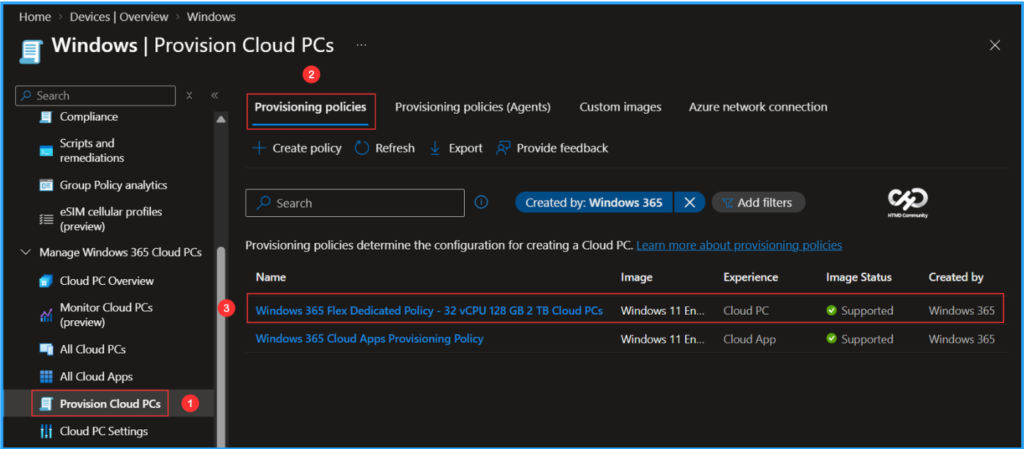
Click on Provision Cloud PCs > Provisioning policies > Windows 365 Flex Dedicated Policy – 32vCPU 128 GB 2 TB Cloud PCs (In this example)

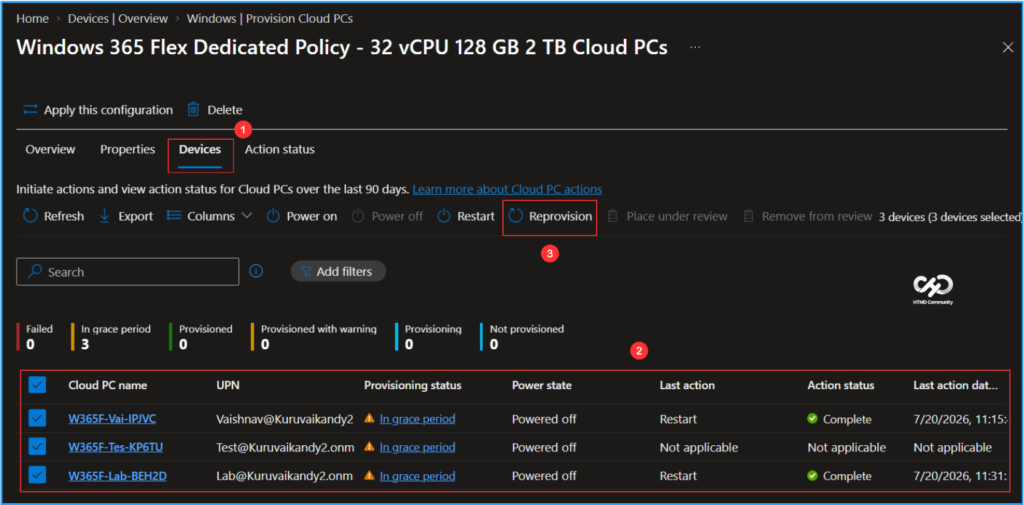
After opening the policy, you will see the updated navigation options. Click on the Devices tab, select Cloud PCs under the grace period, and then click on Reprovision.
Note: Reprovisioning a Cloud PC will delete all data and reset any changes made on your Cloud PC. Reprovisioning a Cloud PC will reinstall Windows, remove personal files and apps, reset any changes to settings, and remove any saved restore points. Your Cloud PC will be unavailable until it finishes reprovisioning.
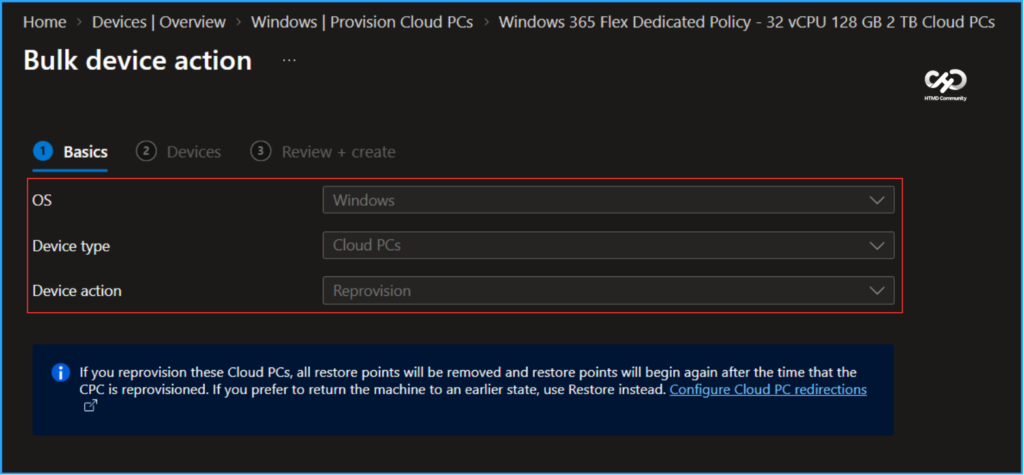
Since we selected multiple Cloud PC reprovisions, the options for OS, Device type, and Device action will be greyed out. We will need to click Next on the page. Note that if you reprovision these Cloud PCs, all restore points will be removed, and new restore points will begin to accumulate after the Cloud PCs are reprovisioned. If you would like to return the machine to an earlier state, use the Restore option instead.
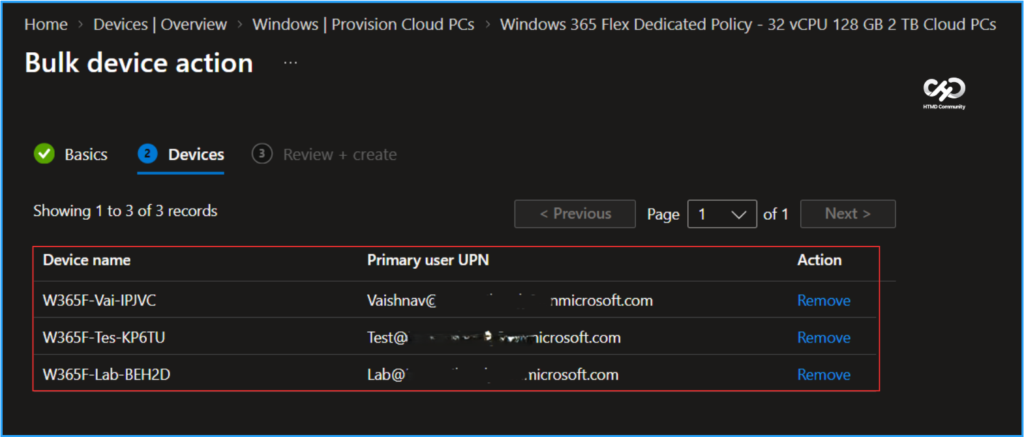
In the Devices tab, you will see the selected Device name, the Primary user UPN, and the Action. If you need to remove any Cloud PCs from reprovisioning, do so at this step, then click Next.
- Add Windows 365 Cloud Apps from File Path using Microsoft Intune
- Build a Windows 11 Developer Ready Cloud PC using Intune
- Purchase Windows 365 Flex High Performance Cloud PC Free Trial License
- Latest Intune Patching Scenarios using Windows Update Policies | Automatic Deallocate Cancellation
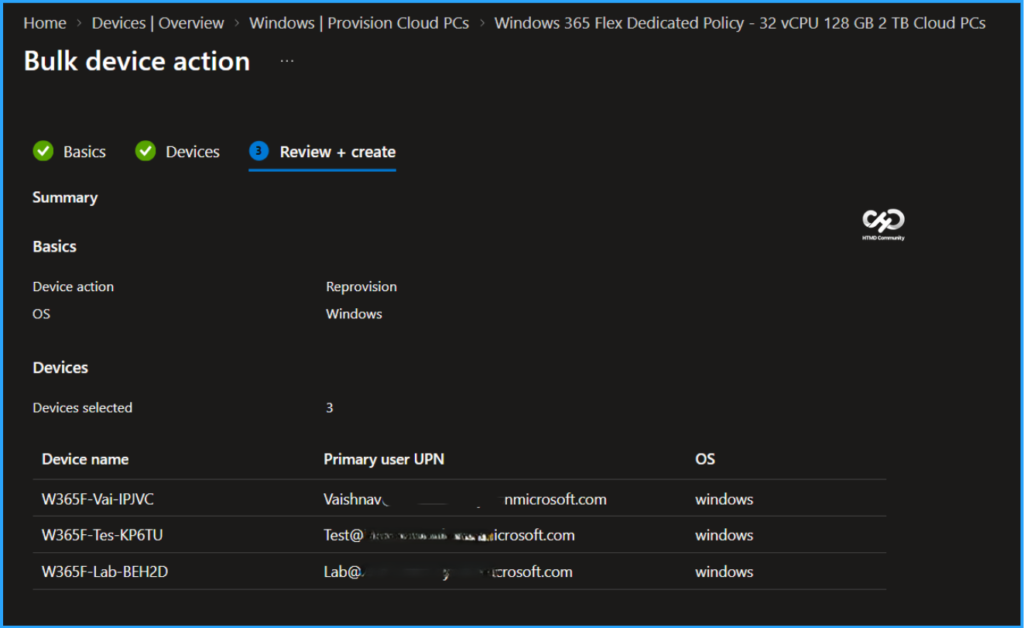
In the Review + create pane, confirm your selection, then click Create to start the bulk reprovisioning process for Cloud PCs.
End Result
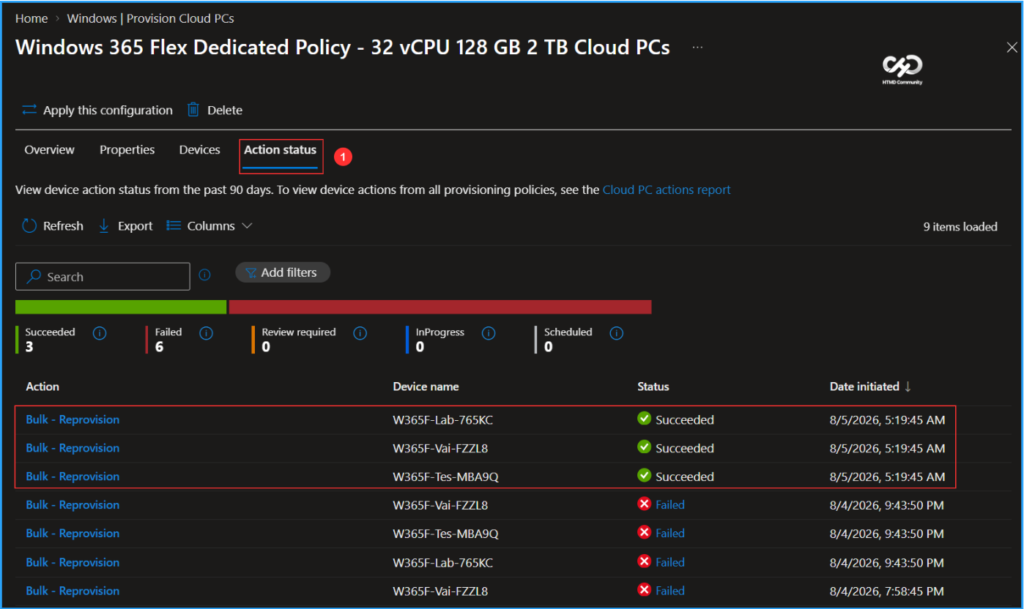
It’s time to check the status of bulk reprovision. In the Intune Portal, navigate to Devices > Manage Windows 365 Cloud PCs > Provision Cloud PCs. Click on Provisioning Policies, and then select the Windows 365 Flex Dedicated Policy – 32vCPU 128GB 2TB Cloud PCs (as shown in this example). Click on the Action status tab. We can confirm that the bulk reprovisioning has been successful for the selected Cloud PCs.
Need Further Assistance or Have Technical Questions?
Join the LinkedIn Page and Telegram group to get the latest step-by-step guides and news updates. Join our Meetup Page to participate in User group meetings. Also, join the WhatsApp Community to get the latest news on Microsoft Technologies. We are there on Reddit as well.
Author
Vaishnav K has over 12 years of experience in SCCM, Intune, Modern Device Management, and Automation Solutions. He writes and shares knowledge about Microsoft Intune, Windows 365, Azure, Entra, PowerShell Scripting, and Automation. Check out his profile on LinkedIn.