Let’s discuss Methods to Change Mouse Pointer Size, Style and Color in Windows 11. A mouse is a pointing device that controls a cursor in a GUI and can move and select text, icons, files, and folders. Without a Mouse, users can not use a PC Properly.
We cannot manage our work without a computer in this digital world. In a Computer system, the mouse is an essential Input device, and the mouse pointer, commonly represented as a Cursor, specifies the focus point on the Screen.
Sometimes, users cannot recognize the cursor on the screen because of its size, style, and color. If you have any vision problems, you can change the default cursor color, size, and style. Changing these mouse settings helps you see the cursor properly.
In this blog post, I will help you change the Mouse Pointer Size, Style, and Color in Windows 11. Different methods are available to change the mouse cursor’s size, Style, and Color.
What are the Advantages of Mouse?
The mouse is an essential Hardware component of Windows 11. It helps you easily select anything on the screen. The following are the Advantages of the Mouse.
1. The mouse is the most accurate input device.
2. It helps to do things at a very fast speed.
3. Helps to point objects on the monitor.
4. Helps to give instructions to your computer to perform the task.
- Windows 11 Mouse Middle Button Magic with App Icons in Taskbar
- Enable Disable On-Screen Keyboard in Windows 11
Methods to Change Mouse Pointer Size, Style and Color in Windows 11
As I mentioned above, many different methods are available for changing the Mouse Pointer Size, Style, and Color in Windows 11. These methods help you easily change these mouse settings. The following table shows the different methods.
| Different Methods to Change Mouse Pointer Size, Style and Color |
|---|
| Change Mouse Pointer Size, Style and Color using Settings App |
| Change Mouse Pointer Size, Style and Color using Control Panel |
1. Change Mouse Pointer Size, Style and Color using Settings App
The first method is to change the mouse pointer size, Style, and Color using the Settings Application. This is very easy, and users can easily do it. The below step will help you change these Settings.
- Select Settings from the Start Menu.
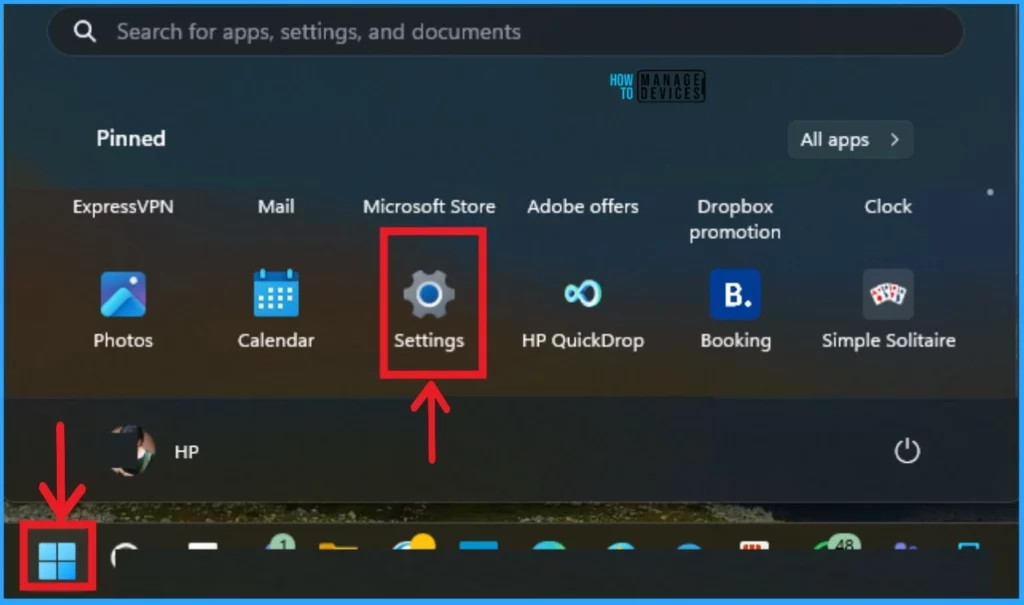
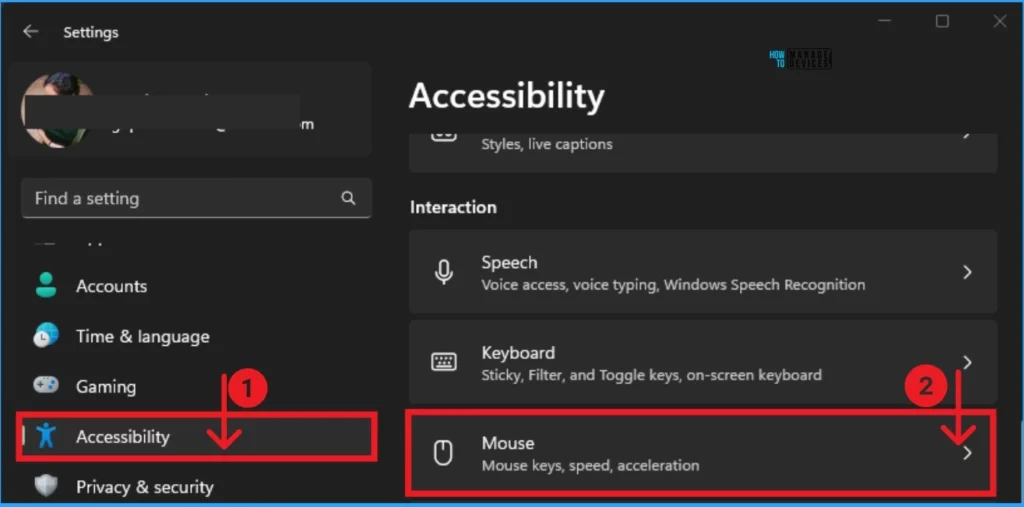
The Settings Applications show different Windows Settings. Select Accessibility Settings on the left side of the Settings Window. Again, select the Mouse option.
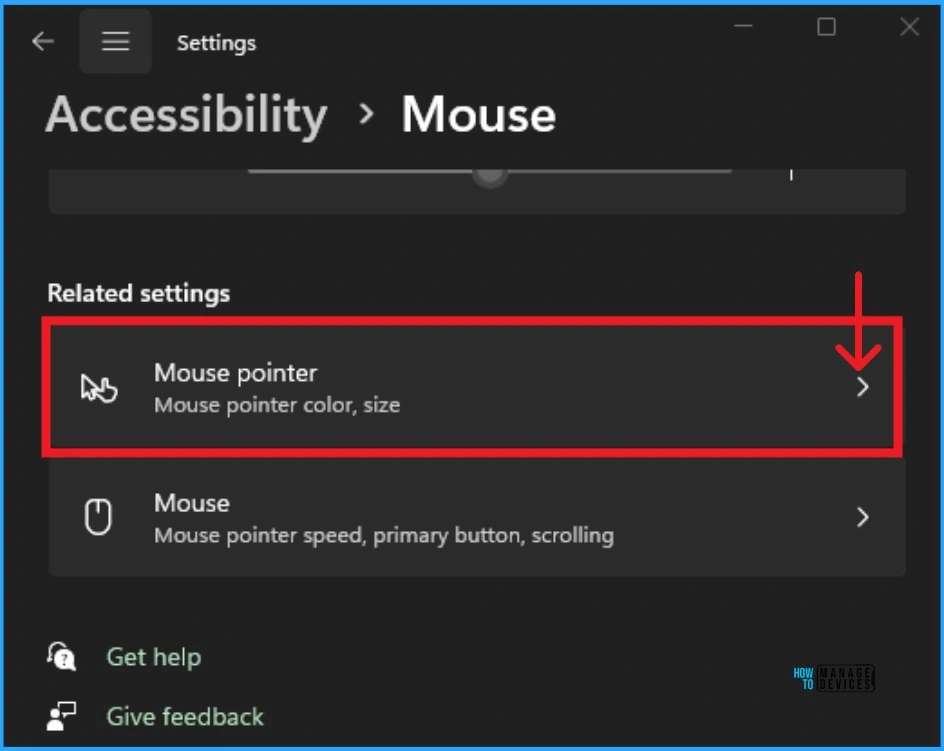
The Mouse option helps you change the different settings related to the Mouse. Select the Mouse Pointer option in the Related Settings of the Mouse.
How to Change Mouse Pointer Style
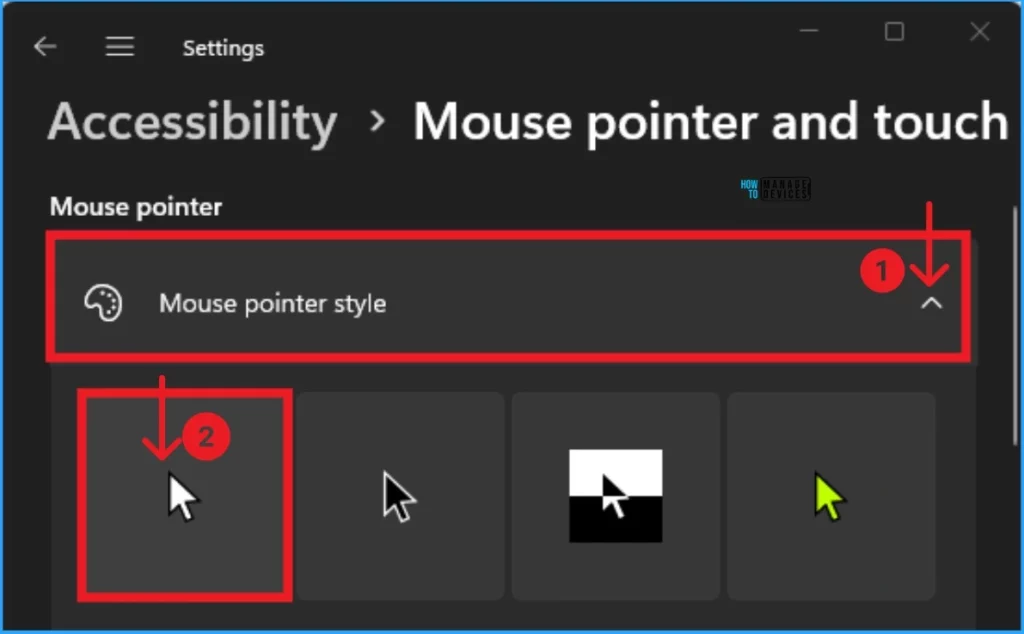
The Mouse Pointer option helps you change the Mouse Pointer Style on your Windows 11 PC. To do this, select the drop-down arrow on the right side of the screenshot. Then, Select the cursor option. There are 4 types of mouse pointer styles Available here.
- White
- Black
- Inverted
- Custom
How To Change Mouse Pointer Size
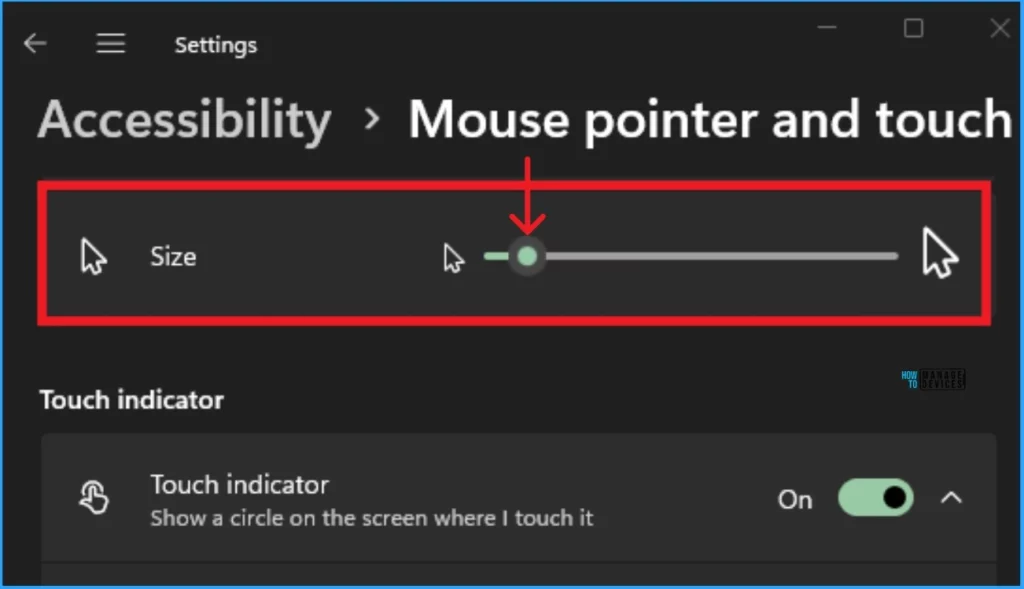
Mouse Pointer Size is an essential part that can be resized according to the user’s preference. The default Mouse Pointer Size is 1. You can easily change the Size from the screenshot below.
How To Change Mouse Pointer Color
The color of the Mouse Pointer in a Windows PC is very important. Users can easily change the color according to their preferences. If Users have any vision problems, they can change the default mouse Pointer color. The default color is White, and Windows allows Many other colors.
- Select the Custom color Mouse Cursor option (Yellow color).
- Click on the Recommended color from this window.
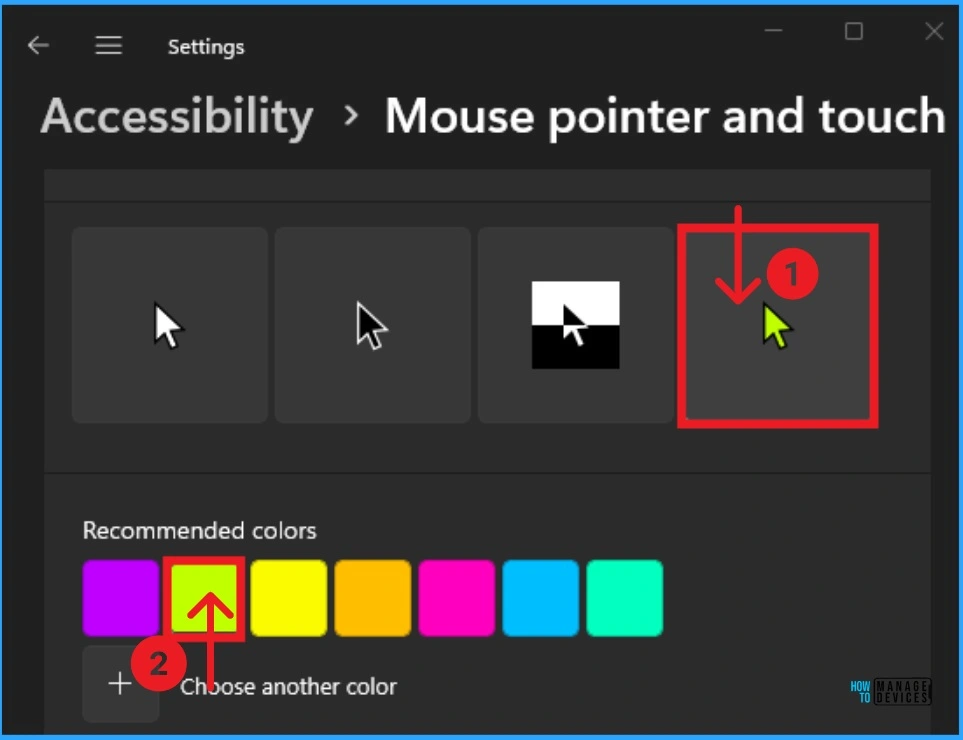
Windows allows users to Customize the Mouse Cursor color. To do this, click on the Custom Mouse Cursor Style(Yellow). Then click on the + Choose another color option from the window below.
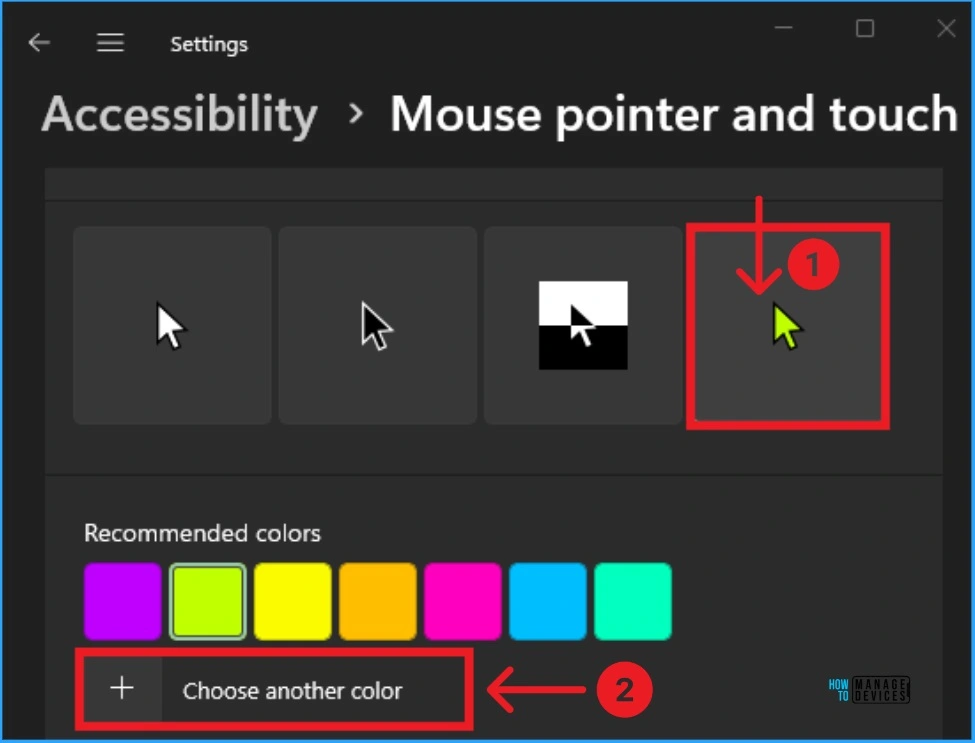
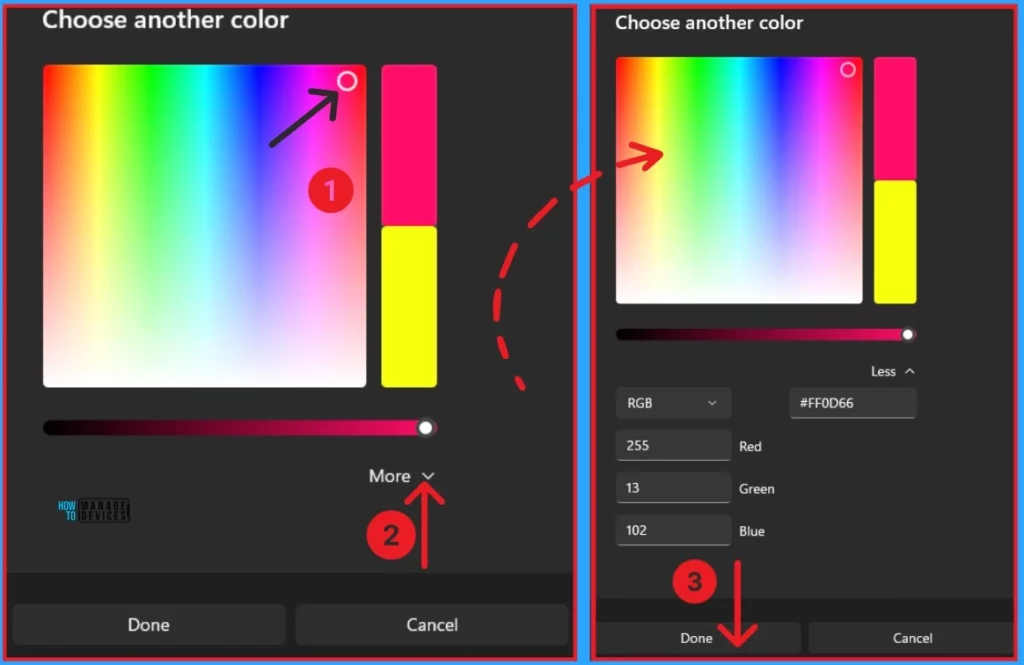
+ The Choose another color option window allows you to customize any color easily. To create a color, click on the color picker. The selected area will be shown on the round, and you can change the color value. Click on the More option to see the color value.
Here, the Values are shown in RGB format, and the combination of the colors is also shown. In this example, the RGB value of the selected color is 255 in Red, 13 in Green, and 102 in Blue. You can change these numbers to change the color or enter a color code. After that, click on the Done option.
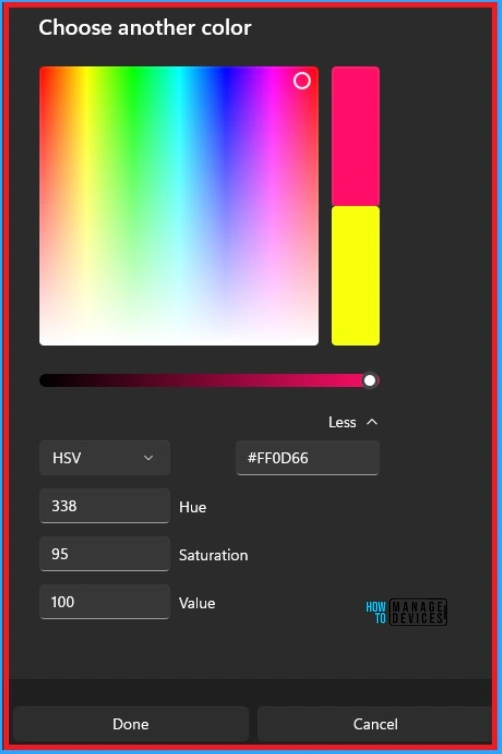
This window also allows you to see the color code in HSV format. Here, the color code value is 338 as Hue, 95 as Saturation, and 100 as Value. After changing this option, click on the Done option to get the selected color.
Here, the Mouse Pointer window shows the customized color. By following the above steps, you can create any color.

2. Change Mouse Pointer Size, Style and Color using Control Panel
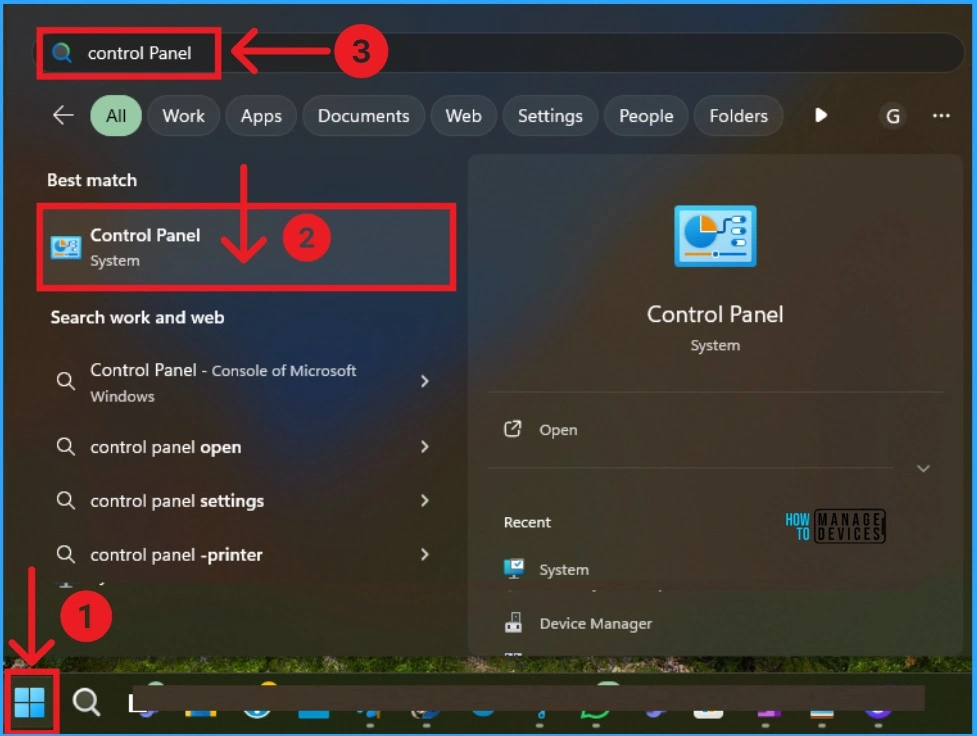
Using Control Panel, you can easily Change Mouse Pointer Size, Style and Color. To do this, Click on the Start Menu, search Control Panel, and Open it.
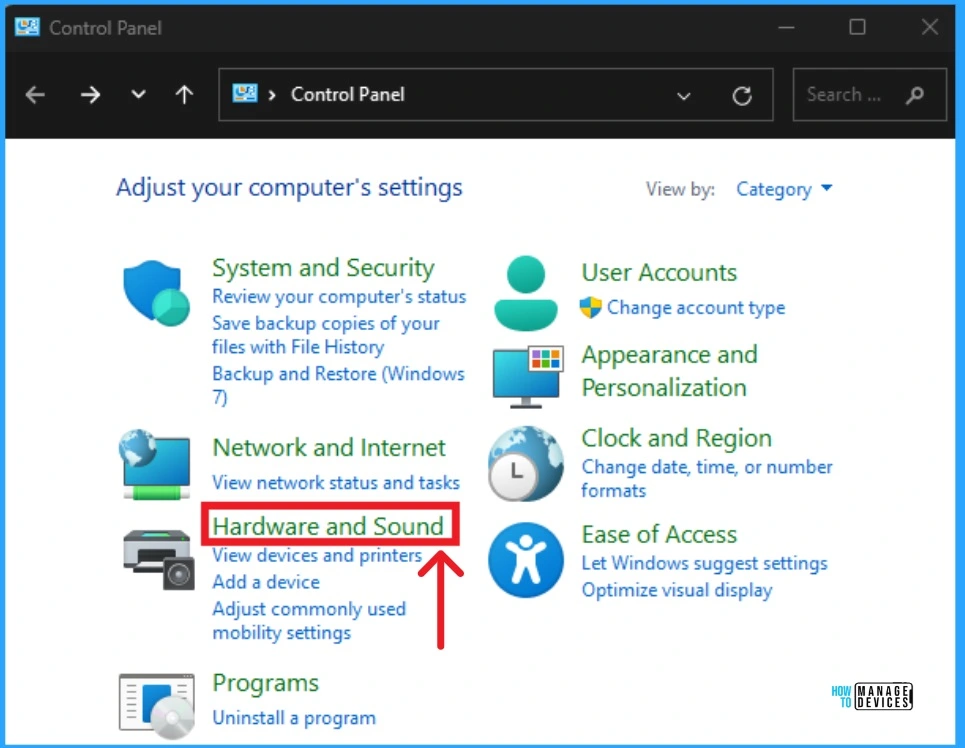
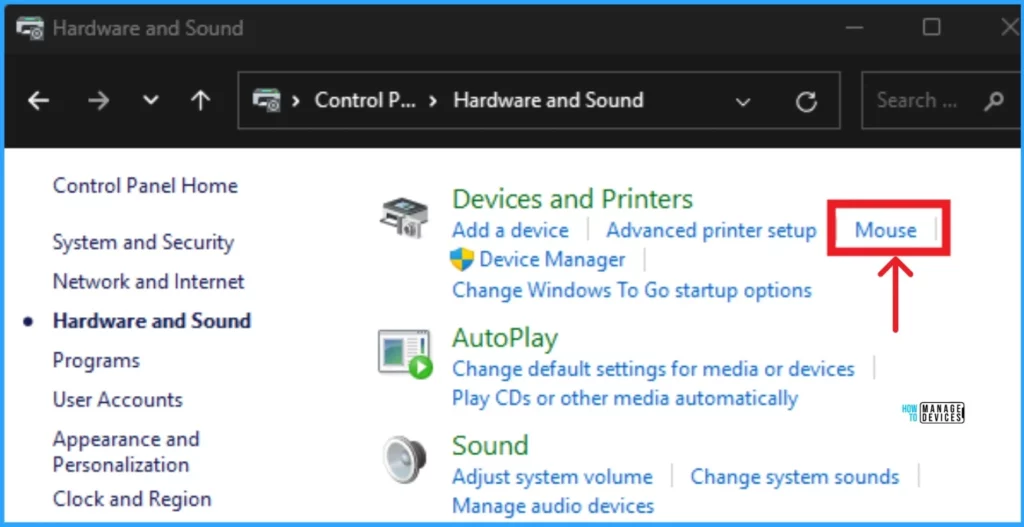
In the Control panel, we can see several options. Click on Hardware and Sound. This option will show the Mouse Settings.
The Hardware and Sound option window shows many options to change hardware and sound settings. Click on the Mouse Option. You can easily access the Mouse option on the Control Panel by searching the Mouse on the Search box on the Control Panel window.
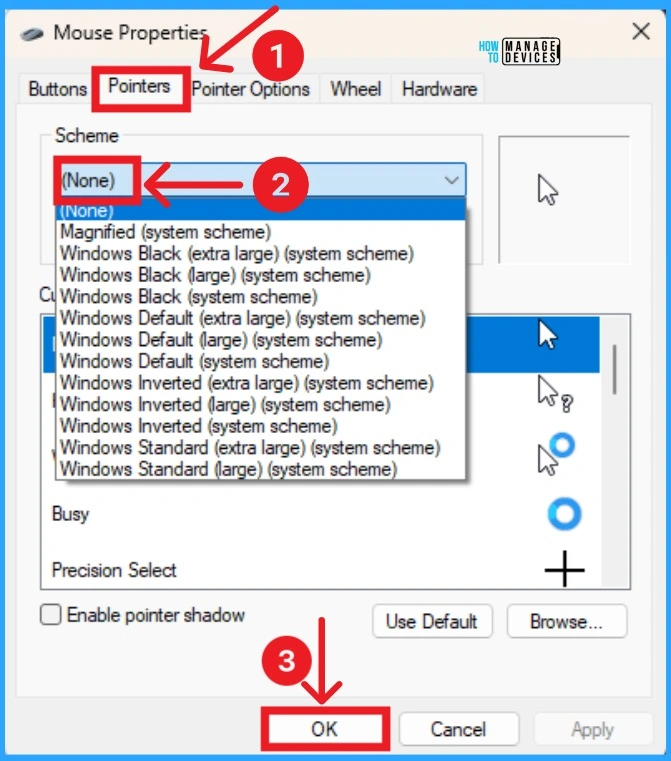
Here, we can see the Mouse Properties options. Select the Pointers tab, which shows many more options. Click on the None Scheme option and click on the OK button.
- 6 Methods to Check Wi-Fi Network Signal Strength in Windows 11
- How to Find Wi-Fi Network Password in Windows 11
We are on WhatsApp. To get the latest step-by-step guides and news updates, Join our Channel. Click here –HTMD WhatsApp.
Author
Anoop C Nair is Microsoft MVP! He is a Device Management Admin with more than 20 years of experience (calculation done in 2021) in IT. He is a Blogger, Speaker, and Local User Group HTMD Community leader. His main focus is on Device Management technologies like SCCM 2012, Current Branch, and Intune. He writes about ConfigMgr, Windows 11, Windows 10, Azure AD, Microsoft Intune, Windows 365, AVD, etc.
