Let’s learn how to change the Mouse Pointer Speed in Windows 11. A mouse is a hand-held pointing device that detects two-dimensional motion relative to a surface. Mouse pointer, also known as a mouse cursor or mouse arrow.
A mouse pointer is a small, graphical symbol or icon that appears on your computer screen and moves in response to your physical mouse movements. It is a graphical image that activates or controls some user interface aspects.
A mouse pointer serves as a visual representation of the position and actions of our mouse. We can improve the speed of the mouse pointer and save a lot of time by changing the pointer sensitivity through the Control panel or the settings App.
This feature is handy for users who want to navigate their computers more quickly. It helps them save time and work more. This blog post explains how to change and increase or decrease the mouse pointer speed.
- Turn On or Off Show Action Hint for Mouse Gesture in Microsoft Edge
- Windows 11 Mouse Middle Button Magic with App Icons in Taskbar
What are the Features of the Mouse Pointer?

The Mouse is one of our computer’s most important hardware components, making it very easy to use. It indicates where your mouse should perform its following action.
Many users are more comfortable using a mouse instead of a keyboard. Mouse pointers have many advantages, which are given below.
1. It serves as a visual representation
2. It helps to open a program
3. It is used to drag a file to another location
4. It helps to interact with the user and the Computer
How to Change Mouse Pointer Speed in Windows 11
A computer mouse is a tool for navigating computers on Windows 11. You can easily configure the mouse’s settings to suit your comfort. The below table shows the details of different methods to improve the mouse pointer speed.
| Different Methods |
|---|
| 1. Change Mouse Pointer Speed in Settings |
| 2. Change the Mouse Pointer Speed in the Control Panel |
| 3. Change Mouse Pointer Speed in Registry Editor |
1. Change Mouse Pointer Speed in Settings
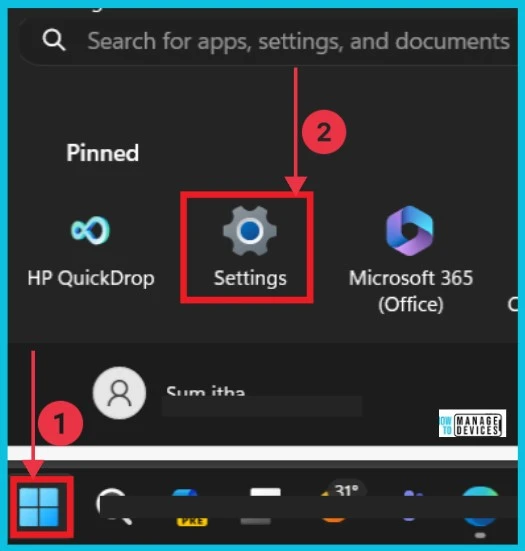
The first and most straightforward method for adjusting the `Mouse Pointer speed is to change it in Settings. First, select the Settings App from the Start button.
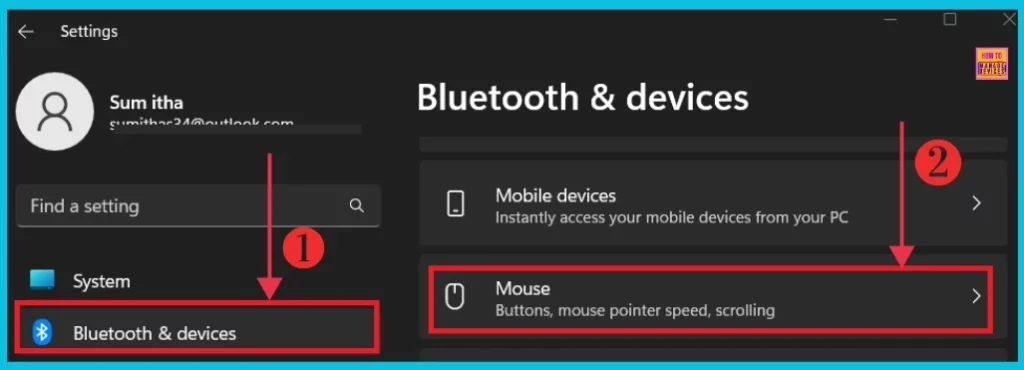
Select Bluetooth & devices from the settings app and click the right arrow next to the mouse option. You can see the Buttons and mouse pointer speed; scrolling is included in this option.
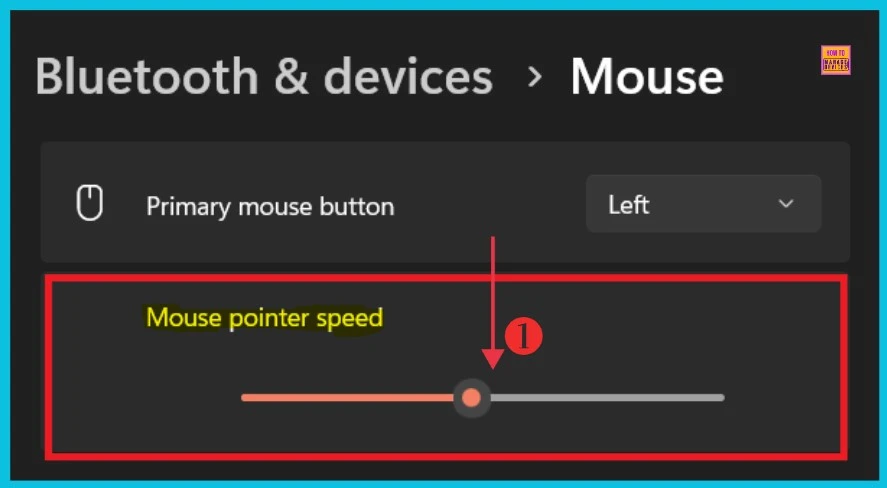
After you click the mouse button, you can see the mouse pointer speed option. Here, you can adjust the speed level to whatever you want. The screenshot below gives the details of changing the Mouse pointer speed.
2. Change the Mouse Pointer Speed in the Control Panel
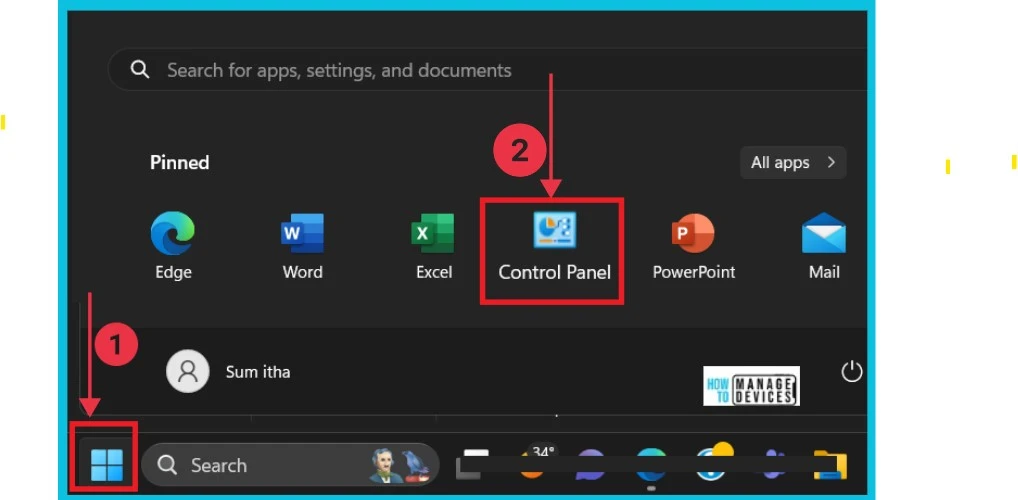
Changing the Mouse Pointer Speed in the Control Panel is the second method used to adjust the Mouse pointer speed. First, you select the Control Panel option from the start menu to do this.
After clicking the Control Panel, you can get a new window of Control Panel where you can see many setting options. Here you can concentrate on the Mouse option. Click on the Mouse option.
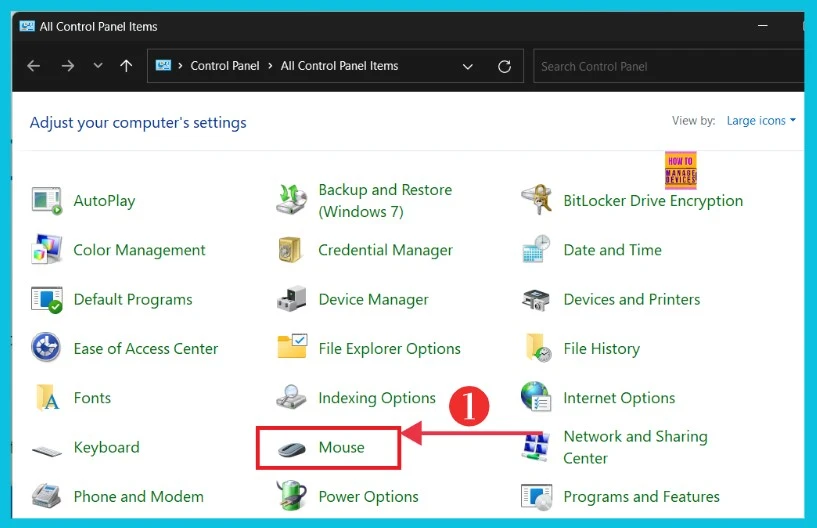
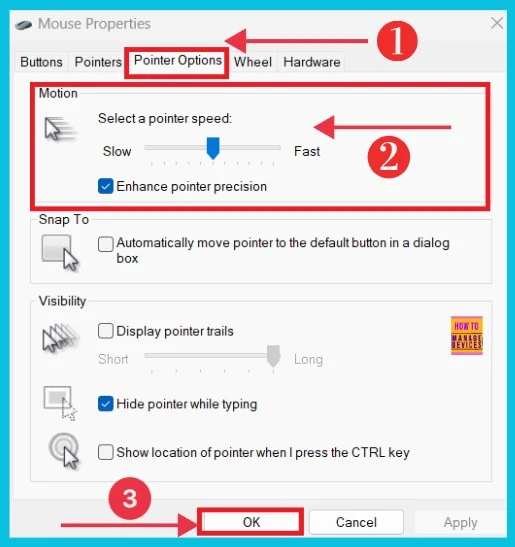
The screenshot below shows the window after you click the mouse option. Here, you can select Pointer Options; now, you can get a small box that adjusts the speed of the pointer. I adjusted the pointer speed to a medium level and then clicked OK.
3. Change Mouse Pointer Speed in Registry Editor
Change Mouse Pointer Speed in Registry Editor is the third and last method for adjusting mouse pointer speed. First, select the following steps to do it.
- Press WIN+R and type regedit, then click Ok
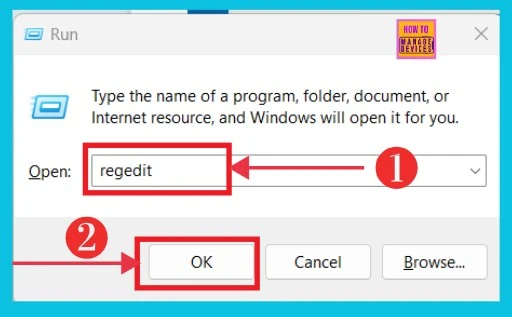
You can open a new window of the Registry Editor. The screenshot below details it. Here, you can get the path to the taskbar to continue the process.
HKEY_CURRENT_USER\Control Panel\Mouse

- How to Enable and Use the New Screenshot Tool in MS Edge
- How to Change User Account Control Settings in Windows 11
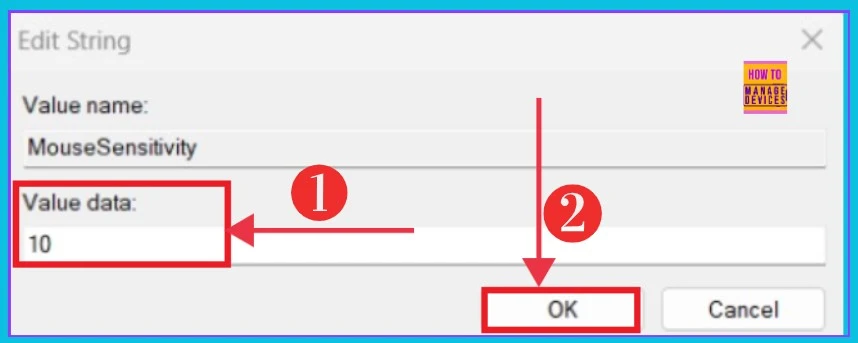
After receiving the path, the window shows the option Mouse on the left side. Click it, then select Mouse Sensitivity on the right side. It helps to edit the speed level.
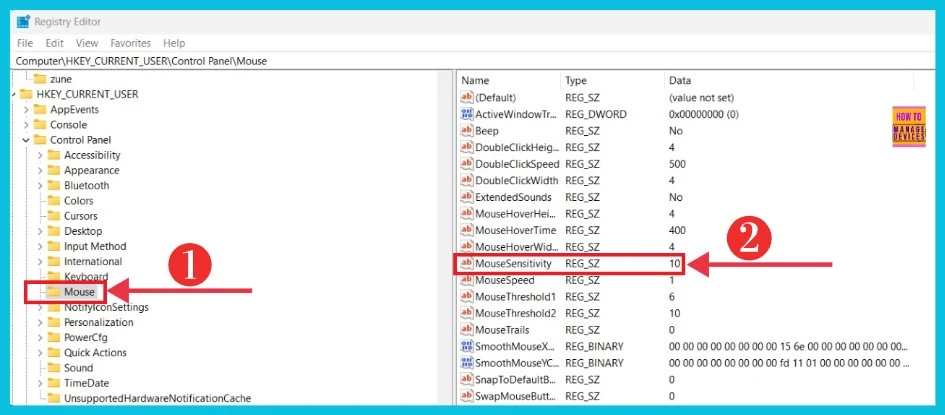
The screenshot below shows the Edit String of Mouse Sensitivity. We can change the value data. 10 is the default value used. You can change it if you want and then click OK.
We are on WhatsApp now. To get the latest step-by-step guides, news, and updates, Join our Channel. Click here. HTMD WhatsApp.
Author
Sumitha was introduced to the world of computers when she was very young. She loves to help users with their Windows 11 and related queries. She is here to share quick news, tips and tricks with Windows security.
