Let’s learn how to configure screen capture protection for AVD Windows 365 Cloud PC. Screen capture protection prevents sensitive information from being captured on the client endpoints. When you enable this feature, remote content will be automatically blocked or hidden in screenshots and screen shares.
Also, the Remote Desktop client will hide content from malicious software that may be capturing the screen. When you enable Screen Capture Protection, remote content will be automatically blocked or hidden in screenshots and screen shares.
- Protects from functionalities such as PrtScn, Snipping Tools, and third-party applications installed on the client.
- Secures a single session host or use Active Directory to manage different host pools centrally.
- Available for all Azure Virtual Desktop customers at no extra cost.
Protection is enforced by verifying the Azure Virtual Desktop client’s capabilities. If the user tries to connect with an unsupported client, Azure Virtual Desktop will deny the connection.
When enabled, remoted content will be automatically blocked/hidden in screenshots, screen shares, and also from malicious software that may be continuously capturing the screen content.
- Configure Single Sign-on SSO for Windows 365 Azure AD Join Cloud PC
- FIX Cloud PC Does Not Belong To The Current User Error | Windows 365
Prerequisites to Configure Screen Capture Protection
Screen capture protection is configured on the session host level and enforced on the client. Only clients that support this feature can connect to the remote session.
You must connect to Azure Virtual Desktop with one of the following clients to use support screen capture protection:
- The Windows Desktop client supports screen capture protection for full desktops only.
- The macOS client (version 10.7.0 or later) supports screen capture protection for both RemoteApps and full desktops.
Steps to Configure Screen Capture Protection
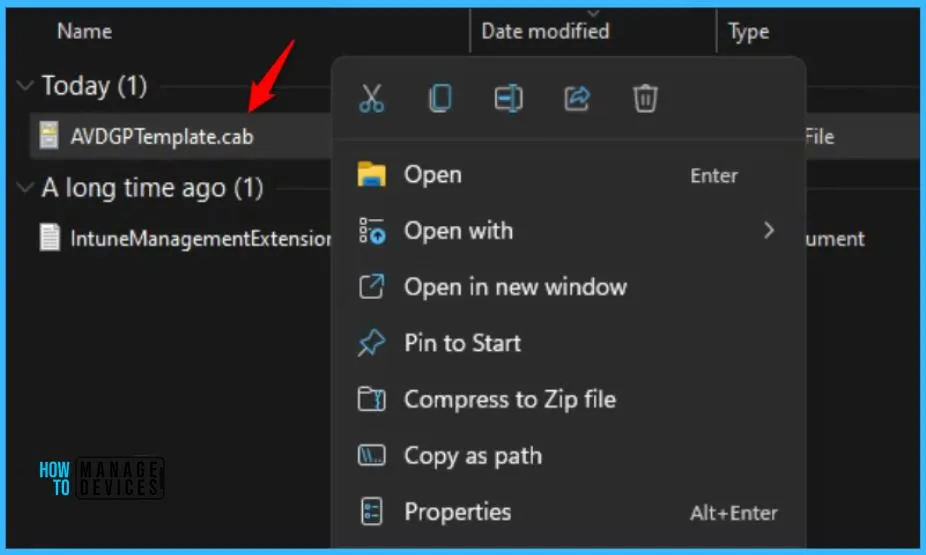
To configure screen capture protection, You can download the Azure Virtual Desktop policy templates file. The file (AVDGPTemplate.cab) will automatically be started download. Double-click or open the cab file and extract the contents of the cab file.
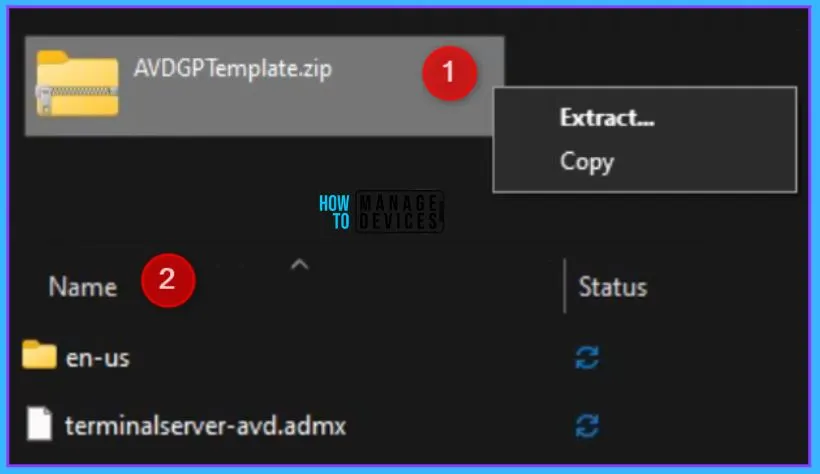
Here you need to copy AVDGPTemplates.zip file to a folder and extract the contents. The next step is to extract the contents of the zip to a folder.
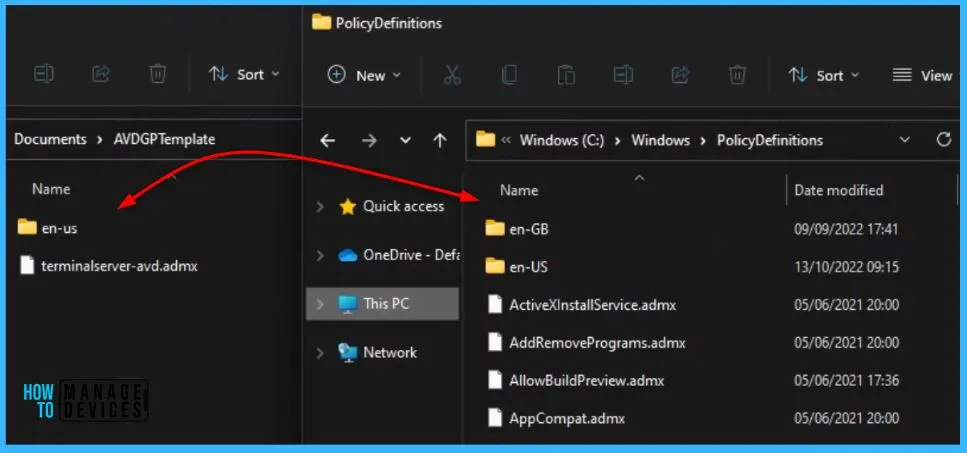
Open the extracted folder “\AVDGPTemplate” to copy the admx, adml files to file to the %windir%\ PolicyDefinitions folder.
Add Remote Desktop Template to Local Group Policy
You can use Local Group Policy Editor on the target computer to configure policies on individual computers. This approach lets you apply policy settings that only affect the local device.
You must install Remote Desktop Templates into Cloud PC if you are using Local Policies after you extract the templates, open AVDGPTemplate.
Note – You can also install administrative templates to the group policy Central Store in your Active Directory domain.
- Copy the terminalserver-avd.admx file to the %windir%\PolicyDefinitions folder.
- Copy the en-us\terminalserver-avd.adml file to the %windir%\PolicyDefinitions\en-us folder.
Here you see the admx files has copied to the local client machine in source location C:\Windows\ PolicyDefinitions folder.
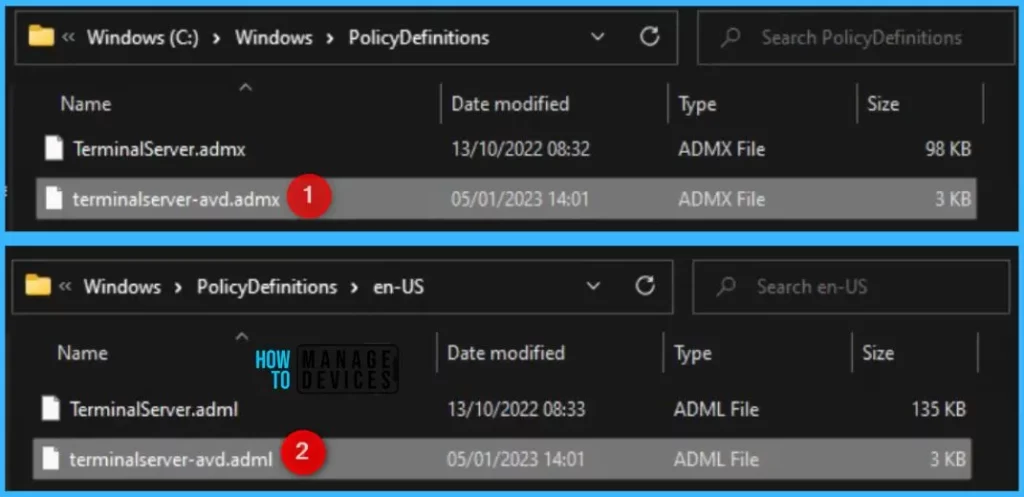
When you add the administrative template files to the appropriate location, Remote Desktop policy settings are immediately available in the Local Group Policy Editor.
To confirm the files loaded correctly, open Local Group Policy Editor directly (Windows key + R and enter gpedit.msc) or open MMC and load the Local Group Policy Editor snap-in.
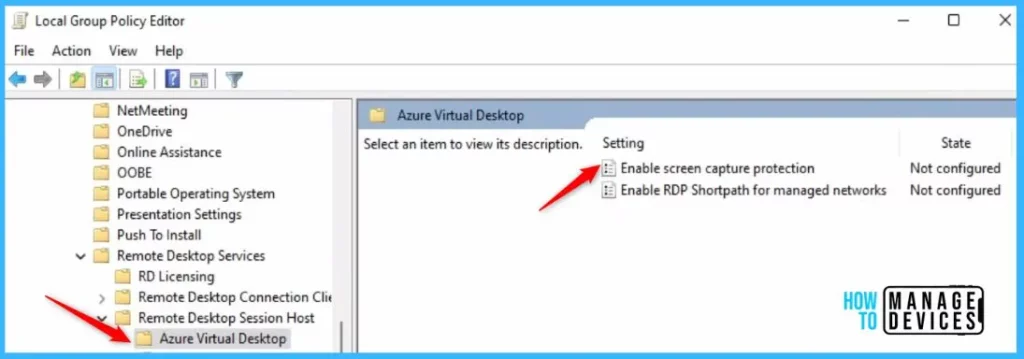
In Group Policy Editor, Navigate to the Computer Configuration > Administrative Templates > Windows Components > Remote Desktop Services > Remote Desktop Session Host > Azure Virtual Desktop. You should see one or more Azure Virtual Desktop policies.
Double-click on the “Enable screen capture protection” policy to open and get the detailed view.
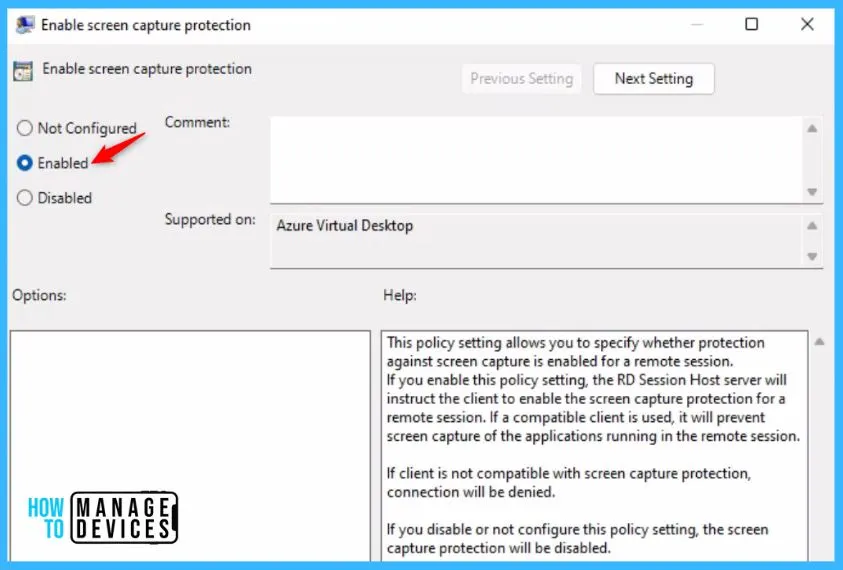
This policy setting allows you to specify whether protection against screen capture is enabled for a remote session. In Enable screen capture protection, click Enabled and Apply.
If you enable this policy setting, the RD Session Host server will instruct the client to enable screen capture protection for a remote session. If a compatible client is used, it will prevent screen capture of the applications running in the remote session.
If you disable or not configure this policy setting, the screen capture protection will be disabled.
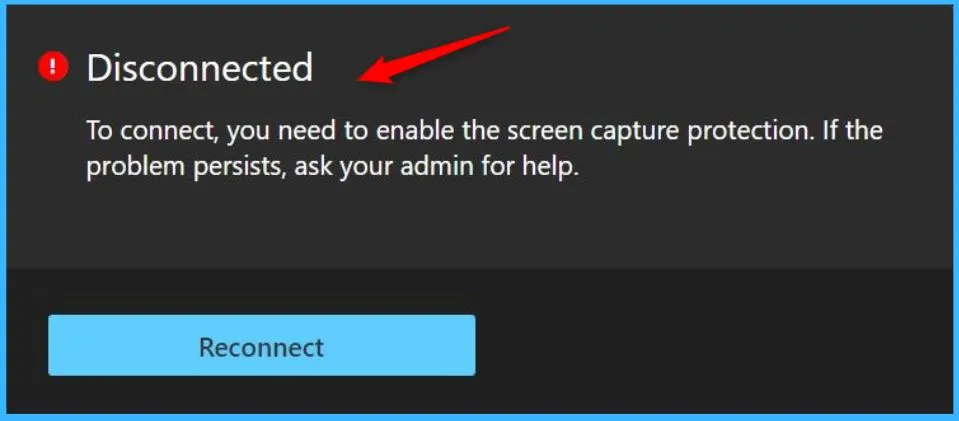
Important – If the client is not compatible with screen capture protection, the connection will be denied.
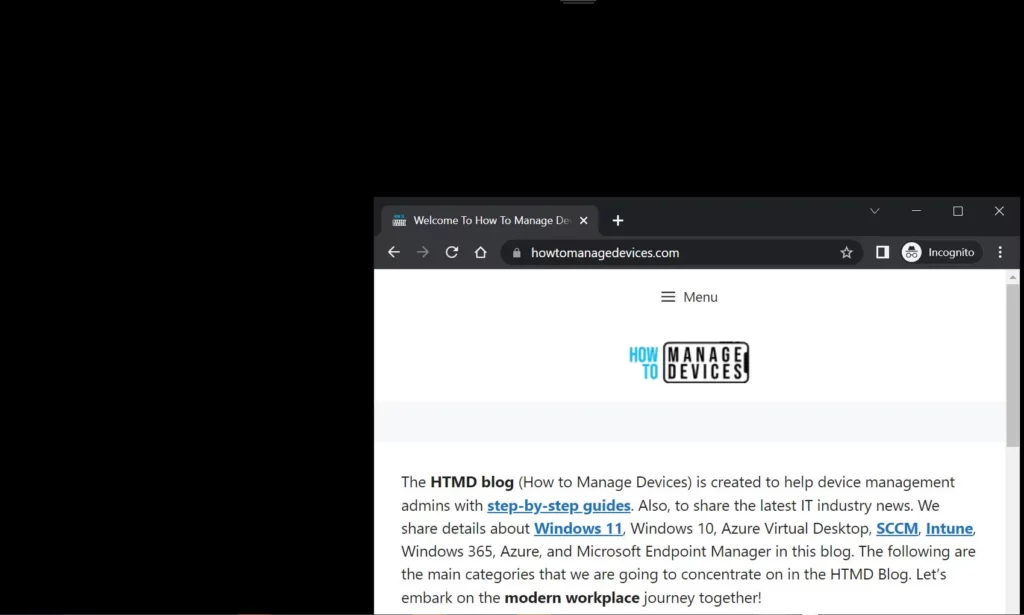
When enabled, remoted content will be automatically blocked/hidden in screenshots, screen shares, and also from malicious software that may be continuously capturing the screen content. In this screenshot, you will see how the session in the middle is protected and doesn’t show any remoted content.
Limitations and Known Issues
Once you configured the policy, It is important to know about the limitations and know issues with screen capture protection for AVD Windows 365.
- If a user tries to connect to a capture-protected session host with an unsupported client, the connection won’t work and will instead show an error message with the code
0x1151. - This feature protects the Remote Desktop window from being captured through a specific set of public operating system features and Application Programming Interfaces (APIs). However, there’s no guarantee that this feature will strictly protect content in scenarios where a user is to take a photo of their screen with a physical camera.
- For maximum security, customers should use this feature while also disabling clipboard, drive, and printer redirection. Disabling redirection prevents users from copying any captured screen content from the remote session.
- Users can’t share their Remote Desktop window using local collaboration software, such as Microsoft Teams, while this feature is enabled. When they use Microsoft Teams, neither the local Teams app nor Teams with media optimization can share protected content.
Author
About Author – Jitesh, Microsoft MVP, has over five years of working experience in the IT Industry. He writes and shares his experiences related to Microsoft device management technologies and IT Infrastructure management. His primary focus is Windows 10/11 Deployment solution with Configuration Manager, Microsoft Deployment Toolkit (MDT), and Microsoft Intune.

Is it possible to do the same via Intune MEM ?
Yes that’s possible:
https://learn.microsoft.com/en-us/azure/virtual-desktop/administrative-template?tabs=intune