In this post, you can learn how to configure SSO for Windows 365 Azure AD Join Cloud PC. Windows 365 now supports creating Azure Active Directory Join Cloud PCs that use single sign-on for Cloud PC login.
Single sign-on (SSO) allows the connection to skip the Cloud PC credential prompt and automatically sign the user into Windows through Azure AD authentication. Azure AD authentication provides other benefits, including passwordless authentication and support for third-party identity providers.
Without SSO, the client will prompt users for their session host credentials for every connection. The only way to avoid being prompted is to save the credentials in the client. Microsoft recommends only saving credentials on secure devices to prevent other users from accessing your resources.
Single sign-on is available on Cloud PCs having either gallery images or custom images using the following operating systems:
- Windows 11 Enterprise with the 2022-09 Cumulative Updates for Windows 11 Preview (KB5017383) or later installed.
- Windows 10 Enterprise, versions 20H2 or later with the 2022-09 Cumulative Updates for Windows 10 Preview (KB5017380) or later installed.
Existing Cloud PCs won’t have single sign-on configured. You need to reprovision the existing Windows 365 Cloud PC to support SSO. If you are wondering when it will start supporting Hybrid Azure AD Join, you may expect it to be in Q2 2023 in Public Preview.
- Assign Windows 365 Cloud PC License From Cloud PC Portal
- Windows 365 Cloud PC Azure AD Join Provisioning Process
Configure Windows 365 Single Sign-On SSO using Existing Provisioning Policy
Let’s look at the steps to modify an existing Provisioning Policy for Windows 365 Cloud PC Azure AD Join, and Here you can also update general information, image, and network connection –
- Sign in to the Microsoft Intune admin center https://endpoint.microsoft.com/.
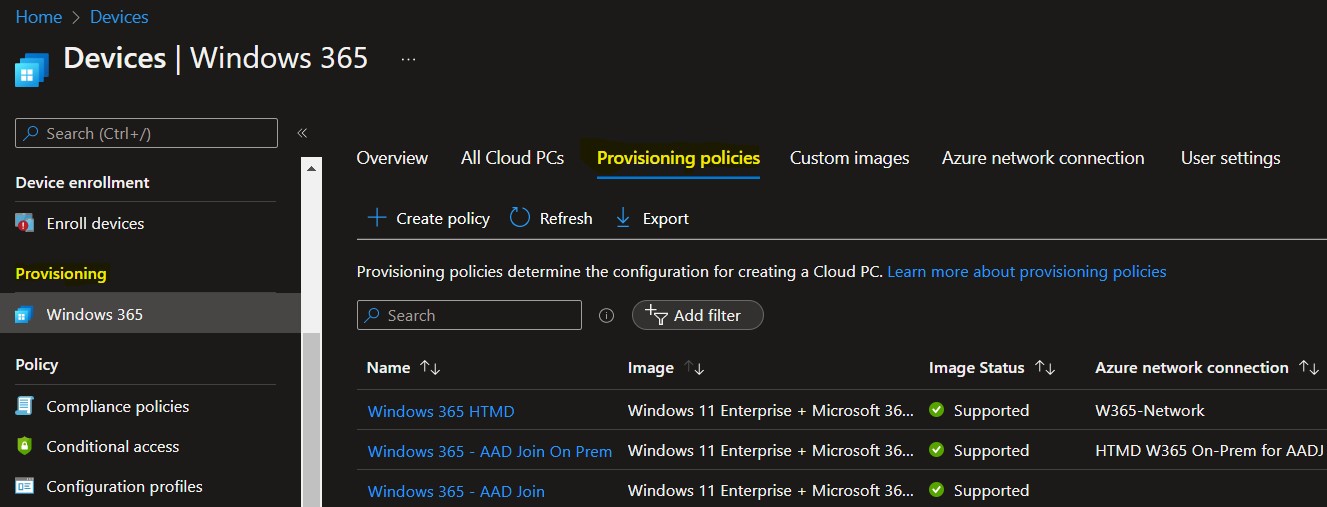
- Select Devices > Windows 365 (under Provisioning) > Provisioning policies.
- Select the Azure AD Join policy from the lists you want to modify to configure Single Sign-on (SSO).
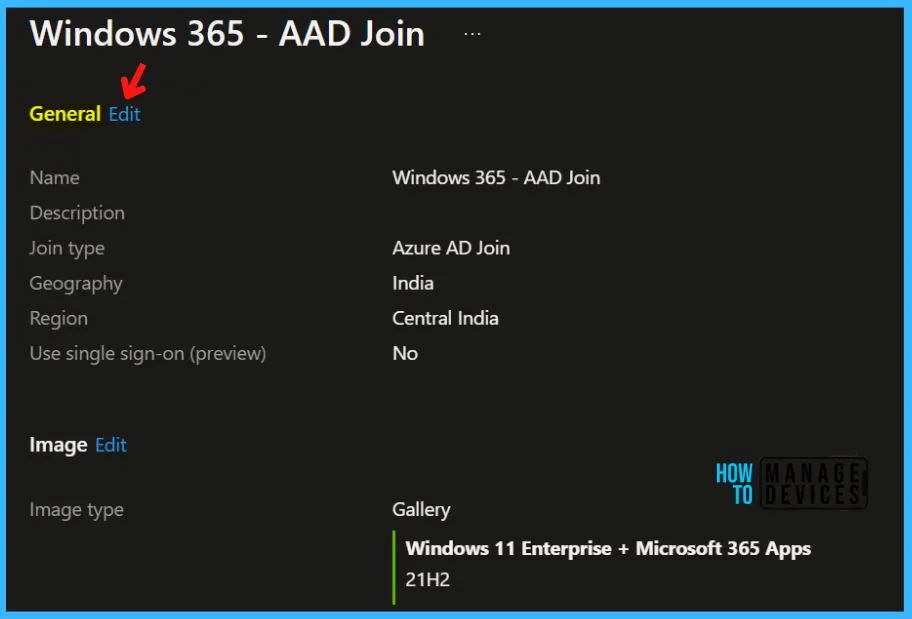
Once you have selected Provisioning policies, Scroll down and click on Edit in the General Information.
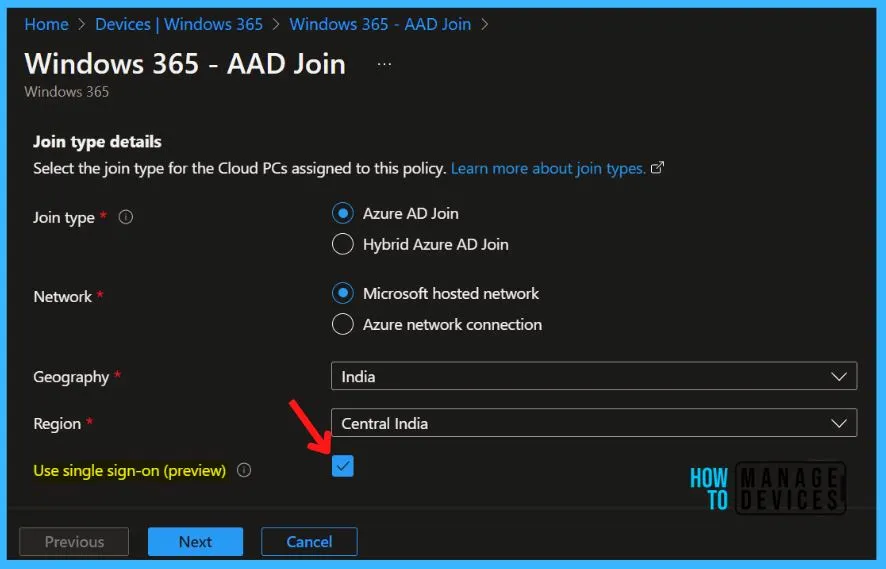
Here you need to check Use single sign-on (preview) and click Next. If you change the network, single sign-on configuration, or image in a provisioning policy, no change will occur for previously provisioned Cloud PCs.
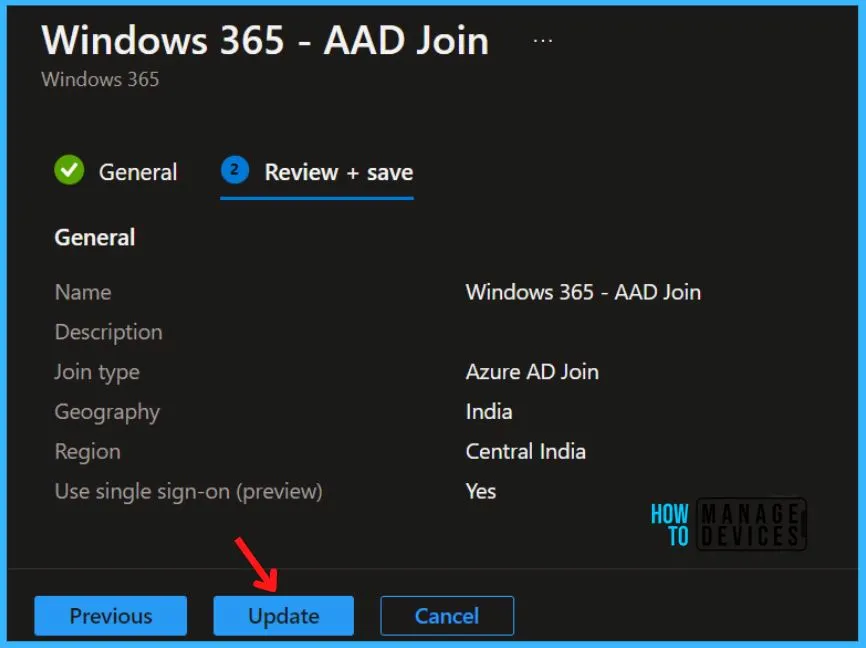
On the Review+Create window, review the added configuration and click Update.
A notification will appear automatically in the top right-hand corner with the message “Successfully updated policy.”
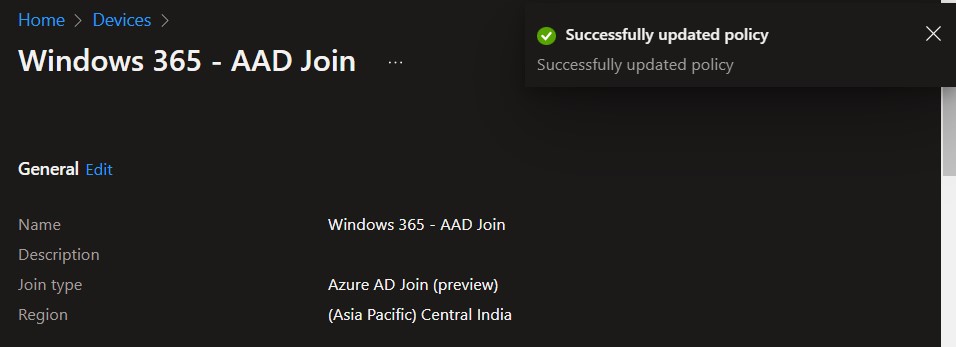
Note – To change the previously provisioned Cloud PCs to align with the changes, you must reprovision those Cloud PCs.
When the Reprovision remote action starts, the user is signed off. The original Cloud PC is deleted, including all user data, applications, customizations, etc. Here, you can learn how to reprovision Windows 365 Cloud PC.
When you initiate the Reprovisioning of a Cloud PC, the initial status you see is Provisioning.
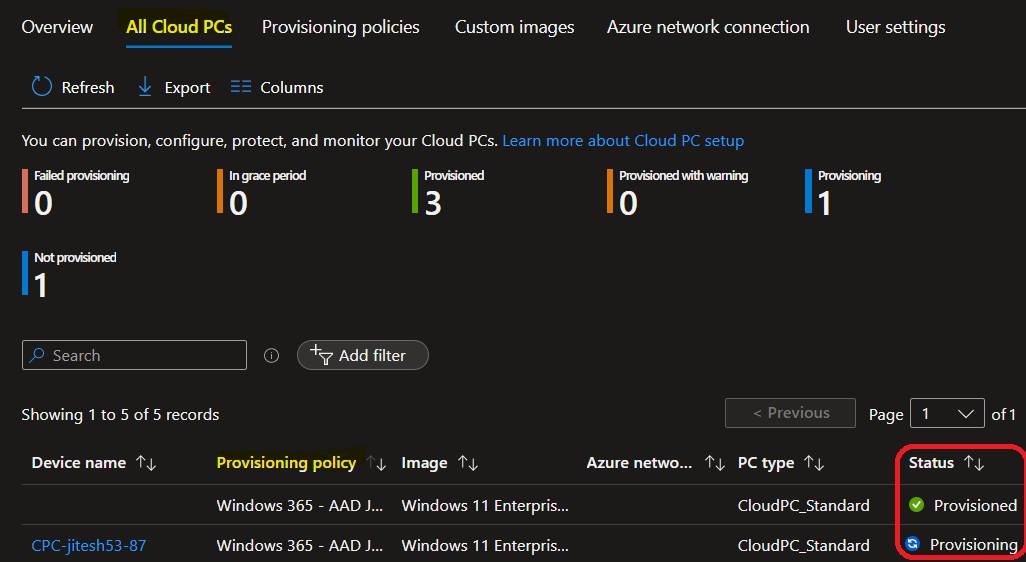
After a few minutes, the provisioning got completed successfully. You will see that the status is changed to provisioned, and the device name is changed from CPC-jitesh53-87 to CPC-jitesh53-DE. The cloud PC is ready to use with SSO.
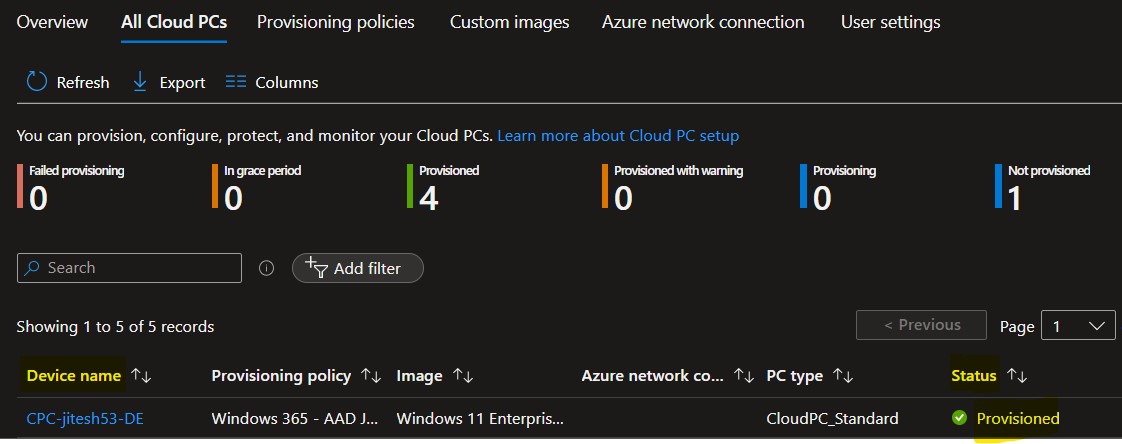
If you assign new users to the provisioning policy, and these users have a valid Cloud PC license, provisioning will automatically occur. If you remove users from the provisioning policy assignment, the grace period will be triggered.
Create Provisioning Policy to Configure SSO for Azure AD Join Cloud PC
Let’s create provisioning policies for Windows 365. You need to specify the connection, Windows 10/11 images, and user groups. The provisioning policy helps you configure the settings to host and manage cloud PCs with Single sign-on.
Select Devices > Windows 365 (under Provisioning) > Provisioning policies. Click on the +Create policy button.
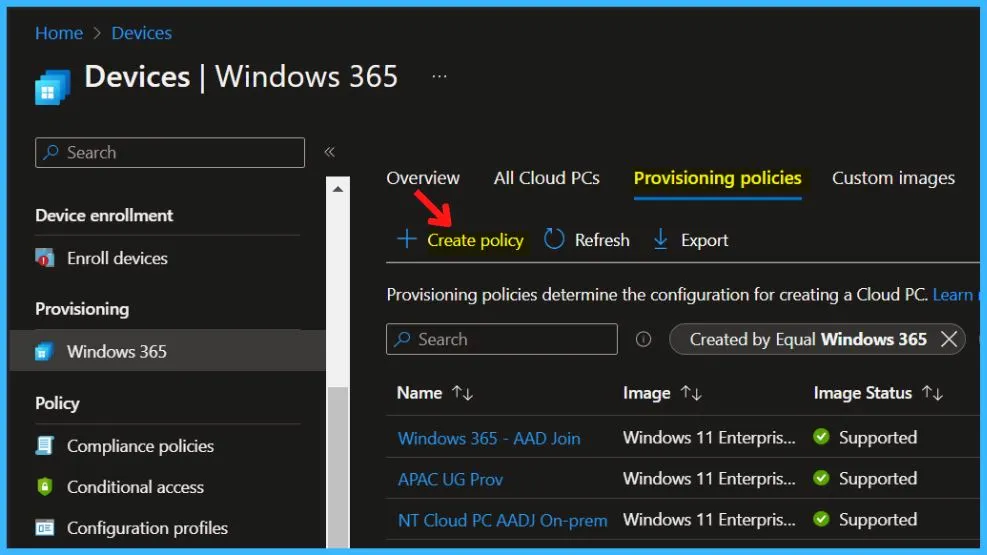
On the General page, enter a Name and Description (optional) for the new policy. (for example, Windows 365 AAD Join – MS Hosted Network)
Select the Join type Azure AD Join (preview). In the Network dropdown, you have the option to select “Micorosft Hosted Network” and “On-premises network connection” Select the network (Micorosft Hosted Network) and click Next.
- If you plan on provisioning Azure AD joined Cloud PCs on a Microsoft hosted network, You can do without an Azure or on-premises infrastructure.
- If you choose to provision Cloud PCs on your own network, an active Azure subscription with additional configurations is required.
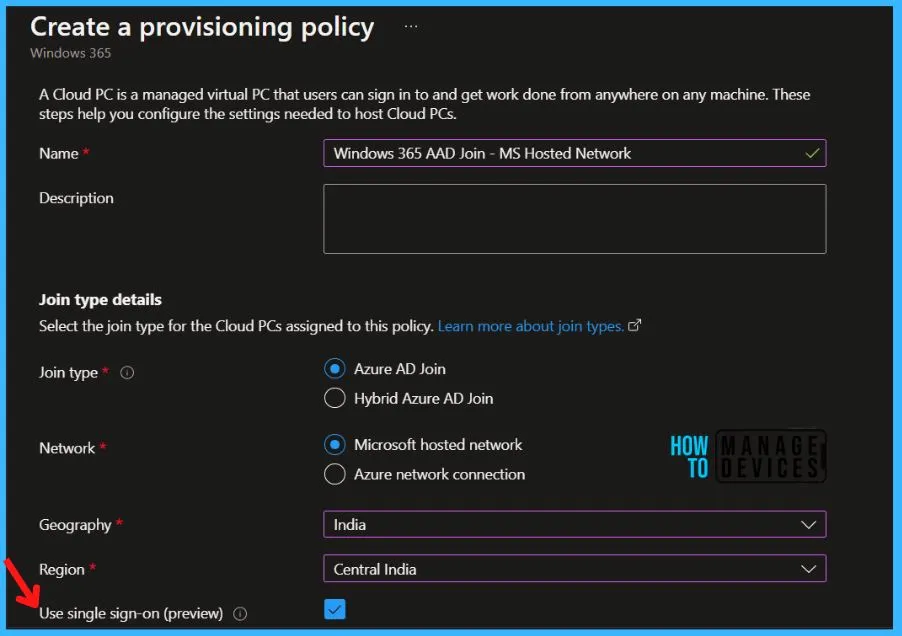
Select Image type ->Gallery image. Select the image type that you want to use to provision cloud PCs. Click on the select button to select the image.
- Gallery images are optimized for Windows 10/11 images provided by Microsoft. Custom images are created and uploaded by you.
- Selected image -> Windows 11 Enterprise + Microsoft 365 Apps.
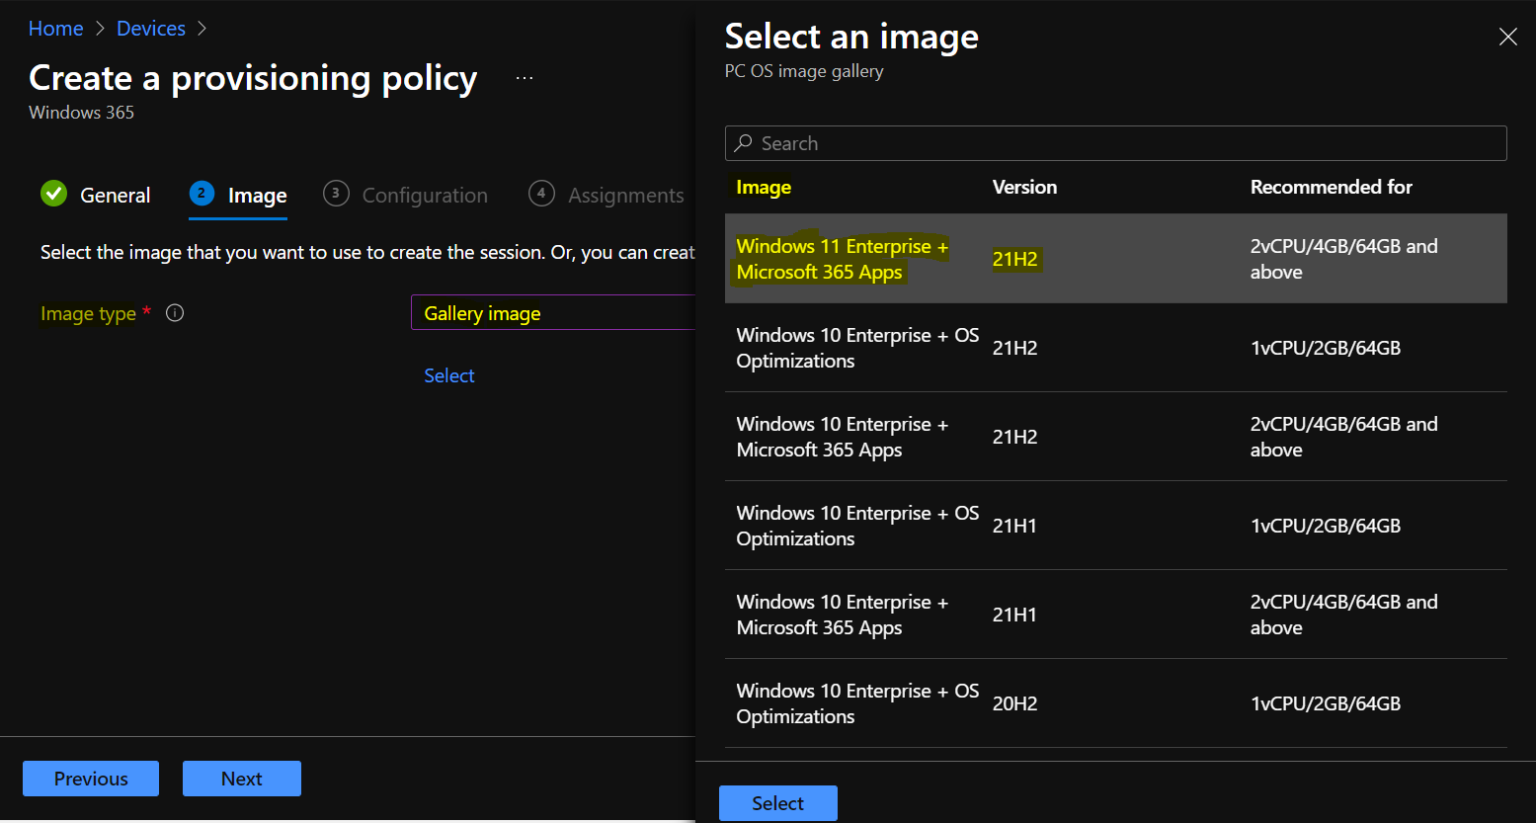
Once you select the image, it will appear as shown. If you want, you can change the selected image and click Next.

On the Configuration page, select the preferred language and Region or country for your Cloud PCs in the dropdown. The chosen language pack will be installed on Cloud PCs provisioned with this policy.
Optionally, choose a service Windows Autopatch or Microsoft Managed Desktop, under Additional services, and Select Next.
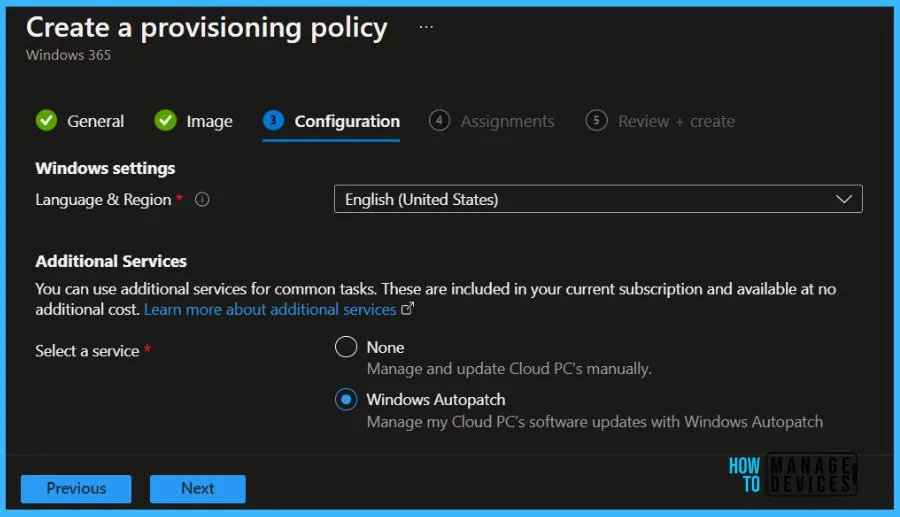
On the Assignments page, click on Add groups > choose the groups you want this policy assigned to > Select, then click Next.

On the Review + create page, select Create. After clicking Create, the new Cloud PCs will start to provision directly for the AAD group members you assigned to the provisioning policy.
The provisioning policies successfully added a new policy under the Provisioning policies tab. The entire process could take approx 20-25 minutes, and Once the provisioning process will successfully get completed. Cloud PCs will appear under the All Cloud PCs tab.
- Windows 365 App Experience | Cloud PC Application for Windows
- Get Alerts For Windows 365 Cloud PC Status
Windows 365 Cloud PC Sign-In Experience with Single Sign-On SSO
Once provisioned, the end user can sign in to the Windows Cloud PC from anywhere. You can use the Cloud PC URL https://windows365.microsoft.com/ to launch Windows 365 service and start working on a personalized desktop in the cloud.
You will be asked to log in with your Azure AD credentials (corp ID) when you launch the URL. Enter your credentials and proceed.
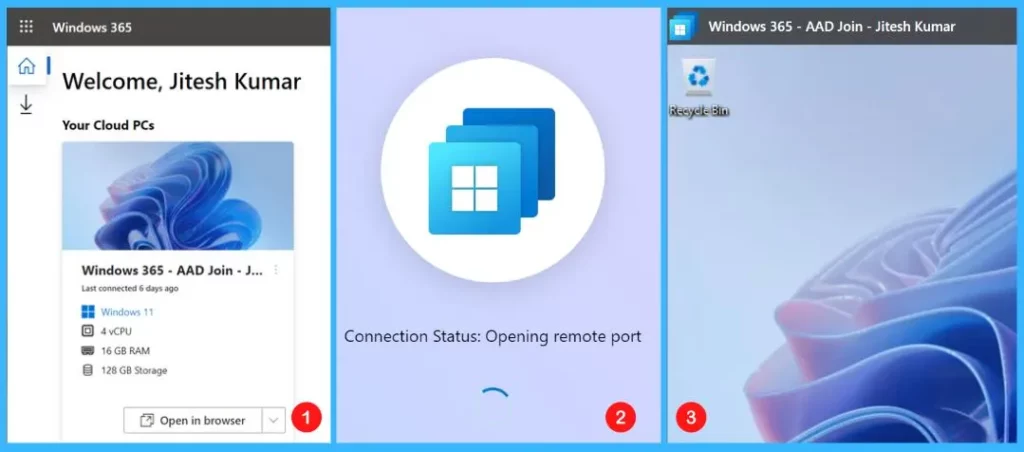
Here you can see the different Cloud PCs assigned to you in the Windows 365 web client portal. Let’s select Open in browser to see Windows 365 Cloud PC experience:
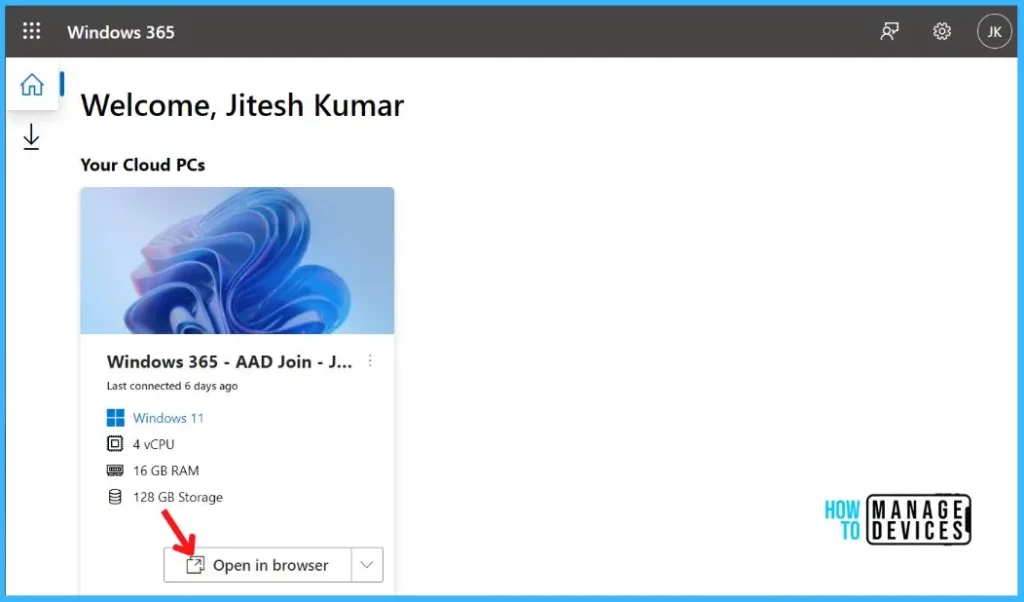
Note – This is the first time experience for the provisioned Cloud PC with Single-Sign-On. You will no longer be prompted for authentication and sign-in prompt for the next connectivity to Cloud PC, a seamless experience with Windows 365 App and Web.
You will be prompted to select the desired level of access that the Cloud PC to your local resources. You can choose from the options Printer, Microphone, and Clipboard.
Here you can also select the remote keyboard layout you want to use in your remote session. This keyboard must be installed in the remote session. Once you are done with the settings configuration, Click on Connect.

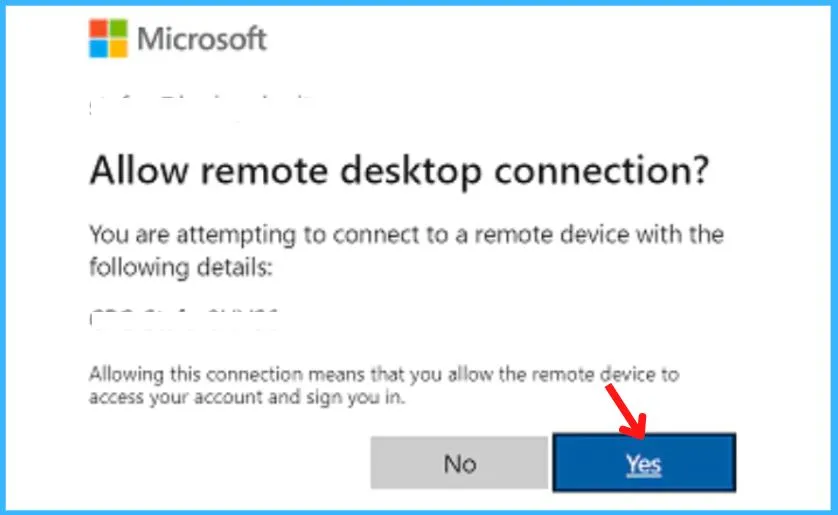
Once you click on Connect, You will see the message Connecting to your Cloud PC. A prompt will appear asking you to allow the remote desktop connection. Click on Yes.
Allowing this connection means that you allow the remote device to access your account and sign you in. You will no longer need to use your sign-in info for the next login process.
Here you will be landed to Windows 365 Cloud PC Desktop. This is how the screen will appear for you, Cloud PC is ready for productivity.

Next, Once you try to sign in to the Windows 365 Cloud PC, click on Open in browser from your Cloud PCs Web or Windows 365 App Connect. You will have a seamless experience.
Author
About Author – Jitesh, Microsoft MVP, has over five years of working experience in the IT Industry. He writes and shares his experiences related to Microsoft device management technologies and IT Infrastructure management. His primary focus is Windows 10/11 Deployment solution with Configuration Manager, Microsoft Deployment Toolkit (MDT), Windows 365, and Microsoft Intune.
