Let’s learn how you can create App Categories in Intune Company Portal. Categories make it easier for users to find the app when browsing through the company portal.
Users can see all the available applications in the company portal with additional information, product icons, and categories, ensuring users are familiar with the interface when accessing applications.
App categories can help you sort apps to make them easier for users. You can assign one or more categories to an app, for example, Productivity, Developer, or Communication apps.
There are several ways to do this. If you want to provide a better end-user experience from Company Portal, let’s look at the steps to configure Intune company portal branding.
- Enable Device Restart Grace Period for Intune Win32 App
- Intune Win32 App Failure Log Collection Backend Secrets
- Intune Win32 App Issues Troubleshooting
Create App Categories in Intune
To create or edit categories for apps, Follow the below steps –
- Sign in to the Microsoft Endpoint Manager admin center https://endpoint.microsoft.com/
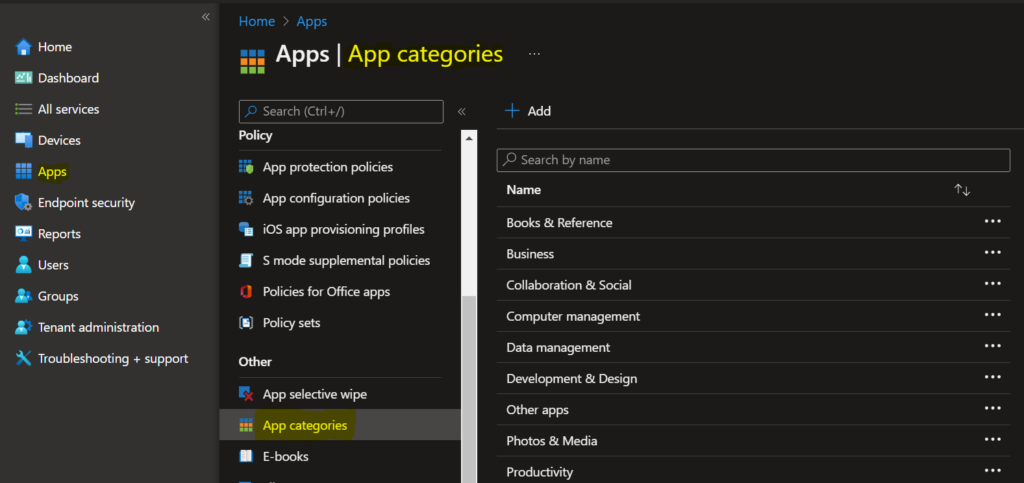
- Select Apps > App categories.
The App categories pane displays a list of current categories. By default, you will see the below categories.
In the next step, To add a category, in the Create category pane, select Add, and then enter a name for the category. Select Create.
Select the ellipsis (…) next to the category to delete a category, and then choose Delete.
Note – Names can be entered in one language only, and Intune does not translate them.
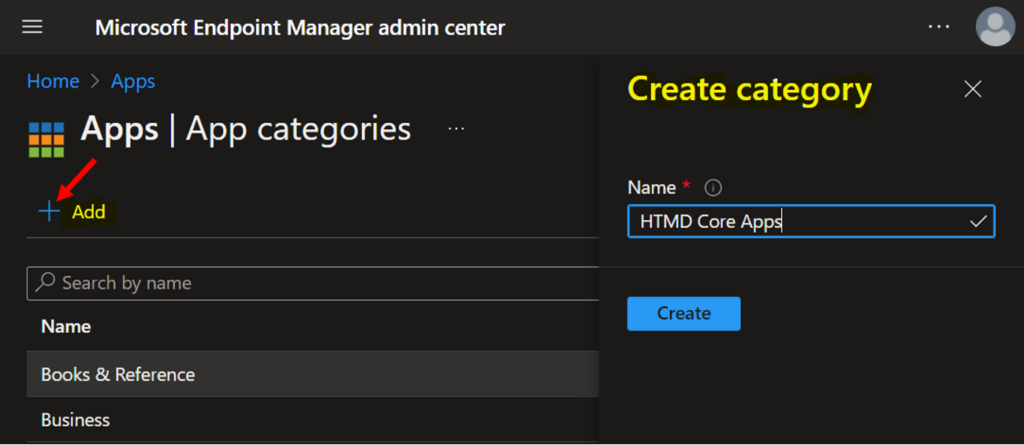
A notification will appear automatically in the top right-hand corner with a message App category “HTMD Core Apps” created. You will see the newly created category in the App categories list.
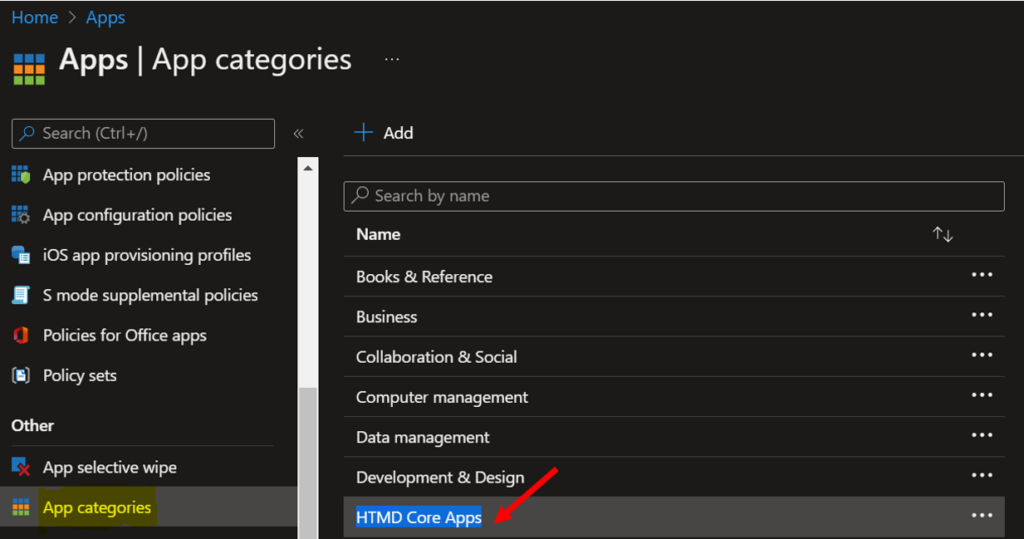
The following steps help you to assign or change the category for the existing application –
In MEM Admin Center, Select Apps > Windows > Windows apps. Select the existing Win32 application from the list.
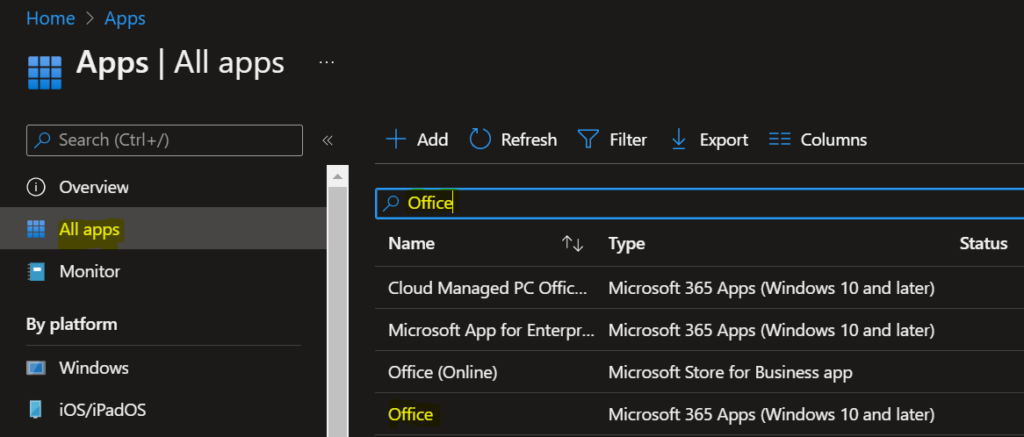
Select the application and select Properties. Scroll down and click on Edit in the App information.
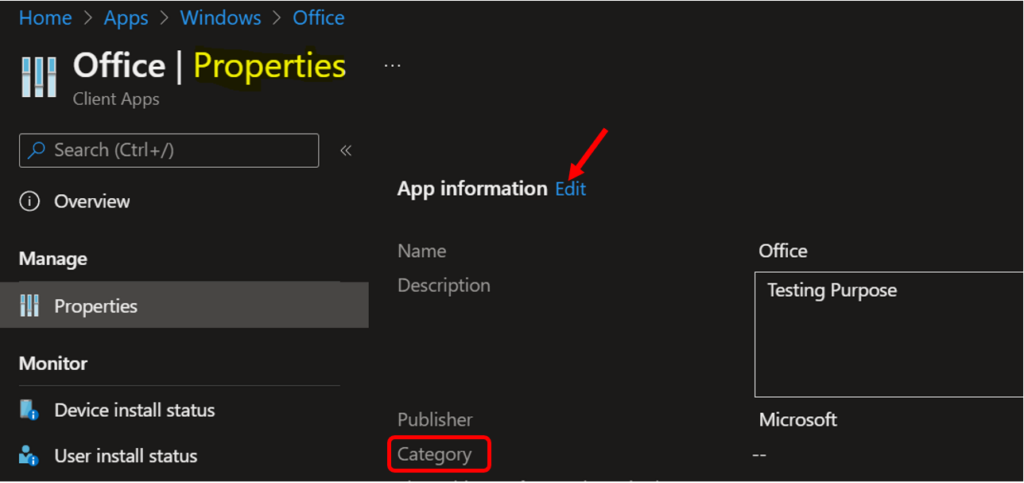
Depending on the app that you chose, On the App information page, you can also add the details for your app. Select Category to pick one or more of the built-in app categories, or select a category you created from the drop-down list.
Here I selected the built-in category “Productivity”. Once you have chosen the category, click Review + save.
Note – Categories make it easier for users to find the app when browsing through the company portal.
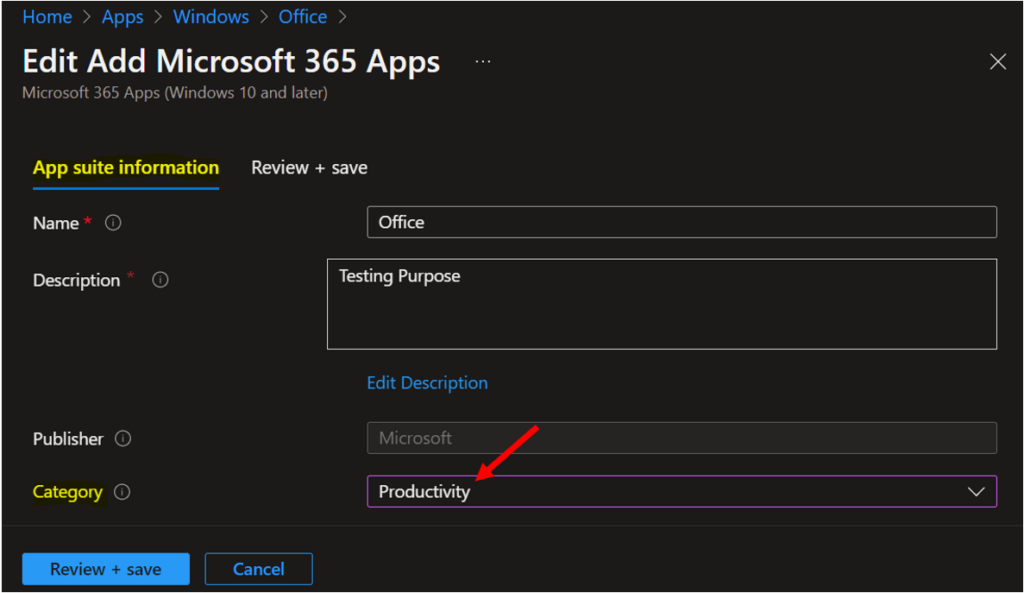
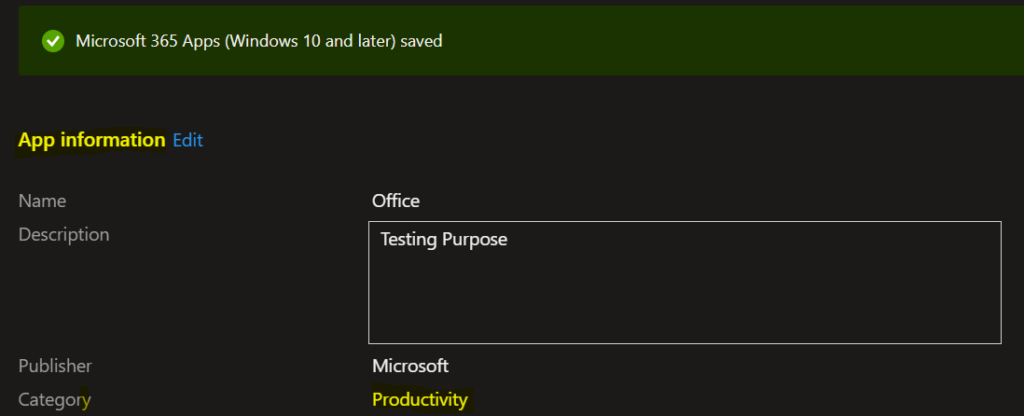
Once you have selected the summary screen will appear. Click Review + save. A notification will appear automatically in the top right-hand corner with a message Application “Office” saved successfully.
Depending on the app type you choose, Here you can see the status message “Microsoft 365 Apps (Windows 10 and later) saved”
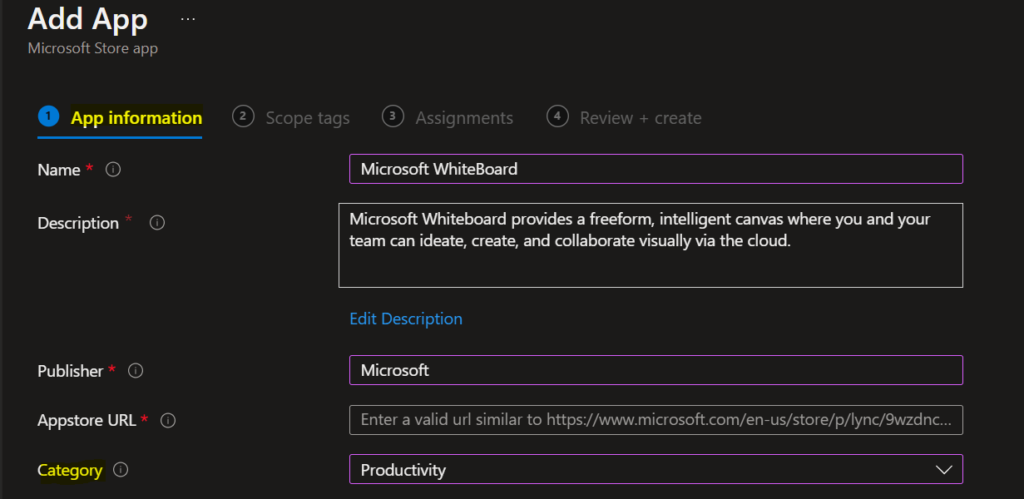
Add Category from Create Application Wizard
In the Microsoft Endpoint Manager admin center.
Select Apps. Choose the app types based on your needs on the Select app type pane. For Example – The selected Microsoft store app.
On the App information page, add the details for your app. Select Category from the drop-down list and then finish all steps of the Application wizard.
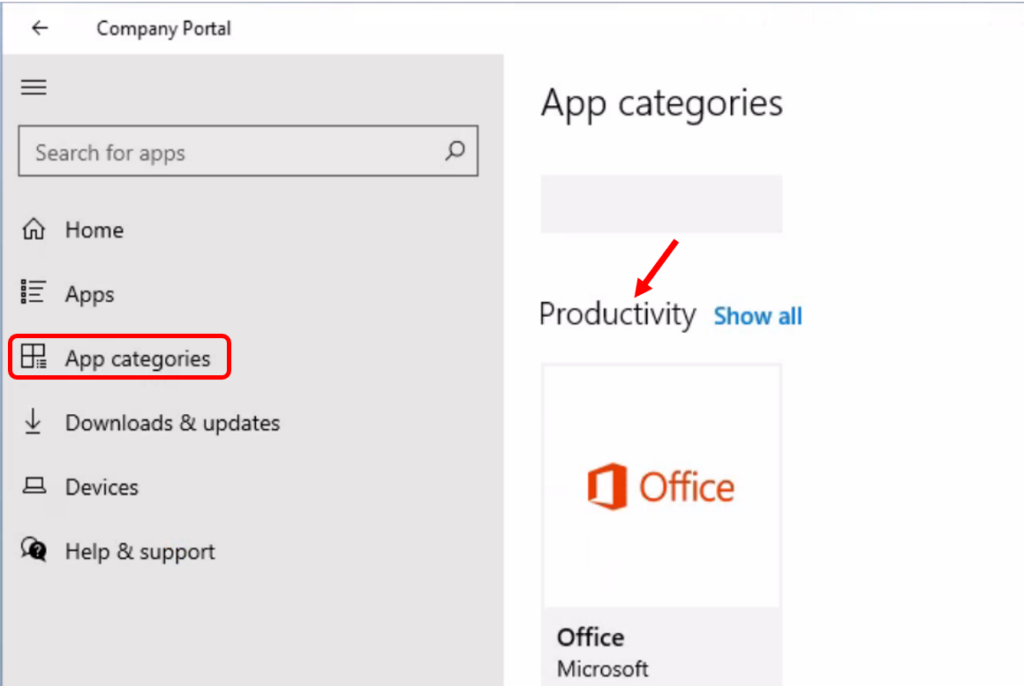
End Users Experience – Company Portal
Let’s check the end-user experience in the Company Portal.
Launch Company Portal on the device that you manage.
Here you see the application based on configured categories appearing as “Productivity” App categories, providing the best visibility about the application, and making it more user-friendly to use from Company Portal.
Microsoft Intune company portal provides a lot of branding options for Applications to provide a better user experience. Learn how to configure Intune Company Portal Icon of an Application.
You can also check Intune company portal branding options. These are the options to add more info when a user opens the company portal app.
