This post will explore how to Set the Default Behavior for AutoRun Policy Using Intune. We will check how to apply this policy using Intune’s Configuration Profiles. This post’s main aspect is getting familiar and hands-on experience in configuring and setting the Default Behavior for AutoRun Policy Using Intune.
This policy setting defines the default action for Autorun commands, typically found in autorun.inf files. These commands often initiate installation programs or other processes. Before Windows Vista, the system would execute the program automatically without requiring user approval when media containing an Autorun command was inserted. This posed a significant security risk, as code could execute without the user’s awareness.
Starting with Windows Vista, the default behavior was changed. The system now prompts the user to confirm whether they want to run the Autorun command, and it is represented as a handler in the Autoplay dialog. When you enable this policy setting, an administrator can modify the default behavior for Autorun commands on Windows Vista or later systems in two ways:
- Completely Disable Autorun Commands: This option prevents Autorun commands from running at all.
- Revert to the Pre-Windows Vista Behavior: This choice reinstates the earlier behavior seen in Windows versions before Vista, where Autorun commands are automatically executed without user confirmation.
If you choose to disable or leave this policy setting unconfigured, Windows Vista or later systems will continue to prompt the user to confirm whether they want to run an Autorun command, enhancing security and user control.

- Best Guide to Enable Windows NTP Server Policy using Intune
- Turn Off Cloud Consumer Account State Content Policy using Intune
Windows CSP Details SetDefaultAutoRunBehavior
We will see Windows CSP Details for this Policy setting SetDefaultAutoRunBehavior. It’s important for administrators to carefully consider the security implications and user experience when configuring this policy setting. In most cases, the default behavior in Windows Vista and later, which prompts the user to make a decision, strikes a balance between security and usability. However, specific security requirements and compatibility concerns may lead organizations to adjust this setting accordingly.
CSP URI – ./Device/Vendor/MSFT/Policy/Config/Autoplay/SetDefaultAutoRunBehavior

Set the Default Behavior for AutoRun Policy using Intune
To Set the Default Behavior for AutoRun Policy Using Intune, follow the steps stated below:
- Sign in to the Intune Admin Center portal https://intune.microsoft.com/.
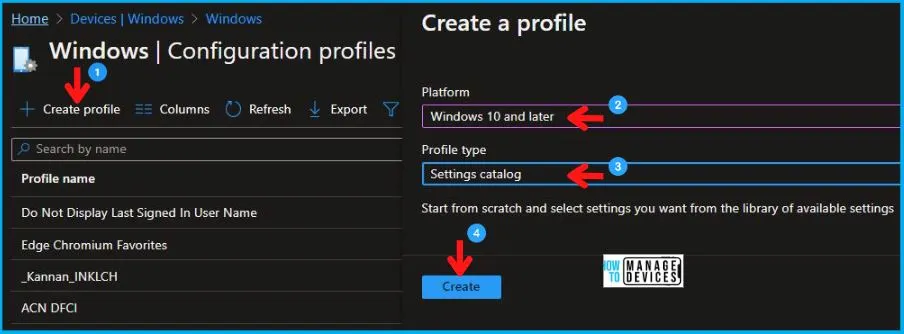
- Select Devices > Windows > Configuration profiles > Create a profile.
In Create Profile, Select Windows 10 and later in Platform, and Select Profile Type as Settings catalog. Click on the Create button.
| Platform | Profile Type |
|---|---|
| Windows 10 and later | Settings Catalog |
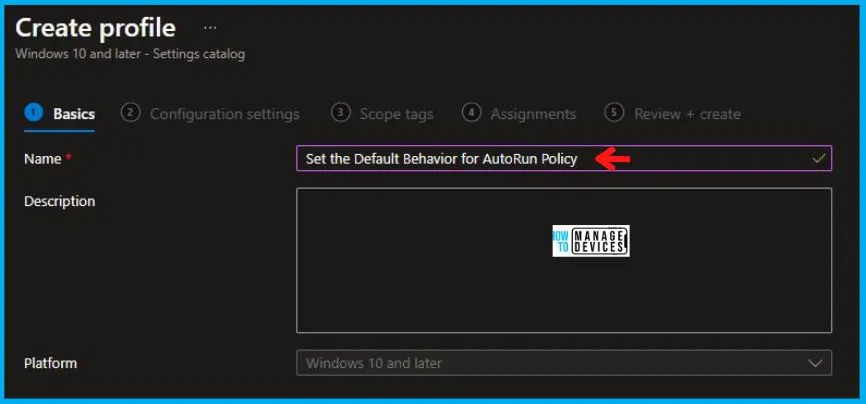
On the Basics tab pane, provide a name for the policy as “Set the Default Behavior for AutoRun Policy.” Optionally, you can enter a policy description and proceed by selecting “Next.“
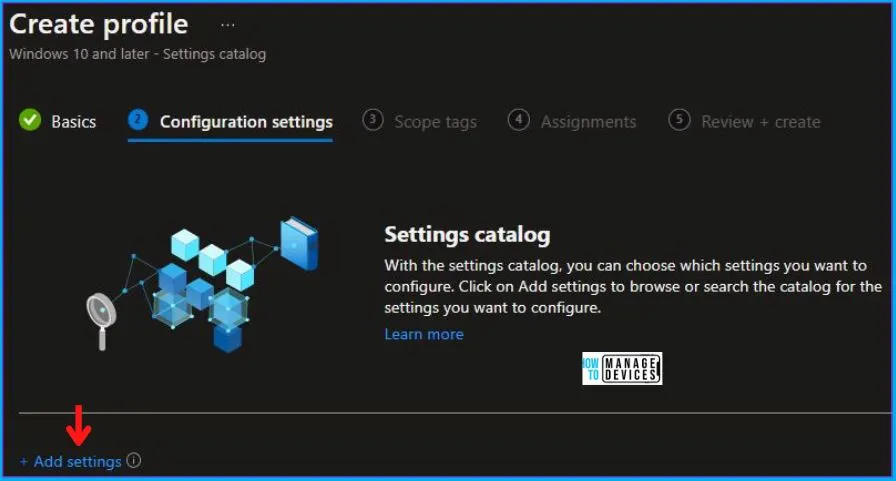
Now in Configuration Settings, click Add Settings to browse or search the catalog for the settings you want to configure.
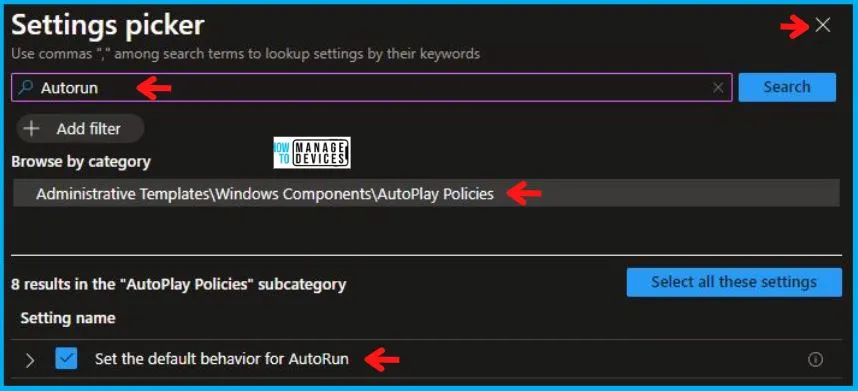
In the Settings Picker windows, search by the keyword Autorun, you’ll get the category Administrative Templates\System\Windows Components\AutoPlay Policies, and select this.
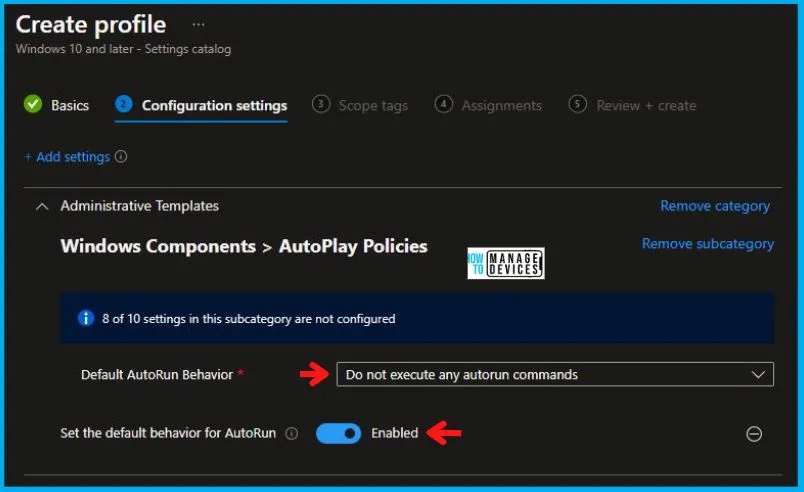
When you select the option stated above, you will see one option: Set the default behavior for AutoRun. After selecting your setting, click the cross mark at the right-hand corner, as shown below in the image.
In the Administrative Templates, we now have to set Set the default behavior for AutoRun to Enabled. After enabling, you will get one more option to choose, Default AutoRun Behavior. Here you need to select:
- Do not execute any autorun commands
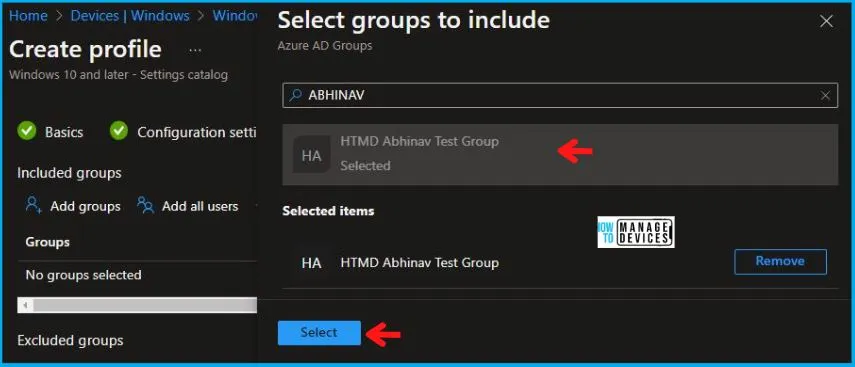
Using Scope tags, you can assign a tag to filter the profile to specific IT groups. One can add scope tags (if required) and click Next to continue. Now in Assignments, in Included Groups, you need to click on Add Groups, choose Select Groups to include one or more groups, and click Next to continue.
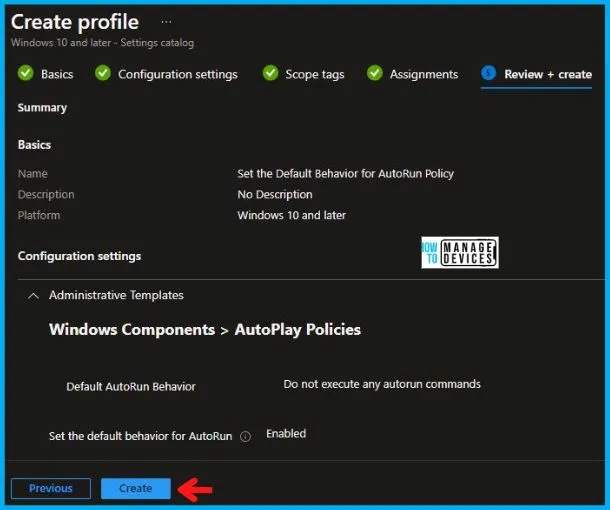
In the Review + Create tab, you need to review your settings. After clicking on Create, your changes are saved, and the profile is assigned.
Upon successfully creating the “Set the Default Behavior for AutoRun Policy,” notification will appear in the top right-hand corner, confirming the action. You can also verify the policy’s existence by navigating to the Configuration Profiles list, where it will be prominently displayed.
Your groups will receive your profile settings when the devices check in with the Intune service. The Policy applies to the device.
Intune Report for Set the Default Behavior for AutoRun Policy
From Intune Portal, you can view the Intune settings catalog profile report, which provides an overview of device configuration policies and deployment status.
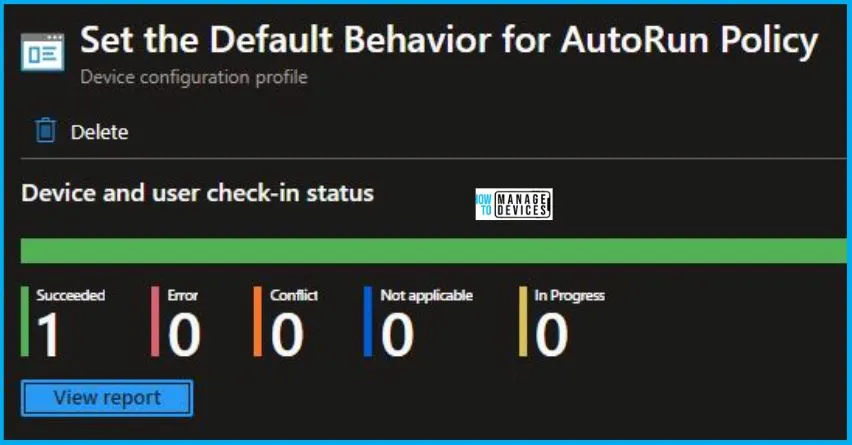
To monitor the implementation of the policy, you must choose the appropriate policy from the Configuration Profiles list. Here I choose Set the Default Behavior for AutoRun Policy from the list. By examining the status of device and user check-ins, you can ascertain the successful application of the policy. If you need more comprehensive details, you can click the “View Report” option to access supplementary insights. As you can see, it is successfully implemented on the targeted device.
Registry-Key Verification for SolicitedRemoteAssistance
To access the registry settings that hold the group policy configurations on a specific computer, you can execute “REGEDIT.exe” on the target computer and navigate to the precise registry path mentioned below where these settings are stored.
- Computer\HKEY_LOCAL_MACHINE\SOFTWARE\Microsoft\PolicyManager\providers\5B88AEF1-09E8-43BB-B144-7254ACBBDFF3E\default\Device\Autoplay
When you navigate the above path in the Registry Editor, you will find the registry key SetDefaultAutoRunBehavior. Refer to the table and image below.
| Registry Name | Data | Data Id | Value |
|---|---|---|---|
| SetDefaultAutoRunBehavior | Enabled | NoAutorun_Dropdown | 1 |

As you can confirm from the above image, the Registry key has been created, and we can confirm that the policy has been implemented on the target device successfully.
We are on WhatsApp. To get the latest step-by-step guides and news updates, Join our Channel. Click here – HTMD WhatsApp.
Author
Abhinav Rana is working as an SCCM Admin. He loves to help the community by sharing his knowledge. He is a B.Tech graduate in Information Technology.
