In this post, we will see a step-by-step guide for deploying FileZilla Client Using Intune MSI. In this Intune application deployment guide, we will use the MSI application to deploy FileZilla Client using Intune on Windows 10/11 client machines.
The FileZilla Client and FileZilla Server are free, open-source, cross-platform FTP programs. Clients are available for Windows, Linux, and macOS. Both the server and client support FTP and FTPS, and the client can also make SFTP connections.
FileZilla Server does not allow users to connect to other servers—it only allows connections in. FileZilla Client is an application that allows a user to connect to an FTP server. The client can connect to any number of FTP servers, and users can upload and download files using it.
The computers must be connected via a network and configured properly to transfer files via FTP. FTP services must be configured on servers, and clients must have FTP software installed on their computers.
Prepare Win32 App Installation Source for FileZilla Client
Preparing a Win32 app using the Microsoft Win32 Content Prep Tool is necessary before adding it to Microsoft Intune. To pre-process Windows classic (Win32) applications, you use the Microsoft Win32 Content Prep Tool.
Let’s first identify the command line to perform the silent installation or uninstallation of FileZilla Client. Download Download FileZilla Client (filezilla-project.org).
Silent Install Command Line for FileZilla Client
The internet helps you find an Install command for any application. In our case, we have to search for the install command for the FileZilla Client Application. After searching, we found that the install command for the FileZilla Client Application is FileZilla_3.62.2_setup.exe /S.
After successfully installing FileZilla Client using the install command in your test environment, you have to look for the Uninstall command. The Uninstall Command for FileZilla Client is “% ProgramFiles%FileZilla FTP Clientuninstall.exe” /S.
| Install Command | Uninstall Command |
|---|---|
| FileZilla_3.62.2_win64_setup.exe /S | “%ProgramFiles%\FileZilla FTP Client\uninstall.exe” /S |
Download the updated IntuneWinAppUtil.exe from GitHub. Run IntuneWinAppUtil.exe file Run as administrator.
- Please specify the source folder – Enter the folder that contains your application setup files. (For Example, C:\sources\FileZilla Client)
- Please specify the setup file – Enter the setup file name (such as setup.exe or setup.msi), for Example – FileZilla_3.62.2_win64-setup.exe
- Specify the output folder – Input the output folder to generate the .intunewin file.
- Do you want to specify catalog folder – Type N.
Note! Please wait a few minutes while running the Win32 Content Prep Tool. Once it generates the .intunewin file, the status indicates 100% at the bottom of the command prompt.
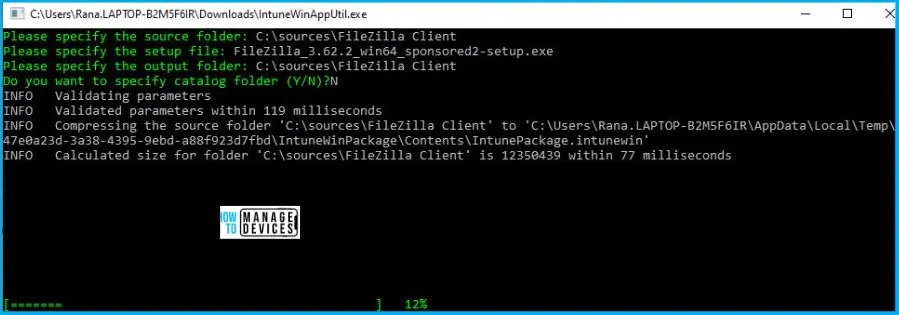
Once the process completes, Browse to the output folder (For Example, C:\sources\FileZilla Client) to collect the Intune Win32 app deployment file.
Deployment of FileZilla Client Using Intune
Let’s follow the steps below to upload the Intunewin file for deploying FileZilla Client to managed devices. Here’s how you can deploy FileZilla Client using Intune Portal.
- Sign in to the Microsoft Intune admin center https://endpoint.microsoft.com/ with appropriate access rights.
- Select Apps > All apps > Add, or navigate to Apps > Windows > Windows Apps.
- On the Select app type pane, select Windows app (Win32) under the Other app types and click Select.
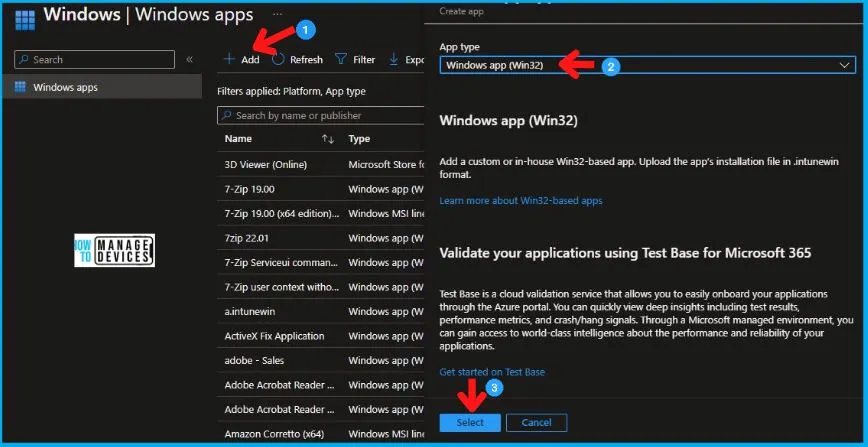
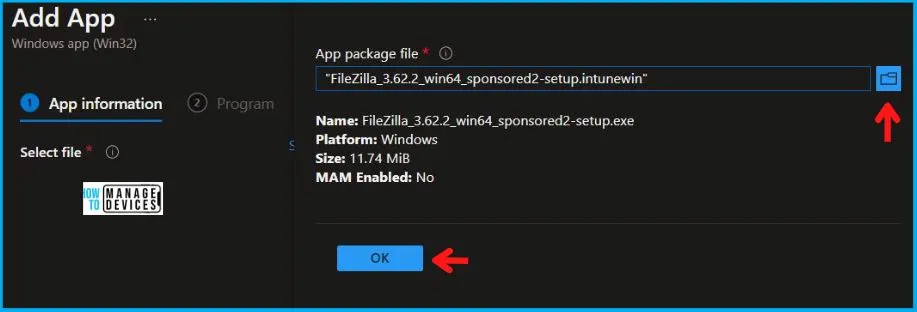
On the Add app pane, click Select app package file. Click the browse button. After that, select the prepared file with the extension .intunewin. Detailed information about the app appears. You can now select OK on the App package file pane when you’re done.
Enter the Name of the Windows App Win32 (For Example, FileZilla Client), and Enter the Description of the Windows App. Enter the Publisher name – FileZilla, and You may specify the additional app information here.
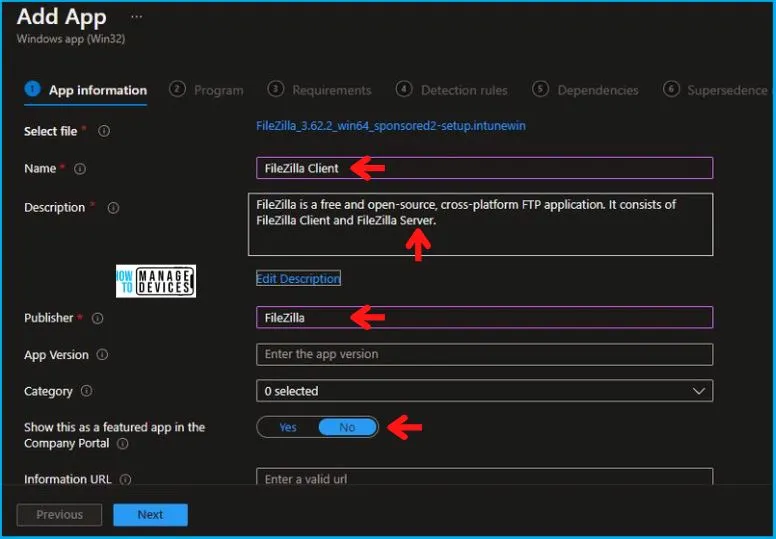
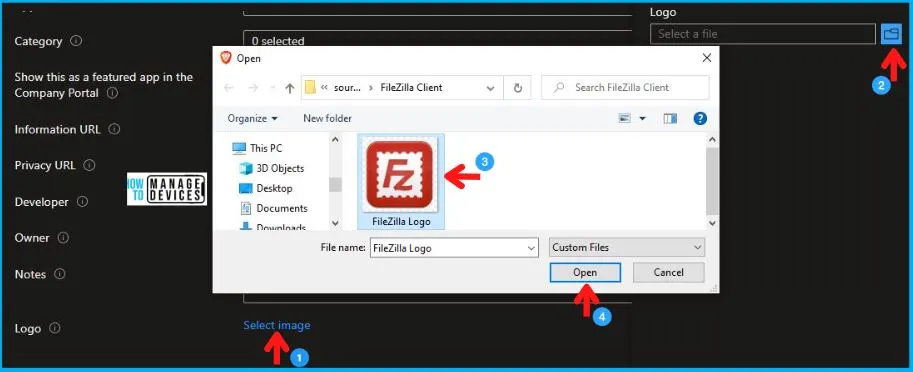
After entering the above details, you will scroll down to the same page and see the option to Upload an icon for the app. This icon is displayed with the app when users browse the company portal and click Next.
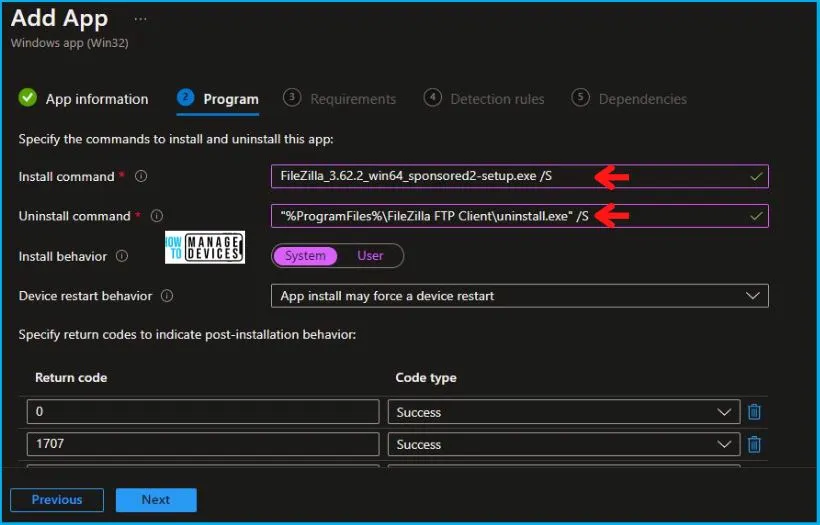
The most important part is to specify the commands. On the Program, configure the app installation and removal commands for the app:
- Install base: Add the complete installation command line to silent install FileZilla Client. (FileZilla_3.62.2_win64_setup.exe /S)
- Uninstall command: Add the uninstallation command line for FileZilla Client. (“%ProgramFiles%\FileZilla FTP Client\uninstall.exe” /S )
- Install behavior: Set the install behavior to System.
You can also specify the Device restart behavior and Post-installation behavior. Click Next to continue.
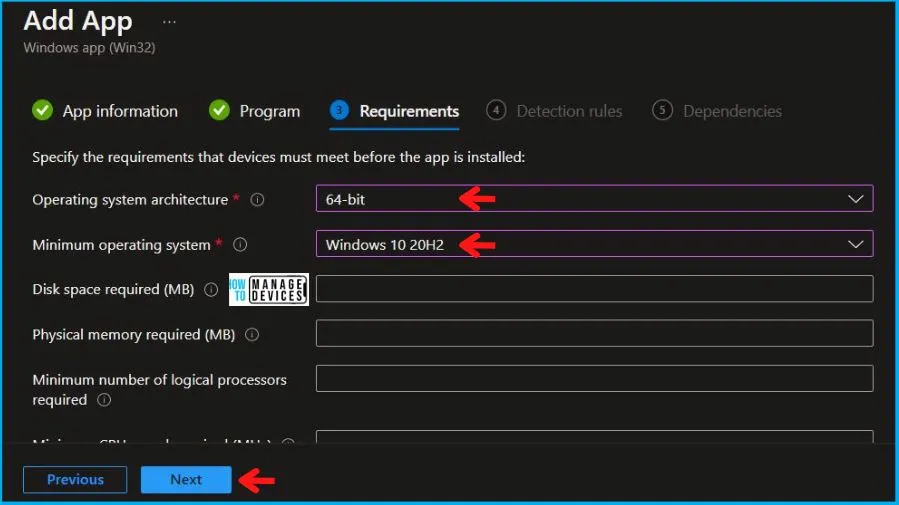
On the Requirements page, specify the mandatory requirements that devices must meet before installing the update and click Next.
- Operating system architecture: Choose the architectures needed to install FileZilla Client.
- Minimum operating system: Select the minimum operating system needed to install Pidgin.
There are some built-in and custom requirements rules when creating your Win32 application. Explore Intune Win32 App Requirement Rules.
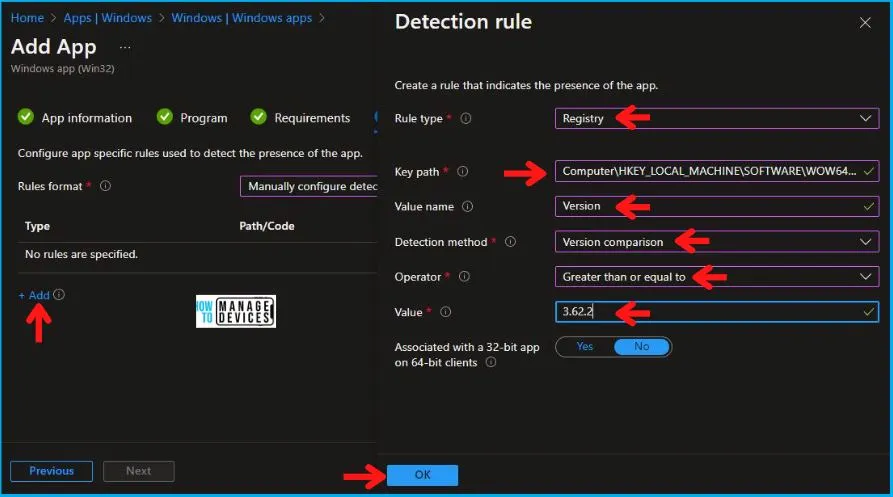
On the Detection rules pane, configure the rules to detect the presence of the app. You can choose to add multiple rules. Here I selected the Manually configure detection rules format. Click on Add button, and A popup will appear showing the Detection rule, select Registry.
Here you can check the registry path for the applications. Most apps are installed in the same location depending on the app architecture, and Detection Method for Intune Win32 App. For Example, Here, Check for registry value string equals.
After this, you have to check for the Detection Method. Here we try to use the Registry type for the detection method. For this, we need to go to Registry Editor, open the Find dialogue box, and search for Pidgin. The below path directly navigates you there.
Computer\HKEY_LOCAL_MACHINE\SOFTWARE\WOW6432Node\Microsoft\Windows\CurrentVersion\Uninstall\Pidgin
We double-click on the DisplayVersion and copied the Value data, DisplayVersion = 2.14.10.
| Rule Type | Key Path | Value Name | Detection Method | Operator | Value |
|---|---|---|---|---|---|
| Registry | Computer\HKEY_LOCAL_MACHINE\SOFTWARE\WOW6432Node\FileZilla Client | Version | Version Comparision | Greater than or equal to | 3.62.2 |
Check the details from the above table and enter as shown below carefully.
You can also specify app dependencies where the applications must be installed before your Win32 app can be installed. Also, in the scope tag section, you shall get an option to Configure scope tags for this Windows App Win32 application.
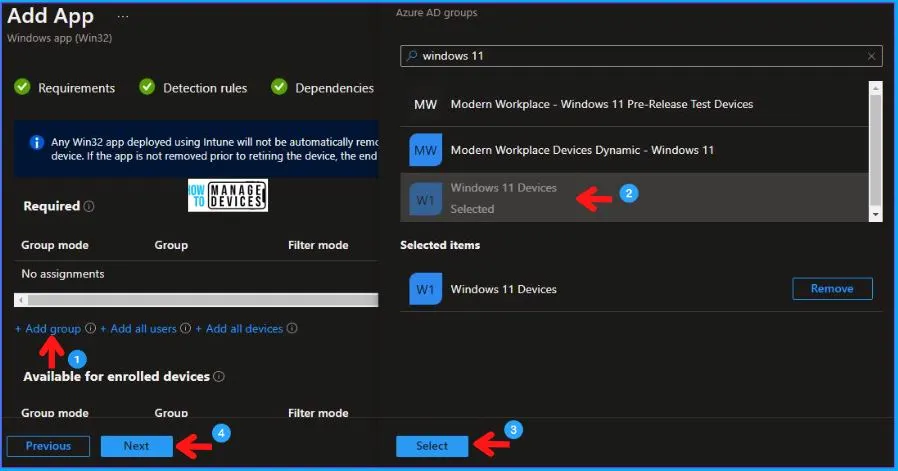
Under Assignments, In Included groups, click Add groups and then choose Select groups to include one or more groups to which you want to deploy the Windows Update. Click Next to continue.
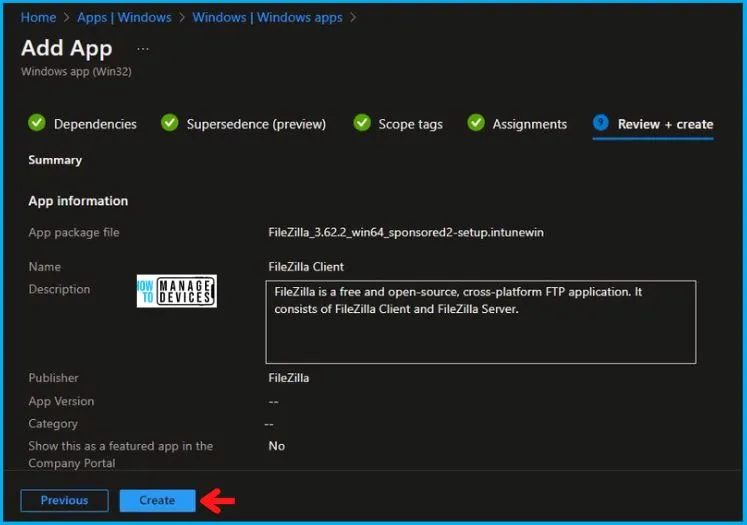
Now you will see all the details you provided during the application creation process. Review your settings and select Create to add the app to Intune.
Once you proceed to create, you will see the status Uploading is in progress, If you are thinking about how much time will it take to complete the upload? It depends on the size of the application and the speed of internet connectivity.
Please wait some time to complete the upload process, and you can check the progress by clicking on the Notification icon. Once the Intune package is uploaded and finished, you will get the status “Upload finished.”
- Intune Company Portal App for Windows 11 Android | Install and Uninstall
- 32 Privacy Settings for Windows 11 | 99 Intune Privacy Settings Policies
Author
Abhinav Rana is working as an SCCM Admin. He loves to help the community by sharing his knowledge. He is a B.Tech graduate in Information Technology.

Hye,
CUrrently Filezilla is stuck in downloading phase. Its taking more than an hour and still not installed.
Tried re-packagin application twice. Same issue…
I tried installing on my laptop manually, Filezilla is installed but i went to the registry Computer\HKEY_LOCAL_MACHINE\SOFTWARE\WOW6432Node\FileZilla Client | couldnot find FileZilla in there.
You can always put the .exe as detection method, or the folder location. So in this case: C:\Program Files\FileZilla FTP Client
I find that works better in most cases then putting the detection on the registry.
This setup does not install the Filezilla shortcut on the desktop
Anyone knows how to do this