Let’s learn about the Enable Flash Screen During Audio Notifications in Windows 11. This new feature helps users who need visual notifications. A notification is an announcement that allows notification or information.
Audio notifications are sounds that play when a device or application seeks to catch the user’s attention. They alert users to new texts, emails, calls, or other important events. Sometimes, audio notifications help remind us of important meetings.
Depending on the device or application, notification sounds can have a range of tones, volumes, and lengths. They might be brief and straightforward, like a beep or chime, or lengthy and complicated, like a tune or spoken message.
We can easily change sound notifications using shortcuts or the following method. This blog post will help you Flash screens during Audio Notifications in Windows 11.
- Turn On or Off USB Connection Notifications in Windows 11
- How to Turn Off Microsoft Edge Notifications
What are the Advantages of Audio Notification?

Audio Information is data or knowledge shared through sounds. This can be music, words spoken by people, or noises made by objects. We learn or understand something by listening.
1. It enhances memory retention
2. Accessible for visually impaired
3. Easy to understand
4. Portable and convenient
Enable Flash Screen During Audio Notifications in Windows 11
Notification sounds are an essential part of an operating system. Whenever a critical action is required, Windows, by default, provides feedback to the user through notifications. Different methods are used for this. The table below gives the details.
| Different Methods |
|---|
| 1. Using settings App |
| 2. Using the Control Panel |
| 3. Using Registry Editor |
1. Using Settings App
The first method for Flashing the Screen during Audio Notifications in Windows 11 is using the Settings app. To do this, follow the following steps.
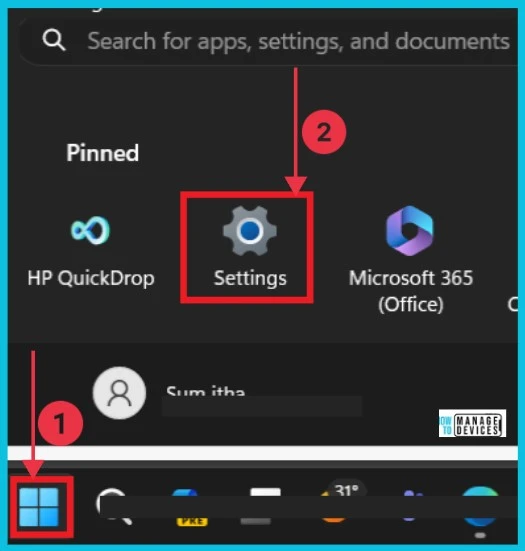
- Select Settings App from the Start button
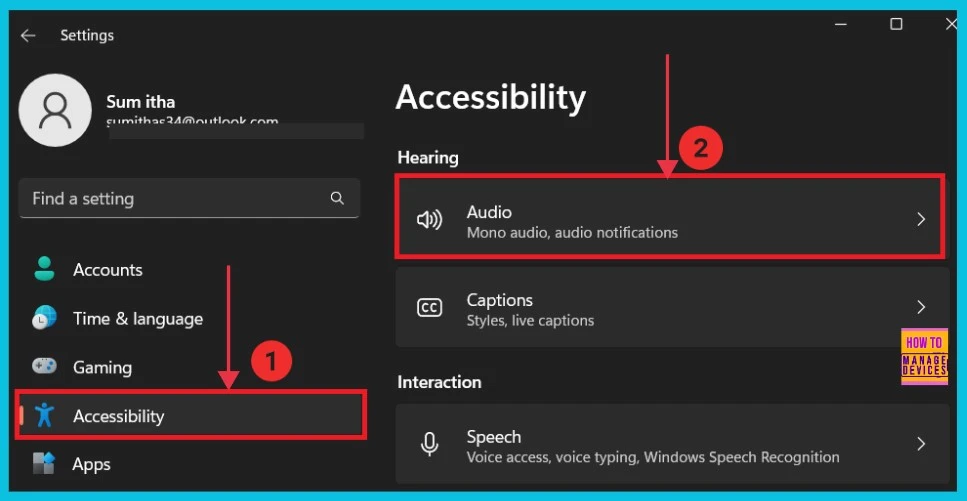
Select Accessibility from the settings app. Then click the Audio option on the right side; this option helps us with mono audio and audio notifications.
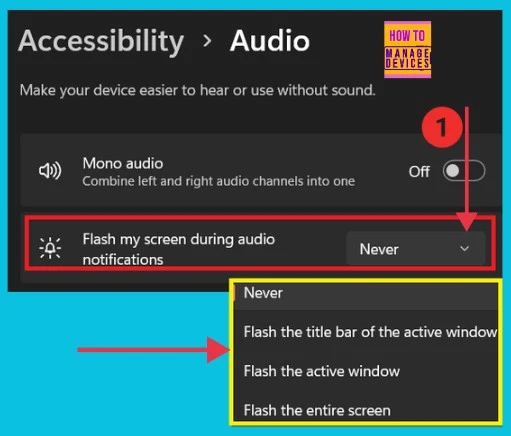
In the following screenshot, we can choose to “Flash my screen during audio“; here, we can click the dropdown arrow next to Never. Now, we can see the different options that we want to select. The table below shows the various options under Flash My Screen during audio.
| Flash My Screen during Audio Options |
|---|
| Never |
| Flash the title bar of the active window |
| Flash the active window |
| Flash the entire screen |
- Windows Update Troubleshooting using MoUxCoreWorker-Udiag and MoNotificationUx-Udiag
- Enable Disable Auto-restart Notifications for Windows Update in Windows 11
2. Using the Control Panel
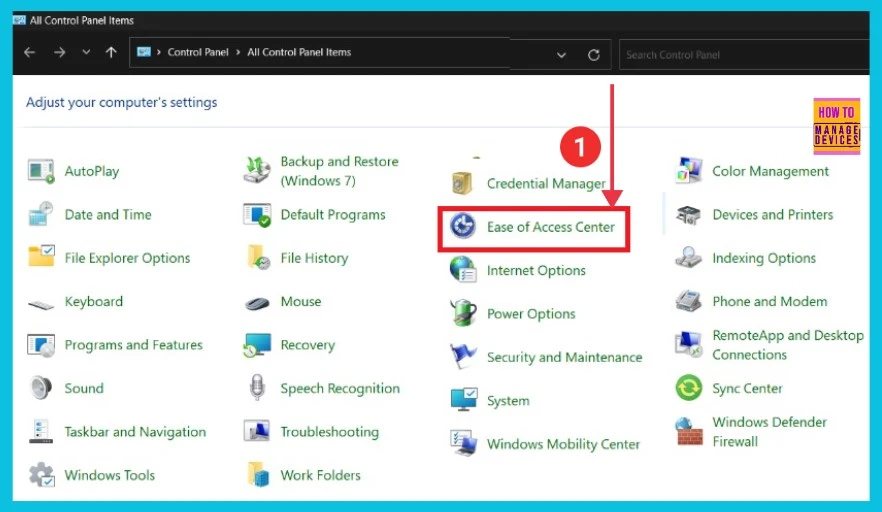
The second method for the flash screen during audio notification is a control panel. To follow this, select the start button and click Control Panel.
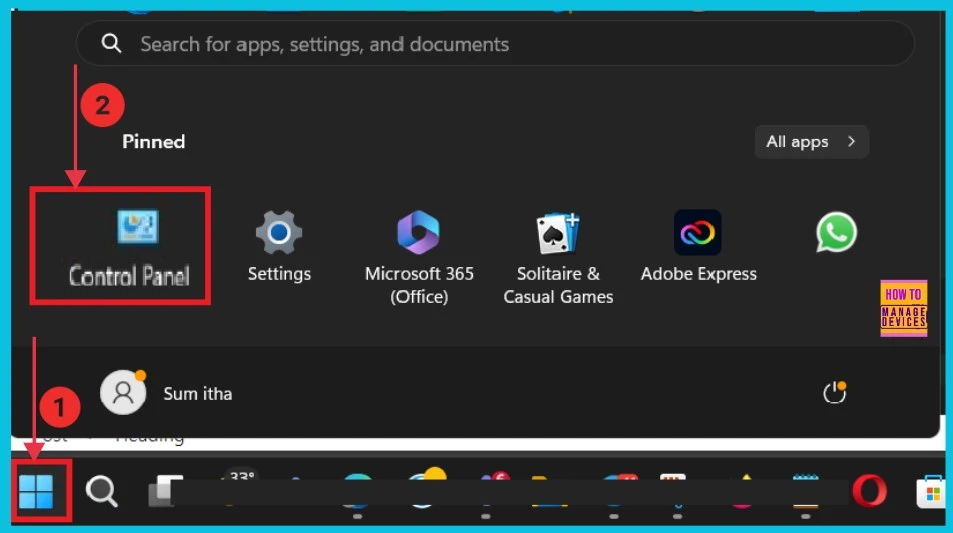
The below screenshot shows the screen after we click the Control Panel. Here, we select Ease of Access Center to continue.
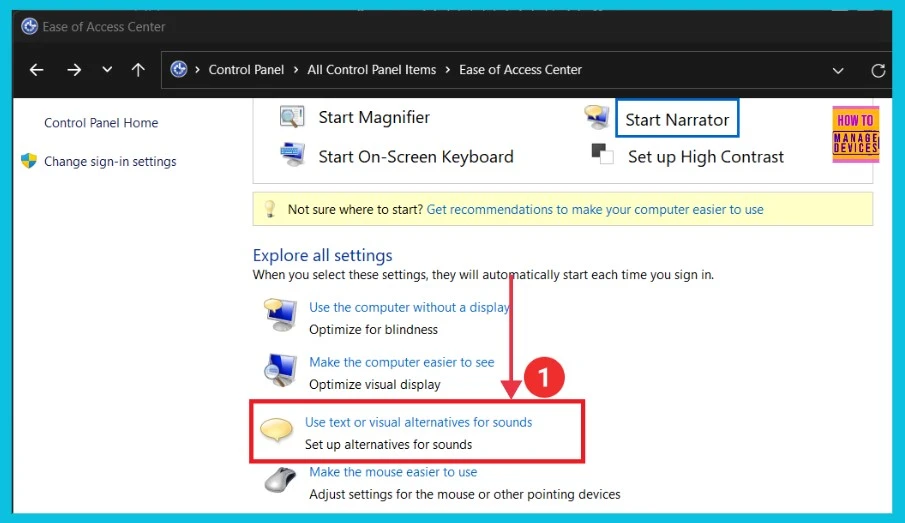
When we click the Ease of Access center, a new window opens. Here, we select Use text or visual alternative for sounds from the Explore all settings.
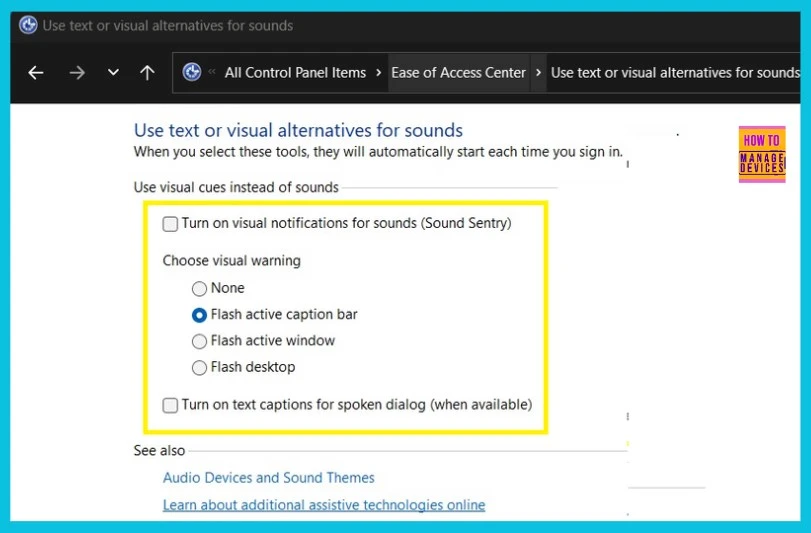
The screenshot below gives the options; it helps to change the options. Here, we can turn on Visual notifications for sounds and choose the options we want.
- Turn on visual notifications for sounds (Sound Sentry)
- Choose visual warning
- None
- Flash active caption bar
- Flash active window
- Flash Desktop
- Turn on text captions for spoken dialog (when available)
3. Using Registry Editor
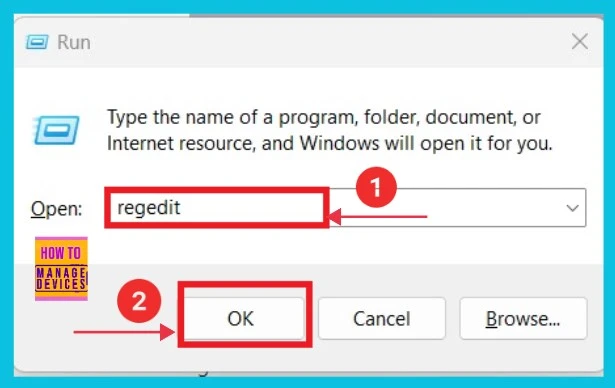
The last method for audio notification is using the Registry Editor. To open it, Press Windows+R. Then type regedit, then click OK.
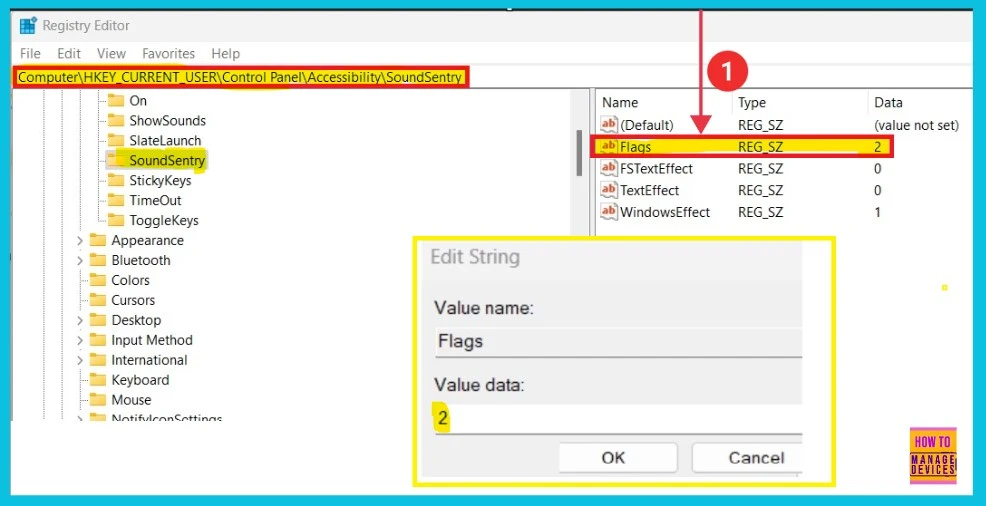
After opening the Registry Editor, we must provide a path to continue. Now we can see different options and soundsentry on the left side. Then click flags on the right side. We can see a small pop-up window for changing the flag value data. Then click ok and restart the computer.
- 0 = None
- 1 = Flash active title bar
- 2 = Flash active window
- 3 = Flash entire display
HKEY_CURRENT_USER\Control Panel\Accessibility\SoundSentry
We are on WhatsApp now. To get the latest step-by-step guides, news, and updates, Join our Channel. Click here – HTMD WhatsApp.
Author
Sumitha was introduced to the world of computers when she was very young. She loves to help users with their Windows 11 and related queries. She is here to share quick news, tips and tricks with Windows security.
