Hi, today we are discussing how to Install Frame App using Intune Enterprise App Catalog App. As you all know, installing an app through the Intune portal is very easy and efficient. With the help of the Enterprise App Catalog app, you will get free packaged installation policies.
Enterprise App Catalog Apps help IT administrators manage applications easily. The Enterprise App Catalog can be accessed directly from the Intune admin center, making it easy for administrators to find and add apps. It simplifies the app management process and reduces admin work.
It simplifies the app management process and reduces admin work. In previous posts, we published many app installation guides. Here, we show the Frame App installation. The Frame App by Nutanix Inc. is a service that lets users access virtual desktops and applications via a web browser or native app.
This application is easy to install because it doesn’t require a complex setup. In this post, we will look at installing the Frame App through the Enterprise App Catalog App in Intune.
Table of Contents
What is Frame App by Nutanix Inc?

While Frame was designed to be accessed from an HTML5-enabled browser, some end users may access their Frame environment from Frame App. Frame App provides additional features to organizations that aren’t available through a modern web browser.
How to Install Frame App using Intune Enterprise App Catalog App
Above, I mentioned a brief overview of the Frame App through the Enterprise App Catalog App in Intune. The Frame App by Nutanix Inc. is a tool that simplifies access to digital workspaces. It allows users to easily use Windows or Linux applications and desktops through web browsers like Chrome, Firefox, Edge, and Internet Explorer.
- How to Install Google Backup and Sync App with Intune Using Enterprise App Catalog App
- Deploy Windows Catalog App type using Intune Enterprise Application Catalog
- Best way to Install Bullzip PDF to Word App using Intune Enterprise App Catalog
How to Install Frame App
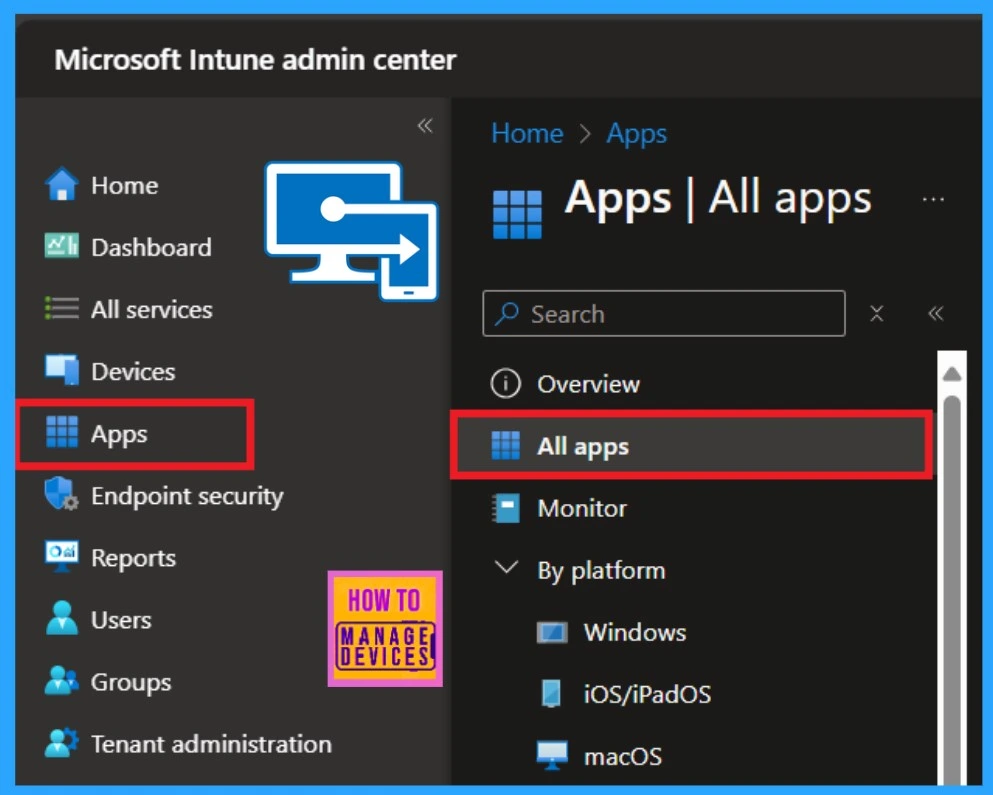
To install the Frame app, first log into the Microsoft Intune admin center with your credentials. After logging in, navigate to the “Apps” section and then select “All Apps”. In this section, you’ll find the option to choose the appropriate app type.
Select App Type
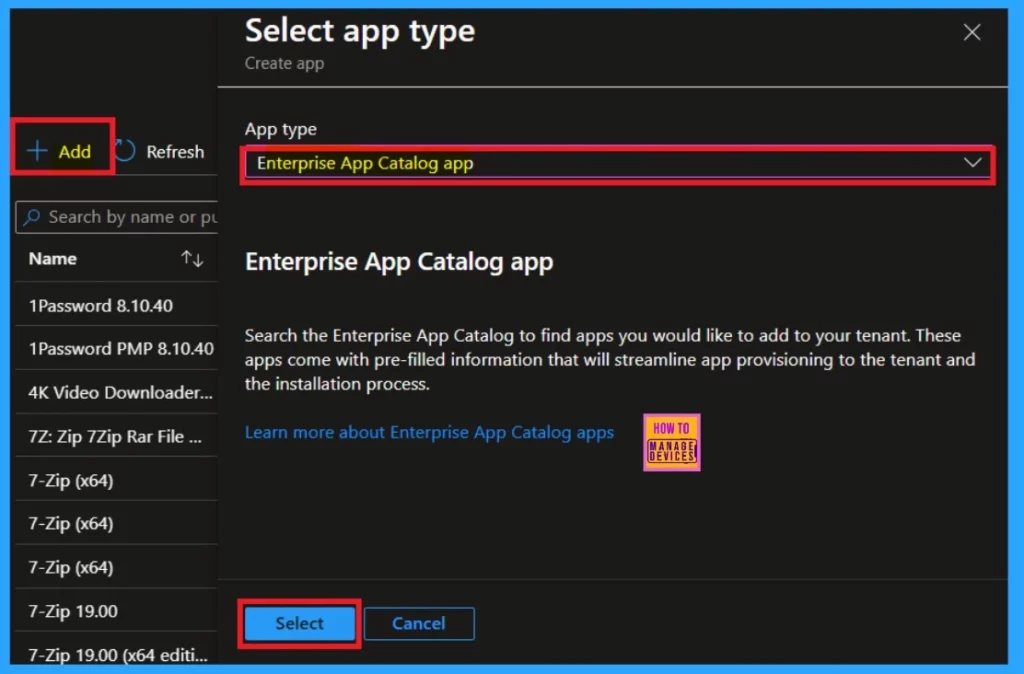
You are now in the process of selecting an app. The first step is to click on the “Add” option located at the top of the app section. After clicking on “Add,” you will be prompted to choose the type of app. You can easily select the enterprise app from the app catalog
- Click on the Select
App Information
The app information is the first step in dealing with that. First, when you are in the app information, you can see the ”select app” option click on that. You will get many app suggestions to install in your organization when you select the app option.
We have to install the frame app, right? So, search for the Frame app. When you find the Framework, click on it and click on the next option.
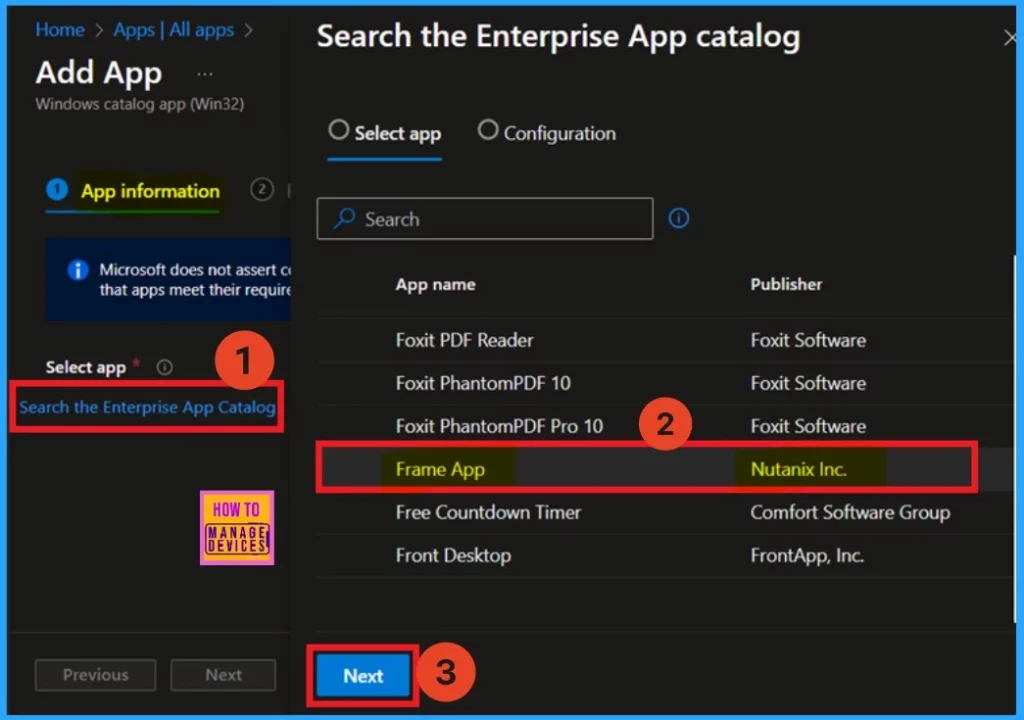
When you search the enterprise App section, you can see that 2 options are available: select app and configuration. You already know you can search for a particular app and select it from there.
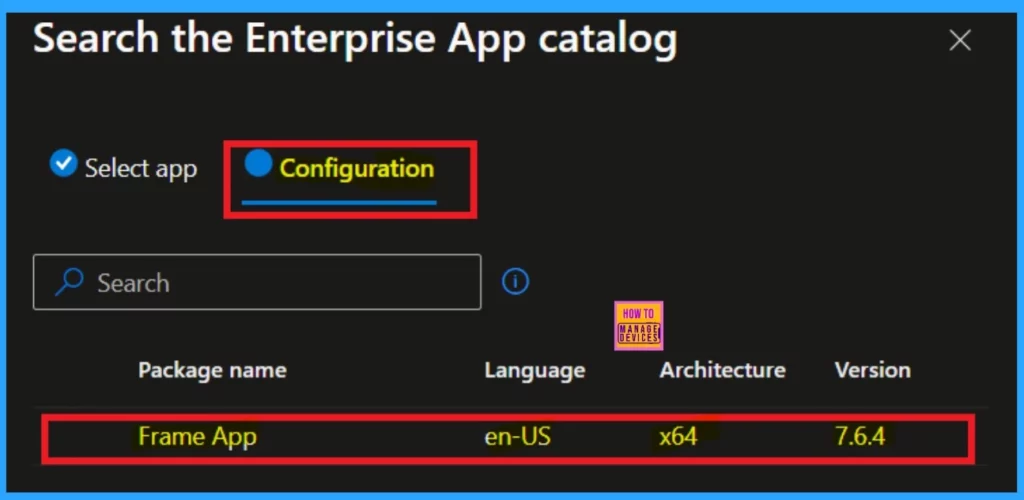
In the configuration tab, you will get the package name and language architecture version details. After selecting the version you want, you can click on the select option here.
- Here it only shows 1 version for the Frame app.
| Package Name | Language | Architecture | Version |
|---|---|---|---|
| Frame App | en-US | *64 | 7.6.4 |
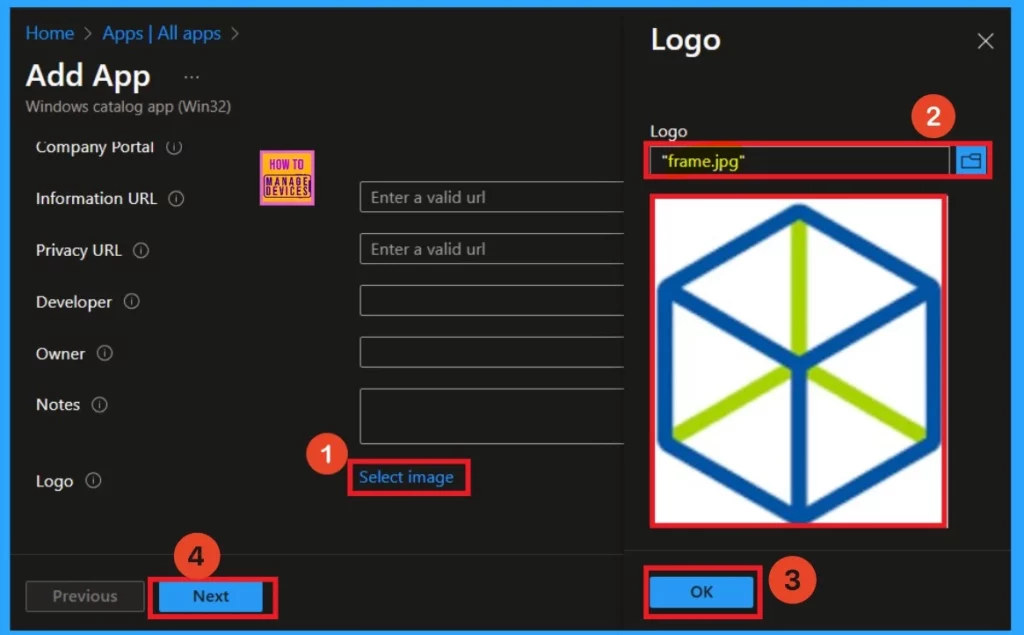
After selecting the app version, scroll down to the App information page. As you scroll down, you will find an option to select images. This option allows you to add a logo for your application. Before you create this policy (installing the app), make sure to download the logo.
When you click on the “Select Image” option, you can choose the image from your files. I uploaded the previously downloaded logo and then clicked the “OK” button. You will receive a notification confirming that the logo has been installed successfully.
- Now you can easily click “Next” to proceed further.
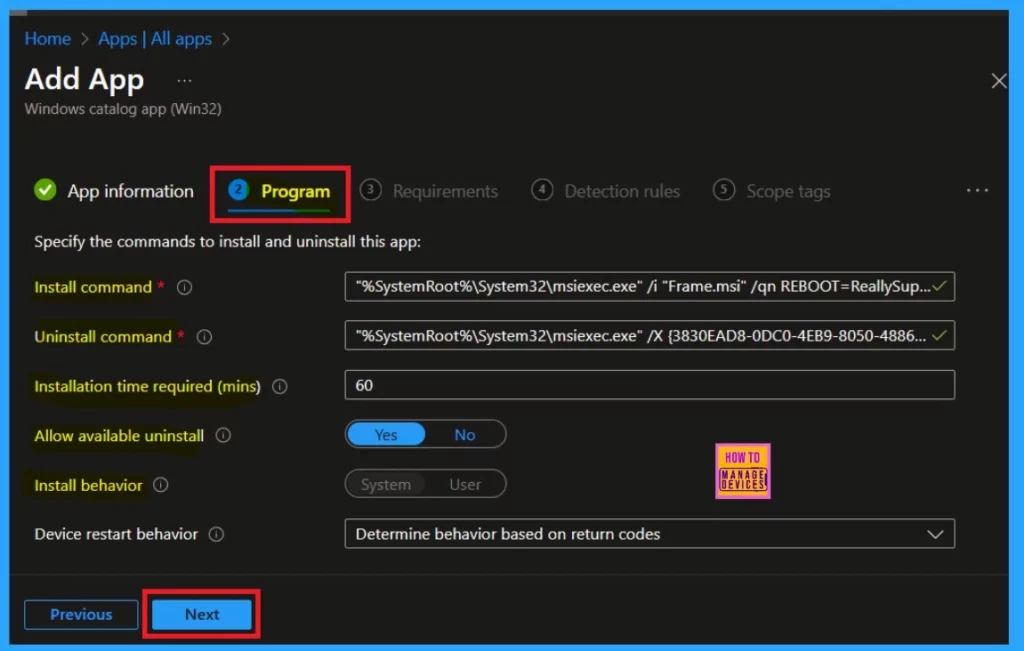
Program
After the app information tab, proceed to the Program tab. This tab will display the installed command, uninstall command, installation time, and other relevant details. In this section, you do not need to make any changes, as everything is already set for the app installation procedure. Simply click on the next option to continue.
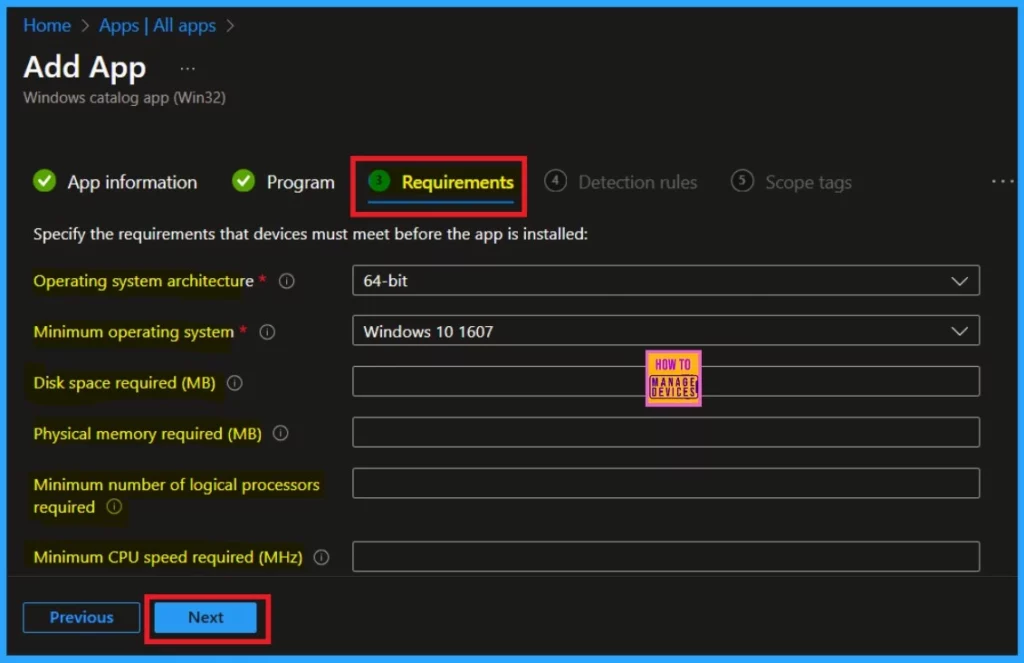
Requirements
After the “Program” tab, navigate to the “Requirements” section. In this section, specify the requirements that the device must meet before the app is installed. Details such as the operating system architecture and the minimum operating system version are displayed here and this tab section is are mandatory.
- Once you’ve completed this, you can click on the “Next” option.
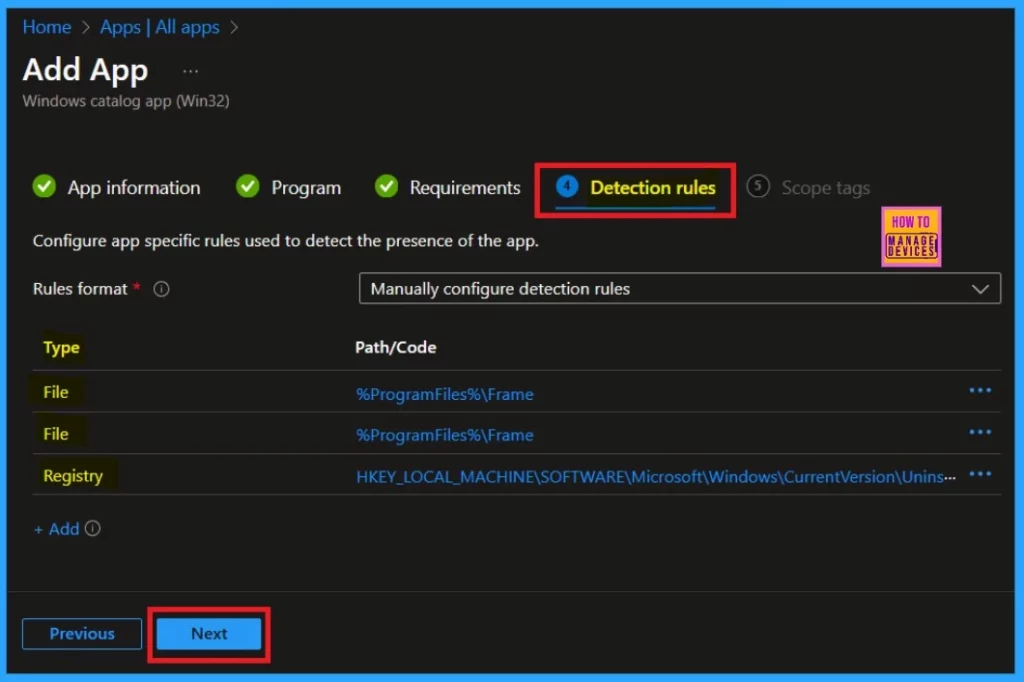
Detection Rule
The next step is the Detection rule. It allows you to Configure app-specific rules used to detect the app’s presence. This will show the rule format, registry path, and file path. This option is also mandatory; click on next.
Scope Tags
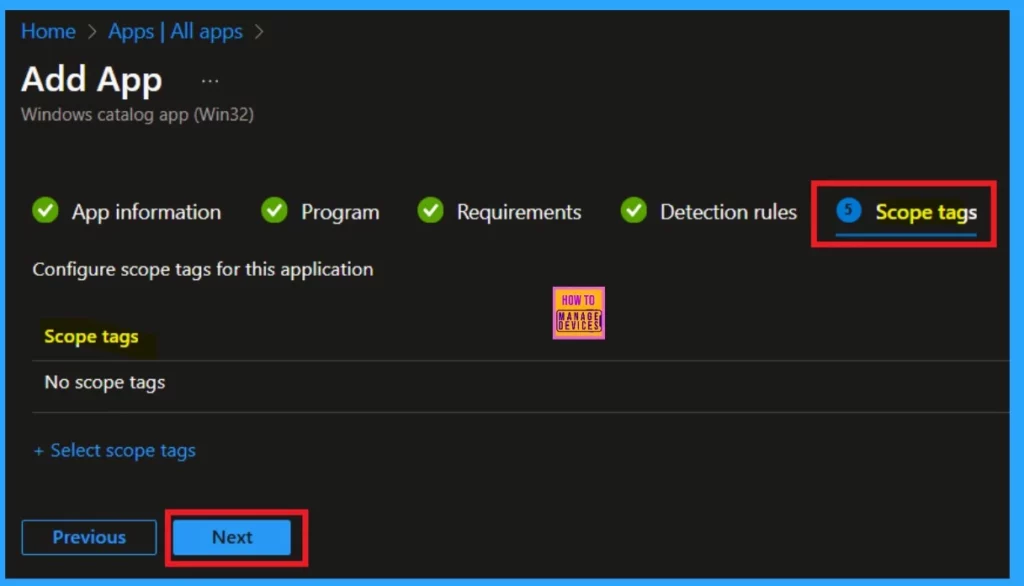
Scope tag is another section in this tab. You can add the scope to the app installation policy, but this section is not particularly necessary. Therefore, you can easily skip this step.
Assignments
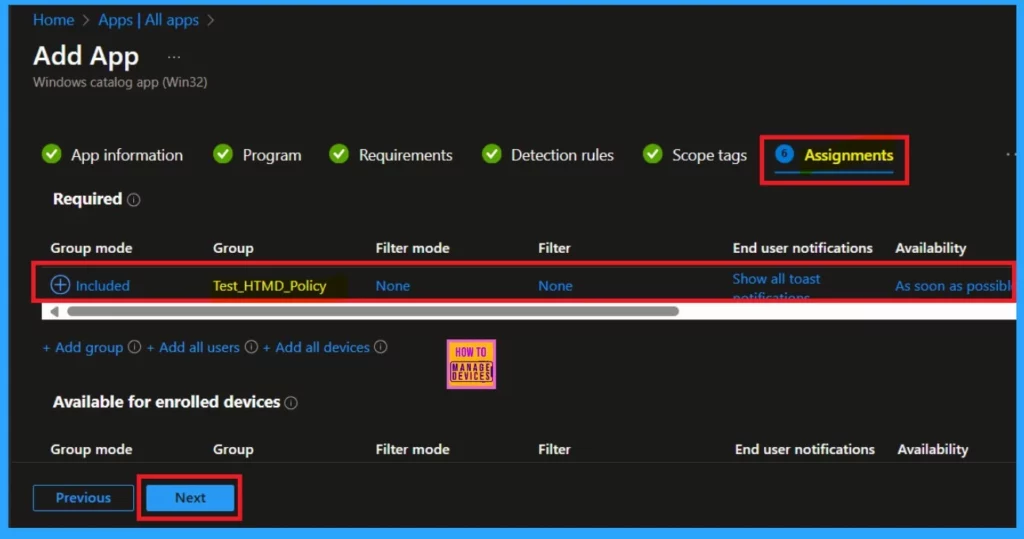
The next section is the assignment, and it is one of the most important parts of the process. Our goal is to install an app for a specific group or organization, right? In this section, you will be able to select the particular group for which you want to install the app. In the “Required” section, you will see an “Add Group” option. Click on that and select the group you want to assign the app to.
- After that, you can click “Next.”
Review +Create
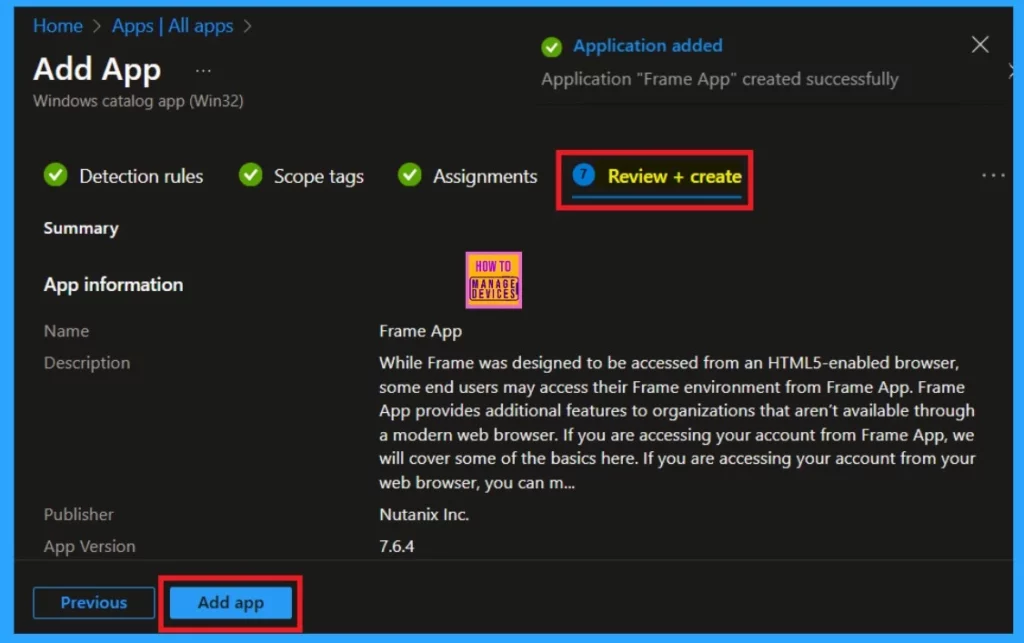
Reviewing + creating options is the final stage of the app installation process. Here, you can see a complete summary of all the information for app installation, including app details, detection rules, Scope tags, assignments, and more.
We know that enterprise app catalogue is a pre-packaged app type. You don’t need to change anything in the review + created section.
- Please click on the Add app option.
Monitoring Status
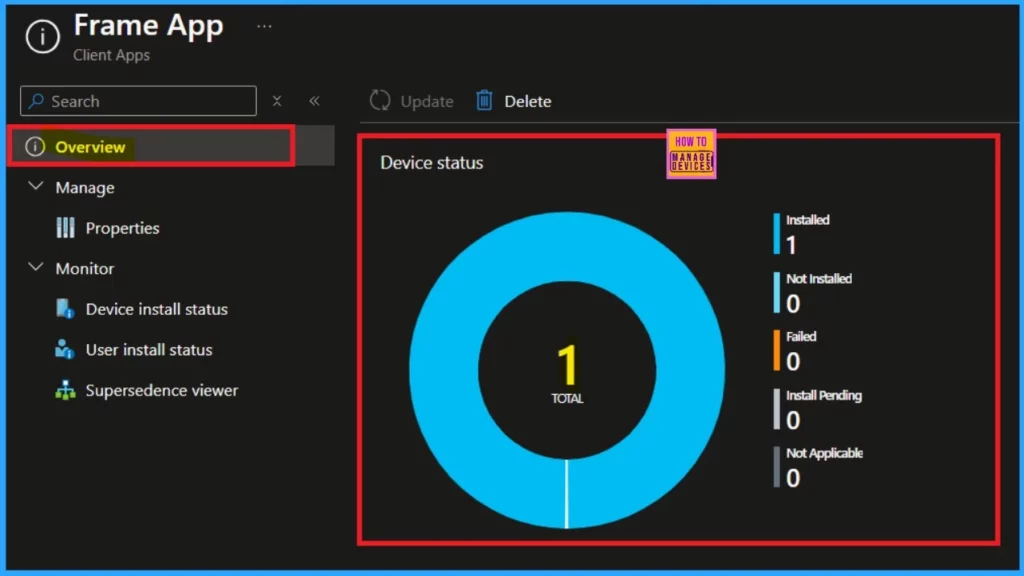
Monitoring the installation status is an important step, as it helps you determine whether your app is installed or not. Typically, it takes about 8 hours to install an app. To avoid this waiting period, you need to Sync the policy through the company portal. Doing this will reduce your waiting time. After that, you can navigate through the Apps Overview section.
- Check the below screenshot for better understanding.
End User Experience
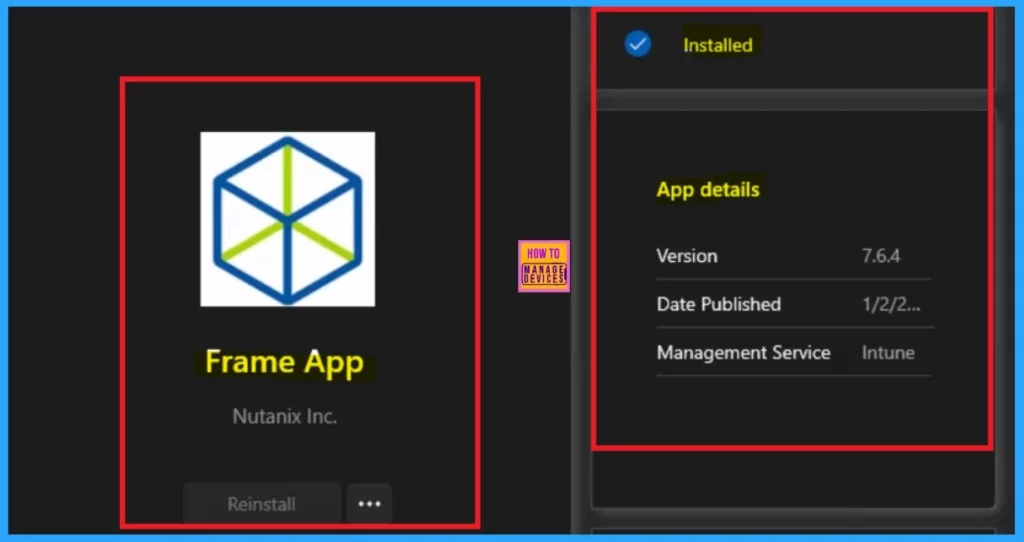
After completing the manual sync, the application will automatically be deployed to the workstation for installation verification. To confirm the installation, go to the company’s portal and select the downloads and updates section. Here, you can search for the Frame app. If you find the app listed, it has been successfully installed.
Need Further Assistance or Have Technical Questions?
Join the LinkedIn Page and Telegram group to get the latest step-by-step guides and news updates. Join our Meetup Page to participate in User group meetings. Also, Join the WhatsApp Community to get the latest news on Microsoft Technologies. We are there on Reddit as well.
Author
Anoop C Nair has been Microsoft MVP from 2015 onwards for 10 consecutive years! He is a Workplace Solution Architect with more than 22+ years of experience in Workplace technologies. He is also a Blogger, Speaker, and Local User Group Community leader. His primary focus is on Device Management technologies like SCCM and Intune. He writes about technologies like Intune, SCCM, Windows, Cloud PC, Windows, Entra, Microsoft Security, Career, etc.
