In this article, I will explain how to Install Google Chrome Extensions using the Microsoft Intune Policy. Google Chrome extensions are small software programs that add functionality to the Chrome browser. They are designed to enhance your browsing experience by providing additional features, improving productivity, and integrating with other web services.
Extensions can modify and extend the browser’s capability, providing a customized browsing experience. Here’s an overview of what they are, how they work, and how to use them.
Definition: Chrome extensions are add-ons that extend the capabilities of the Chrome browser. They can change the browser’s user interface, manage tabs, automate tasks, and interact with web pages.
Types of Extensions: Extensions can range from simple tools like ad blockers and password managers to complex applications that integrate with online services such as Grammarly, Google Drive, Evernote, or social media platforms.
Extensions are typically installed from the Chrome Web Store. Users can browse and search for extensions and install them. Here, we are going to use Intune to install them.

- Easier Way to Enable Local Security Authority Protection Mode with Intune
- Quick and Easy way to Turn on PowerShell Audit using Intune Policy
- Block Google Chrome Extensions from being Installed using Intune Policy
- Best Guide to Enable WinSCP Win32 App Supersedence and Auto-Update with Intune
Key Features of Google Chrome Extensions
Google Chrome Extensions offer various features that enhance the browser’s functionality and provide users with a more customized and efficient browsing experience. Here are the key features of Google Chrome Extensions.
| Category | Features |
|---|---|
| Customization | Extensions allow users to modify and personalize their browsing experience. For example, you can change the browser’s appearance, manage tabs efficiently, or add new functionalities. |
| Productivity | Tools like ad blockers, password managers, and note-taking apps help streamline online activities, making users more efficient. |
| Enhanced Functionality | Extensions can add new features to Chrome that are not available in the standard version. This includes integrations with other apps and services, language translators, and enhanced developer tools. |
| Security and Privacy | Security extensions help protect against phishing, malware, and other online threats. Privacy extensions can block trackers and ensure secure browsing. |
Create a Configuration Profile to Install Google Chrome Extensions with Intune
Follow the steps below to create a configuration profile for Installing Google Chrome Extensions with Intune. Then, sign in to the Microsoft Intune Admin Center using your administrator credentials.
- Navigate to Devices > Windows > Configuration Profiles
- Click on +Create > +New Policy

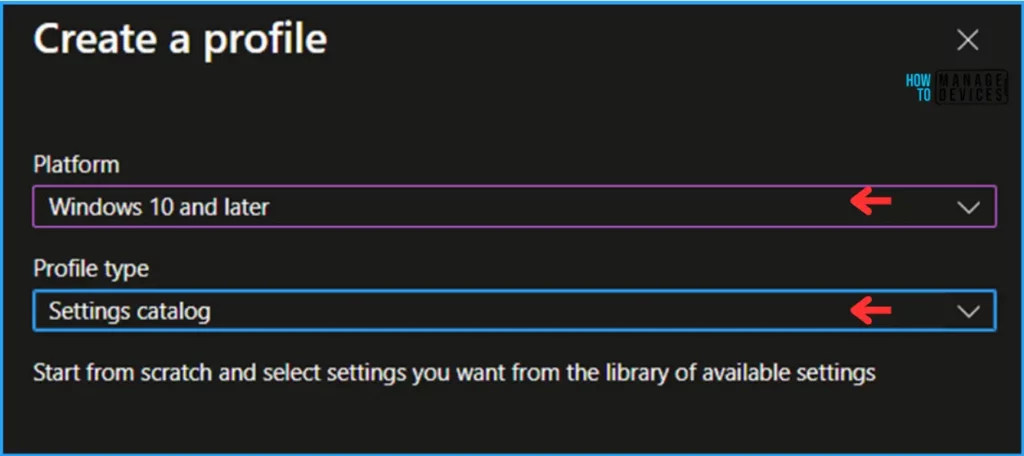
In the next step, we can begin a new Configuration Policy to Install Google Chrome Extensions from scratch by entering the following values from the drop-down and then clicking on Create.
- Platform: Windows 10 and later
- Profile type: Settings catalog
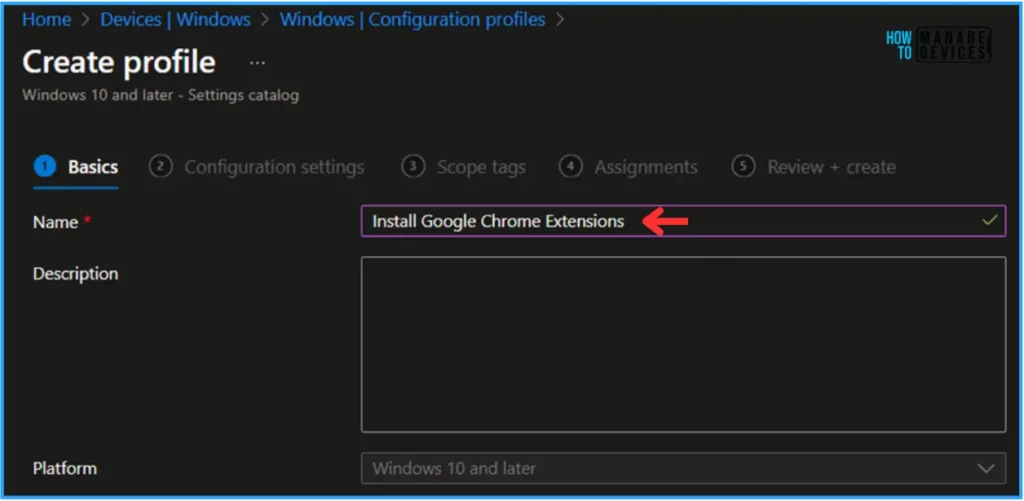
We can give the Configuration profile name “Install Google Chrome Extensions” on the Basics page and click Next.
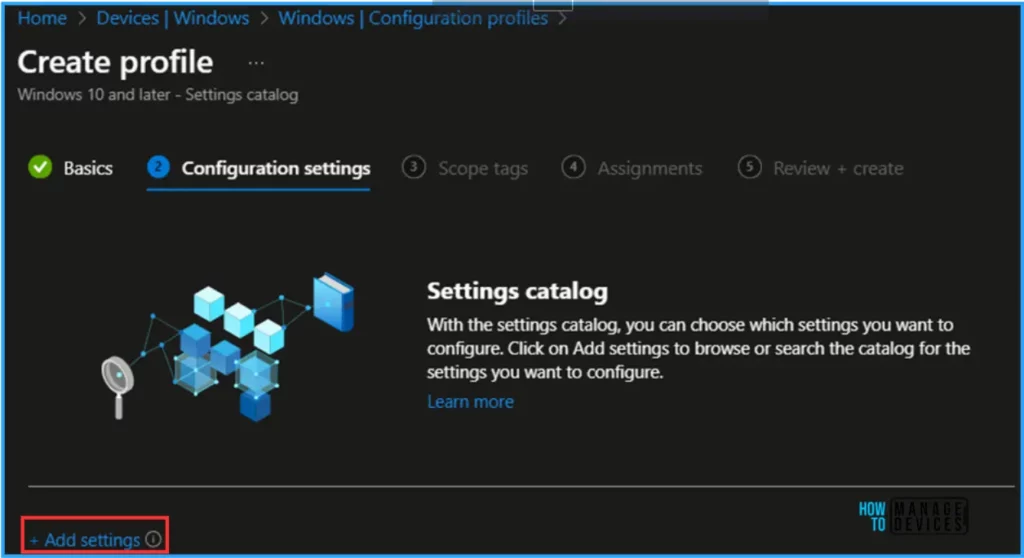
We can now add the required settings to the Configuration Settings pane. To do so, click on +Add settings in the bottom left corner of the page.
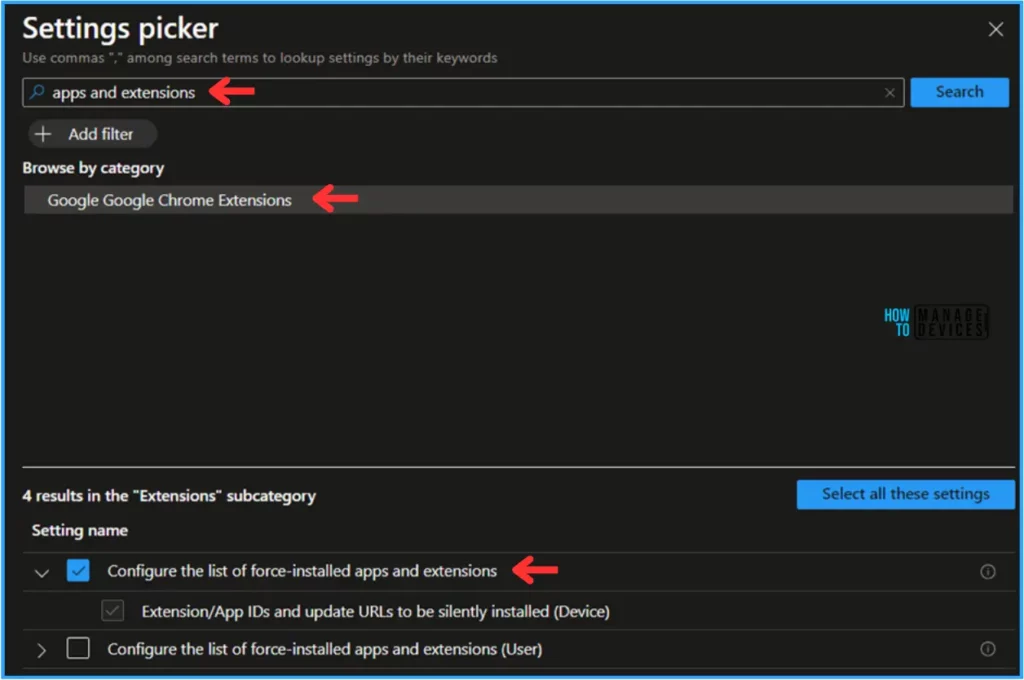
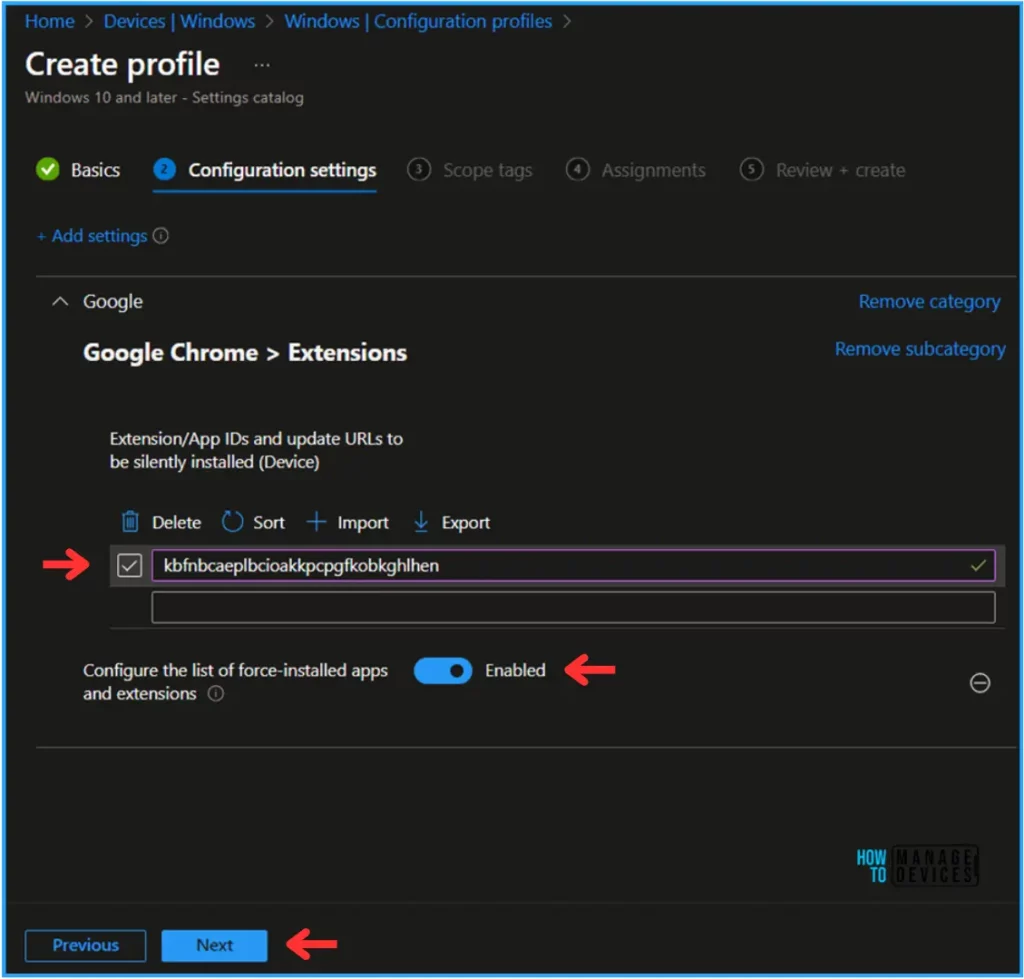
Search for “apps and extensions” as a keyword. This will help you find the correct policy based on our current needs. Now you can see the “Google Google Chrome Extensions” under the Browse by category. Click on that and pick the settings below.
- Configure the list of force-installed apps and extensions
- Extension/App IDs and update URLs to be silently installed (Device)
Important Tips
Setting the policy specifies a list of apps and extensions that install silently, without user interaction, and which users can’t uninstall or turn off. Permissions are granted implicitly, including for the enterprise.deviceAttributes and enterprise.platformKeys extension APIs. (These 2 APIs aren’t available to apps and extensions that aren’t force-installed.) Leaving the policy unset means no apps or extensions are autoinstalled, and users can uninstall any app or extension in Google Chrome.
This policy supersedes the ExtensionInstallBlocklist policy. If a previously force-installed app or extension is removed from this list, Google Chrome automatically uninstalls it. On Microsoft® Windows® instances, apps and extensions from outside the Chrome Web Store can only be forced installed if the instance is joined to a Microsoft® Active Directory® domain, running on Windows 10 Pro, or enrolled in Chrome Browser Cloud Management.
On macOS instances, apps and extensions from outside the Chrome Web Store can only be force installed if the instance is managed via MDM or joined to a domain via MCX. Users may alter an extension’s source code through developer tools, potentially rendering it dysfunctional. If this is a concern, set the DeveloperToolsDisabled policy. Each policy list item is a string containing an extension ID and, optionally, an “update” URL separated by a semicolon (;).
The extension ID is the 32-letter string found, for example, on chrome://extensions when in Developer mode. If specified, the “update” URL should point to an Update Manifest XML document ( https://developer.chrome.com/extensions/autoupdate ). By default, the Chrome Web Store’s update URL is used. The “update” URL set in this policy is only used for the initial installation; subsequent updates of the extension use the update URL in the extension’s manifest.
Note! This policy doesn’t apply to Incognito mode. Read about hosting extensions ( https://developer.chrome.com/extensions/hosting ). Example value: aaaaaaaaaaaaaaaaaaaaaaaaaaaaaaaa;https://clients2.google.com/service/update2/crx abcdefghijklmnopabcdefghijklmnop
The next option is to choose the “Extension/App IDs and update URLs to be silently installed (Device)“. This is our Extension App ID which we are trying to install now as a Google Chrome Extension. In this example, we are going to install Grammarly as an Extension. For that, go to the Google Chrome Web Store URL: https://chromewebstore.google.com/
When you search for Grammarly in “Search extensions and themes,” you will get Grammarly: AI Writing and Grammar Checker App, the URL with the App ID in the last.
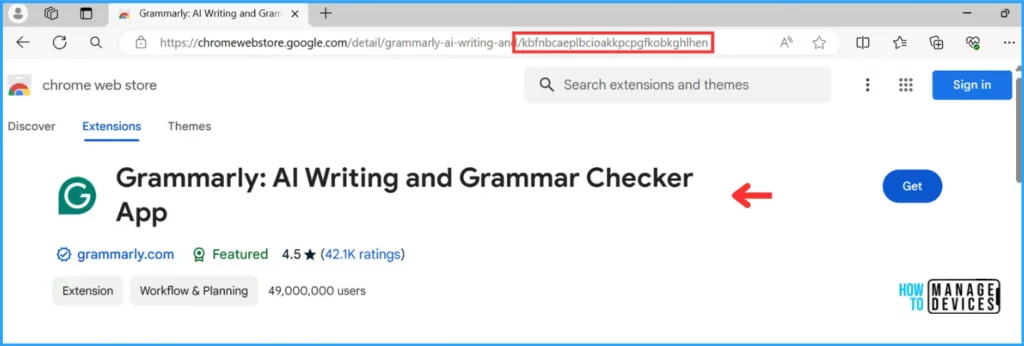
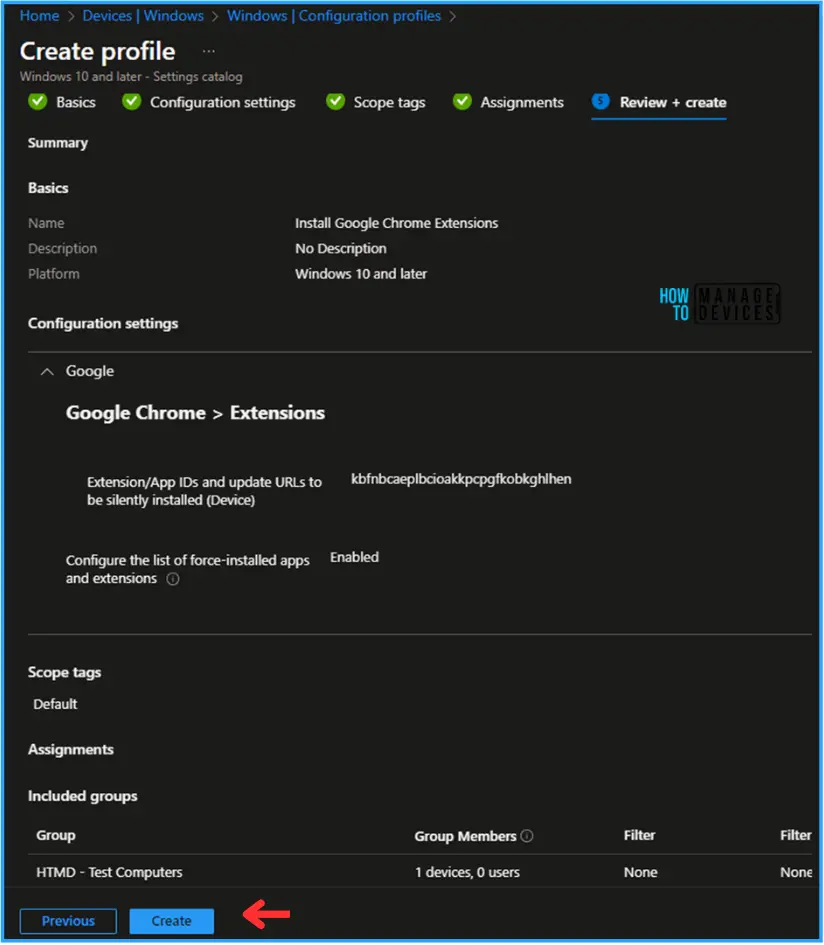
Close the Settings picker window and toggle the “Configure the list of force-installed apps and extensions” option as Enabled. (kbfnbcaeplbcioakkpcpgfkobkghlhen) Copy that add it under Extension/App IDs and update URLs to be silently installed (Device) as shown below and click on Next
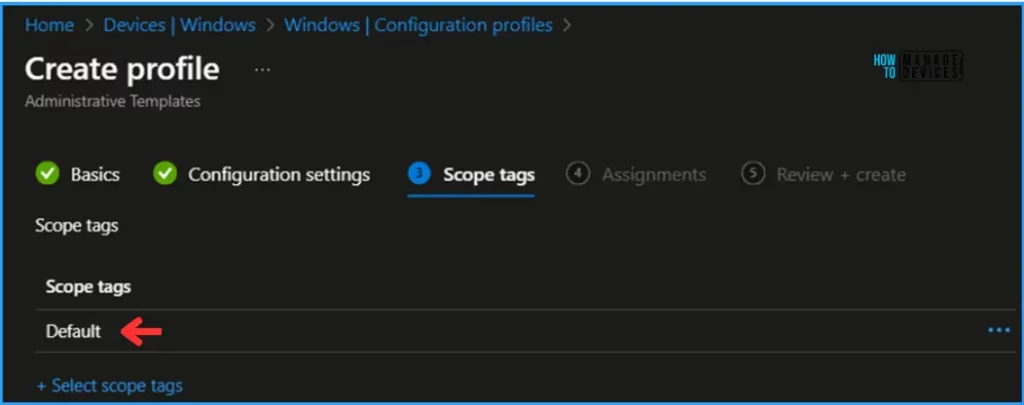
On the next page, Leave the Scope tags as Default. If you have any custom scope tags available, you can also select that for this deployment.
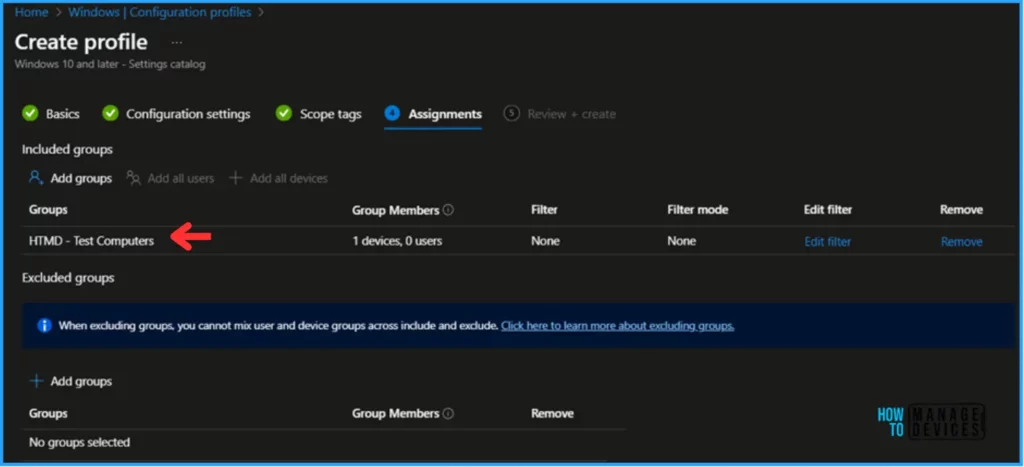
Click on Next and assign the configured policy to HTMD – Test Computers. In the Included Groups option, click on Add groups and select the required device group.
Please take a moment to carefully review all the settings you’ve defined for the “Install Google Chrome Extensions” policy on the “Review + Create” page. When you’re ready, select “Create” to implement the changes.
Monitor the Install Google Chrome Extensions in Intune
The Install Google Chrome Extension policy has been deployed to the Microsoft Entra ID group (HTMD – Test Computers). The policy will take effect as soon as possible once the device is synced.
- To monitor the policy deployment status from the Intune Portal, follow the below-mentioned steps.
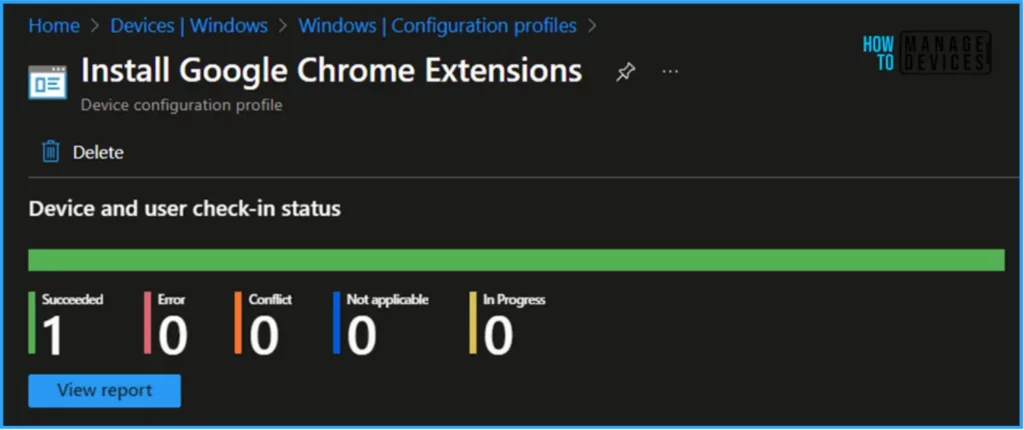
- Navigate to Devices > Windows > Configuration Profiles > Search for the “Install Google Chrome Extensions” policy.
- Under the Device and user check-in status, you can see the deployment status for the same
End User Experience – Install Google Chrome Extensions Policy
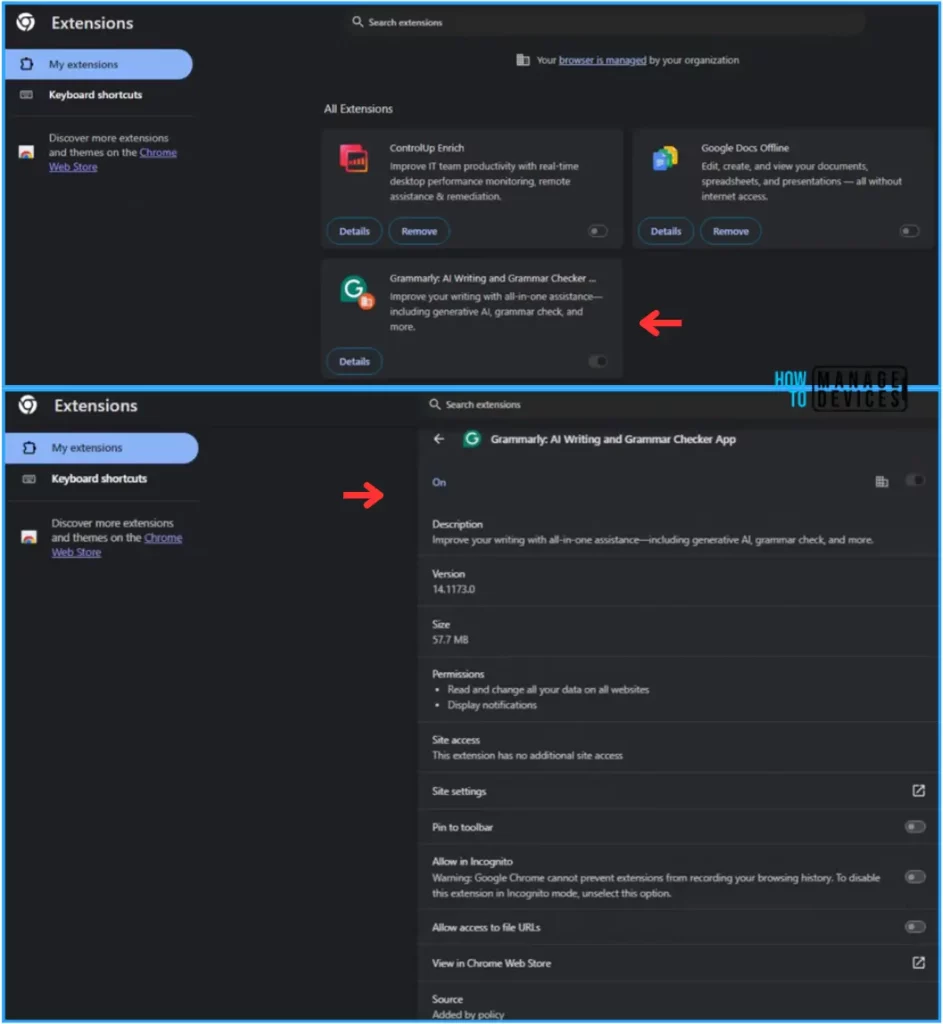
Now, we have to check whether the Install Google Chrome Extensions policy is working fine or not. Log in to one of the policy-targeted devices. Open the Google Chrome browser, click on the 3 dots in the top right corner, then navigate to Extensions > Manage Extensions; you can see the Grammarly Extension was successfully installed via Intune Policy.
I appreciate you taking the time to read my article. I’m excited to see you in the upcoming post. Continue to support the HTMD Community.
We are on WhatsApp now. To get the latest step-by-step guides, news, and updates, Join our Channel. Click here. HTMD WhatsApp.
Author
Vaishnav K has over 10+ years of experience in SCCM, Device Management, and Automation Solutions. He writes and imparts his knowledge about Microsoft Intune, Azure, PowerShell scripting, and automation. Check out his profile on LinkedIn.

Hello,
Nice article.
How I can’t proceed, if i want to deploy differents apps on differents profiles ?
If I create a profil for each app, I’ve a conflict between the policy.
Hi, Olivier Terny. Thanks for your feedback!
In this article, I tried to explain how to Install Google Chrome Extensions using the Intune Configuration profile.
The Example I took here is the Grammarly extension. In the same settings, you have the option to add multiple different Extension App IDs.
If you add an extension to different browsers, like Edge and Firefox, and all the Configuration Policy Settings themselves are different, there won’t be any conflict with Google Chrome.
Hello,
Great article! Only thing i may ask is there a way to force the extension to be pinned to the Google Chrome toolbar?
Thanks!
Hello, Thanks for the feedback. About Pinning, unfortunately, Chrome does not support a policy to pin extensions to the toolbar (as of now). Some extensions pin themselves automatically once force-installed.
Hello, Thanks for the feedback. About Pinning, unfortunately, Chrome does not support a policy to pin extensions to the toolbar (as of now). Some extensions pin themselves automatically once force-installed.
Hello
Does this ensure existing installed chrome extension will remain work as earlier? along with the one that we deployed via Intune.
Hi Chetan, Yes, It won’t impact any existing installed Chrome extensions.