Another day, Another Post, and today it’s about the Password Protected Screen Saver Policy today !!! Here is next in the Configuration Profiles segment. Today, the Password Protected Screen Saver Policy using Intune will be covered. Here also, we will make use of Configuration Profiles from Intune.
This setting determines if screen savers used on the computer will have password protection enabled. Enabling this setting will ensure that all screen savers are password protected while disabling it will prevent password protection from being set on any screen saver.
Additionally, this setting will disable the “Password protected” checkbox in the Screen Saver dialog found in the Personalization or Display Control Panel, preventing users from changing the password protection setting. If this setting is not configured, users will have the option to choose whether or not to set password protection on each screen saver.
To ensure password protection on a computer, enabling the “Enable Screen Saver” setting and specifying a timeout using the “Screen Saver Timeout” setting is recommended. Please note that the “Prevent changing Screen Saver” setting can be used to remove the Screen Saver dialog.
When the “Determines whether screen savers used on the computer are password protected” setting is enabled, it ensures that all screen savers activated on the computer will require a password to unlock or exit. This can be useful in environments where data security is a priority, as it adds an extra level of protection to prevent unauthorized access to the computer.
- Speed Up Windows Update Detection Frequency Policy Using Intune
- Boot Start Driver Initialization Policy Using Intune
Windows CSP Details CPL_Personalization_ScreenSaverIsSecure
Let’s go through Windows CSP Details for this Policy setting CPL_Personalization_ScreenSaverIsSecure. This setting relates to the use of screen savers on a computer, which are visual displays that activate after a period of inactivity to prevent screen burn-in and save energy. Screen savers can often be configured to require a password to unlock or exit, providing an additional layer of security to protect sensitive data.
CSP URI – ./User/Vendor/MSFT/Policy/Config/ADMX_ControlPanelDisplay/CPL_Personalization_ScreenSaverIsSecure

Password Protected Screen Saver Policy using Intune
To set Password protected screen saver Policy Using Intune, follow the steps stated below:
- Sign in to the Intune Admin Center portal https://intune.microsoft.com/.
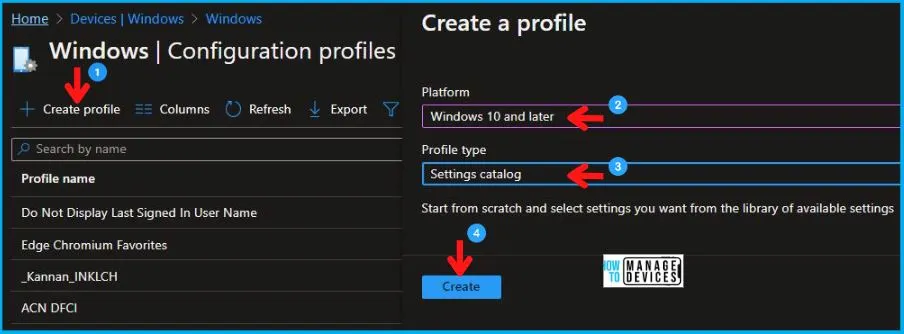
- Select Devices > Windows > Configuration profiles > Create a profile.
In Create Profile, Select Windows 10 and later in Platform, and Select Profile Type as Settings Catalog. Click on Create button.
| Platform | Profile Type |
|---|---|
| Windows 10 and later | Settings Catalog |
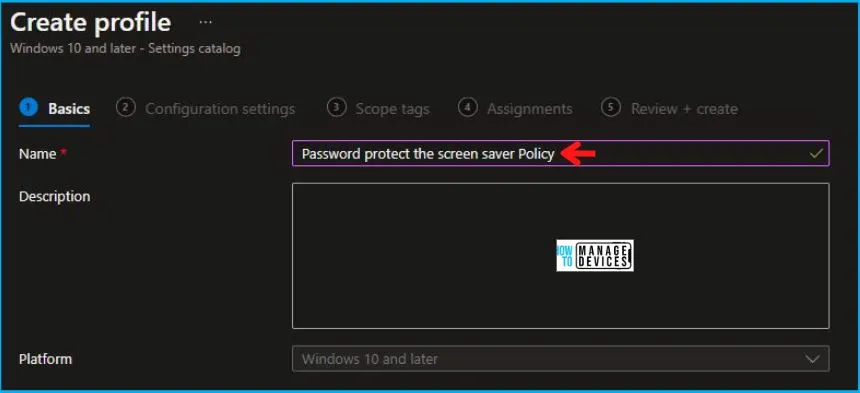
In the Basics tab pane, enter a name for the Policy as Password Protected Screen Saver Policy. You can enter the Description for the Policy if you want, then select Next.
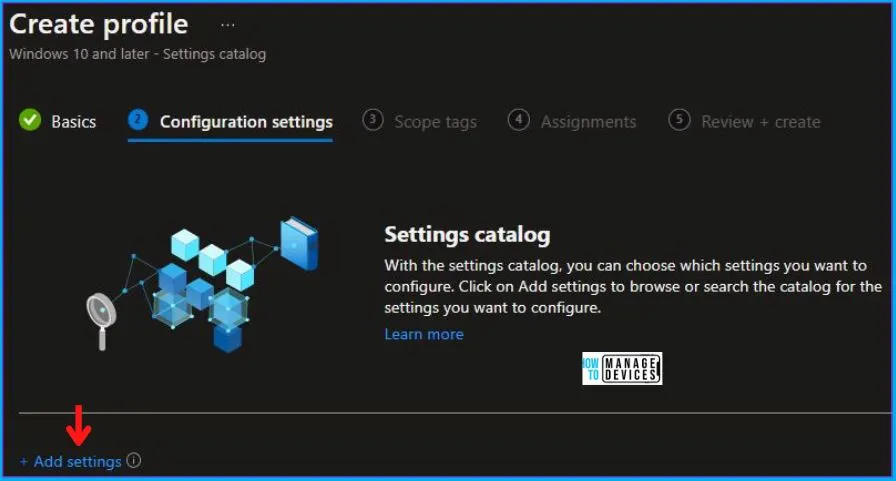
Now in Configuration settings, click Add Settings to browse or search the catalog for the settings you want to configure.
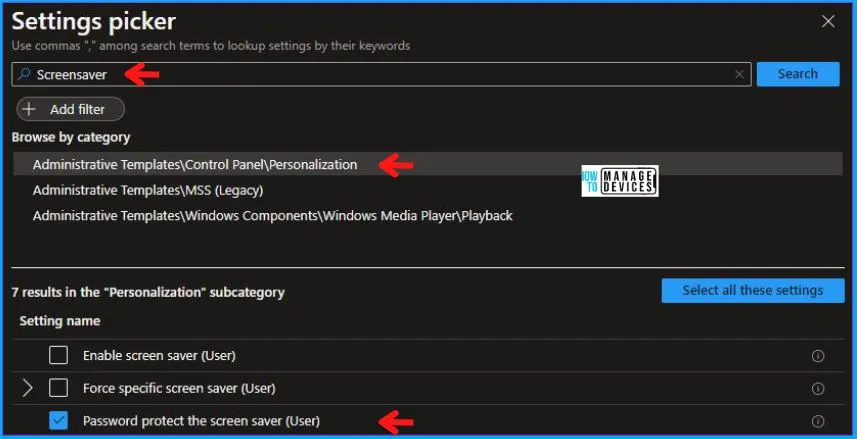
In the Settings Picker windows, search by the keyword Screensaver, you will see Administrative Templates\Control Panel\Personalization, and select this.
When you select the option as stated above, you will see one setting, which is Password Protect the screen saver (User). After selecting your setting, click the cross mark at the right-hand corner, as shown below.
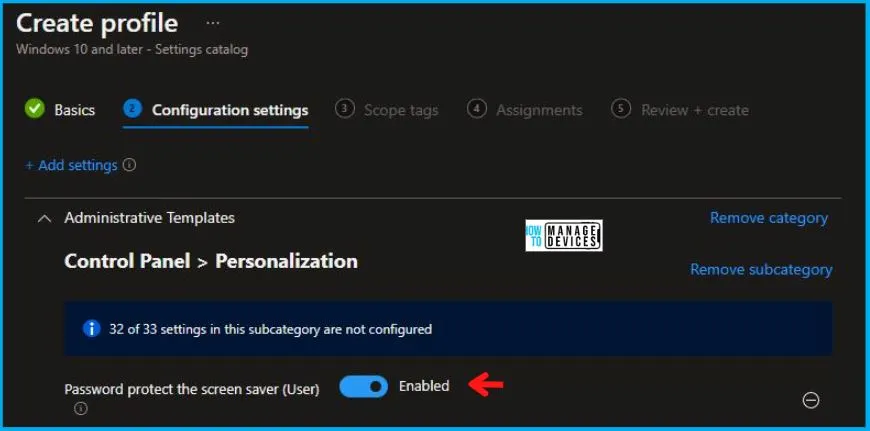
Now, in the Administrative Templates, enabled Password protect the screen saver (User) as shown below in the image.
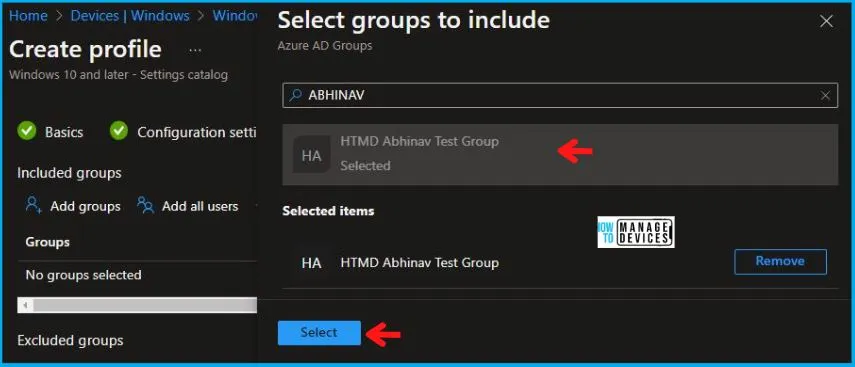
Using Scope tags, you can assign a tag to filter the profile to specific IT groups. One can add scope tags (if required) and click Next to continue. Now in Assignments, in Included Groups, you need to click on Add Groups, choose Select Groups to include one or more groups, and click Next to continue.
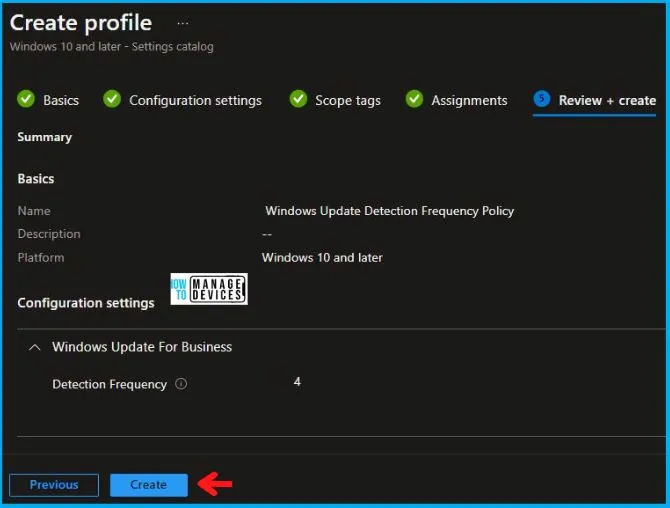
In the Review + Create tab, you need to review your settings. After clicking on Create, your changes are saved, and the profile is assigned.
A notification will appear automatically if you see it in the top right-hand corner. One can easily see that the “Password protected screen saver Policy” was created successfully. Also, if you check in the Configuration Profiles list, the Policy is visible there.
Your groups will receive your profile settings when the devices check in with the Intune service. The Policy applies to the device.
Intune Report for Password Protected Screen Saver Policy
From Intune Portal, you can view the Intune settings catalog profile report, which provides an overview of device configuration policies and deployment status.
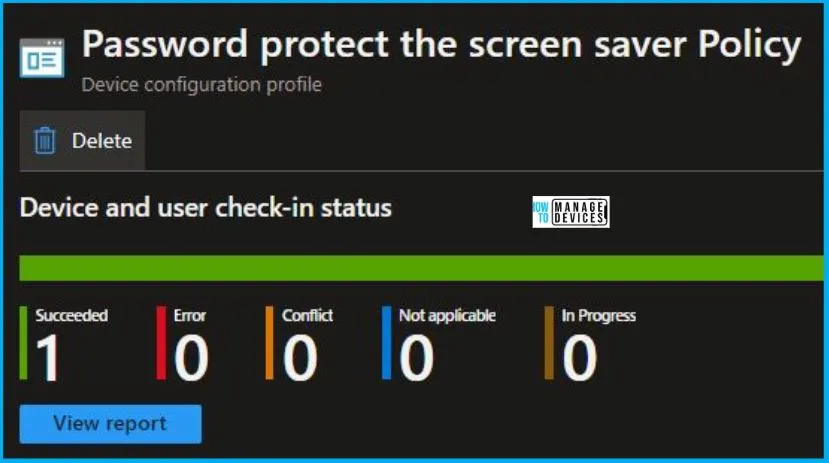
One needs to select the Policy from the list of Configuration Profiles, To monitor the policy assignment, and, here it’s been checked the device and user check-in status. If you click View Report, additional details are displayed. Let’s now check the results of the Password Protected Screen Saver Policy settings.
Intune MDM Event Log
String policy has been applied to Windows 10 or 11 devices can be indicated by Intune event ID 813 or 814. In addition, you can view the exact value of the Policy that is being applied to those devices. For this policy, it’s a string and event ID 814.
To confirm this, you can check the Event log path – Applications and Services Logs – Microsoft – Windows – Devicemanagement-Enterprise-Diagnostics-Provider – Admin.
The log states the following – MDM PolicyManager: Set policy string, Policy: (CPL_Personalization_ScreenSaverIsSecure), Area: (ADMX_ControlPanelDisplay), EnrollmentID requesting merge: (4009A089-4FBA-482B-9D17-9E5A8428CB98), Current User: (S-1-5-21-2901188661-3025291148-348095268-29601), String: (<enabled/>), Enrollment Type: (0xD), Scope: (0x1).
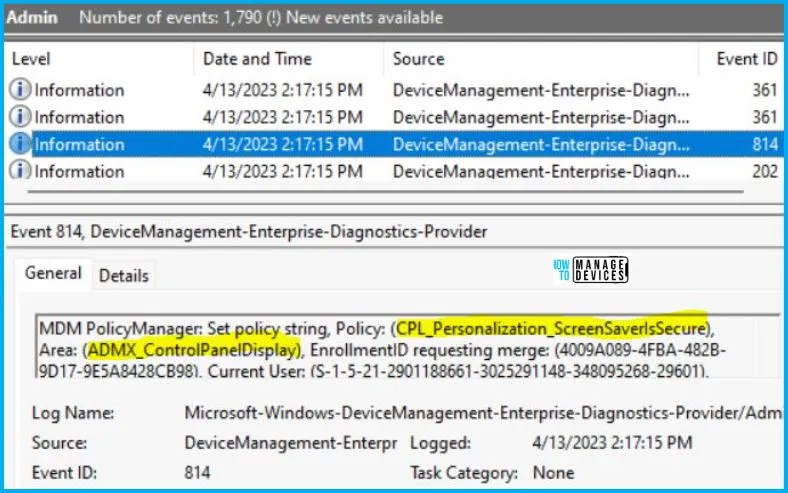
You will get some important information like Area and Enrollment ID that will help you detect the registry path after you look in the event viewer to log above. Please refer to the below table for this information:
| Area | Policy | String | Scoped | Event ID |
|---|---|---|---|---|
| ADMX_ControlPanelDisplay | CPL_Personalization_ScreenSaverIsSecure | Enabled | User | 814 |
Information from the above table of Password protected screen saver Policy Using Intune can be used to REGEDIT.exe on a target computer to view the registry settings that store group policy settings. These settings are located in the registry path.
- Computer\HKEY_LOCAL_MACHINE\SOFTWARE\Microsoft\PolicyManager\providers\4009A089-4FBA-482B-9D17-9E5A8428CB98\default\S-1-5-21-2901188661-3025291148-348095268-29601\ADMX_ControlPanelDisplay
When you navigate to the above path in the Registry Editor, you will find the registry key with the name CPL_Personalization_ScreenSaverIsSecure. Refer to the table and image below.
| Registry Name | Value |
|---|---|
| CPL_Personalization_ScreenSaverIsSecure | Enabled |

Author
Abhinav Rana is working as an SCCM Admin. He loves to help the community by sharing his knowledge. He is a B.Tech graduate in Information Technology.

