In this post, we will learn how to Rename the Guest Account Name using Intune. Also, we will set Guest Account Status as disabled for Windows 11. There are various options to do within Intune itself, but here we are making use of the Setting Catalog.
The built-in local guest account is another well-known name among attackers. It is recommended that you rename this account to something else that does not seem to indicate its purpose. Renaming the account is still recommended even if you disable it, as this will provide extra security.
Almost all computers running Windows 2000 or newer come with a Guest account. And attackers make use of this guest account for unethical activities. And if you rename this built-in guest account, it makes it slightly harder for unauthorized persons to guess this privileged user name and password combination if you rename this account.
Today we will make use of Configuration Profiles in Intune to achieve this task of Renaming the built-in Guest Account name and also set its status as disabled.
- Intune Windows 11 CIS Benchmarks is Available for Download Now
- Set Do Not Track for Browsing Activity In Edge Using Intune
Rename the Guest Account Name Using Intune
Follow the steps stated below for Renaming the built-in Guest Account and set its status as Disabled using Intune:
- Sign in to the Endpoint Manager Intune portal https://intune.microsoft.com/
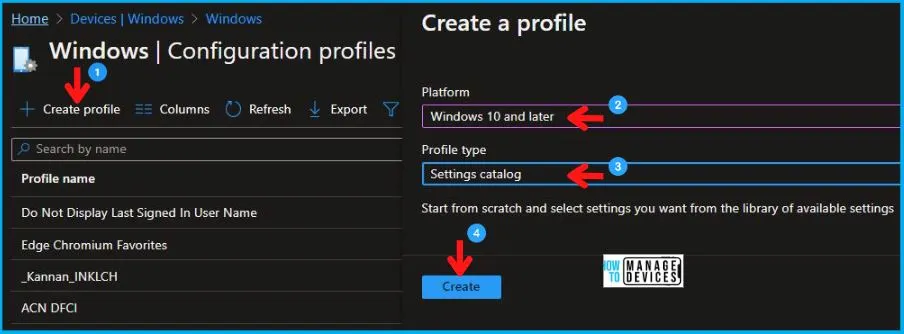
- Select Devices > Windows > Configuration profiles > Create a profile
In Create Profile, Select Windows 10 and later in Platform, and Select Profile Type as Settings catalog. Click on Create button.
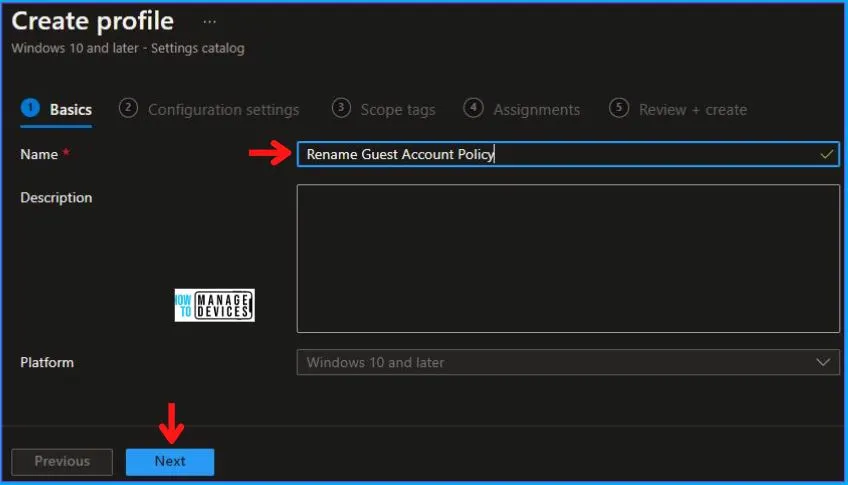
In the Basics tab pane, enter a name for the policy as Rename Guest Account Policy. If you like, you can enter the Description for the policy, then select Next.
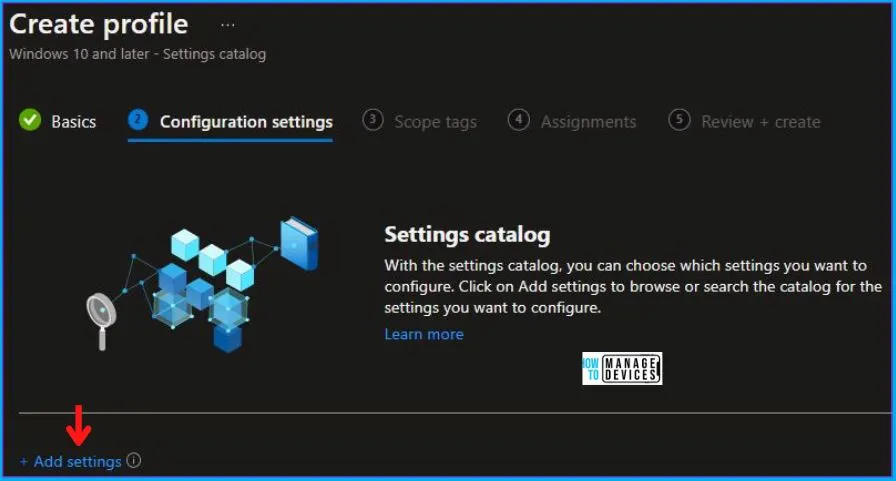
Now in Configuration settings, click Add settings to browse or search the catalog for the settings you want to configure.
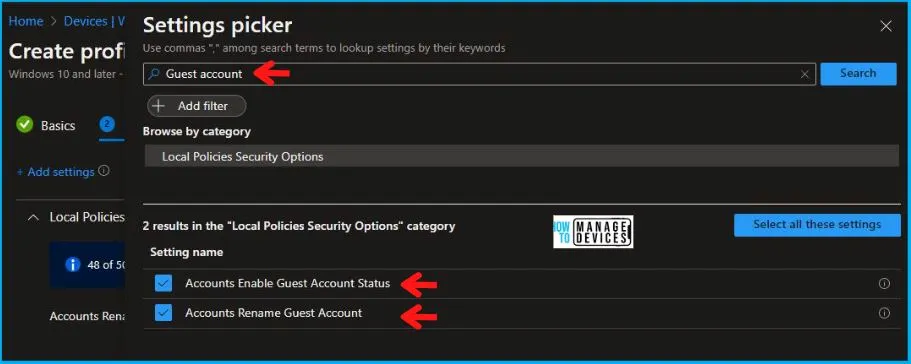
On the Settings Picker windows, if you search by the keyword Guest Account, you will see Local Policies Security Options, as shown below in the image. On selecting Local Policies Security Options, you will see two setting names, as shown below, and you need to select both of these. After adding your settings, click the cross mark at the right-hand corner to close the settings picker.
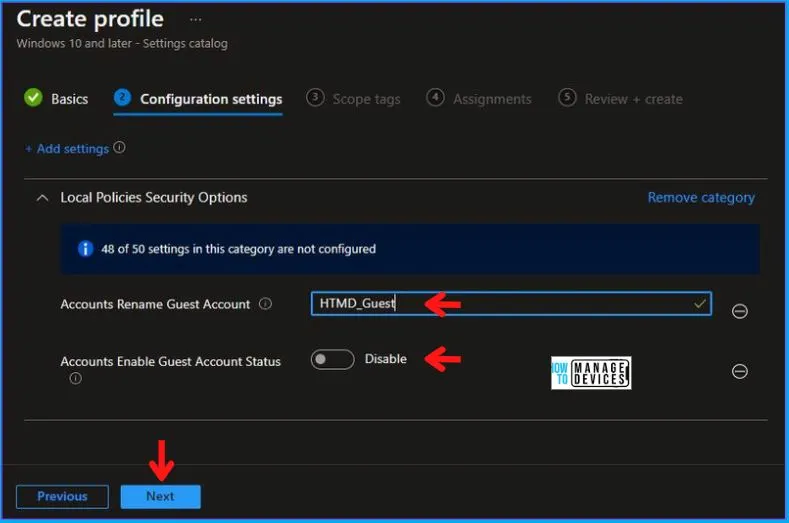
After this, in the Local Policies Security Options, enters the Name in the Accounts Rename Guest Account as per your choice, as shown below. And keep Accounts Enable Guest Account Status as Disable.
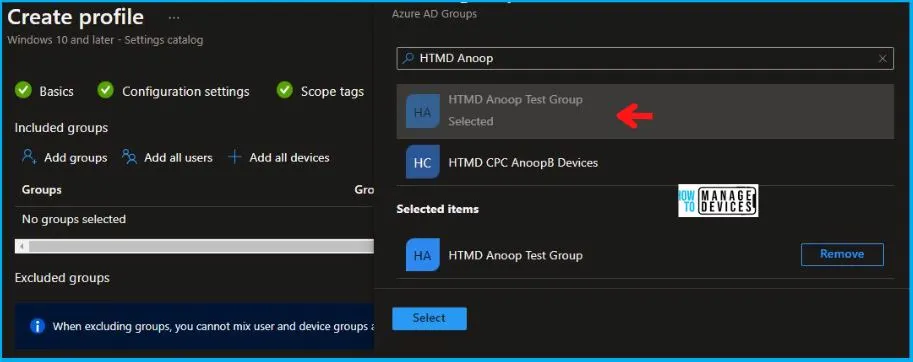
In Scope tags, you can assign a tag to filter the profile to specific IT groups. Add scope tags (if required) and click Next. Under Assignments, In Included groups, click Add groups, and then choose Select groups to include one or more groups. Click Next to continue.
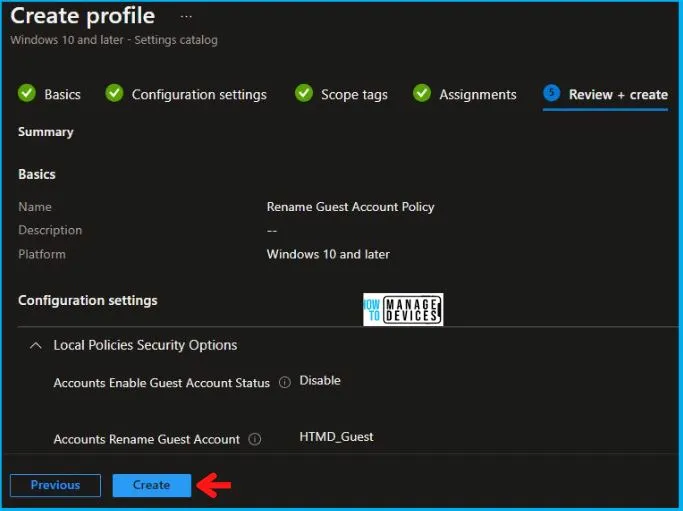
Now in Review + create, review your settings. When you click on Create, your changes are saved, and the profile is assigned.
A notification will appear automatically in the top right-hand corner with a message. You can see that Policy “Rename Guest Account Policy Using Intune” was created successfully. Now the policy is available in the Configuration profiles list.
Your groups will receive your profile settings when the devices check in with the Intune service the policy applies to the device.
Video Rename the Guest Account Name using Intune
Let’s discuss Rename Guest Account | Disable Guest Account Status | Windows Security Policy Deployment using Intune in this video.
Intune Reporting
You can check Intune settings catalog profile report from Intune Portal, which provides an overall view of device configuration policies and deployment status.
To monitor the policy assignment, from the list of Configuration Profiles, select the policy, and here you can check the device and user check-in status. If you click View Report, additional details are displayed.
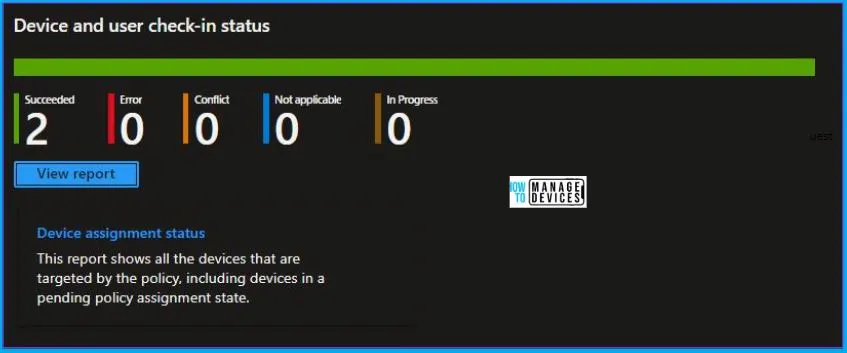
Additionally, you can quickly check the update as devices/users check-in status reports –
Intune MDM Event Log
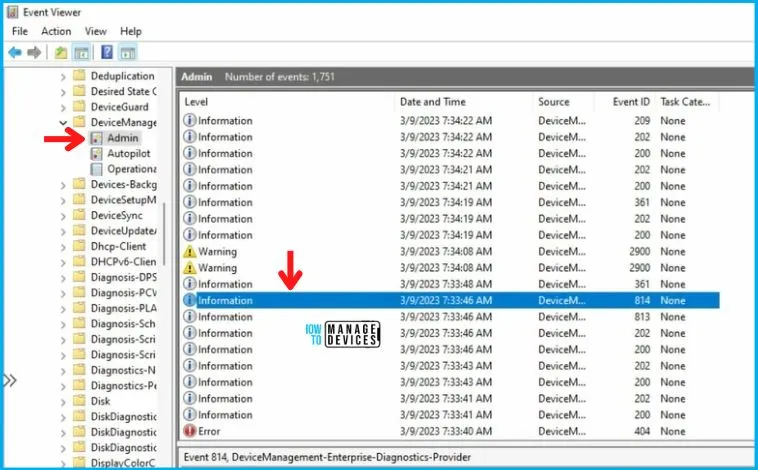
Intune event ID 814 indicates that a string policy has been applied to Windows 10 or 11 devices. In addition, you can view the exact value of the policy that is being applied to those devices –
You can check the Event log path to confirm this – Applications and Services Logs – Microsoft – Windows – Devicemanagement-Enterprise-Diagnostics-Provider – Admin.
You can use REGEDIT.exe on a target computer to view the registry settings that store group policy settings. These settings are located at the registry path –
Computer\HKEY_LOCAL_MACHINE\SOFTWARE\Microsoft\PolicyManager\providers\21915145-BD7F-4430-BC50-4C6F60D24965\default\Device\LocalPoliciesSecurityOptions

Author
Abhinav Rana is working as an SCCM Admin. He loves to help the community by sharing his knowledge. He is a B.Tech graduate in Information Technology.
