Let’s see how to turn on Cloud Protection in Windows 11 Microsoft Defender Using Intune. Cloud protection works together with Microsoft Defender Antivirus to deliver protection to your endpoints much faster than through traditional security intelligence updates.
Microsoft Defender Antivirus cloud protection helps protect against malware on your endpoints and across your network. We recommend keeping cloud protection turned on because certain security features and capabilities in Microsoft Defender for Endpoint only work when cloud protection is enabled.
Cloud protection is enabled by default. However, you might need to re-enable it if it has been disabled as part of previous organizational policies. You can enable cloud protection with Microsoft Intune, Group Policy, or PowerShell cmdlets.
You can specify the level of protection, and The protection level affects the amount of information shared with the cloud and how aggressively new files are blocked.
Cloud protection and automatic sample submission works together with Microsoft Defender Antivirus to deliver accurate, real-time, and intelligent protection. Microsoft Defender Antivirus works seamlessly with Microsoft cloud services.
- Best Antivirus for Windows 11 Microsoft Defender | App Browser Protection | Firewall Protection
- Block Potentially Unwanted Applications In Windows | Microsoft Defender
- Check Firewall Port is Open or Block on Windows 11 using PowerShell Command
Turn on Cloud Protection Using Intune
The following steps help you to turn on cloud protection using Intune –
- Sign in to the Endpoint Manager Intune portal https://endpoint.microsoft.com/
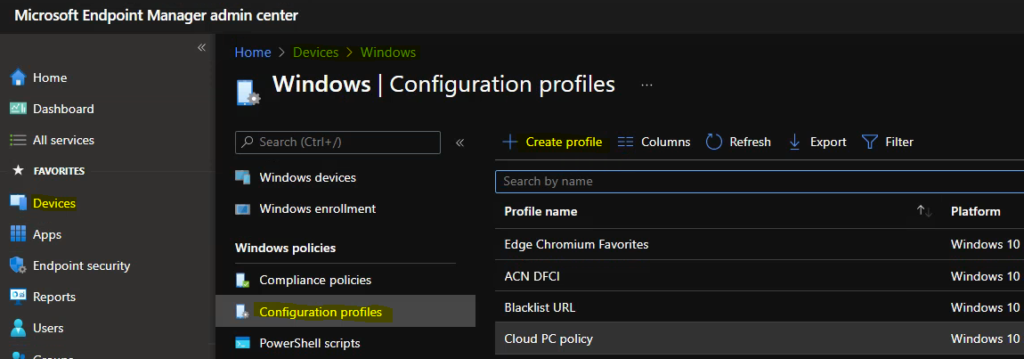
- Select Devices > Windows > Configuration profiles > Create profile
Note : You can also access the setting to manage cloud protection, Choose Endpoint security > Antivirus.
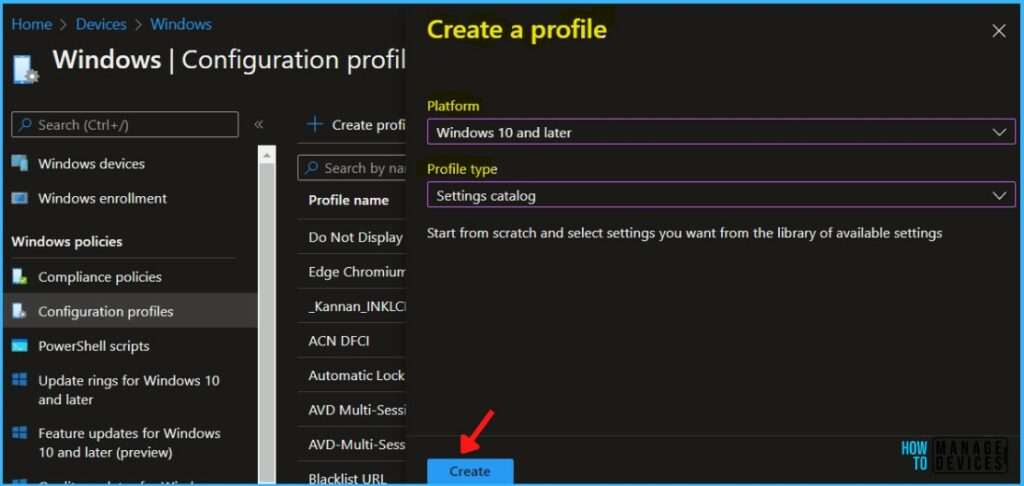
In Create Profile, Select Platform, Windows 10, and later and Profile, Select Profile Type as Settings catalog. Click on Create button.
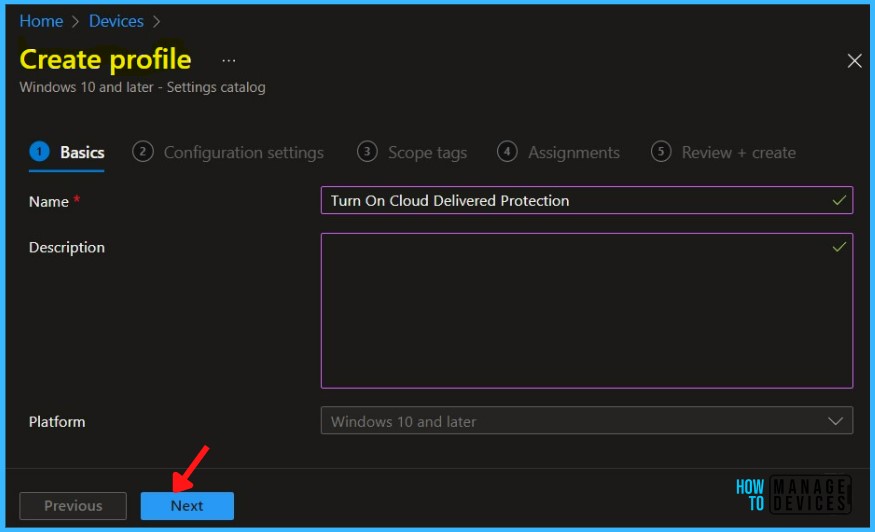
On the Basics tab, enter a descriptive name, such as Turn On Cloud Protection or Turn On Cloud Protection for Microsoft Defender Antivirus. Optionally, enter a Description for the policy, then select Next.
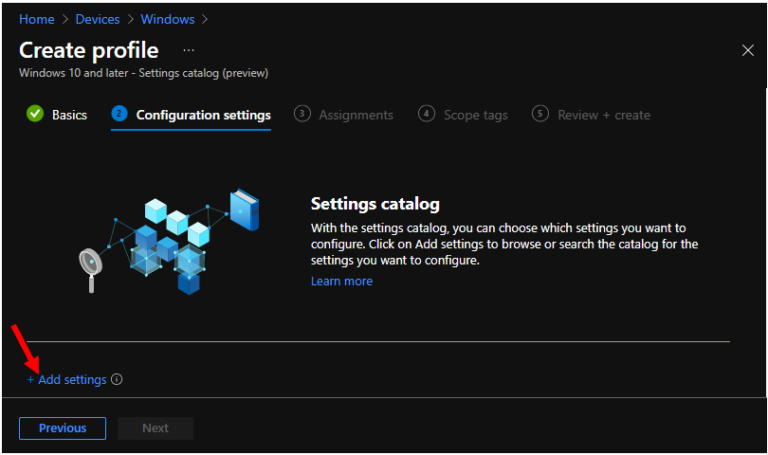
In Configuration settings, click Add settings to browse or search the catalog for the settings you want to configure.
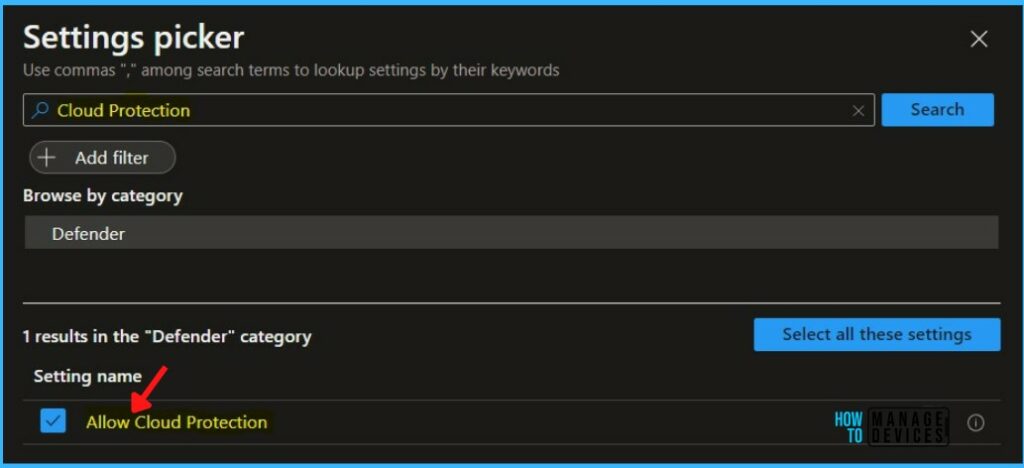
On the Settings Picker windows, use the search box and type Cloud Protection, and click Search. Select the Defender category and double click on the category to see the settings name.
Select Allow Cloud Protection. After adding your settings, click the cross mark at the right-hand corner to close the settings picker.
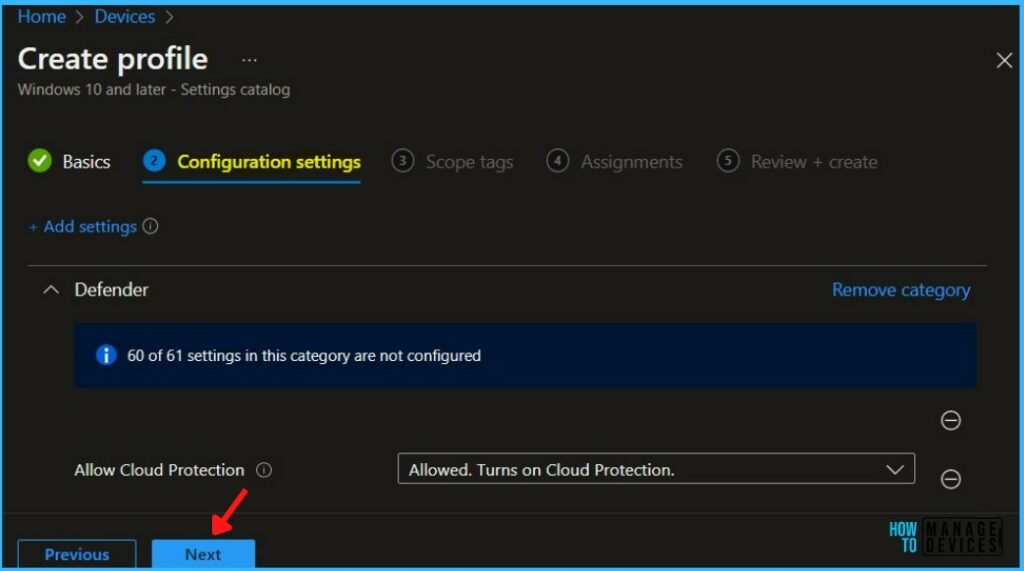
The setting is shown and configured with a default value Allowed. Turns on Cloud Protection. Click on Next.
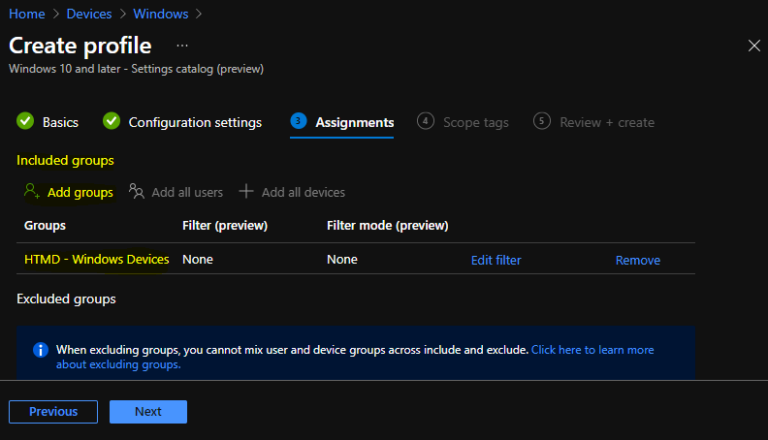
Under Assignments, In Included groups, click Add groups and then choose Select groups to include one or more groups. Click Next to continue.
In Scope tags, you can assign a tag to filter the profile to specific IT groups. Add scope tags (if required) and click Next.
In Review + create, review your settings. When you select Create, your changes are saved, and the profile is assigned.
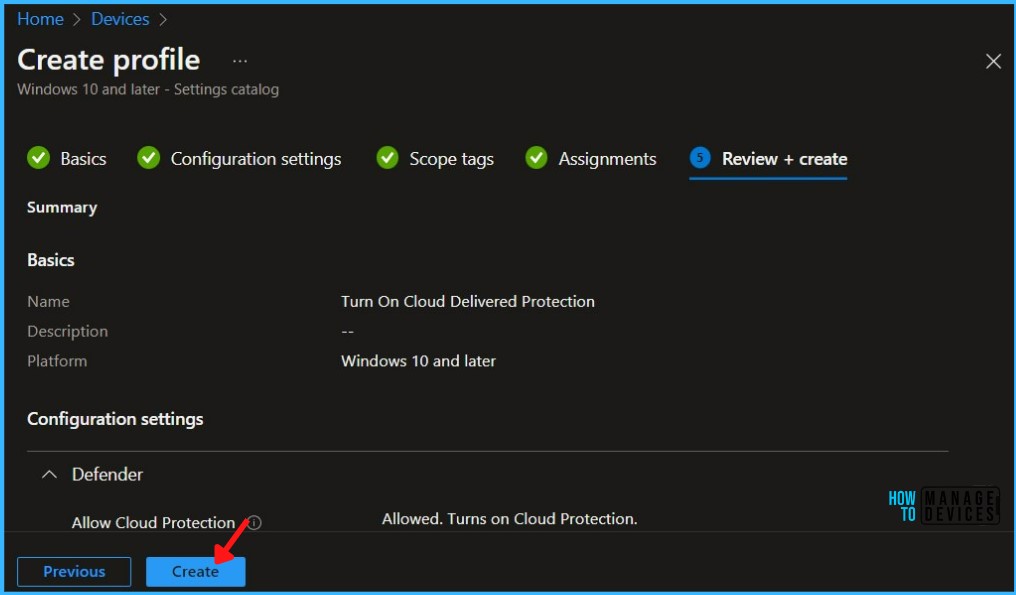
A notification will appear automatically in the top right-hand corner with a message. You can see that Policy “Turn On Cloud Delivered Protection” created successfully. The policy is also shown in the Configuration profiles list.
Your groups will receive your profile settings when the devices check in with the Intune service the policy applies to the device
Intune Reporting
You can check Intune settings catalog profile report from Intune Portal, which provides an overall view of device configuration policies and deployment status.
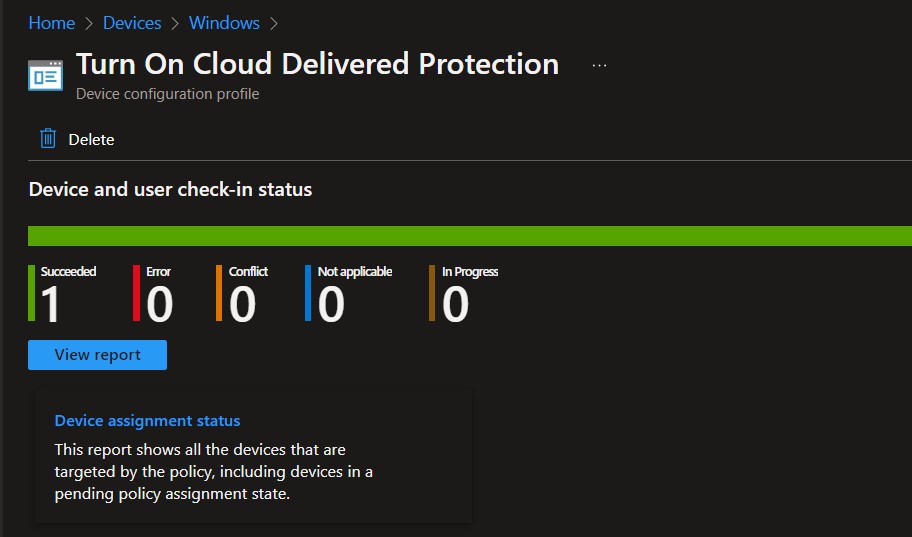
To monitor the policy assignment, from the list of Configuration Profiles, select the policy, and here you can check the device and user check-in status. If you click View Report, additional details are displayed.
Additionally, you can quickly check the update as devices/users check-in status reports –
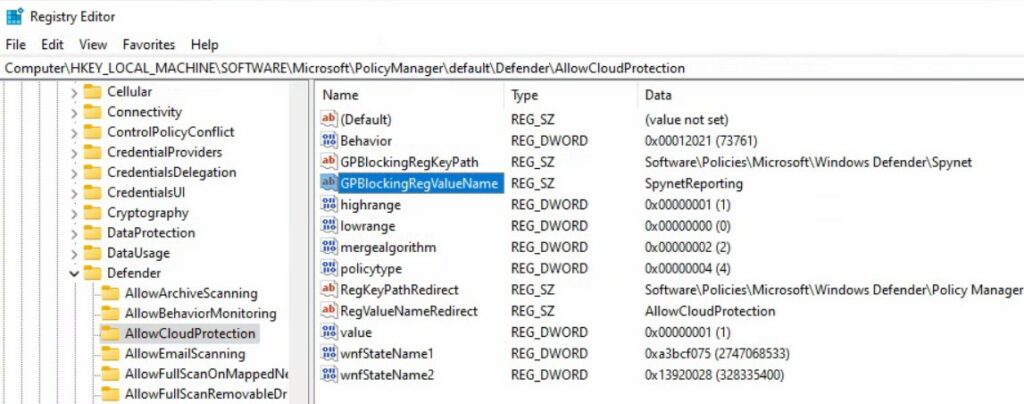
You can use REGEDIT.exe on a target computer to view the registry settings that store group policy settings. These settings are located at the registry path HKEY_LOCAL_MACHINE\SOFTWARE\Microsoft\PolicyManager\default\Defender\AllowCloudProtection Value Data SpynetReporting
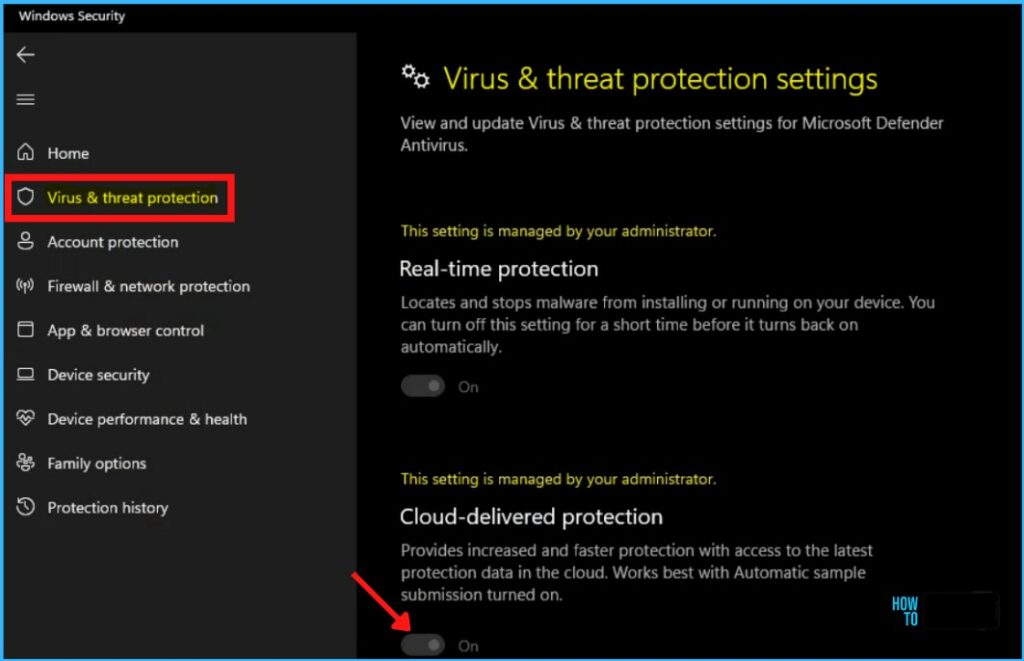
Open Windows Security, Click on Virus & threat protection. Next Click on the Manage settings under Virus & threat protection settings.
Here you can see Cloud-delivered protection is set On.
