Exciting News! New Device Restriction Settings Available in Apple Settings Catalog. The February update for Intune 2402 is now rolling out, and with that update, new device restriction settings are available for the Apple Settings Catalog ( iOS/iPadOS).
Device restrictions are crucial in managing and securing devices within an organization. The Apple Setting catalog is the best, well-organized toolbox for IT administrators. It allows different settings to be applied to various Apple devices, including iPhones, iPads, and macOS.
These settings include controlling how devices connect to networks, limiting certain app functionalities, ensuring privacy, and more. This will allow you to customize and manage your device experience effectively.
Device Restrictions are an essential factor; these settings are controls that allow you to manage and limit certain features and functionalities on your devices. This will help enhance your devices’ security, privacy, and overall management.
- Additional App Configuration Permissions for Android Apps
- Microsoft Intune Extends Support to Android 10 and Later from October 2024
New Device Restriction Settings Available in Apple Settings Catalog
Many Intune features are rolling out in the February update for Intune 2402. One essential feature was added to the Device restrictions settings for iOS/iPadOS. The Settings Catalog lists all configured settings for the device policy in the same place.
New settings have recently been added to the catalog. You must sign in to the Microsoft Intune admin centre to explore them.
- Sign in to the Microsoft Intune admin center.
- Go to the Devices > Configuration > Create >New Policy
See More: Microsoft Intune 2402 New Features February Update
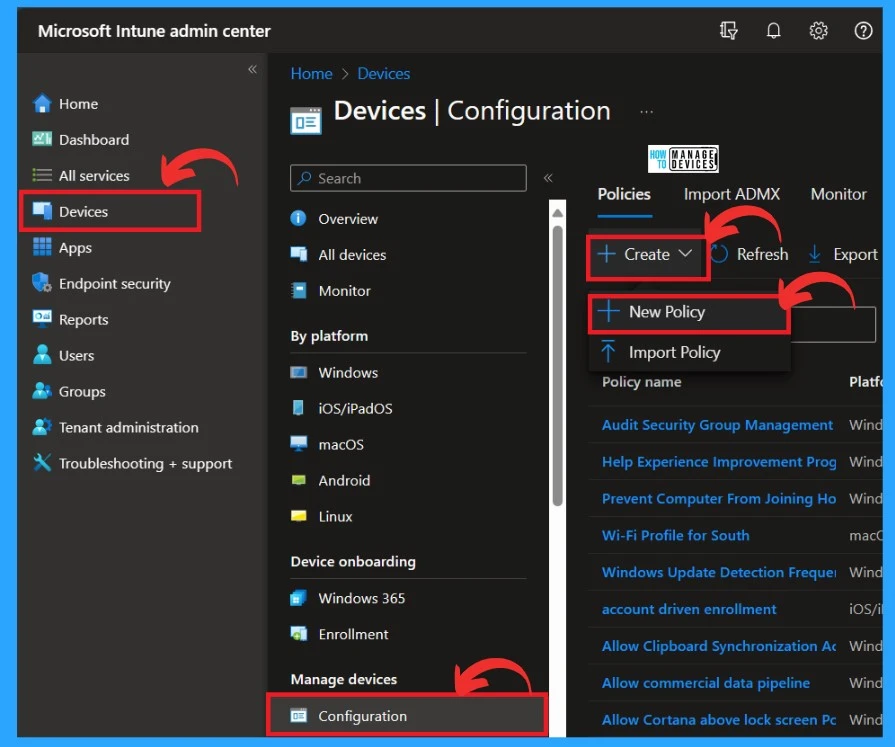
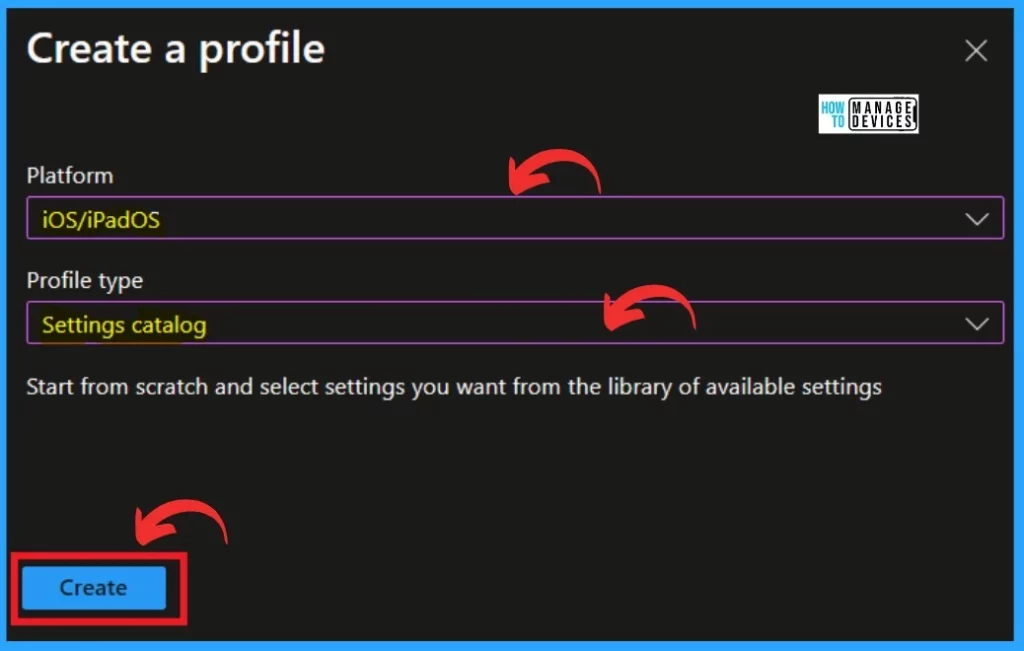
After clicking on the new policy, a side pane will be visible to you. You have to create a profile based on the platform and profile type; this is crucial to creating a profile.
- Choose the platform as iOS/iPadOS.
- Select profile type as Setting catalog
- Click on the Create
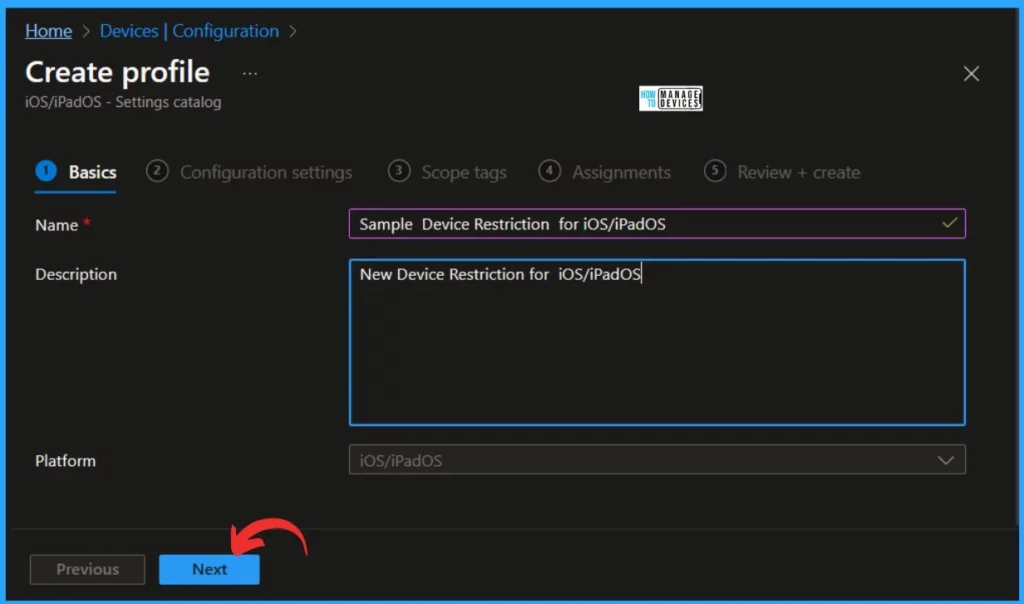
The Next step is Basics; under this section, you must Name the policy. Here, I entered a name, for example. The next step is to describe the policy. This will help you understand the policy later.
- Click on the Next
- iOS iPadOS Intune Enrollment Method is Based on Web Based
- Use MTD to Protect iOS and Android Devices with Microsoft Defender for Endpoint
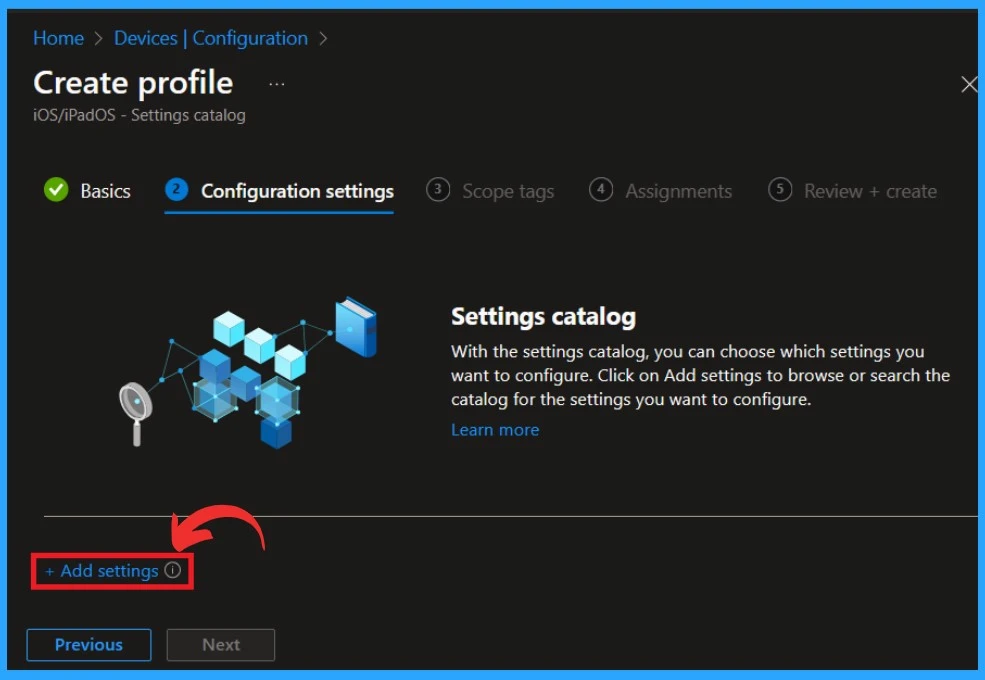
The Next step is Configuration settings. Here, you can choose which settings you want to configure. Click on Add Settings to browse or search the catalog for the settings you want to configure. The add setting option will discover that admins may experience performance degradation when more than 400 settings are added to a single policy.
- Click on Add Settings
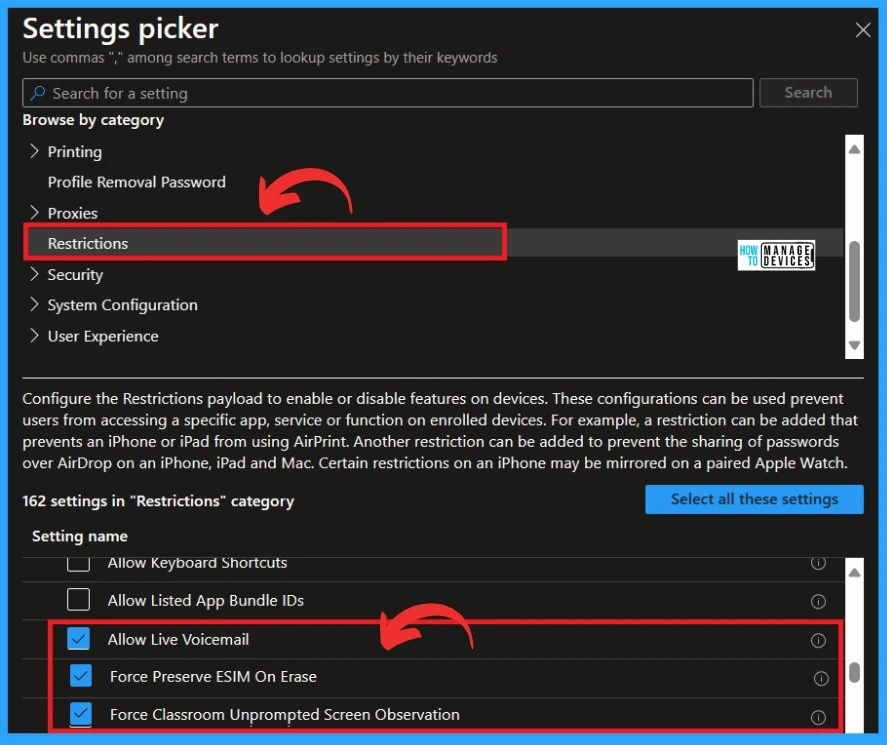
You will get another window called Setting Picker when you click Add Settings. Here, you can browse the setting category. Under the Browse by setting category option, you have to click on Restrictions. Under Restrictions, you will get the New Device Restriction Settings.
- Choose the New Restriction that you want to add
- Intune Shared Device Mode for Android and iOS Devices
- Prevent iOS Managed Apps Removable using Intune
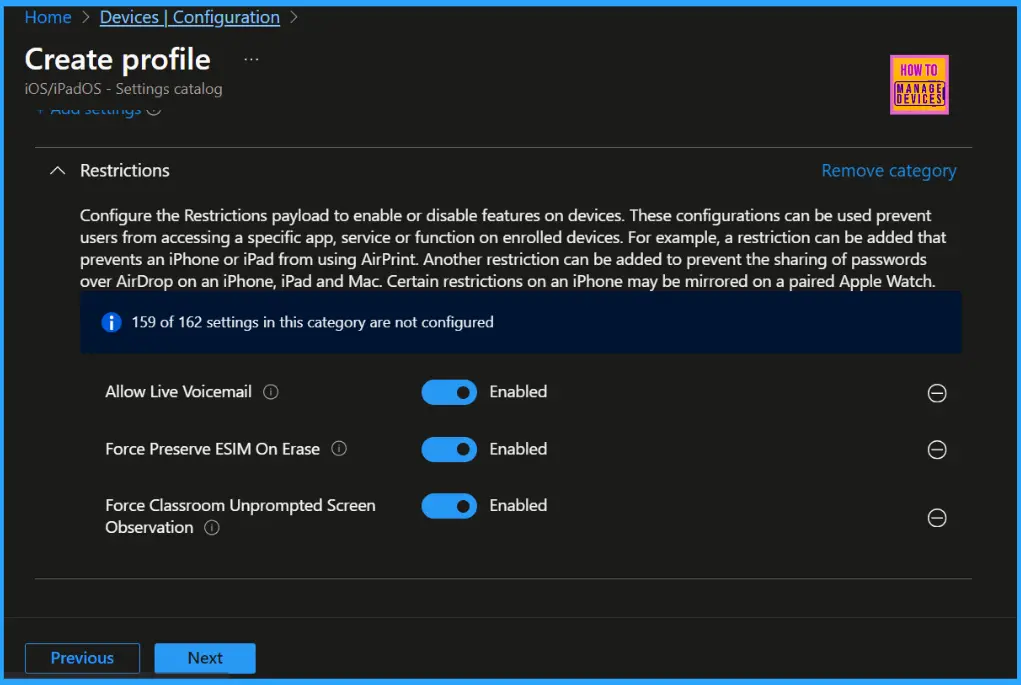
After selecting the settings, close the Settings Picker. Configure the Restrictions payload to turn features on devices on or off. These configurations can prevent users from accessing a specific app, service, or function on enrolled devices.
- For example, a restriction that prevents an iPhone or iPad from using AirPrint can be added. Another restriction can be added to prevent the sharing of passwords over AirDrop on an iPhone, iPad and Mac.
- Certain restrictions on an iPhone may be mirrored on a paired Apple Watch.
- Click on the Next
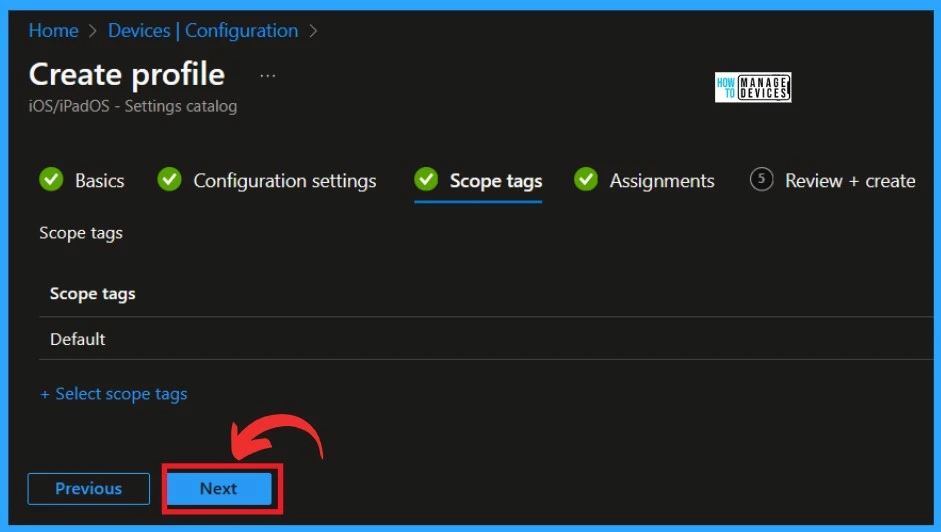
The next step is setting Scope tags, which are optional. Scope tags are used in Microsoft Intune to manage administrators’ access and visibility.
- Click on the Next
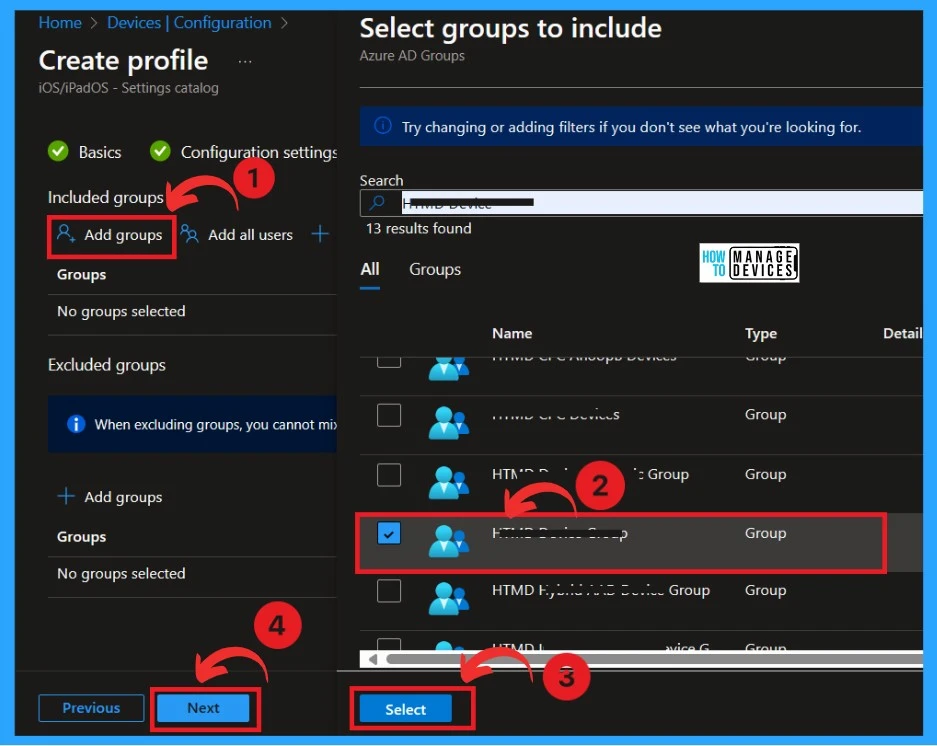
The next and most crucial part is Assignments. A pane with available groups will appear when you click Add Groups under the Include group option. From there, you can assign the policy to the desired group by selecting it and clicking the Add button.
- Click on the Add group under the Include group section (When excluding groups, you cannot mix user and device groups across include and exclude)
- Click on the group that you want to assign the policy
- Click on the Select
- Click on the Next
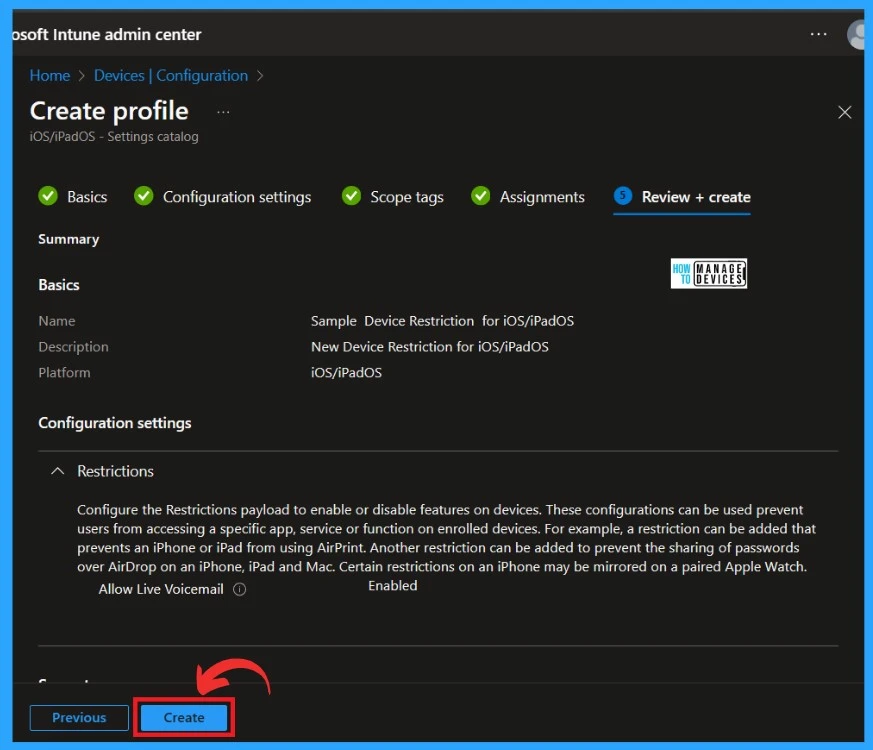
The final step is Review+ Create; with that option, you can recheck all the settings you gave in the previous step. In this step, you can review the settings and Create the policy.
- Click on Create to create the policy.
Reference
What’s new in Microsoft Intune
We are on WhatsApp. To get the latest step-by-step guides and news updates, Join our Channel. Click here –HTMD WhatsApp.
Author
Krishna. R is a computer enthusiast. She loves writing about Windows 11 and Intune-related technologies and sharing her knowledge, quick tips, and tricks about Windows 11 or 10 with the community.
