In this post, you will learn to display the prompt message in SCCM Task Sequence unsupported hardware model. This would be helpful for SCCM admins to allow only certified models for operating system deployment to provide the best user experience and secure environment.
In case within an organization, if anyone attempts to run the task sequence apart from the approved listed models, they will be aware of the prompt message.
To avoid unnecessary deployment time, it’s best to prompt messages for an unsupported hardware model at the beginning of task sequence execution.
The concept here’s to run a generic script to prompt a message that states the computer model is not supported if the driver package for the model is not added for deployment.
Is it best to check the supported hardware with the Run command line in the task sequence? This is a quick way to notify. Else you can also use the configuration baseline that we will try to explore later.
There will be some scenarios that need end-user interaction with the Intune process. You will see more details in the post on using ServiceUI with Intune to bring System Process to Interactive Mode while deploying an application.
- SCCM Customize Windows Out of Box Experience OOBE Using ConfigMgr
- Easy Guide to Deploy Wallpaper using SCCM
- SCCM OSD Task Sequence Troubleshooting Steps by Step Ultimate Guide with SMSTS.log
Download ServiceUI – SCCM Task Sequence Unsupported Hardware Model
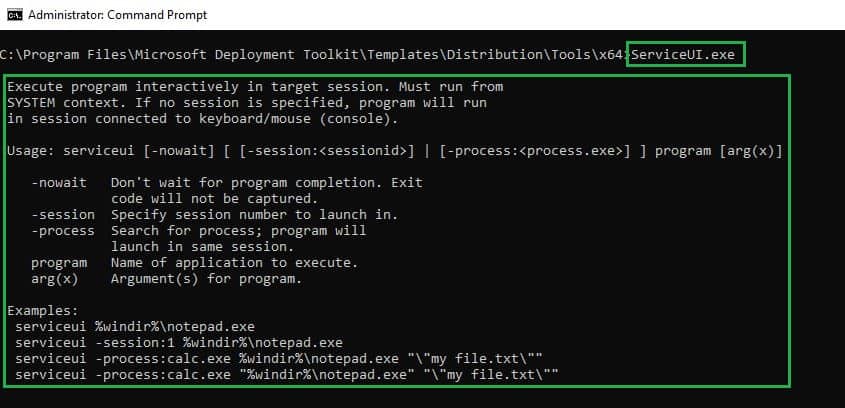
ServiceUI is an executable that comes with the Microsoft deployment toolkit. ServiceUI can detect the user session and allow user interaction. To get the ServiceUI executable, you need to download Microsoft Deployment Toolkit (MDT) from Microsoft Download Center and install it on your client machine.
Once MDT is installed, you can locate ServiceUI in MDT Installed directory. You need to use the version of serviceUI.exe with the same architecture as the boot image that you are deploying to ignore any issues. For Example – You can see it’s located in the below path. The syntax is shown below –
<MDT Installed Drive>\Program Files\Microsoft Deployment Toolkit\Templates\Distribution\Tools\x64\ServiceUI.exe"

Prepare Scripts – SCCM Task Sequence Unsupported Hardware Model Prompt Message
Next, you need to prepare a PowerShell script to prompt the user that the hardware model is not supported; based on your requirements; you can add more to the script to perform all the necessary actions. Here’s a sample script; please test it before executing to the production environment –
- Copy the ServiceUI.exe to your package source file folder.
- Open Notepad, Or PowerShell ISE on your device. Copy and paste the below line, Save it as FileName.ps1 to appropriate location –
function New-PopupMessage {

Add-Type -AssemblyName System.Windows.Forms

[System.Windows.Forms.MessageBox]::Show('This Computer model is not supported. IT Help is Nearer! For more information, please contact your system administrator.', 'Computer Hardware - Not Supported', 'Ok', 'Stop')

}

#Close the Task Sequence Progress Bar to appear the prompt message for unsupported hardware model

try
{
$TSProgressUI = new-object -comobject Microsoft.SMS.TSProgressUI
$TSProgressUI.CloseProgressDialog()
}
Catch{}
#Run the function
New-PopupMessage
Create Package in SCCM
The next step is to create a package in Configuration Manager to prompt messages in SCCM Task Sequence Unsupported Hardware Model. Let’s get started –
Go to the Software Library workspace in the Configuration Manager console, expand Application Management, Right-click Packages, and select Create Package.

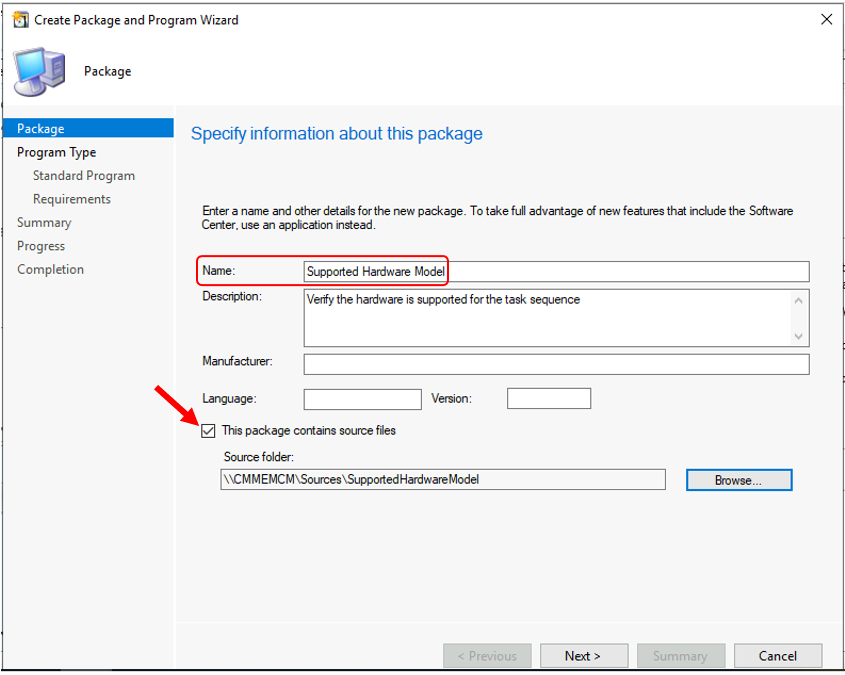
On the Package page, Specify the following information and click Next.
- Name: Specify a name for the package.
- Description: Specify a description for this package.
- Source folder: Choose to Browse to select the UNC path and then specify the location of the source files for the package.

On the Program Type, Choose the type of program. Do not create a program. Click Next.

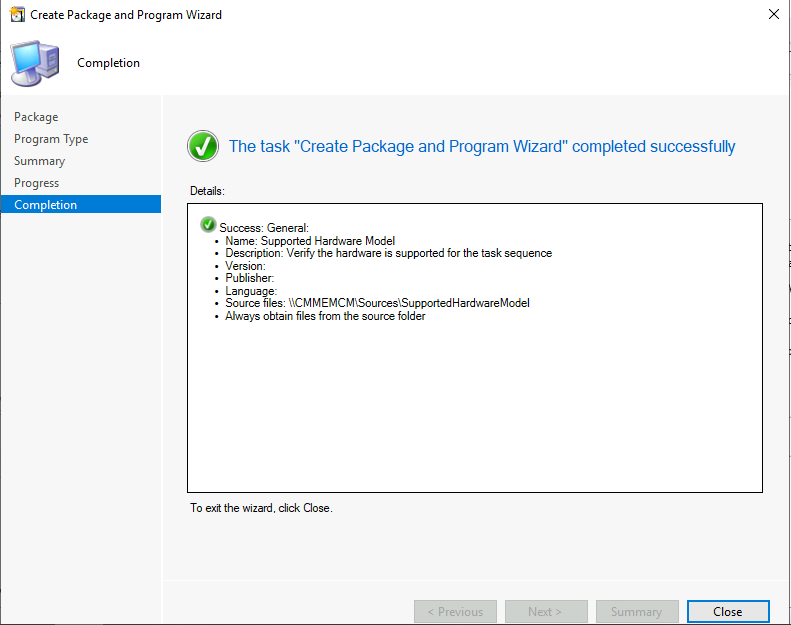
Review the settings click Next. The Package creation process was completed successfully. Click Close to complete the wizard.

The Created package now appears in the Packages node of the Configuration Manager console. You’ve finished creating a package.

Important – You must distribute the content to the distribution point. Right-click on package and click Distribute Content. Select the distribution point or groups where you want to distribute this package.
Deploy SCCM Task Sequence
Let’s follow the steps to add the package to SCCM Task Sequence –
Create or Edit an Existing Task Sequence
This guide will help you create a Configuration Manager task sequence from scratch. Use the following steps to modify an existing task sequence –
Customize Task Sequence
In the Configuration Manager console, go to the Software Library workspace, expand Operating Systems, and select the Task Sequences node.
Select the task sequence in the Task Sequence list that you want to edit. Select Edit to modify.

Based on your business requirements, In the Task Sequence steps, You can set up WMI queries – All WMI queries are under “If Any the conditions are true:” or “If none of the conditions is true:”
You can add Run Command-Line, PowerShell Script options based on the script you had. Learn more about how to add the Run Command Line step to SCCM Task Sequence. We will add the following steps to the task sequence –
Run Command Line – To add this step in the task sequence editor, select Add, select General and choose Run Command-Line.

For this step, on the Properties tab, configure the settings described in this section. Specifies the command line that the task sequence runs.
ServiceUI.exe -process:TSProgressUI.exe %windir%\System32\WindowsPowerShell\v1.0\powershell.exe -Noprofile -WindowStyle Hidden -executionpolicy bypass -File FileName.ps1Package – Select this option to specify the Configuration Manager package containing the necessary execution files.

In this scenario, I will add the condition if the computer hardware is not supported for deployment. It will prompt a message to users, or the supported models task sequence will continue without prompt.
On the Run Command Line step, Options tab. Add Condition – Query WMI Select * from Win32_ComputerSystem where Model like ‘Latitude 5420%’

Similarly, you can add device models that are supported or not supported based on your task sequence conditions. You can check more detailed steps to create the WMI conditions.
Review other settings added in Task Sequence and apply all changes. Click Apply and OK, close the window.
Select the task sequence and target the Deployment to Collections. You can refer to Easy Guide to Deploy Windows 10 21H1 Using SCCM Task Sequence | ConfigMgr | Step by Step
End Users Experience
On Target Computers, it depends on deployment settings. You will be presented with the Welcome to the Task Sequence Wizard.
Complete the Task Sequence Wizard by selecting deployed task sequence. Click Next. Once you complete the Wizard, the deployment begins, and the user will get the below prompt in case the hardware model you added is not supported.

Suppose you have a different experience or approach and want to share it with us. You are always welcome to comment in the post below to help the community with your wide knowledge.
Author
About Author, -> Jitesh has over five years of working experience in the IT Industry. He writes and shares his experiences related to Microsoft device management technologies and IT Infrastructure management. His primary focus area is Windows 10 Deployment solution with Configuration Manager, Microsoft Deployment Toolkit (MDT), and Microsoft Intune.

Just a few things
Shouldn’t that prompt occur prior to rebooting the machine into WinPE so users know its not supported and save some time and confusion. Also, if the user hits okay, I assume it just continues as there is no error code thrown to SCCM to crash the process, am I right and is this the intention?
Hello, You can change the order! If you need, You can terminate the task sequence process after displaying the message. Since it’s a custom prompt we can’t generate random error code, Good to have Warning/Error as a message to provide users with insight deploying task sequence could be risky! You can customize the prompt or message based on your requirements.
Hey Jitesh, Thank you for this post.
Here you have taken the Non-Supported models to add, we cannot do it as we are not sure which model will anyone try to build as due to global chip shortage they are ordering any model available with vendor.
Hence I want to put supported models with wmi query and any model that is not there should throw that error. SO will there be any changes required in the script as well ?
please suggest.
Hi, Appreciate your inputs! In the scenario, we have taken as an example to demonstrate how we can prompt messages for users during task sequence execution. Based on your requirements you can customize the WMI query added to Task Sequence step as well as the prompt message! The script is generic, which doesn’t check the models it has been used to display messages. As I mentioned in a previous comment to one of our community member, If you need to have the script to stop the task sequence execution after displaying the warning\error message, You can customize it accordingly.
Hi,
I’m trying to test this and it’s not working. TS always fails with 0x800700A1 error.
“Failed to resolve the source for SMS PKGID = “my package id”, ht=0x800700a1
Install Software failed to run command line, hr=0x800700a1″
I’ve double checked the ServiceUI parameters cmd and everything is ok. Already recreated the package and is perfect distributed to all DP’s. What is wrong?
edit to my previus comment.
Found that this only works after OS is installed!
Thank you for letting us know! Where had you added the step after Apply OS Phase?
Hi Jitesh – thanks for the post. I’ve implemented this but I’m getting an error on the TS Output.
The Specified Path is invalid
Any ideas?
Thanks. Appreciate. Can i have modification which i need to make incase if i want to terminate the TS on pressing OK.
Hi Adeel, You can modify the added script to meet your requirement.
Hi Jitesh, thank you for the helpful post. When I try this, it only works when I deploy the Task Sequence as available. If I deploy as required, I get “Process completed with exit code 4294967295” and the task sequence fails. Were you able to deploy your TS as required?
I am working on Pop-Up a custom Pop-Up window to select a Country Code and Site Code so that based on the selection machine should get renamed based on the Country and Site Code Selection with first 7 letters of Device Service Tag number.
I am running this PowerShell Script during the SCCM OSD Task Sequence execution, by adding a command line:
ServiceUI.exe -Process:TsProgressUI.exe %windir%\System32\WindowsPowerShell\v1.0\powershell.exe -NoProfile -WindowsStyle Hidden -ExecutionPolicy Bypass -File Set-RenamingSolution.PS1
The step is failing with the errorcode 0x800736B1 with modifying the command by different type with no success.