Learn how to Expedite Microsoft Office Apps Updates. Faster and Quicker updates for Microsoft 365 Apps using Intune Policy is the topic for today. The faster updates of Office help us to fix zero-day issues like Outlook without any delay. We are back with another post from Intune Configuration Profiles.
In this tutorial, we will learn how to Delay Download and Install Updates for Office Policy Using Intune. As with the previous task, we will make use of Configuration Profiles from Intune.
By setting these policy settings, you can delay downloading and installing Office updates by a specified number of days. You won’t be able to use this policy setting if you are managing updates differently when you deploy Office updates through System Center Configuration Manager or specify a target version via Group Policy, for instance.
You won’t have to worry about updates being delayed if you switch from one update channel to another. You can specify the number of days the Office should delay downloading and applying updates if you enable this setting. There is a maximum value of 14 that you can specify. Updates will be downloaded and applied as soon as Office detects that they are available if you specify 0.
Windows Autopatch Update
This event is a continuation of the Service Health Dashboard post MO528367. As a response to CVE-2023-23397, we’ve identified that users may have also had a new “Windows Autopatch – Office Update Configuration – Expedited” policy added to their Device configuration profiles.
The policy didn’t actually take effect for tenants that opted out, and we’re removing the policy to resolve the issue fully. The Expedited Office update policy has 0 days of deferral and 0 days for the deadline (install) in the default Monthly Enterprise Channel.
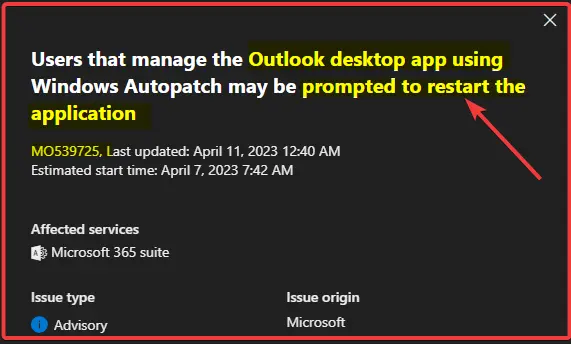
NOTE! – Users that manage the Outlook desktop app using Windows Autopatch may be prompted to restart the application. Additionally, this update is a one-off remediation and will not appear in the next monthly update unless a similar case of immediate remediation is needed.
The deadline you specify with this policy setting won’t be considered until after the delay you specify for updates to be installed. The Office will download and apply updates as soon as it detects that updates are available if you disable this policy setting or do not configure it. This setting applies only to subscription versions of Office, such as Office 365 ProPlus, Visio, and Project.
- Detect Potentially Unwanted Applications using Intune
- Scan all downloaded files and attachments Policy Using Intune
Expedite Microsoft Office Apps Updates using Intune Policy | Faster Updates for M365 Apps
There could be many situations where you need to quickly update the Microsoft 365 Apps. One of the situations is to FIX the Zero Day vulnerabilities similar to the following – FIX Zero Day Security Vulnerability for Outlook. There are several different options to quickly update the Office apps as explained in the following YouTube video shared by HTMD Community.
NOTE! – Office ADMX Policies: All the policies mentioned in this post are part of Office ADMX, and hence you won’t be able to find the same in the CSP configuration.
Delay Download and Install Updates for Office Policy Using Intune
Follow the steps stated below to Delay Downloading and Installing Updates for Office Policy Using Intune:
- Sign in to the Intune Admin Center portal https://intune.microsoft.com/.
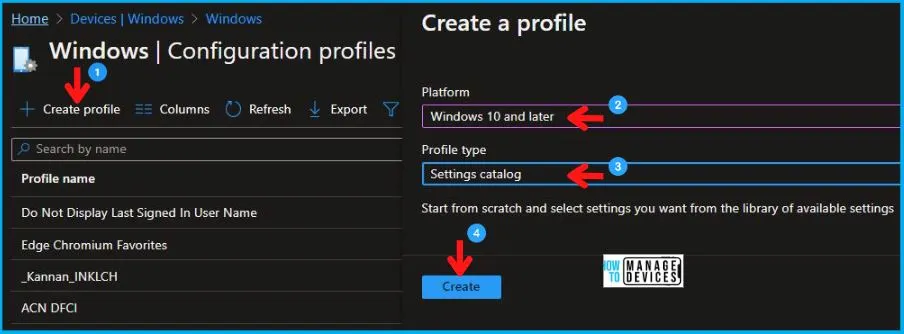
- Select Devices > Windows > Configuration profiles > Create a profile.
In Create Profile, Select Windows 10 and later in Platform, and Select Profile Type as Settings catalog. Click on Create button.
| Platform | Profile Type |
|---|---|
| Windows 10 and later | Settings Catalog |
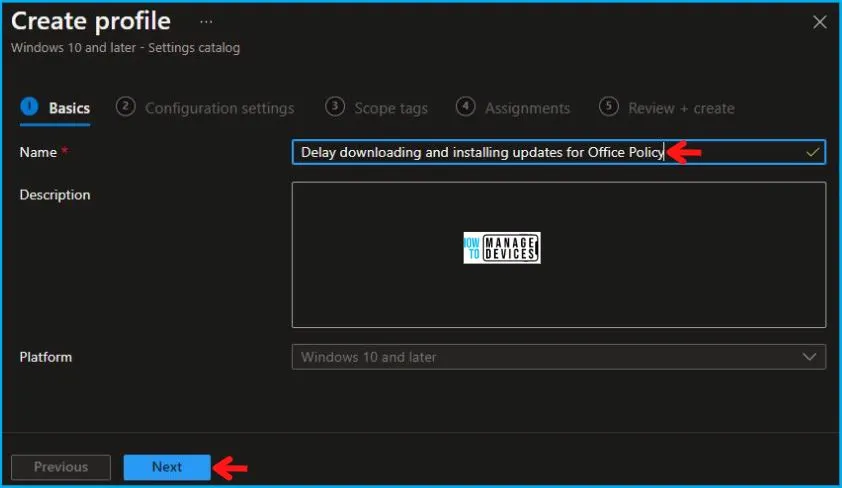
In the Basics tab pane, enter a name for the Policy as Delay Downloading and Installing Updates for Office Policy. If you like, you can enter the Description for the Policy, then select Next.
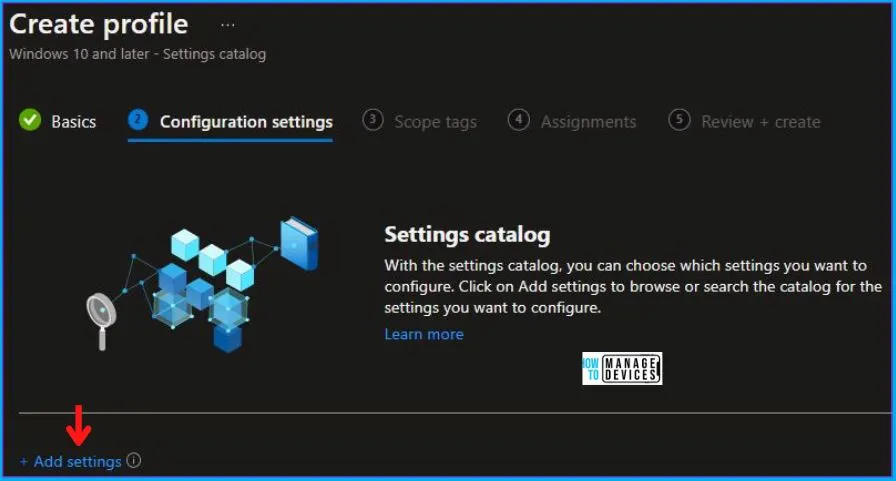
Now in Configuration settings, click Add Settings to browse or search the catalog for the settings you want to configure.
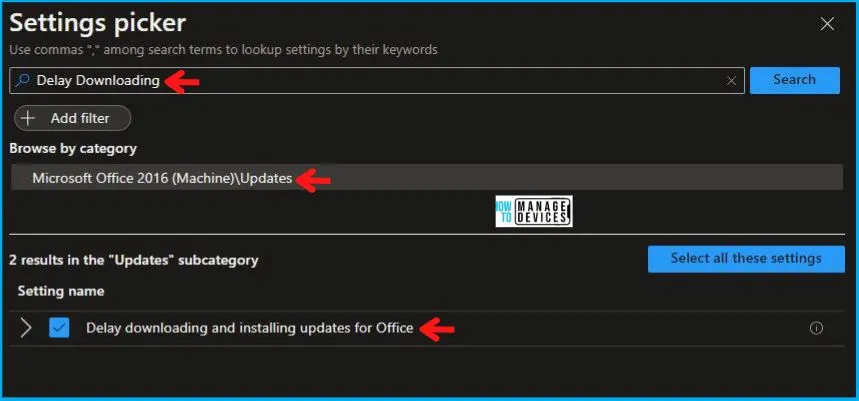
On the Settings Picker windows, if you search by the keyword Delay Downloading, you will see Microsoft Office 2016 (Machine)\Updates, as shown below in the image, select this.
On selecting the option shown below in the image, you will see one setting name, Delay Downloading and Installing Updates for Office. After adding your setting, click the cross mark at the right-hand corner, as shown below.
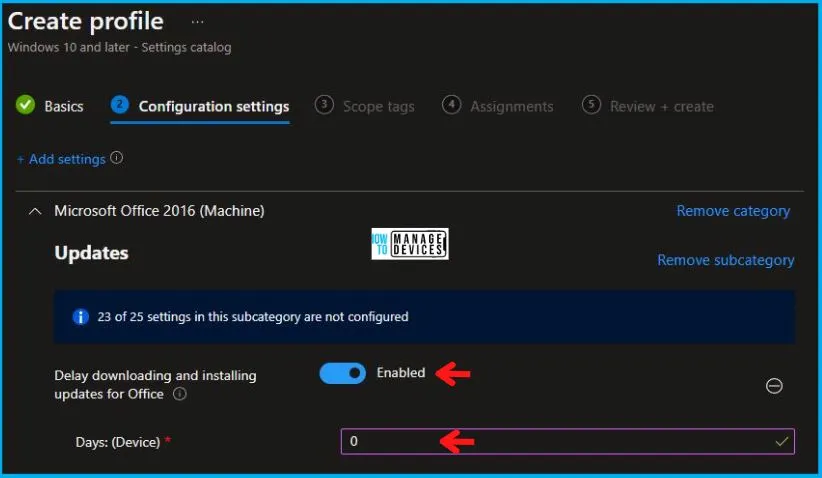
After this, in the Microsoft Office 2016 (Machine), set the Delay Downloading and Installing Updates for Office to Enabled, as shown below in the image. Also, enter 0 in the Days: (Device) column.
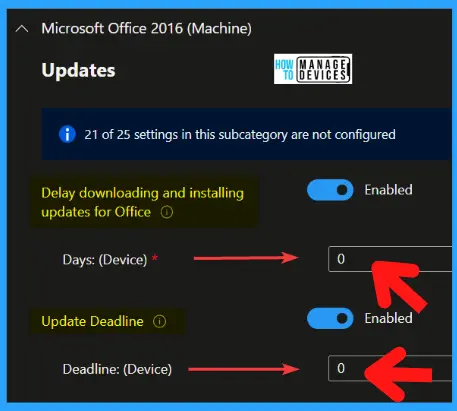
The Update Deadline policy setting allows you to set a deadline by when updates to Office must be applied. You can set a deadline in one of two ways: Specify a date and time Specify a certain number of days after the update has been downloaded Prior to the deadline, users will receive multiple reminders to install the updates.
- Delay downloading and installing updates for Office – Enabled
- Days: (Device) – 0
- Update Deadline – Enabled
- Deadline: (Device) – 0
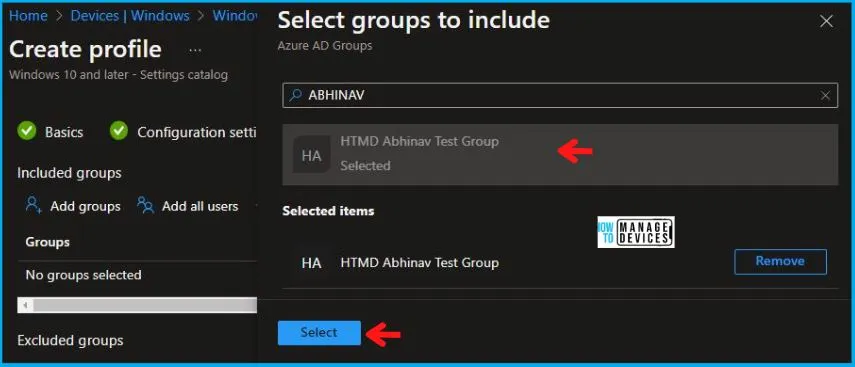
In Scope tags, you can assign a tag to filter the profile to specific IT groups. Add scope tags (if required) and click Next. Under Assignments, In Included Groups, click Add Groups, and then choose Select Groups to include one or more groups. Click Next to continue.
Now in Review + Create, review your settings. When you click on Create, your changes are saved, and the profile is assigned.
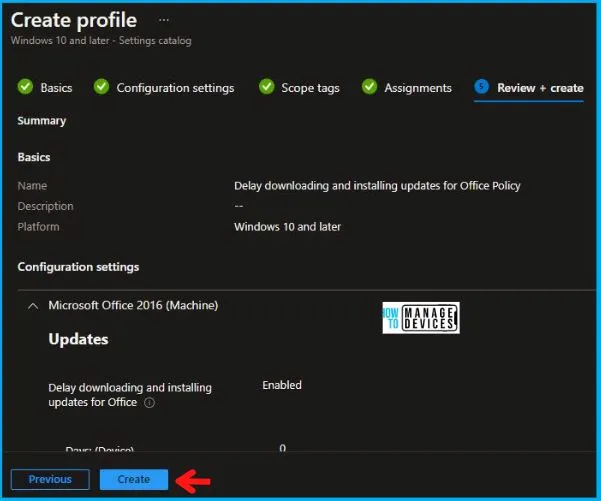
A notification will appear automatically in the top right-hand corner with a message. You can see that the Policy “Delay Downloading and Installing Updates for Office Policy” was created successfully. If you check, the Policy is also available in the Configuration profiles list.
Your groups will receive your profile settings when the devices check in with the Intune service. The Policy applies to the device.
Intune Report for Faster Updates for Microsoft Office
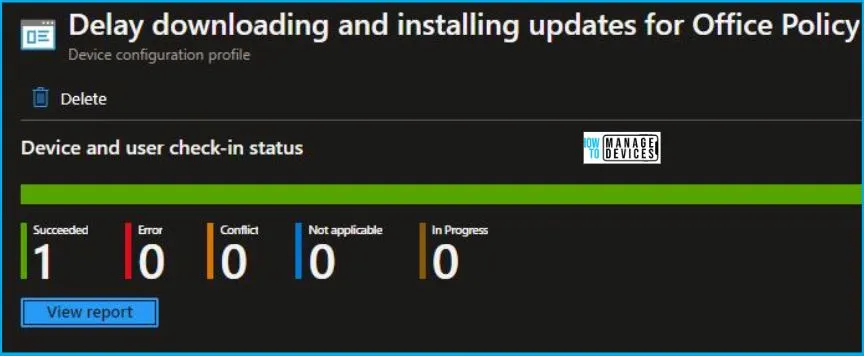
From Intune Portal, you can view the Intune settings catalog profile report, which provides an overview of device configuration policies and deployment status for quick office updates.
To monitor the policy assignment, select the Policy from the list of Configuration Profiles, and here you can check the device and user check-in status. If you click View Report, additional details are displayed. Let’s now check the results of Office Update policy settings.
Intune MDM Event Log
Intune event ID 813 or 814 indicates that a string policy has been applied to Windows 10 or 11 devices. In addition, you can view the exact value of the Policy that is being applied to those devices. For office updates, it’s an integer value and event ID 814.
You can check the Event log path to confirm this – Applications and Services Logs – Microsoft – Windows – Devicemanagement-Enterprise-Diagnostics-Provider – Admin. In this post, I have covered two settings, but in this section, I have covered only one policy configuration result, and that is for L_DeferUpdateDays.
The log states the following – MDM PolicyManager: Set policy string, Policy: (L_DeferUpdateDays), Area: (office16v3~Policy~L_MicrosoftOfficemachine~L_Updates),
EnrollmentID requesting merge: (4009A089-4FBA-482B-9D17-9E5A8428CB98), Current User: (Device),
String: (<enabled/><data id=”L_DeferUpdateDaysID” value=”0″ />), Enrollment Type: (0xD), Scope: (0x0).
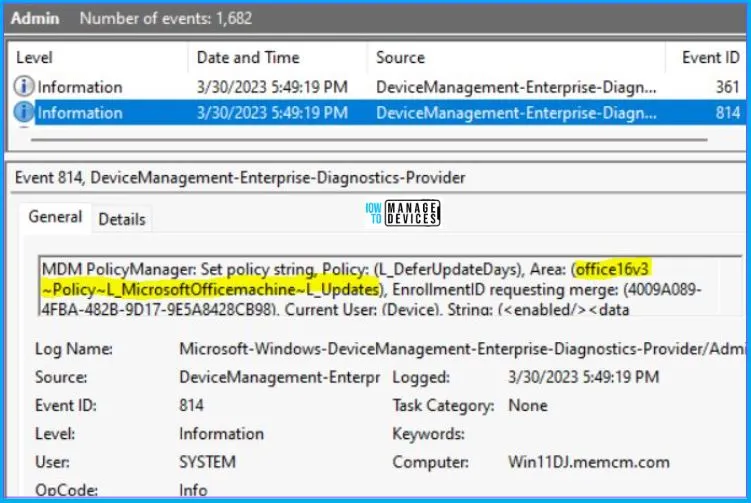
If you look in the event viewer log above, you will get some important information like Area and Enrollment ID that will help you detect the registry path. Please refer to the below for this information:
| Area | Policy | String Value | Scoped | Event ID |
|---|---|---|---|---|
| office16v3~Policy~L_MicrosoftOfficemachine~L_Updates | L_DeferUpdateDays | Enabled | Device | 814 |
You can use information from the above table to REGEDIT.exe on a target computer to view the registry settings that store group policy settings. These settings are located in the registry path.
- Computer\HKEY_LOCAL_MACHINE\SOFTWARE\Microsoft\PolicyManager\providers\4009A089-4FBA-482B-9D17-9E5A8428CB98\default\Device\office16v3~Policy~L_MicrosoftOfficemachine~L_Updates
After navigating the above path in the Registry Editor, you will find the registry with the name L_DeferUpdateDays. Refer to the table and image below.
| Registry Name | Data |
|---|---|
| L_DeferUpdateDays | Enabled <data id=”L_DeferUpdateDaysID” value=”0″ /> |

Author
Abhinav Rana is working as an SCCM Admin. He loves to help the community by sharing his knowledge. He is a B.Tech graduate in Information Technology.
