Let’s Learn how to Install and Use WPS Office All-in-One Office Suite on Windows 11 PC. WPS Office is an office suite that helps create, edit, share, and manage Word documents, presentations, and spreadsheets. The WPS was formerly known as Kingsoft Office.
WPS Office is an all-in-one office suite for viewing and editing multiple types of files. It also provides Cloud Storage, a Template Library, and Sharing features. WPS Cloud supports document management. When you Upgrade to WPS Pro to enjoy more advanced features, WPS Cloud offers up to 20 GB of storage space.
It is an excellent option for all users. It is user-friendly and completely free. Users can access various functions of this app on multiple devices. It allows users to convert MS Word documents, remove watermarks, compress files, add comments, and more.
It is available on every platform. You can quickly transfer your documents to mobile devices. You can run WPS Office smoothly on your PC for a good Work Experience. Now, we will see how to install this app on Windows 11.
Table of Contents
What are The Advantages and Features Of WPS?
WPS Office allows you to edit scanned PDF files and slides, convert spreadsheets, and view documents. It also works perfectly with Google Classroom, Slack, Google Drive, etc.
1. Multiple file formats supported by WPS Office
2. WPS Cloud offers you up to 20 GB of storage space
3. WPS Supports for a compelling cloud storage and sharing functions
5. It Supports Multiple languages
6. Ensure password protection and encryption options for securing sensitive spreadsheet data
How to Install and Use WPS Office All in One Office Suite on Windows 11 PC
WPS Office is an office suite that helps us edit, share, and manage Word documents, presentations, and spreadsheets. Its built-in PDF editor allows us to convert Microsoft Word documents, remove watermarks, compress files, add comments, and more.
We can easily install and use the WPS Office all-in-one office suite on your Windows 11PC from the Microsoft Store. We can also install and use this app through their website. The following are the steps to install the WPS Office on your PC.
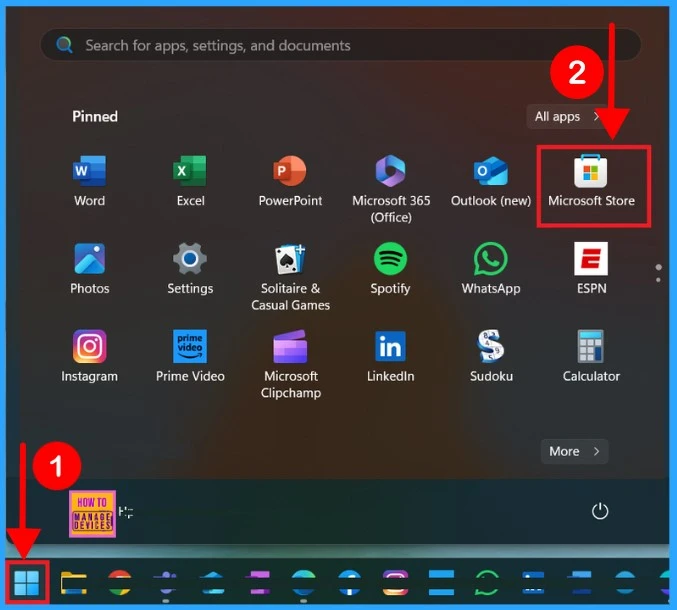
- Select Microsoft Store from the Start Menu
- How to Install and Use Canva in Windows
- How to Install and Use Adobe Acrobat Reader DC
- How to Install and Use the WhatsApp App on Windows 11 PC | Detailed Review
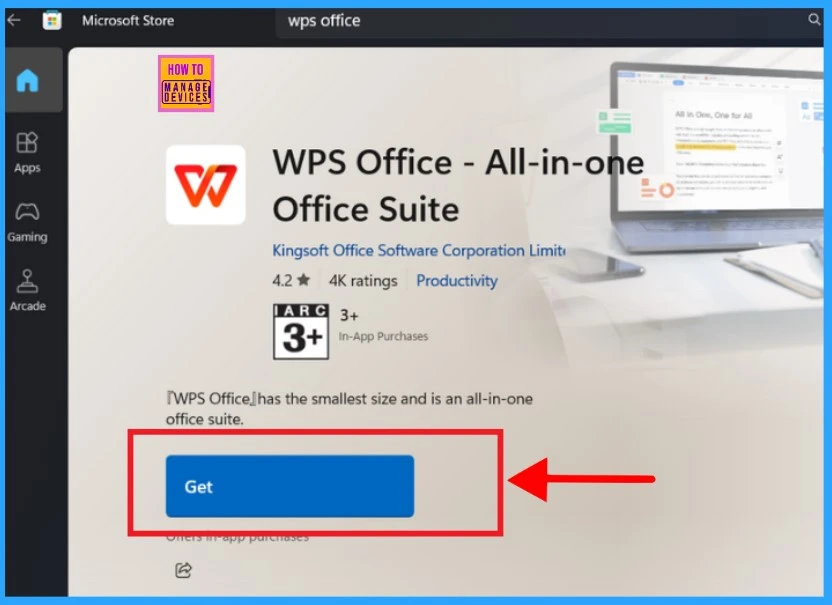
After opening the Microsoft Store, type WPS Office in the search box and click the Get button. The screenshot below (fig.2) will help you.
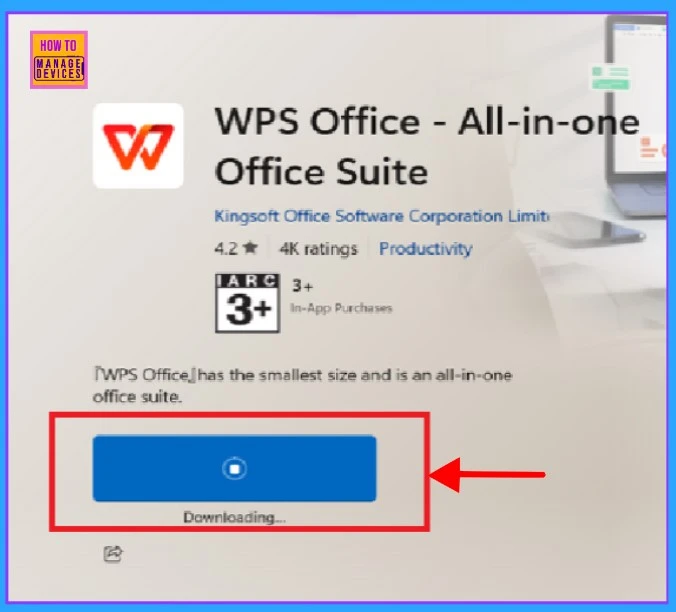
When we click the Get button to install, WPS Office All in One Office Suite downloads. It will take a few minutes to download.
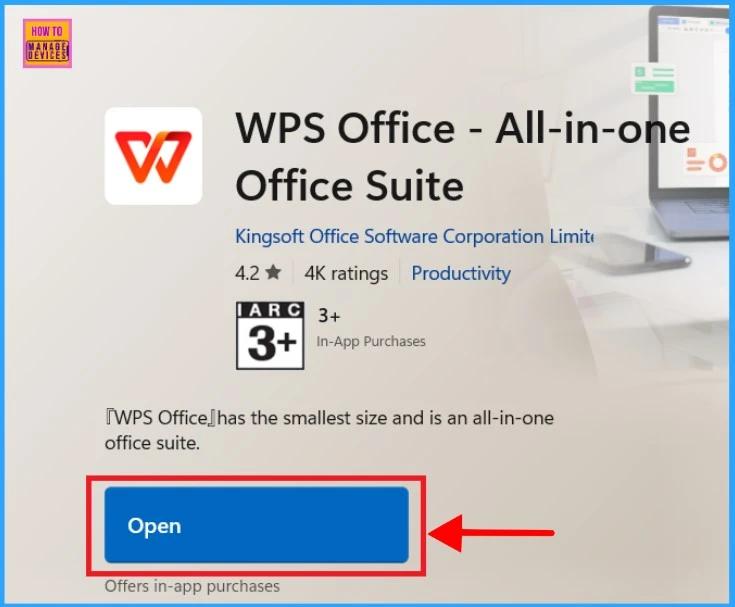
After a few moments, the app is downloaded on our Windows 11 PC. After downloading, we must click the open button to run the application.
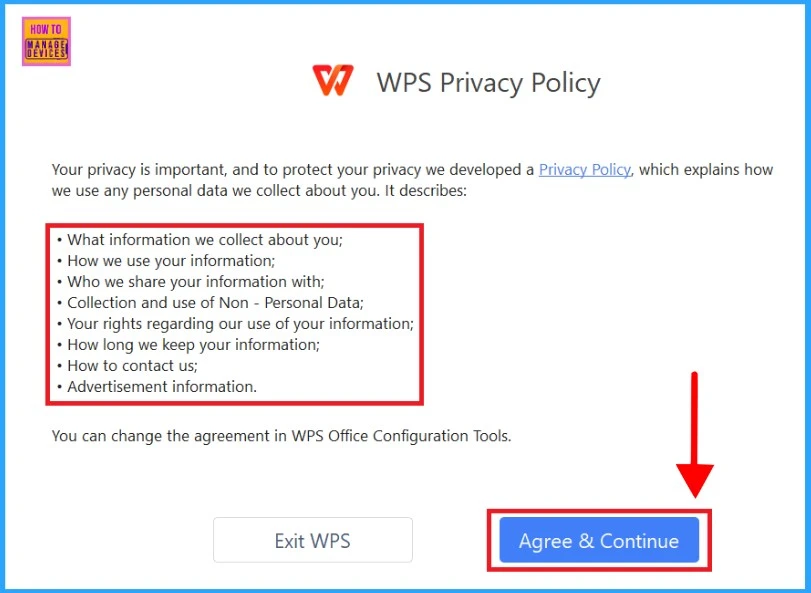
We will be directed into a new window that gives information about the privacy and policies of the application. Then, we need to click Agree & Continue, and we can see the WPS Office interface. Here we can see what the main points in privacy policy.
- What information we collect about you
- How we use your information.
- Who do we share your information with.
- Collection and use of non-personal Data.
- Your rights regarding our use of your information.
- How long do we keep your information.
- How to contact us.
- Advertisement information.
After clicking on Agree and Continue, the installation process was completed. We successfully installed WPS Office on our Windows 11 PC, which is now ready to use.
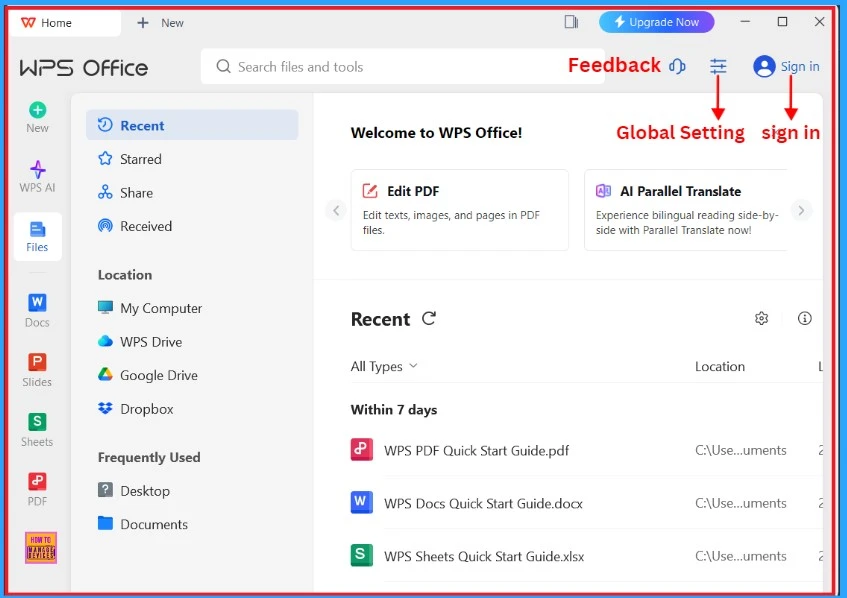
After agreeing the privacy and policy, a new window will open. Now we are on the home page of the WPS Office. At the top right side of the window, we can see Feedback and Sign in (optional), please see the table and screenshot below.
| Home Screen Options | Usage |
|---|---|
| Feedback | We can add our feedback here |
| Sign in | we can sign in and avail more features |
| Global Settings | WPS Settings |
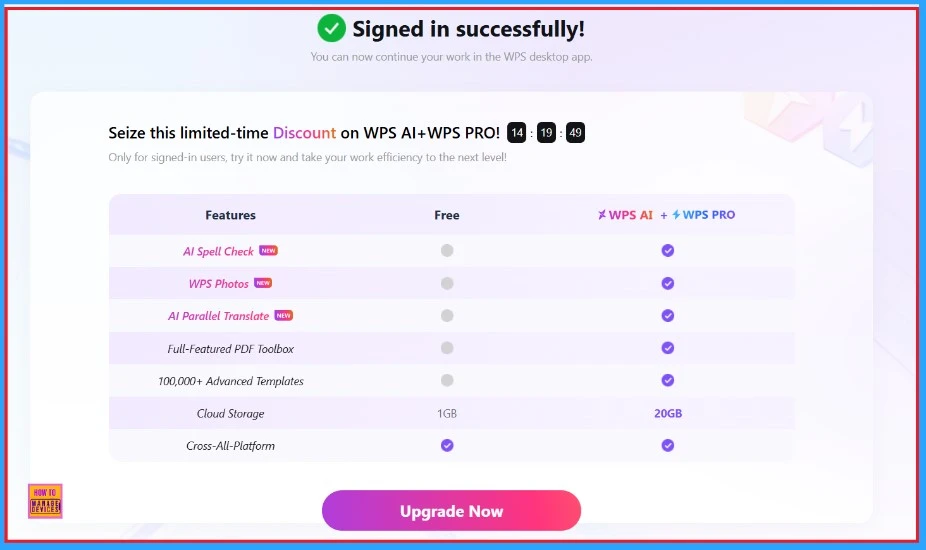
We can sign in to WPS Office with our Gmail and Facebook accounts, etc. After we have finished logging in, we can upgrade our WPS Office for more features, but it is not free. The following Features are Available When we Upgrade the WPS Office.
- Al Spell Check
- WPS Photos
- Al Parallel Translate NLW
- 100,000+ Advanced Templates
- Cloud Storage
- Cross-All-Platform
Create New
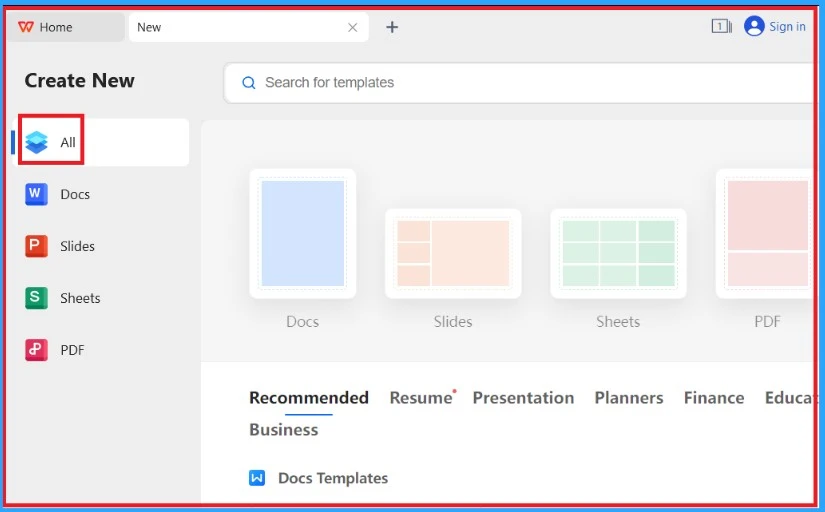
Now, we look into other freely available features in WPS Office. New is the first option in WPS Office, and when we click Create New, it goes to another tab. Then click the All button, and we can see the icons below. We can access Docs, Slides, Sheets, PDFs in it.
| Options in Create New | Details |
|---|---|
| ALL | It shows all the tabs like Docs, Slides, sheets, Pdf, etc. |
| DOCS | We can create new documents |
| SLIDES | We can access many slides like education, business, work, etc. |
| SHEETS | We can create different sheets for Education, calendar, invoice, etc |
| We can edit, convert, split and combine pdf to different formats |
- Snipping Tool in Windows 11 Latest Features | Settings | Uninstall
- How to Install and Use Lenovo Vantage
- How to Install and Use Microsoft Power Automate Desktop
The WPS Presentation
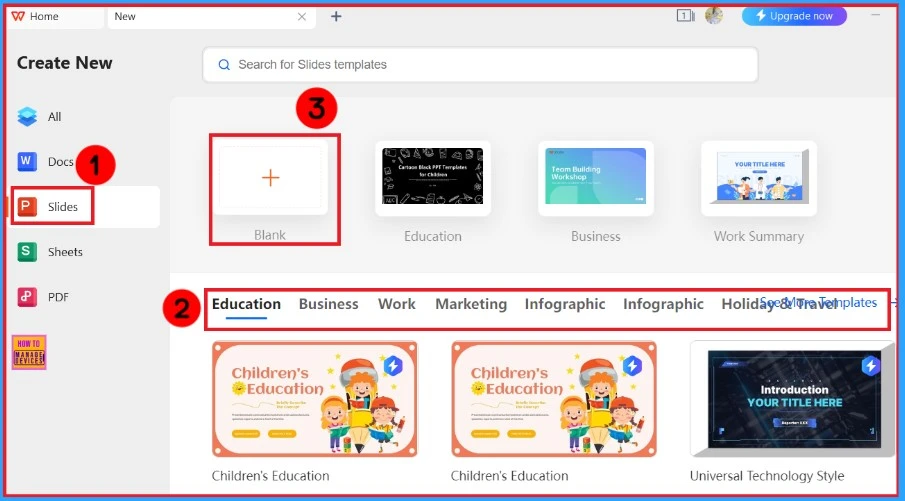
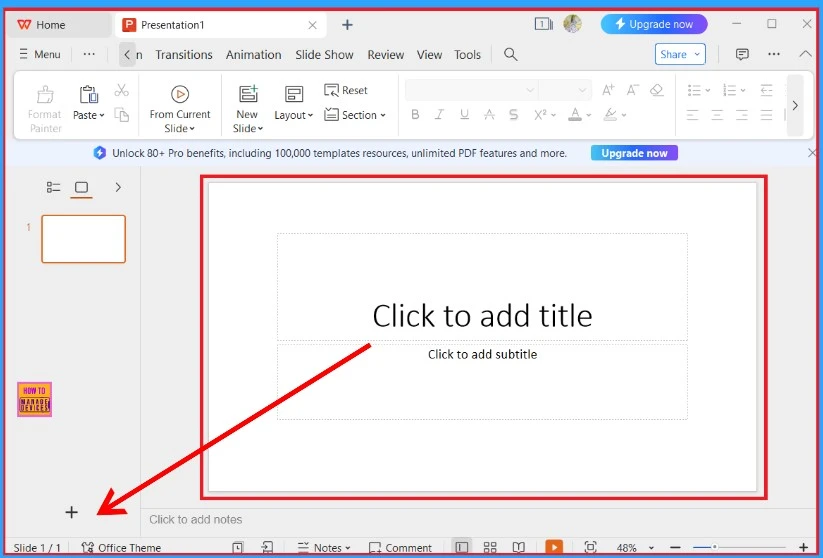
We need to open WPS Office, click the New button and select Slides. There are many categories, such as education, work, business, marketing, etc. (fig 8.1). You can choose one of them or select the Blank button to create a new presentation. A new presentation will be created. Click the + button to add slides (fig 8.2). You can add text, images, and other objects to our slides (fig 8.3).
Here, we can see a square box (Click to add title) in the middle of the screen.You can add any image or document in that place. And we can add subtitles to the presentation, In the left side of the screen, we can see how many slides we have created.
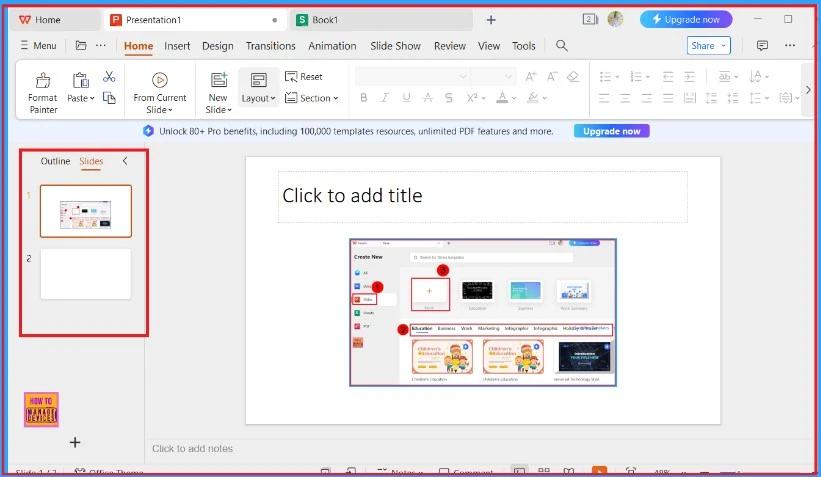
We added an image to the first slide. And we can see how many slides we used to create this presentation. Please refer to the image (fig.8.3).
WPS AI
When you click on WPS AI, all AI tools will open. We can see Doc Smart Create, Docs Smart Edit, Spell Check, Parallel Translate, etc. However, we can only use the AI tools here in the upgraded version.
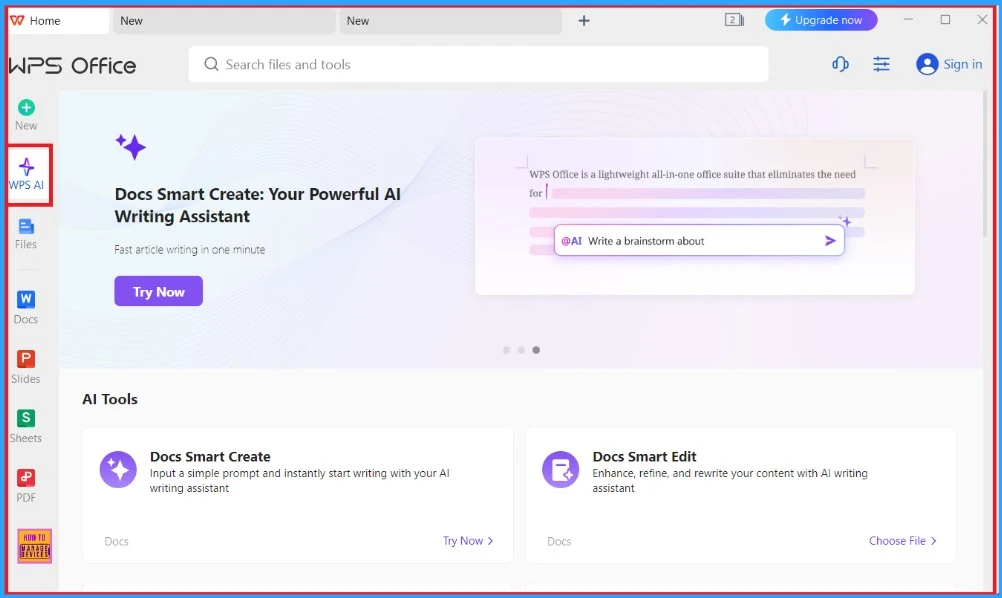
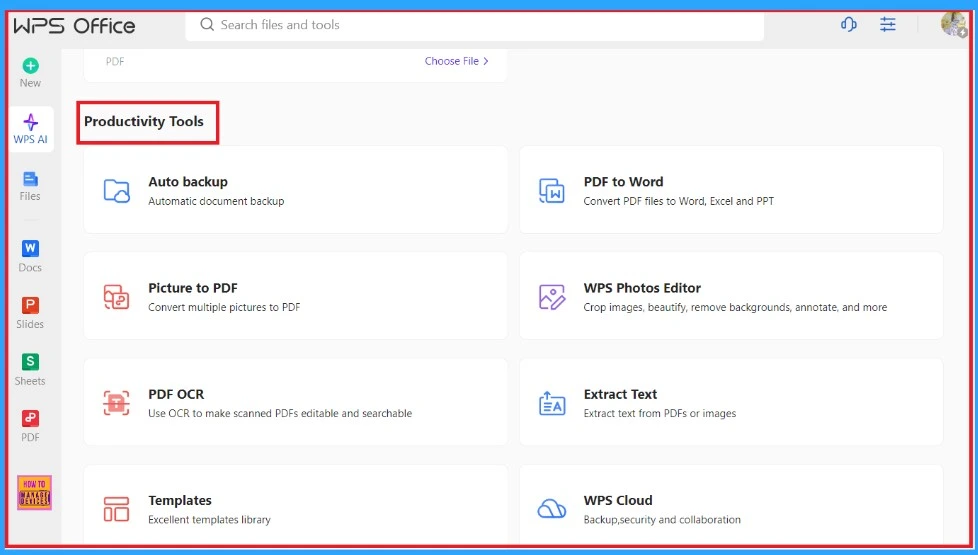
In the free version, we can use Productivity tools like Auto backup, PDF to Word, etc. The following list shows what the productivity tools are.
- Auto backup
- PDF to Word
- Picture to PDF
- WPS Photos Editor
- PDF OCR
- Extract Text
- Templates
Files
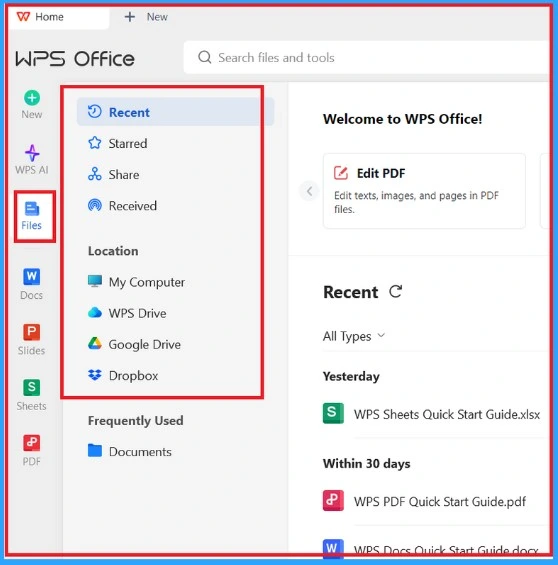
While clicking on Files, we can see the file folder, similar to our desktop file explorer. Your file explorer will open after clicking on the Select a File option. You can select any file from your file explorer.
| Menu | Used to |
|---|---|
| Recent | Used for viewing recent activities |
| Starred | Easily access frequently used files |
| Share | To share selected files with others |
| Received | To receive files from other devices |
| My computer | The source of all resources in our PC |
| WPS Drive | To store, sync and share files to multiple devices |
| Google Drive | To find your Drive files on your computer |
| Dropbox | Store files. We can access them online |
Docs
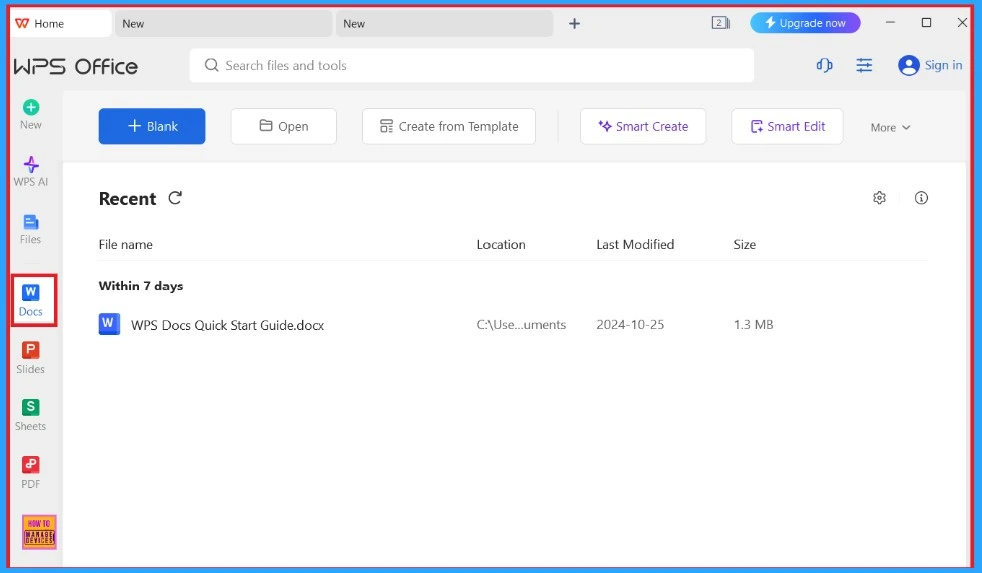
Docs help insert tables and other file types into documents. Password protection and encryption options keep sensitive documents secure. The WPS Docs quick start guide opens when we click the Docs icon. While opening the Docs, the complete guidance of ‘WPS’ opens in a new tab (Word).
Slides
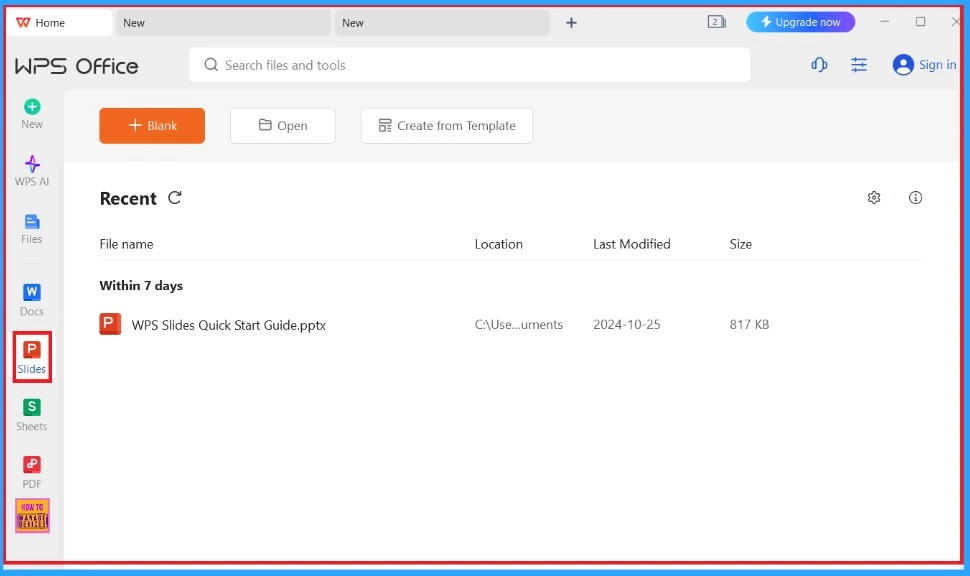
There is extensive support for various PowerPoint animation effects and the insertion of sound and video. It helps in easy sharing of presentations When we open the Slides icon, the WPS Slides Quick Start Guide will open, and the guide provides complete details about how to use the slides in the WPS Office.
Sheets
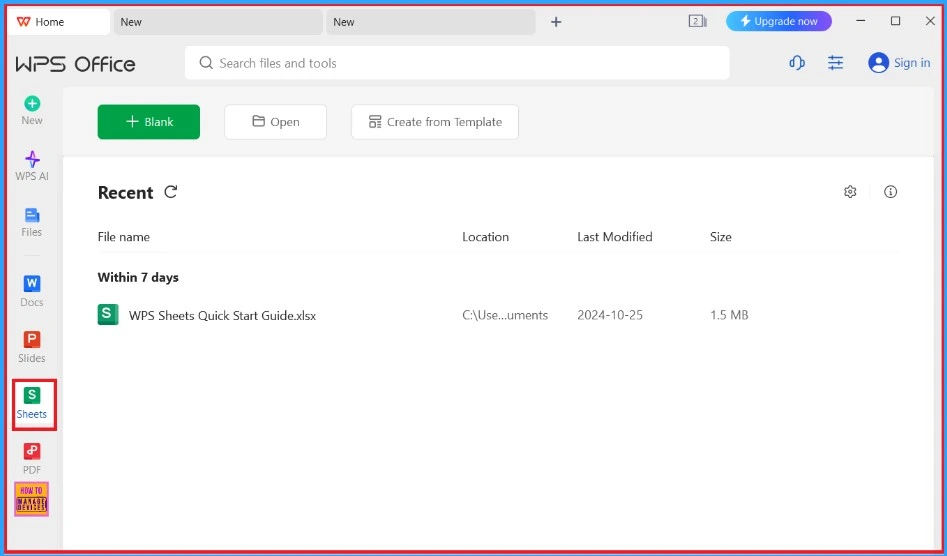
It is compatible with all Office spreadsheet formats and password protection and encryption options for securing sensitive spreadsheet data. When we click the Sheets icon, the WPS Sheets Quick Start Guide will open. The guide provides complete details about how to use the sheets in the WPS Office.
End Result – Create a Sheet
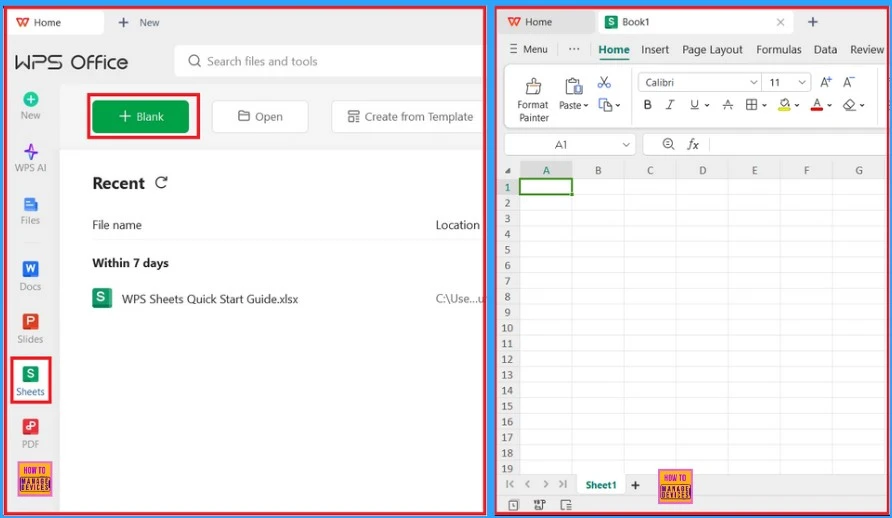
Open the WPS Sheet Interface from the dashboard. Choose the file format we want to create, such as Blank workbook, Create from Template, or you can open a spreadsheet. Here we click blank to open the spreadsheet in the top left menu bar (fig 14.1).
End Result – PDF
It is for managing and reading PDF files. We can easily add highlights and annotations to PDFs. When we click the PDF icon, the WPS PDF Quick Start Guide opens. The guide provides complete details about how to use the PDF in the WPS Office.
Global Settings
When we click the Global Settings button, a drop-down menu will pop up. We can then change the language in the WPS Office, change the theme, etc.
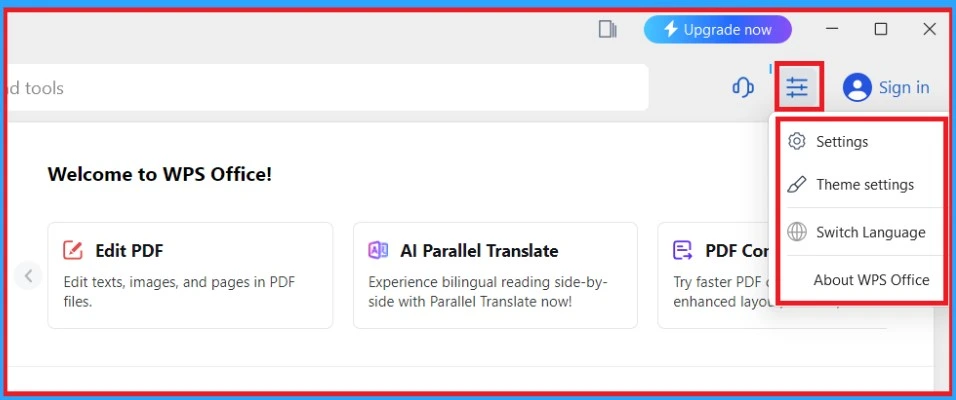
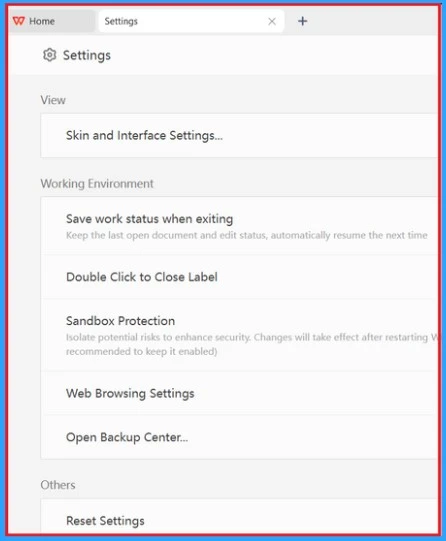
| Settings | Details |
|---|---|
| Skin and Interface Settings | Theme settings |
| Save work status when exiting. | Keep the last open document. |
| Double Click to Close Label | To close |
| Sandbox Protection | Enhanced security |
| Web Browsing Settings | Web search |
| Open Backup Center | Used to recover files |
| Reset Settings | To reset everything |
| Privacy Settings | To limit who can access |
When we click on the settings icon, many options are available. Skin and Interface Settings allows us to change the theme of WPS Office. We can also save and keep the last open document. The screenshot below will help us learn more about the settings icon.
Need Further Assistance or Have Technical Questions?
Join the LinkedIn Page and Telegram group to get the latest step-by-step guides and news updates. Join our Meetup Page to participate in User group meetings. Also, Join the WhatsApp Community to get the latest news on Microsoft Technologies. We are there on Reddit as well.
Author
Anoop C Nair has been Microsoft MVP from 2015 onwards for 10 consecutive years! He is a Workplace Solution Architect with more than 22+ years of experience in Workplace technologies. He is also a Blogger, Speaker, and leader of the Local User Group Community. His primary focus is on Device Management technologies like SCCM and Intune. He writes about technologies like Intune, SCCM, Windows, Cloud PC, Windows, Entra, Microsoft Security, Career, etc.
