Walk Through of NAKIVO Hyper-V Backup – Installation. I have a Hyper-V server 2016 with SCCM, AD servers, and Windows 10 virtual machines. In this post, I will share my experience installing the NAKIVO Hyper-V backup solution.
NAKIVO Backup & Replication supports Microsoft Hyper-V 2016, 2012(R2), and 2012 hypervisors. The installation was straightforward, and it did take less than 5 minutes for me.
Download NAKIVO backup and replication solution from https://goo.gl/3Tb7D2
NAKIVO Backup & Replication provides integration with Microsoft Active Directory. You can easily map Active Directory groups to NAKIVO Backup & Replication user roles.
I plan to cover the BACKUP and RESTORE guide in future blog posts. IE is missing from the recommended browsers list of NAKIVO. I don’t know what the exact reason for the same is. In this post, I will cover the following.
Prerequisites for NAKIVO Microsoft Hyper-V backup How to Install NAKIVO Backup and Replication Solution What is a Transporter? NAKIVO troubleshooting Logs How to Perform NAKIVO Configurations How to Create a New Backup Repository for NAKIVO Hyper-V Video Tutorial of NAKIVO Backup & Replication Installation
Prerequisites for NAKIVO Microsoft Hyper-V backup
- Full administrative permissions are required
- Default administrative shares must be enabled on Hyper-V hosts
- The “File server” role must be enabled on Hyper-V hosts
- The SMB v1 protocol should be allowed on Hyper-V hosts
NAKIVO Backup & Replication can be installed on the following operating systems.
- Windows Server 2012 R2 Standard (x64)
- Windows Server 2012 Standard (x64)
- Windows Server 2008 R2 Standard (x64)
- Windows 10 Professional (x64)
- Windows 8 Professional (x64)
- Windows 7 Professional (x64)
NAKIVO Backup & Replication can be accessed from the following Web browsers
- Google Chrome v26 or later
- Mozilla Firefox v21 or later
How to Install NAKIVO Backup and Replication Solution
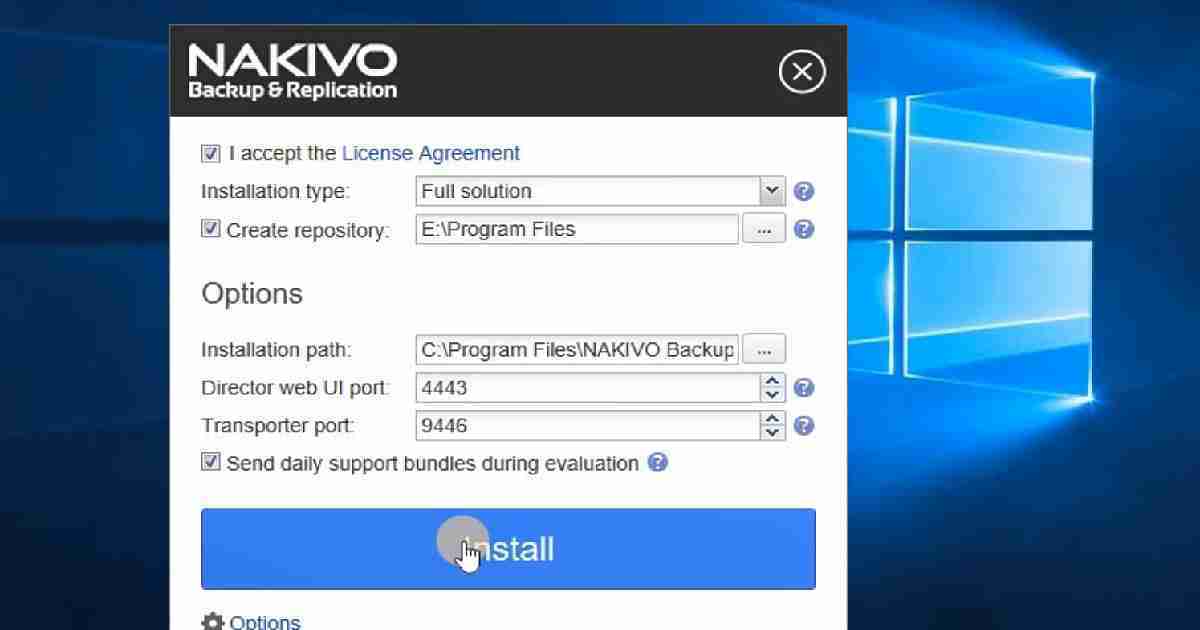
NAKIVO can be installed on Windows, Linux, and NAS. To install NAKIVO Backup & Replication on the Windows platform, run the NAKIVO Backup & Replication installer and click Install. This is explained in the video tutorial here.
NAKIVO has three main components: Director, Transporter, and Backup Repository. When you select FULL Installation, all three parts will automatically get installed. Following are the configuration that I chose for installation.
- Installation Type: Full solution
- Create Repository: E:\Program Files
- Installation Path: C:\Program Files\NAKIVO Backup & Replication
- Director Web UI port: 4443
- Transporter Port: 9446
What is a NAKIVO Transporter?
A Transporter is a service that runs actual backup, replication, and recovery tasks. These components are also responsible for the management of backup repositories.
Do I Need a Transporter? One transporter called the “Onboard transporter” is already included in your installation. If you run a large environment or have multiple sites, you may need additional transporters.
NAKIVO Logs Location for Troubleshooting
C:\Program Files\NAKIVO Backup & Replication\logs\0
How to Perform NAKIVO Configurations
The configuration steps are General, Inventory, Transporters, Repositories, Events, and Licensing. Inventory and backup repository configurations are the most important settings from my perspective.
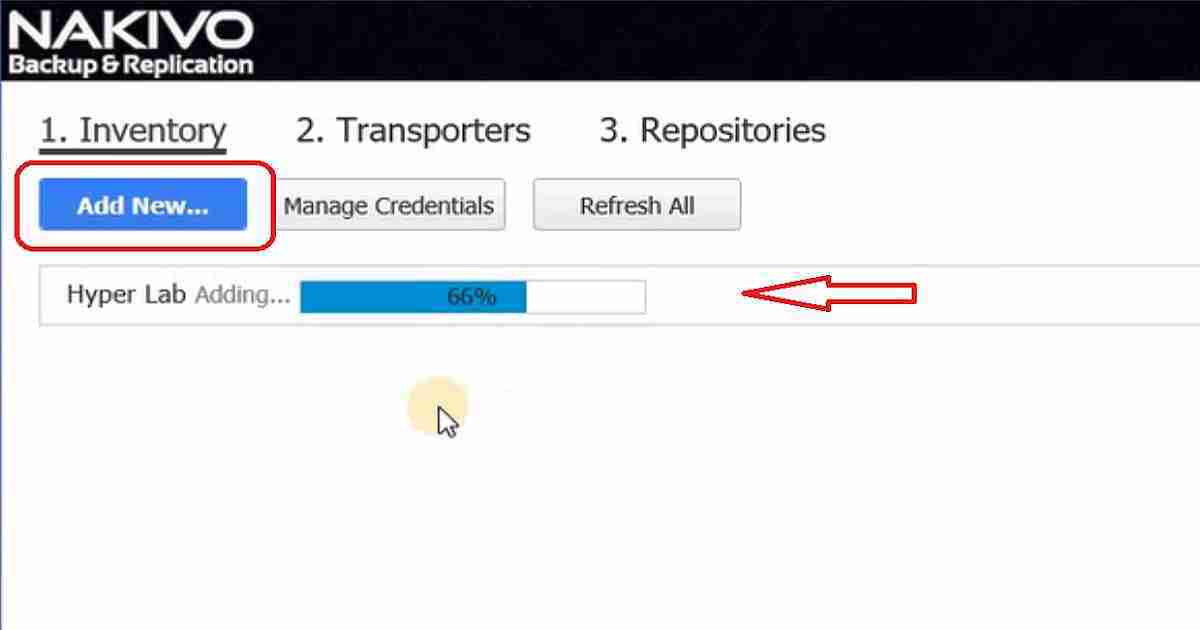
Inventory is the place where you add the hypervisor connectivity details and inventory of that infrastructure.
I tested the NAKIVO inventory option with Adding Hyper-V Servers to connect my SCCM Hyper-V lab infrastructure with NAKIVO.
Display Name: Type: select whether you want to add a standalone Hyper-V server Hostname or IP: Specify the hostname or IP address of the Hyper-V server Username and Password: Specify credentials of the Hyper-V server that you want to add to the inventory. The credentials you specify should have full administrative privileges to the Hyper-V server WS MAN port: 5986 – Specify the port number for WS MAN.
How to Create a New Backup Repository for NAKIVO Hyper-V
To create a new Backup Repository, follow the steps below
- Click Configuration in the upper right corner of the product.
- Go to the Repositories tab and click Add Backup Repository
- Click Create a new backup repository
- Fill out the fields as described below:
Name, The target (Assigned transporter), Type (Forever incremental, Incremental with full backups), Location (Local folder on assigned transporter), etc… - To specify advanced options, click More options and perform the following options Storage Savings & Encryption
Video Tutorial of NAKIVO Backup & Replication Installation
Reference
https://helpcenter.nakivo.com/
Author
Anoop is Microsoft MVP! He is a Solution Architect in enterprise client management with more than 20 years of experience (calculation done in 2021) in IT. He is a blogger, Speaker, and Local User Group HTMD Community leader. His main focus is on Device Management technologies like SCCM 2012, Current Branch, and Intune. E writes about ConfigMgr, Windows 11, Windows 10, Azure AD, Microsoft Intune, Windows 365, AVD, etc…
