Exciting News! New Platform SSO for macOS Devices in Microsoft Intune. Microsoft Intune is always implementing new features in device management. Recently, Microsoft announced SSO for the company portal. With this new announcement, we can expect a significant change in Enterprise device management.
Single Sign-on (SSO) is the best feature for Enterprise device management. Users can access different apps and systems by providing their login details once. Integrating Intune and the macOS Company Portal App with Platform SSO demonstrates Microsoft’s dedication to enhancing the user experience.
Now you are wondering Why platform SSO? We have to know that Platform SSO will be a game-changer in macOS. Platform SSO enhances the existing Microsoft Enterprise SSO plug-in for Apple devices.
SSO is a single sign-in process allowing users to log in once and access multiple apps and websites without re-entering credentials. In this blog post, we can discuss the overview of Platform SSO and how to configure Platform SSO in Intune.
- How to Troubleshoot Microsoft Enterprise SSO Plug-in on macOS using Intune
- macOS Devices Migration Framework to Intune from Jamf Kandji JumpCloud Platforms
- 2404 Microsoft Intune New Features April Update

Video- Intune Policies to Manage Microsoft Enterprise SSO Plug-in macOS
We have a video on the basis of Intune Policies to Manage Microsoft Enterprise SSO Plug-in macOS by Snehasis Pani. This video covers How to implement the Microsoft Enterprise SSO plug-in using Intune, and this feature can be implemented using JAMF or any other device management solution like Intune, VMware Airwatch etc.
SSO for macOS Devices in Microsoft Intune
Platform SSO is the best improvement to the existing Microsoft Enterprise SSO plug-in for Apple devices. This aims to manage the macOS device smoothly and securely. Platform SSO and helps users sign into apps and websites with their Microsoft Entra ID. The SSO app extension is part of Platform SSO.
It also supports using Touch ID and passkeys for an even easier sign-in process. As I mentioned, here is a brief overview of Platform SSO. Now, we can discuss how it is configured in macOS devices through Intune.
- Sign up for the Microsoft Intune admin center
- Navigate through the Device>Configuration>New Policy
Note: Platform SSO is available in public preview On macOS devices.
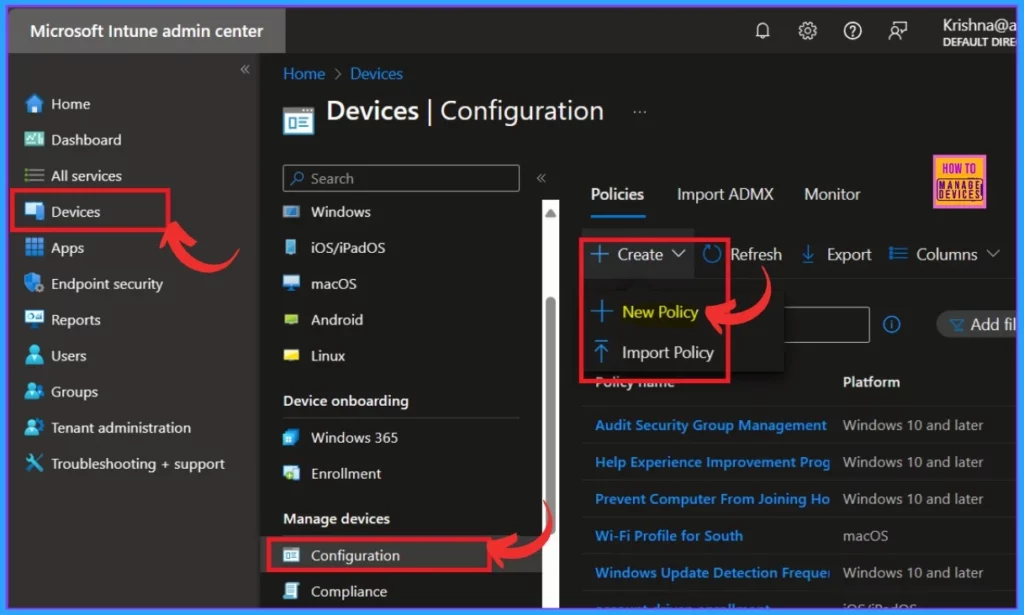
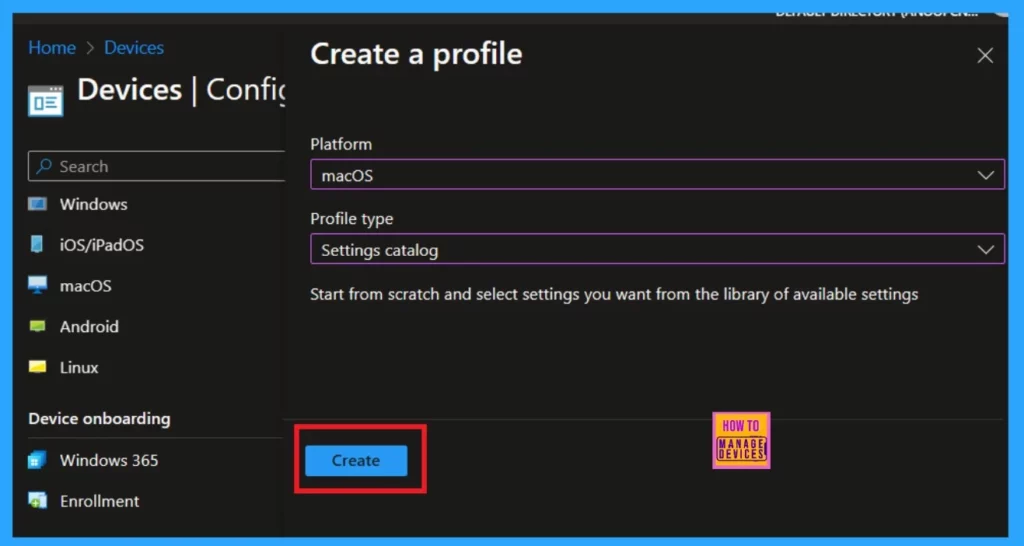
When you select the new policy, you must make some more settings. You must select the platform as MacOS and the profile type as Setting Catalog there.
- Click on the Create
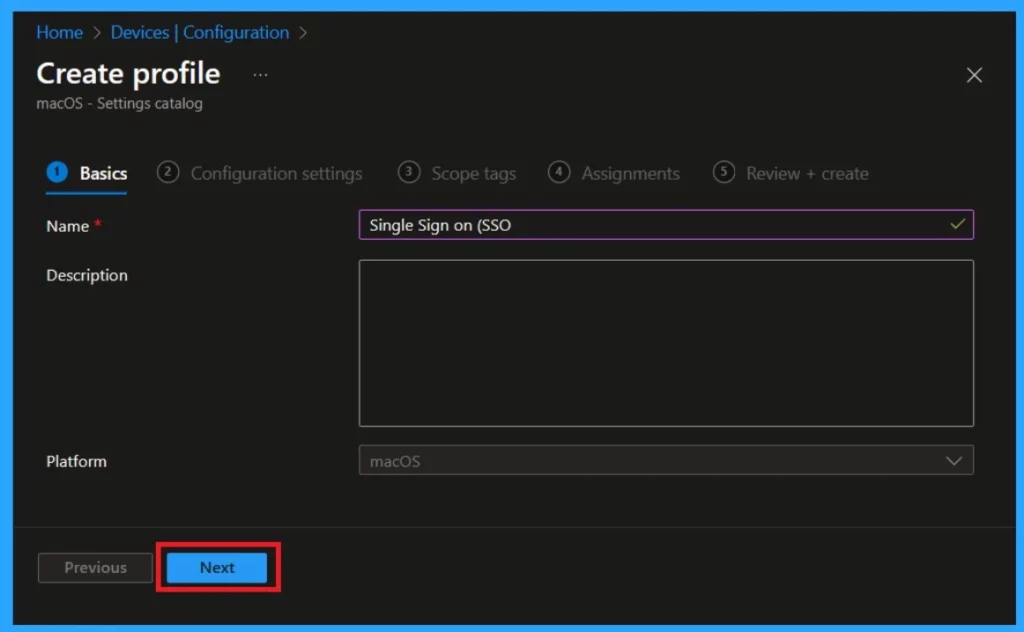
After that, the main important step is to Name the policy; for example, I added Sigle sign-on (SSO). If you want to remember the policy later, you have to add the description later. It will help you to understand the policy better.
- Click on the Next option
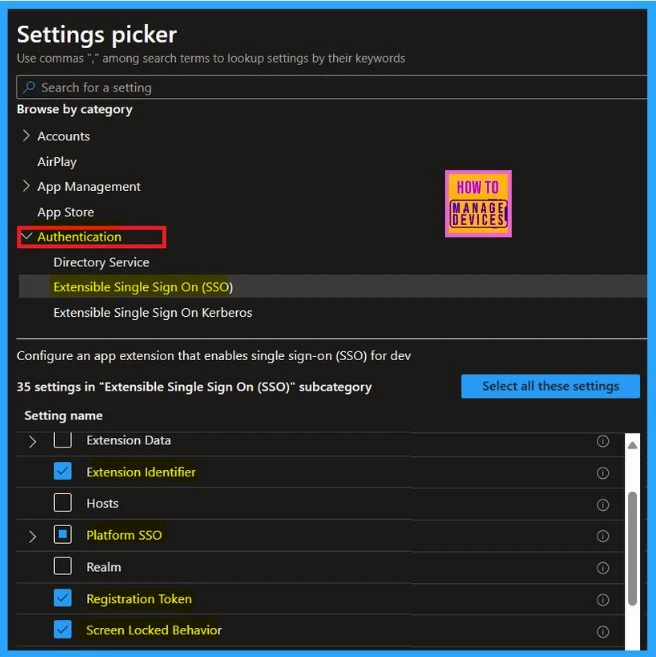
The next important and crucial step is configuration settings; here, you have to apply the settings for the policy you will create. To do so, select the Add setting option. When you click on that, the settings picker will show up.
- Expand the Authentication option as a category
- Then select the option called Extensible Single Sign On (SSO)
- Then check the options below
- Extension Identifier
- Then Expand the platform SSO
- Select the Authentication method
- Select Use Shared Device Keys
- Select Registration Token
- Select Screen Locked Behavior
- Select Team Identifier
- Select Type
- Select URLs
| Settings | Info |
|---|---|
| Platform sso | This is the dictionary used to configure PlatformSSO. |
| Extension Identifier | The bundle identifier of the app extension that performs SSO for the specified URLs. |
| Registration Token | The token this device uses for registration with Platform SSO. Use it for silent registration with the Identity Provider. Requires that ‘AuthenticationMethod’ isn’t empty. Available in macOS 13 and later |
| Authentication Method | The Platform SSO authentication method to be used with the extension. Requires that the SSO Extension also support the method |
| Screenlock Behaviour | When set to Do Not Handle, the request continues without SSO. Available in iOS 15 and later and macOS 12 and later |
| Team identifier | The team identifier of the app extension. This key is required on macOS and ignored elsewhere |
| Type | The type of SSO. |
| URL | An array of URL prefixes of identity providers where the app extension performs SSO. Required for Redirect payloads. Ignored for Credential payloads. The URLs must begin with http:// or https://, the scheme and hostname are matched case-insensitively, query parameters and URL fragments are not allowed, and the URLs of all installed Extensible SSO payloads must be unique |
See More: How to setup Microsoft Enterprise SSO plug-in for Apple macOS Devices using Intune
- Update Intune Company Portal App for macOS Device
- New Device Restriction Settings Available in Apple Settings Catalog
- Additional App Configuration Permissions for Android Apps
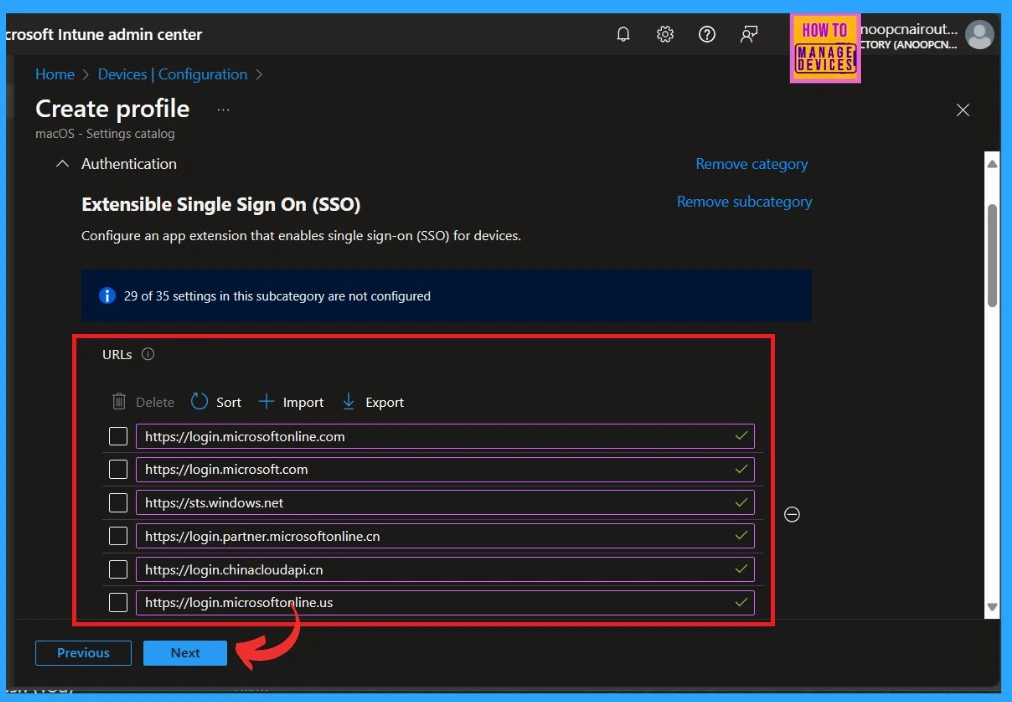
When you select the settings, close the settings picker and go back to the configuration settings window. Here, you get all the settings that you selected. Now, you have to add the appropriate value. The table below helps you add the value.
- After giving the appropriate value, Click on the Next
| Settings | Value |
|---|---|
| URL Address | https://login.microsoft.com https://sts.windows.net https://login.partner.microsoftonline.cn https://login.chinacloudapi.cn https://login.microsoftonline.us https://login-us.microsoftonline.com https://login.microsoftonline.com |
| Extension Identifier | com. microsoft.CompanyPortalMac.ssoextension |
| Use Shared Devices Keys | Enabled |
| Registration Token | {{DEVICEREGISTRATION}} |
| Authentication Method | UseSecureEnclaveKey |
| Screen Locked Behavior | Do Not Handle |
| Team Identifier | UBF8T346G9 |
| Type | Redirect |
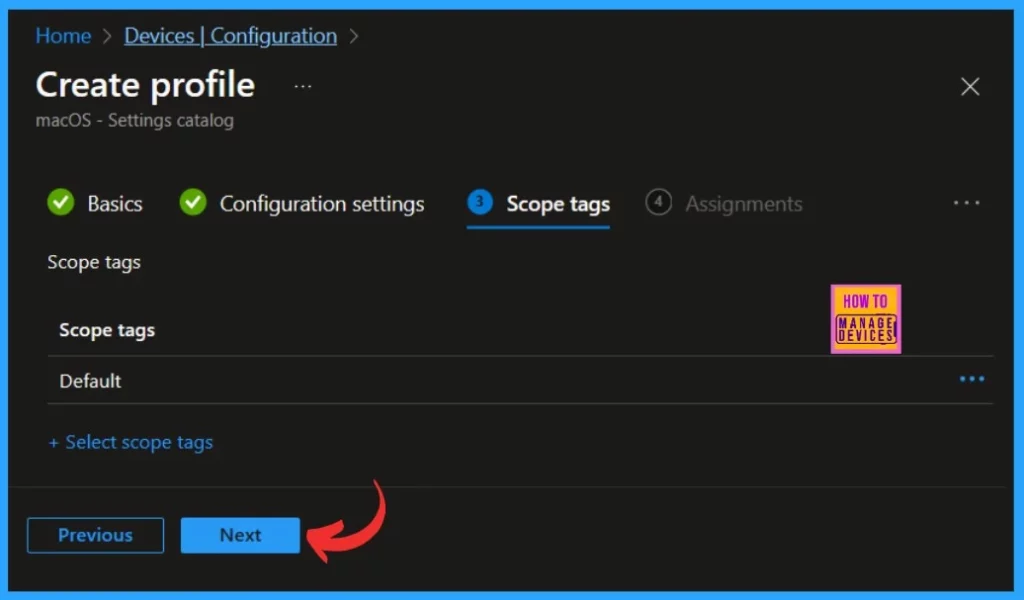
The next step is a scop tag, which is a mandatory option. You can choose it according to your preference. This section allows you to manage and control access to the platform. Here, I skipped this section and clicked on the Next option.
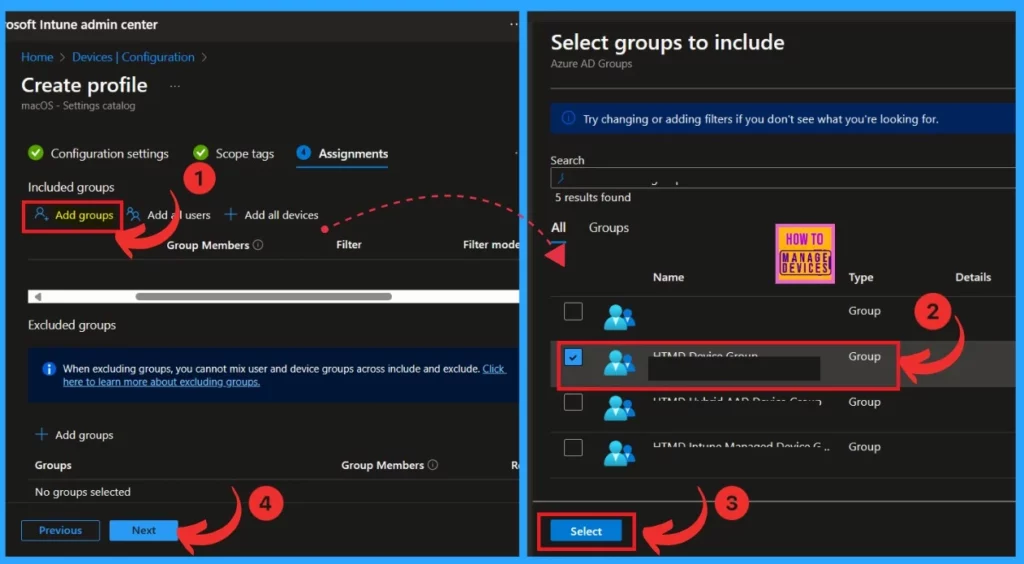
The next step is to go to Assignments. Here, you have to add the policy to the preferred groups. Click on add groups under Include groups. When you click on Add group, you will get a window where you have to add a group for the policy( you can also search for the groups).
- Click on the Next
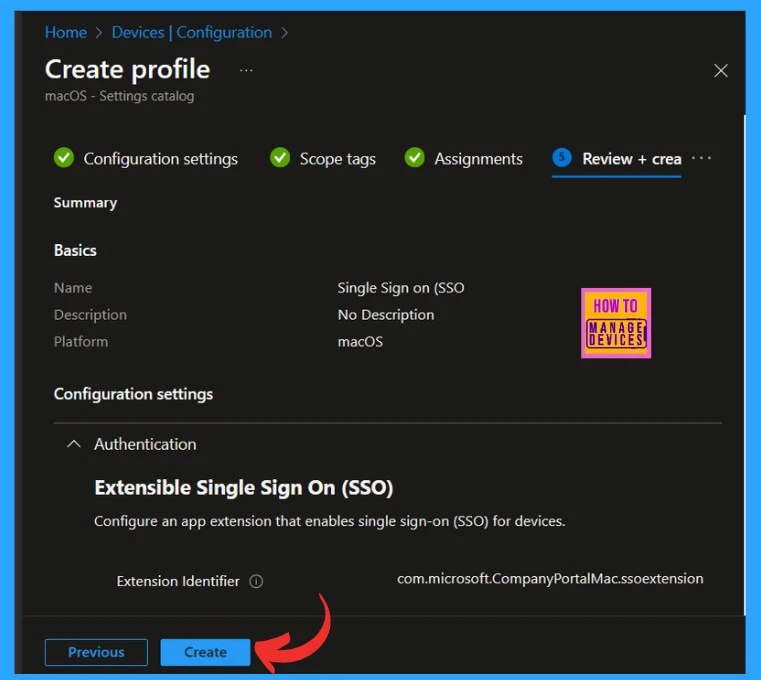
The last step, called the Review and Create option, gives you the recheck option to check all the details that you are given and whether any changes are to be made in this procedure. This is the final stage; you can view all the details in one window.
- Click on the Create option
We are on WhatsApp. To get the latest step-by-step guides and news updates, Join our Channel. Click here –HTMD WhatsApp.
Reference
What’s new in Microsoft Intune
Author
Krishna. R is a computer enthusiast. She loves writing about Windows 11 and Intune-related technologies and sharing her knowledge, quick tips, and tricks about Windows 11 or 10 with the community.
