Hi, best way to Set the Run Command to the Start Menu through the Intune. As you all know, the Run command is an important feature in Windows. It lets users quickly access system functions, programs, and files by typing specific commands. Windows users have used this tool for a long time.
In our previous post, we discussed different deployment types setting catalog policies. Today, we are Discussing How to add the Run command to the Start menu through the setting catalog. The Run command is useful for everyone. It can make tasks easier, improve productivity, and help users personalize their computer experience.
The Run command is known for its speed and efficiency in work, so it helps users be productive. The start menu is one of the important sections in a Windows system. It allows users to access tools such as file settings and programs easily. Windows users can easily customize the Start menu and the Run command.
Administrative users always need the Run command, so adding it to the Start Menu is easy. The Run command helps users access system tools and settings quickly, making tasks like opening the Control Panel, Task Manager, and Registry Editor easier.
Table of Contents
What Happens if you Disable the Add the Run Command to the Start Menu?
If you disable or don’t configure this setting, the Run command isn’t visible on the Start menu by default, but it can be added from the Taskbar and Start menu properties. If the Remove Run link from Start Menu policy is set, the Add the Run command to the Start menu policy has no effect.
Best way to Set the Run Command to the Start Menu – CSP Details
We talked about Run command and how it to be possible to add in the start menu through in the Intune. Now, we need to focus on CSP details, which are really important. In Intune, CSP (Configuration Service Provider) helps manage and set up settings on Windows devices.
| Scope | Editions | Applicable OS |
|---|---|---|
| Not applicable for Device | Pro | Windows 10, version 2004 with [10.0.19041.1202] and later |
| Applicable for User | Education | Windows 10, version 20H2 with [10.0.19042.1202] and later |
| Windows SE | Windows 10, version 21H1 with [10.0.19043.1202] and later | |
| Enterprise | Windows 11, version 21H2 [10.0.22000] and later | |
| LoT Enterprise / loT Enterprise LTSC |

- Configure Registry Processing Policy using Intune
- Best 15 Accessibility Settings Run Commands for Windows
- Find Folder Locations Using RUN Command in Windows
Now, let’s look at how to deploy the policy Set the Run Command to the Start Menu. First, log in to the Microsoft Intune admin center using your credentials. Then, go to the Devices section, click Configurations, and create a new policy.
When you click on the “New Policy” option, the Create a Profile window will appear. In this window, you’ll need to select the platform. I chose Windows 10 and Later. Next, select the profile type; I selected “Settings Catalog” from the options.
- Finally, click the “Create” button.

Basics
The next step is to focus on the basics. In this section, you’ll enter the key details for the policy. You can provide a name, description, and select platform options. For example, I named the policy “Add the Run Command to the Start Menu.” You can also add a description to help you understand the policy later on. The platform is already set to Windows, so you don’t need to change that.
- Once you’re finished, click Next.

Configuration Settings
Let’s take a look at how to manage the configuration settings. In the configuration settings menu, you will see an option called Add Setting in a a hyperlink. Click on that link, and a settings picker window will appear. In this window, you need to expand the “Administrative Templates” option.
This will allows additional options; select Start Menu and Taskbar from that. Once you click on “Start Menu and Taskbar,” you will find various settings available. I selected the option to add the Run Command to the Start Menu. After making your selections, close the settings picker window.
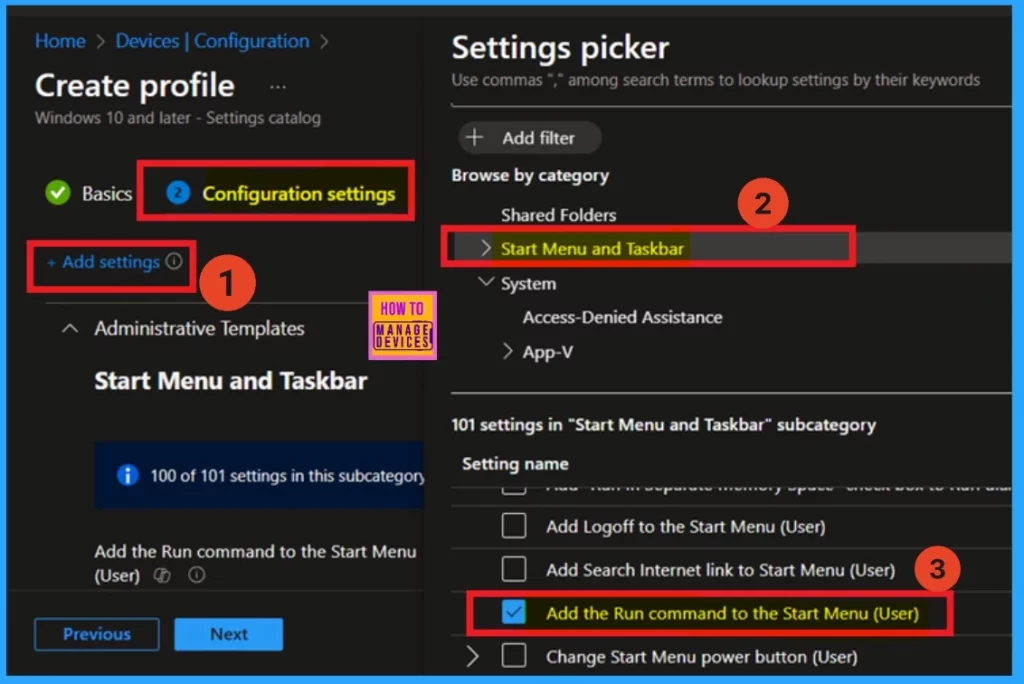
When you close the settings picker window, you’ll notice an option in the configuration settings that allows you to turn on or off the Add the Run Command to the Start Menu. To enable this option, toggle the button from left to right. (If you have any doubts, please refer to my screenshot).

Scope Tags
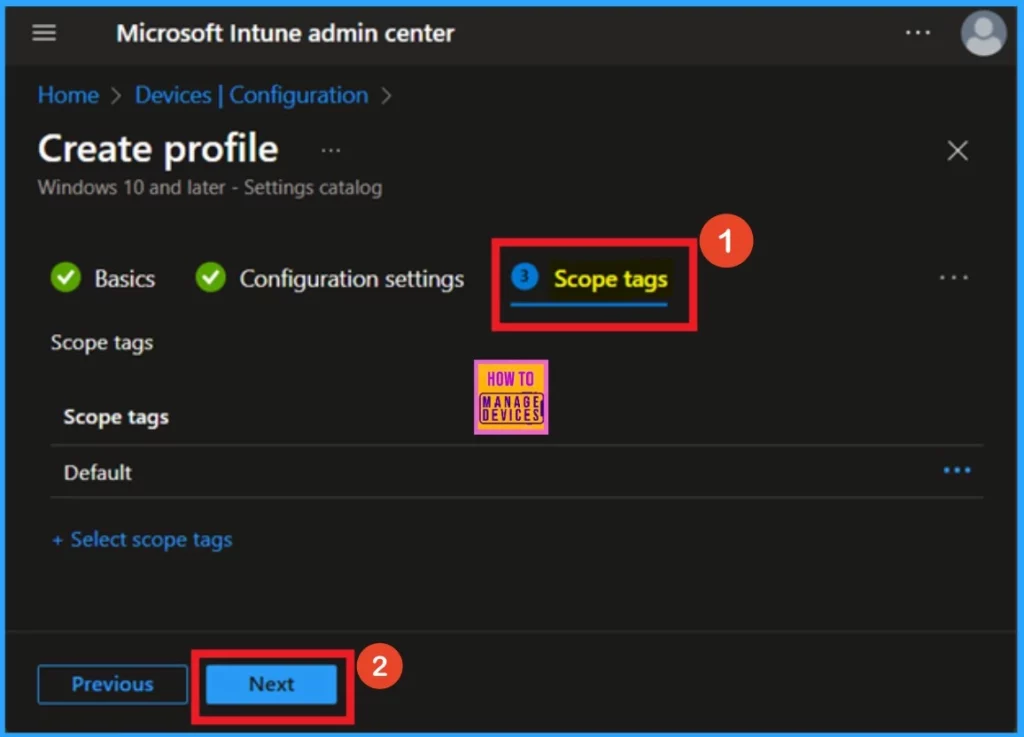
The next section is the scope tag. While no action is required here, it’s important to remember that the scope tag plays a crucial role in every policy creation. To set a scope tag, click on the “Select Scope Tags” hyperlink to add scope tags to the policy.
- I am skipping this policy, I will click on the Next section
Assignments
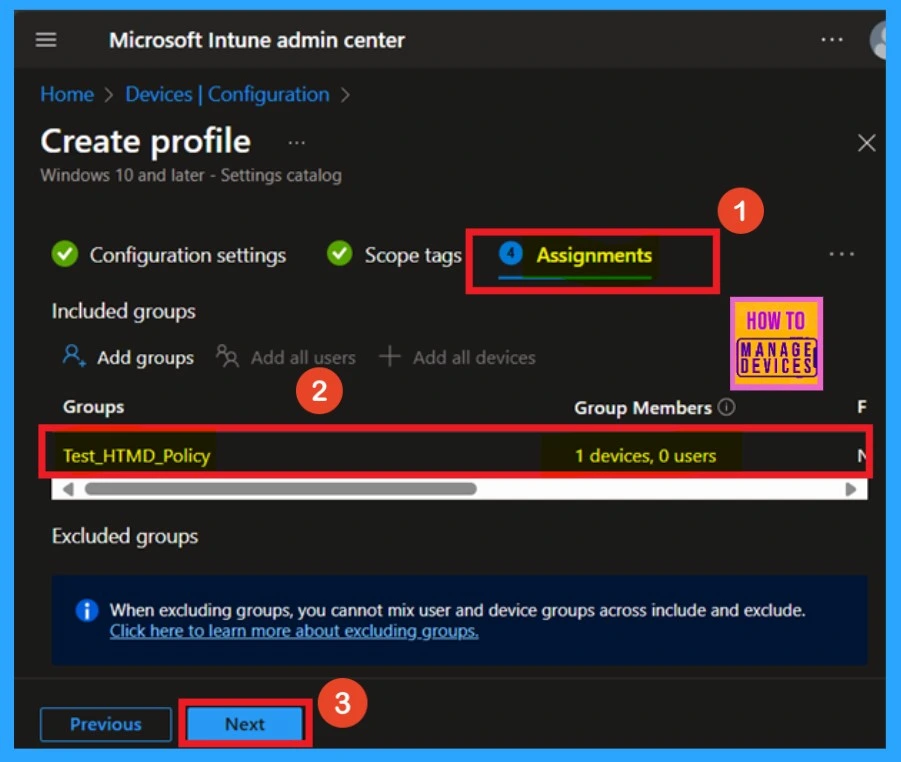
The next step is essential that is Assignment section. In this section, you will assign a group to the policy. The purpose of creating a policy is to apply specific settings to a designated group. To proceed, find the option labeled “Include Group.” Click on it, and a list of available groups will appear. You can select the groups from this list or create a new group if needed.
Review + Create
The “Review + Create” page summarises all the details related to your policy. You can review the policy’s name and description. Once you’ve checked everything, click the “Create” button. After that, you will receive a notification confirming your policy has been created successfully.

Monitor Status
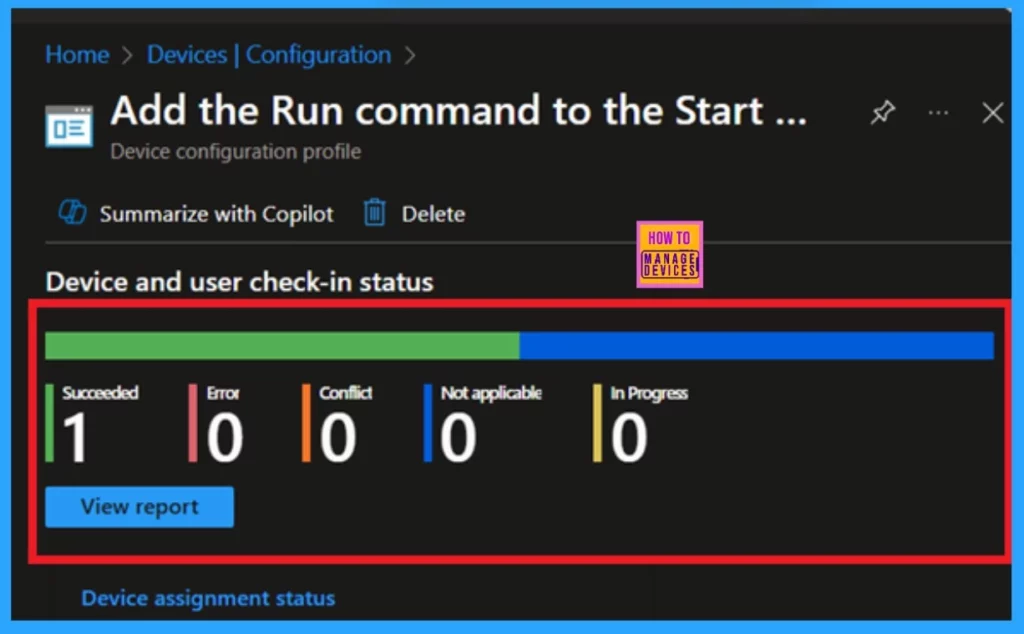
Monitoring a policy’s status after its creation is crucial to ensuring successful implementation and detecting potential errors or conflicts. To check the status, go to the Devices section, navigate to Configurations, and search for the policy you created. Once located, click on the policy to view a status overview. You must wait around 8 hours to receive the monitoring results.
- However, you can speed up this process using the company portal sync option.
Client Side Verification
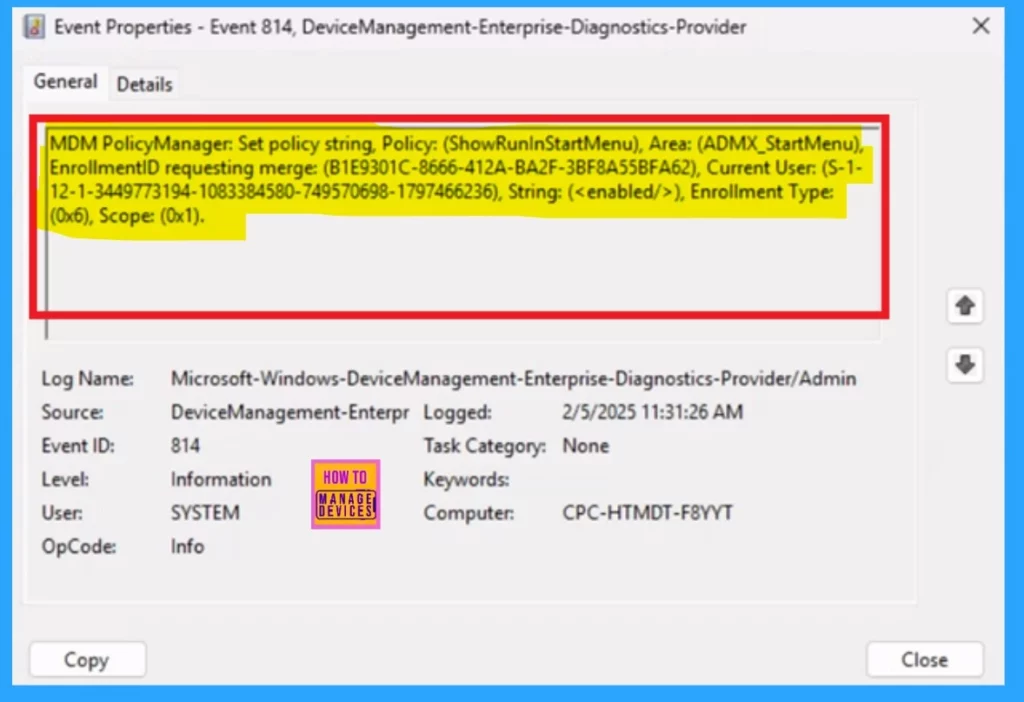
To check the client-side status, you can use the Event Viewer. Go to Applications and Services Logs > Microsoft > Windows > Devicemanagement-Enterprise–Diagnostics-Provider > Admin. Then, search for Event ID 814, which indicates a successful result.
Need Further Assistance or Have Technical Questions?
Join the LinkedIn Page and Telegram group to get the latest step-by-step guides and news updates. Join our Meetup Page to participate in User group meetings. Also, Join the WhatsApp Community to get the latest news on Microsoft Technologies. We are there on Reddit as well.
Author
Anoop C Nair has been Microsoft MVP for 10 consecutive years from 2015 onwards. He is a Workplace Solution Architect with more than 22+ years of experience in Workplace technologies. He is a Blogger, Speaker, and Local User Group Community leader. His primary focus is on Device Management technologies like SCCM and Intune. He writes about technologies like Intune, SCCM, Windows, Cloud PC, Windows, Entra, Microsoft Security, Career, etc.
