Let us learn about the SCCM MSIX App Deployment Guide to Deploy 7Zip.MSIX. In the previous blog post, I shared my experience with the MSI to MSIX conversion process.
You can convert MSI packages to MSIX using the SCCM MSIX Conversion Process 13 Steps Guide. The MSIX is one of the application types supported by the Microsoft Windows 365 Cloud PC offering as well.
The Windows 11 operating system also supports MSIX. Intune also supports the deployment of MSIX. However, the most common application type used in Intune is a unique format called IntuneWin.
SCCM MSIX is a powerful packaging format. In this blog post, I will guide you through creating an SCCM MSIX app deployment.
How to Convert MSI Packages to MSIX?
Microsoft MSIX is the future of Windows application installation technology. I have already explained how to convert MSI to MSIX.
I don’t think you can convert all the MSI packages to MSIX without any repackaging and programming efforts. Most organizations are waiting for software or application vendors to start releasing new applications in MSIX package format.
SCCM MSIX App Deployment Guide to Deploy 7Zip.MSIX
Let’s discuss the SCCM MSIX App Deployment Guide to Deploy 7Zip.MSIX. This post provides all the details of the SCCM MSIX App Deployment Guide to Deploy 7Zip.MSIX.
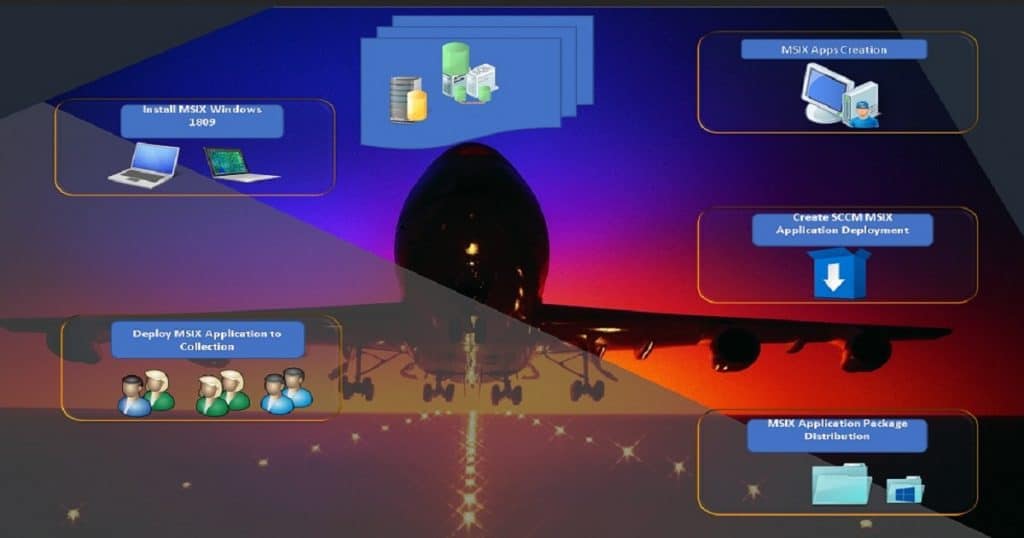
SCCM MSIX Application Deployment – Flow Chart
Video Guide SCCM MSIX Application Deployment Process
In our HTMD YouTube channel, we uploaded the SCCM MSIX App Deployment Guide to Deploy 7Zip.MSIX Video. Here you can get more details about SCCM MSIX app deployment.
Create or Upload MSIX Application to SCCM – 7Zip.MSIX
The following steps will help to create the SCCM MSIX App (7Zip.MSIX) from the SCCM console. You need to complete this step before SCCM MSIX App Deployment.
- Navigate SCCM Console to Software Library Workspace – Application Management
- Right Click on the Application node and New
- Create Application Wizard Page – Specify settings for the application
- Select the option “Automatically detect information about the application from installation files“
Here you will need to select the MSIX packages that have already been created. More details SCCM MSIX Conversion Process 13 Step Guide.
- Select – Type -> Windows App packages (*.appx, *.appxbundle, *.msix, *.msixbundle)
- Click on the Location – Browse button to provide the source location of the 7Zip.MSIX application. It should be the UNC path
- Click on the NEXT button to proceed
- Create Application Wizard Page – Specify settings for the application
Automatically detect information about the application from installation files.
Select – Type – Windows App packages (*.appx, *.appxbundle, *.msix, *.msixbundle). Click on the Browse button to provide the source location of the 7Zip.MSIX application. It should be the UNC path. Click on the NEXT button to proceed.
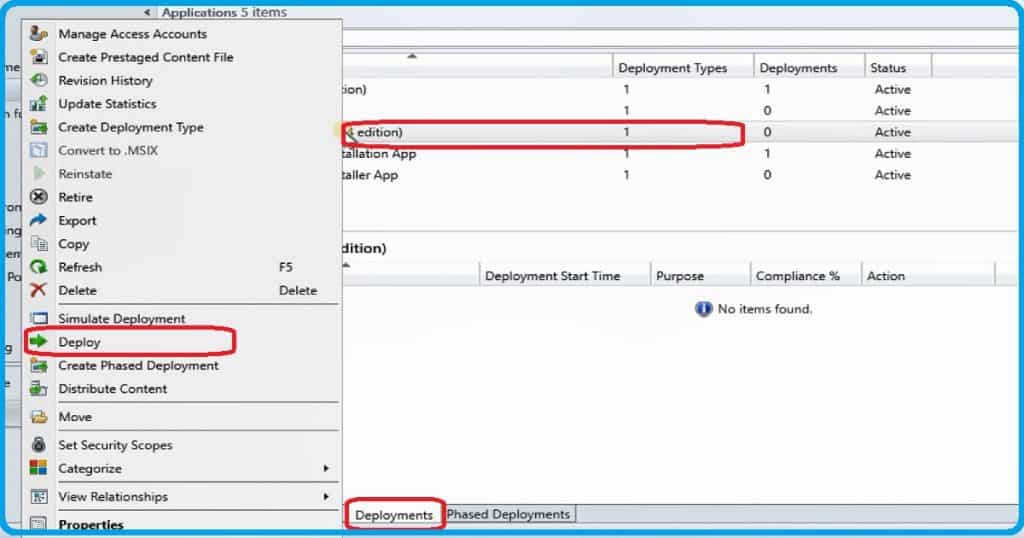
SCCM MSIX App Deployment – Create New Deployment for MSIX App
The next step is to create an SCCM MSIX App deployment. Once you have created the application (as mentioned above section), you can select the application called 7Zip.MSIX.
The following steps will help you to create an SCCM MSIX deployment.
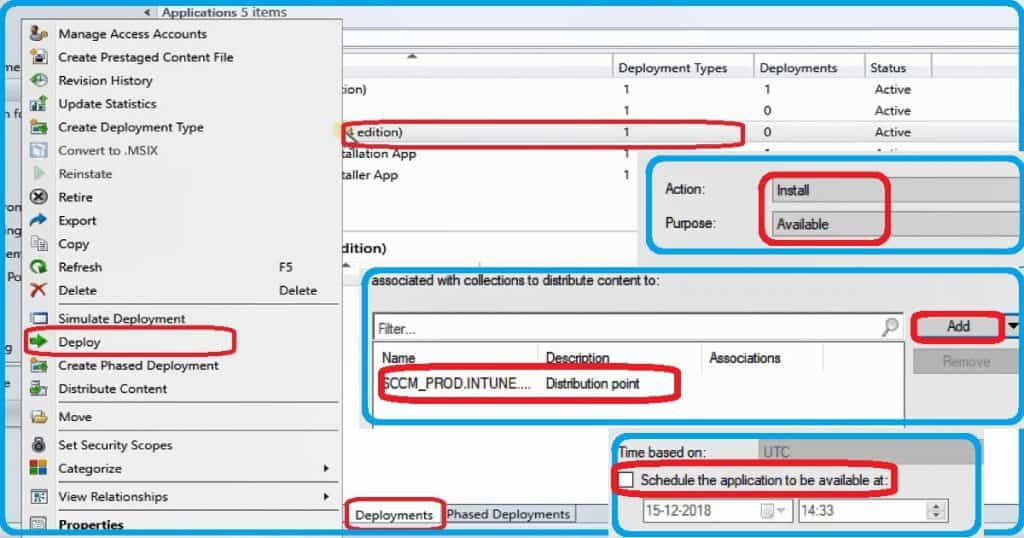
- Right-click on 7Zip.MSIX application (from SCCM console) and Deploy
- Select a Collection (test collection) from the Deploy Software Wizard page
- Select the SCCM distribution point to distribute the content MSIX application from Specify the content destination
- Click on the Add – Distribution Point button from Specify the content destination
MSIX application deployment is the same as other application types.
- Select Action “Install” and Purpose “Available” and select any of the following options:
- Check “Allow end users to attempt to repair the application“
- Check “An administrator must approve a request for this application on the device”
- Click Next button
- Select the Schedule the application to be available SCCM MSIX app on Windows 10 devices (I selected the default options) and click on the next button
Select the appropriate user experience for the installation of the SCCM MSIX app from the user experience page (I selected the default options) and click on the Next button.
Click Next, Next, Next, and Close to finish the wizard.
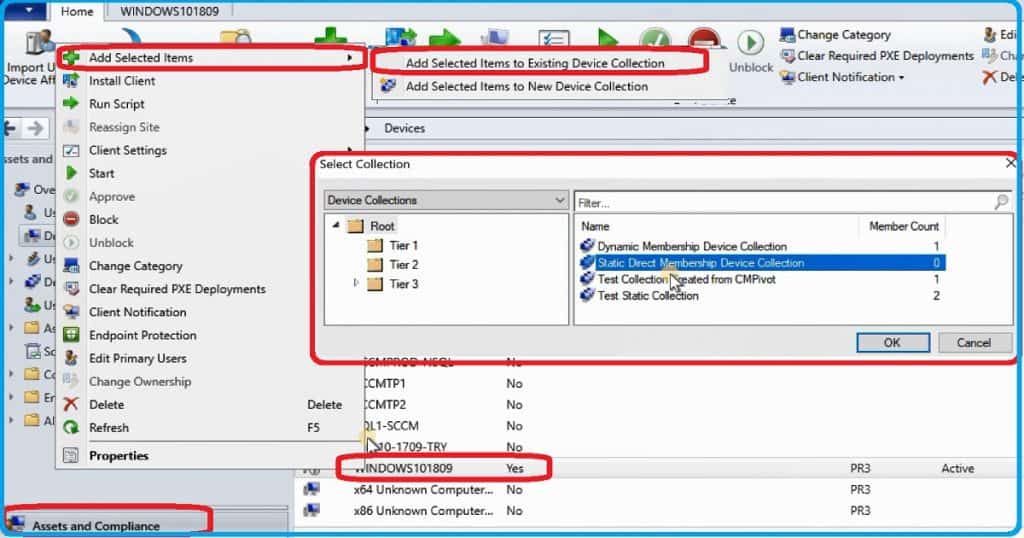
How to Add a Device into a Device Collection for App Deployment
The next step is to add a device to a device collection (test collection). If you want to learn more about using SCCM collections, I recommend reading the previous post. The best practices of creating SCCM collection.
SCCM MSIX App Deployment guide will help you to understand the end-to-end process of MSIX application deployment.
- Select the test “Windows 10 1809” device (my test device) and right-click on the device from the SCCM console
- Select Add Selected Items – Add Selected Items to Existing Device Collection
- Select Add Selected Items – Add Selected Items to Existing Device Collection option to add the device to a static collection
- Select Device Collection you want to add the Windows 10 device and click OK
MSIX Application Content Distribution to DPs
Make sure that the 7Zip.MSIX application is distributed to relevant SCCM distribution points before deploying the application to the devices.
You can confirm the SCCM MSIX app content distribution status from the Software Library workspace – applications – click on the application and check the content status pane in the console.
Windows 10 or Windows 11 – MSIX Application Installation
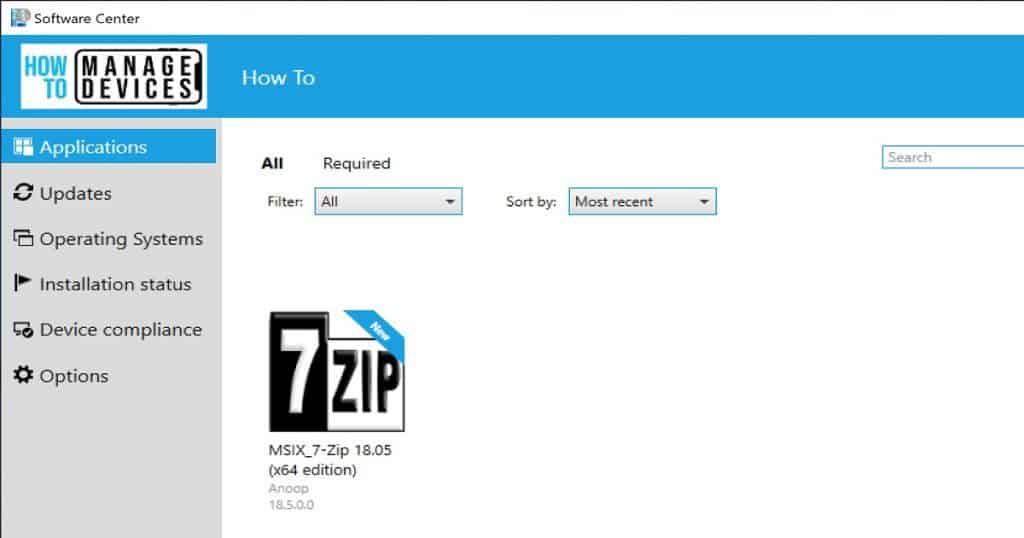
I deployed the MSIX application as available; hence, it was waiting for me at the Windows 10 software center. You can deploy 7Zip.MSIX application as required as well. This step is the SCCM MSIX App Deployment.
So, if you deployed the SCCM MSIX app as available, then end-user interaction is needed to install the app. If you want the application to be automatically installed on a Windows 10 device, then you have to use the required deployment.
- Launch SCCM Software Center from the Windows 10 start menu
- Goto Applications Tab
- Click on the MSIX application Icon that you want to install (7Zip.MSIX in my scenario)
- Click on the Install button from the Applications – Application Details menu
- The status will show you as Installing, and there will be a cancel button to cancel the installation process. More details about the troubleshooting SCCM application deployment can be done with the Support Center tool
- Once the MSIX app is installed successfully, then the Uninstall button will appear in the Software Center near the application icon
- If the MSIX application installation fails, then you can check the SCCM log files to get more details about the MSIX app installation issues. Also, you can look at Windows 10 event logs –
Applications and Services Logs > Microsoft > Windows > AppxPackagingOM? Microsoft-Windows-AppxPackaging/Operational to get more details.
Resources
- SCCM MSI to MSIX Conversion Guide (13 Steps)
- MSIX modification packages on Windows 10 1809 update
- Intune Beginners Guide to Deploy MSI Application
- Intune Win32 App and . EXE Application Deployment using Modern Management
We are on WhatsApp now. To get the latest step-by-step guides, news, and updates, Join our Channel. Click here. HTMD WhatsApp.
Author
Anoop is Microsoft MVP! He is a Solution Architect in enterprise client management with more than 20 years of experience (calculation done in 2021) in IT. He is a blogger, Speaker, and Local User Group HTMD Community leader. His main focus is on Device Management technologies like SCCM 2012, Current Branch, and Intune. E writes about ConfigMgr, Windows 11, Windows 10, Azure AD, Microsoft Intune, Windows 365, AVD, etc…

Hi Anoop,
The right click menu is not available in the 7-zip MSIX package, does it work for you?
I don’t remember this now.. sorry
I heard about the similar issues after converting MSI to msix