Let’s check how to Install Ubuntu Terminal environment on Windows 11 with WSL (Windows Subsystem Linux) from Microsoft Store. The Ubuntu application is available in Microsoft Store, and you can install it directly from there.
The Ubuntu Terminal environment works with Windows Subsystem Linux (aka WSL) support available with Windows 11. You need to take care of all the prerequisites for WSL before installing this app from Microsoft Store.
Windows Subsystem for Linux (WSL) in Windows 11 helps System Admins and Developers to test and run the programs/applications compatible with Linux operating system. I have seen this is impacting the performance of Windows 11 because of resource utilization.
Windows 365 Cloud PC nested virtualization option enables this feature for developers to test Linux-based code without having additional devices. This helps to avoid having the purchase of new hardware that supports virtualization.
Prerequisites to Install Ubuntu on Windows 11
Let’s check the Prerequisites to Install Ubuntu on Windows 11. You need to ensure that virtualization support is enabled on firmware and CPU processor support. You also need to enable Windows Subsystem for Linux before installing the apps from Microsoft Store.
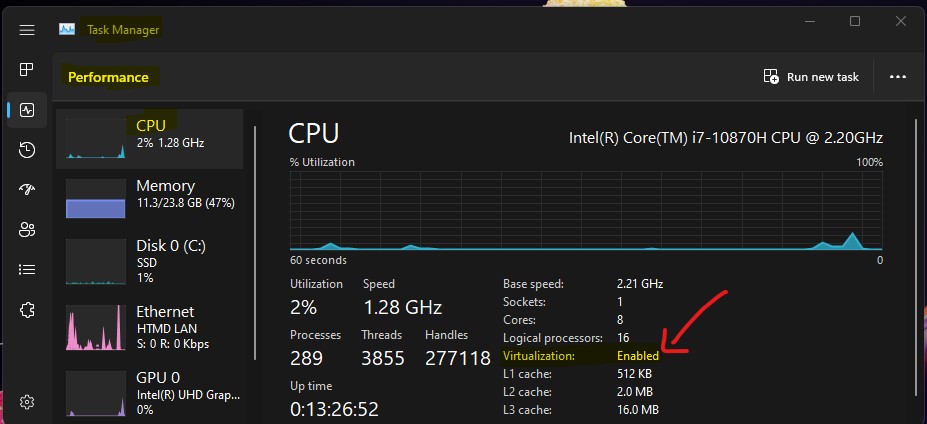
You can quickly check whether the CPU virtualization support is enabled or not from Windows 11 Task Manager. The performance page on Windows Task Manager provides the information on virtualization, which is required to run the Ubuntu application.
The other requisites for running the Ubuntu application on Windows 11 are below as per the store guidance. These are very generic once, such as Windows 10 version 162115.0 or later (all Windows 11 versions). 4GB RAM is a minimum requirement.
Key Features of Ubuntu Application on Windows 11
Let’s check the Key Features of the Ubuntu Application on Windows 11. The following are the Key features:
- Efficient command line utilities including bash, ssh, git, apt, npm, pip, and many more
- Manage Docker containers with improved performance and startup times
- Leverage GPU acceleration for AI/ML workloads with NVIDIA CUDA
- A consistent development to deployment workflow when using Ubuntu in the cloud
- 5 years of security patching with Ubuntu Long Term Support (LTS) releases
How to Turn on Windows Subsystem for Linux using Command Line
Let’s enable or turn on Windows Subsystem for Linux (WSL) on Windows 11 PC. You have different options to enable Windows Subsystem for Linux on Windows 11 or Windows 10 devices. Let’s check the command line option.
- You can launch the Windows Terminal from the Start -> Search option.
- Run the following command from the Windows terminal (with administrative access).
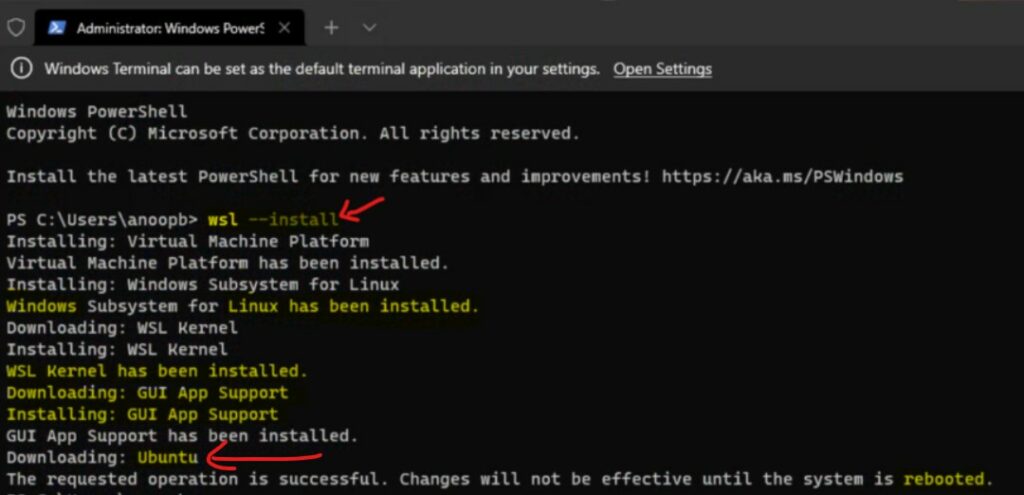
wsl --installThe default Linux distribution installed will be Ubuntu. You can change the distro using the following command-line option. You must restart the PC after enabling the Linux subsystem for Windows.

NOTE! – When you use the PowerShell command to Turn on Windows Subsystem for Linux, the Linux distributions such as Ubuntu will automatically get installed. This is not the case when you use Windows Features from the Control panel.
As you can see, Ubuntu is getting downloaded, and it’s giving the message that the operation is successful and change will not become effective until the system is rebooted.
How Ubuntu LTS version Update Works on Windows 11
Let’s check how to update the Ubuntu LTS version on Windows 11. With the Microsoft Store app (the process explained below), I think this will get automatically updated.
With the above command, the latest version of Ubuntu is always installed. When new LTS versions are released, you can update to the latest version of Ubuntu using the command line:
sudo do-release-upgradeEnable Windows Subsystem for Linux using Windows Features from Control Panel
Let’s see how to Enable Windows Subsystem for Linux using Windows Features from Control Panel. This is a useful method, but there is an additional step, and that is you need to install Linux Distrs available on Microsoft Store before you can run Linux Shell.
You can follow the steps mentioned below steps to enable the WSL using the Windows Features applications from Control Panel.
- Click on Windows 11 Start menu and click on the Search Box.
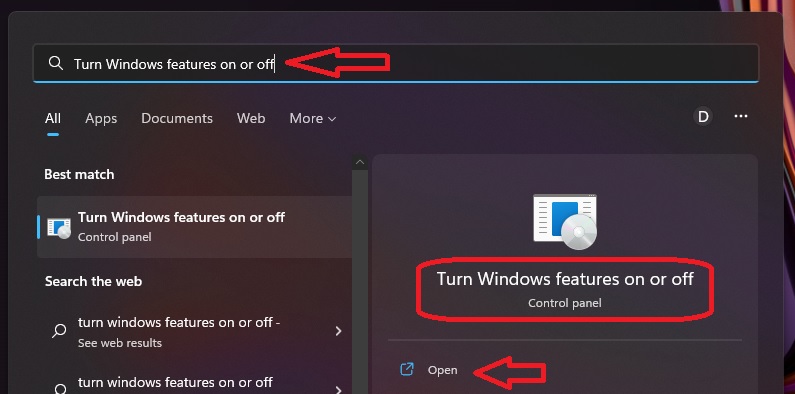
- Type in “Turn Windows features on or off” to search the application to add WSL.
- Click on the “Turn Windows features on or off” application from the search results, as shown in the screenshot below.
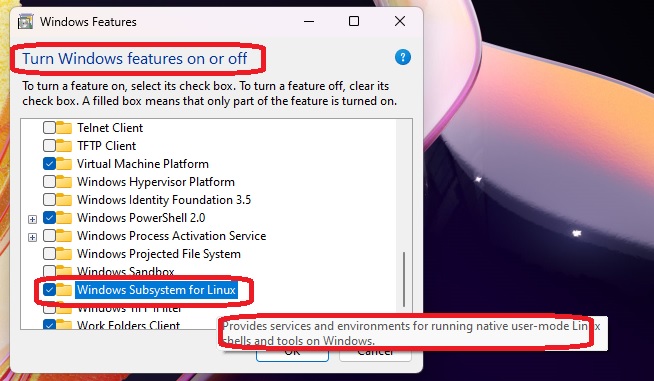
From the Windows Features – Turn Windows features on or off the application, and select Windows Subsystem for Linux option. This option provides services and environments for running native user-mode Linux shells and tools on Windows 11.
- Scroll down the list of features and Select the Windows Subsystem for Linux option.
- Click OK to start the enablement process of WSL.
Windows 11 will search for the required files needed to enable the WSL windows feature. Normally, it will complete within a few seconds and automatically be redirected to the next confirmation page.
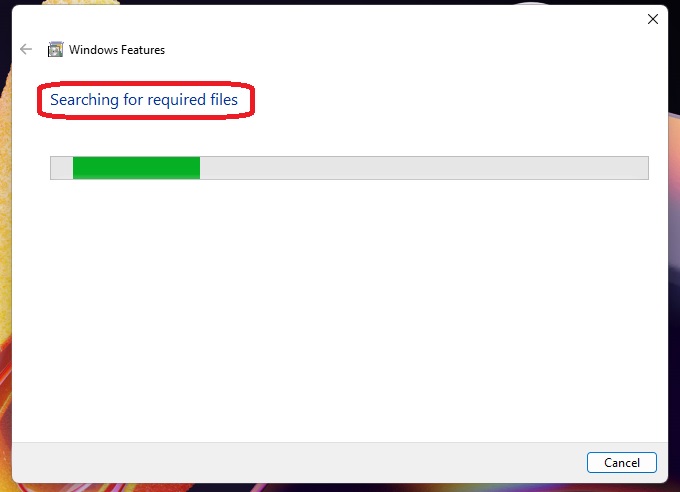
Once the feature Windows Subsystem for Linux is enabled, you must restart the Windows 11 device to complete the process. You get two options from the Windows Features wizard.
- Click on Restart Now button before continuing with the next step.

NOTE! – When you use the GUI method to enable Windows Subsystem for Linux, you will have to remember that Linux distributions such as Ubuntu will not get installed automatically. You can Distributions can be installed by visiting the Microsoft Store as explained below.
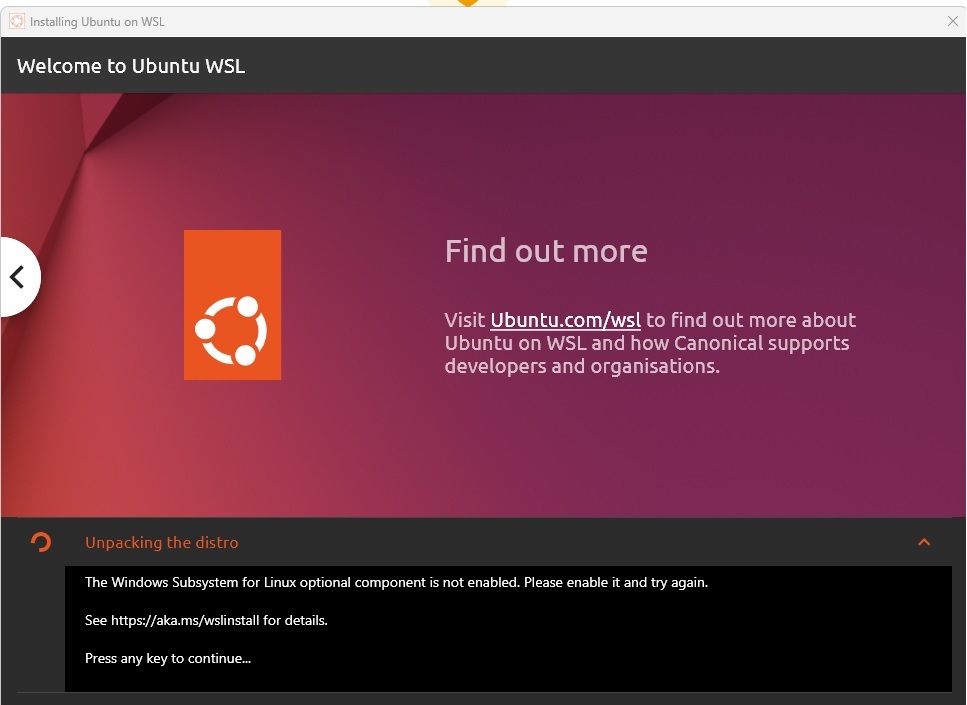
As you can see in the below picture, The Windows Subsystem for Linux optional component is not enabled error will appear when you try to launch the Ubuntu application after the installation during the Unpacking the Distro stage.
Install Ubuntu Terminal Environment on Windows 11 from Microsoft Store
Let’s check how to Install Ubuntu Terminal Environment on Windows 11 from Microsoft Store. Microsoft Store app install is the additional step you need to follow if you have to use any Linux Distributions available on Microsoft Store.
NOTE! – When you use the command-line tool to enable Windows Subsystem for Linux, the Ubuntu distr is included by default.
Login to Microsoft Store and search for the application or click on the Ubuntu Terminal Environment link to directly open the app and install it on your Windows 11 PC.
- Launch the Microsoft Store using the link Ubuntu Terminal Environment.
- Click on the Get button to start the download and installation process of the Ubuntu app.

The process of acquiring the app license, downloading, and installing it happens automatically in the background. Now, Ubuntu is ready to get launched.
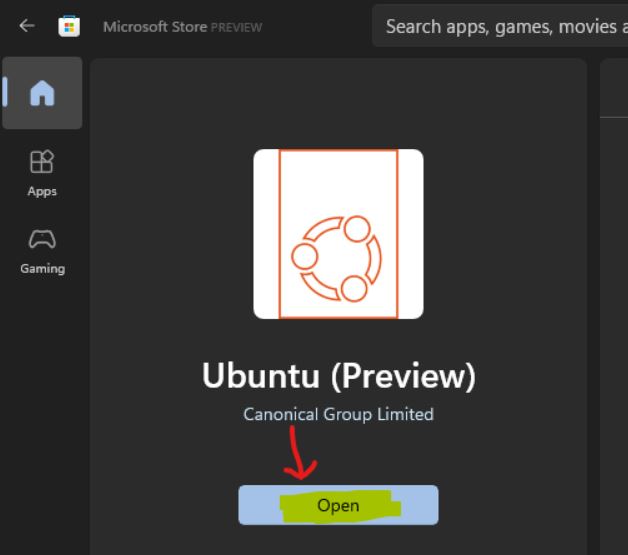
- Click on the OPEN button to continue.
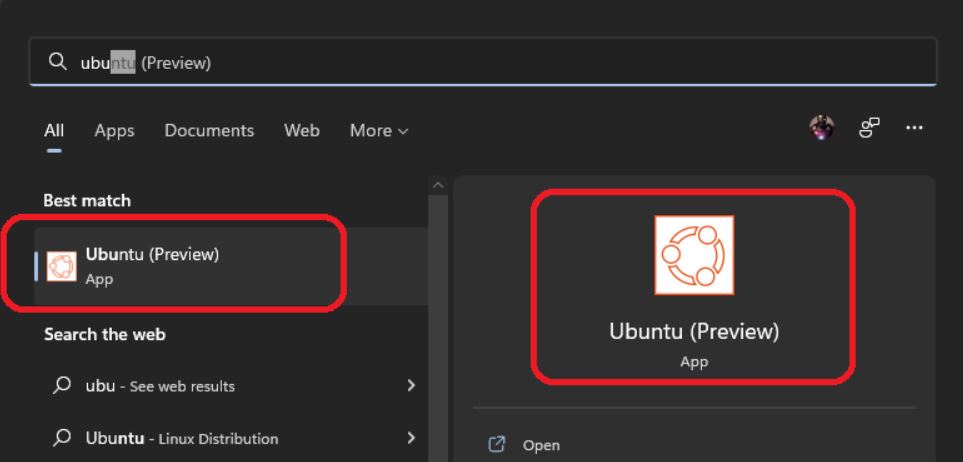
You can now open the Ubuntu application from Windows 11 Start -> Search box, as you can see in the below screenshot.
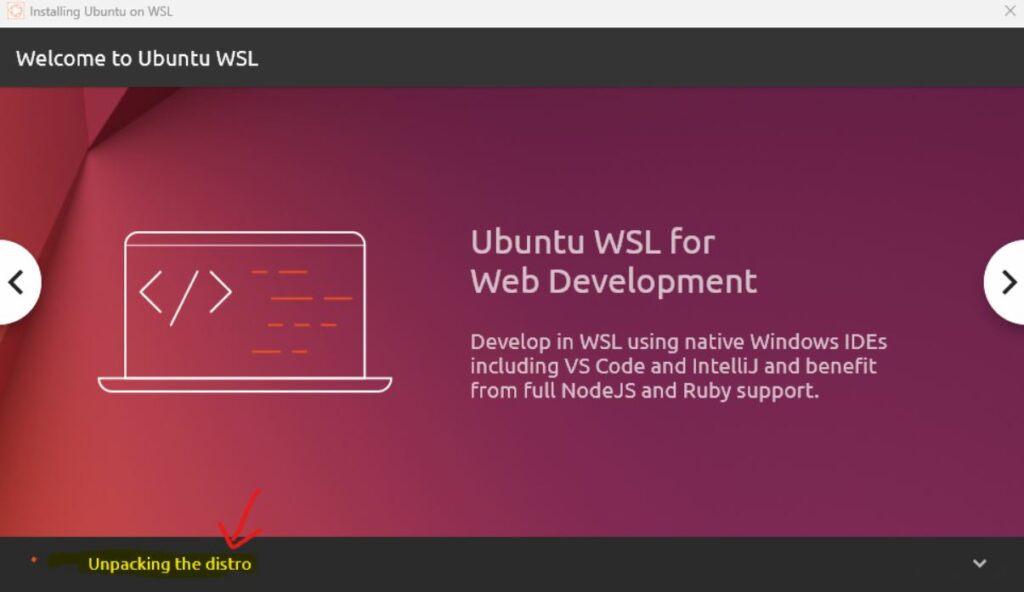
Once the Ubuntu application is launched, you see Unpacking the distro step will start, and the Linux distro for Ubuntu will get updated. This step needs an internet connection similar to other steps.
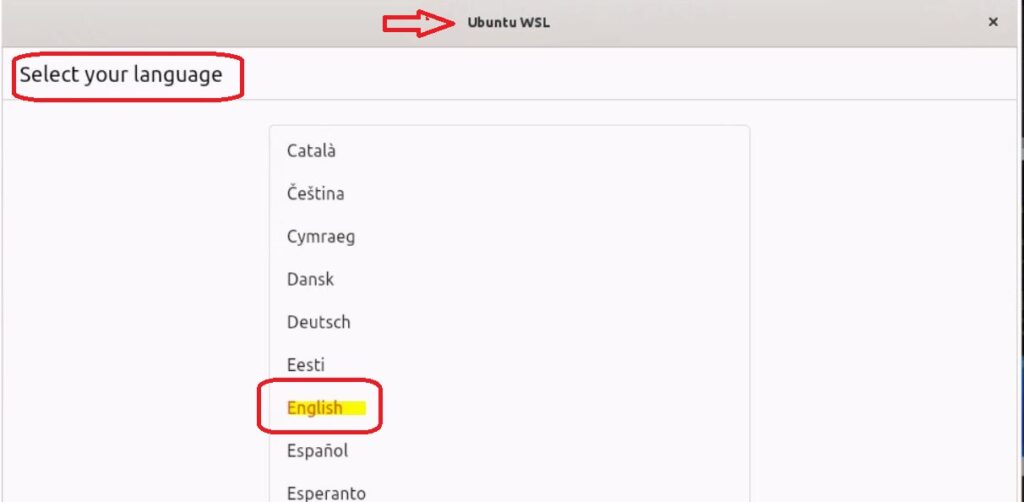
After the Distro update, you will be presented with a language selection screen where you can select the language for the Ubuntu application on Windows 11.
- Select the Language that you prefer – I have selected English.
- Click on the Continue button.
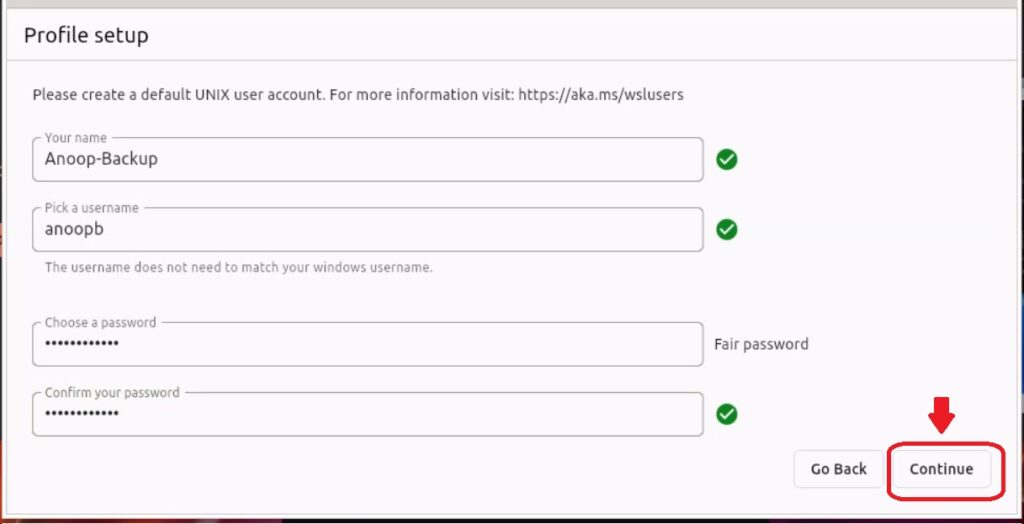
You need to create a default UNIX user account for Ubuntu application access. You can use any user name and password. This is not Windows 11 password. Rather this is for Windows Subsystem for Linux password. Let’s create a Unix user account on a Windows 11 system.
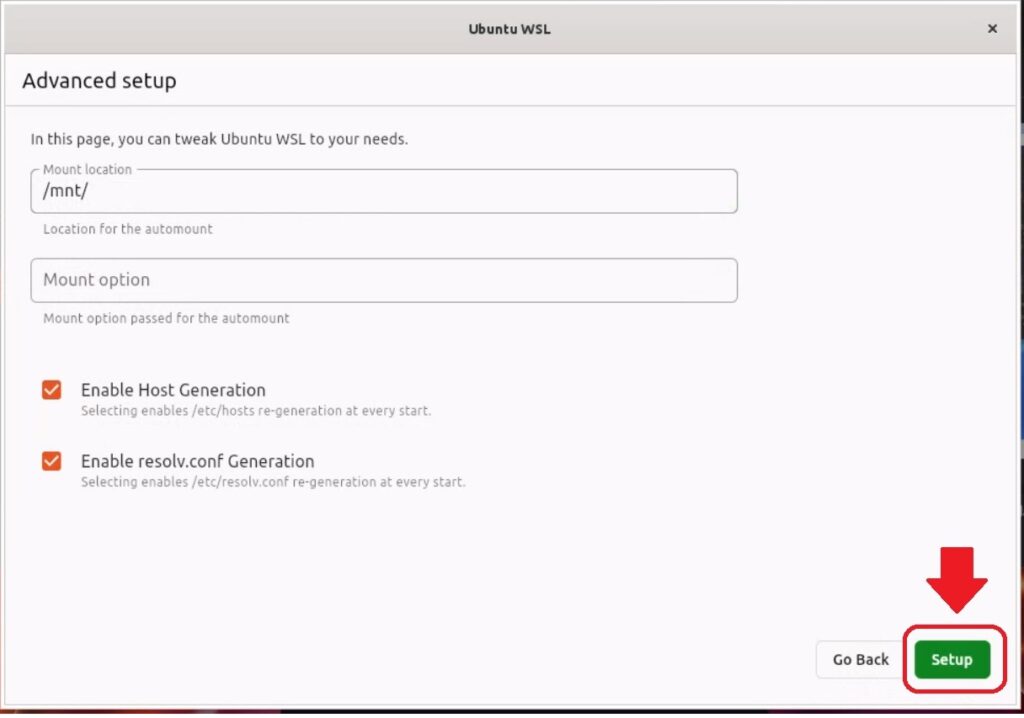
Ubuntu WSL advanced setup options are available where you can tweak mount location for automount. You have the mount option passed for the automount.
- Enable Host Generation – Selecting enables . / etc / hosts regeneration at every start.
- Enable resolv.conf Generation – Selecting this enables . / etc / resolv.conf regeneration at every start.
NOTE! – I kept the default settings for the first time Ubuntu application. Click on the Setup button to continue with the setup.
The Ubuntu setup is almost done, as you can see in the below screenshot. The setup has been completed now. You must run the following Linux commands to update to the latest version of Ubuntu.
You must restart the Ubuntu before start using it for the first time. Click on the Finish button to launch the Ubuntu terminal for the first time.
$ sudo apt update
$ sudo apt upgrade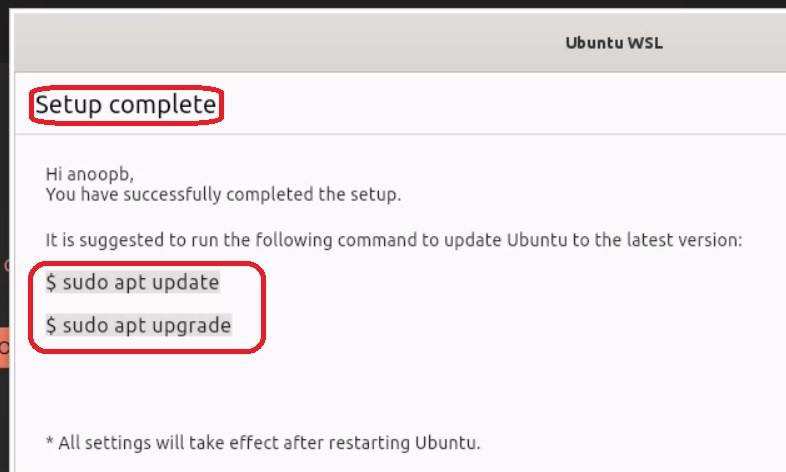
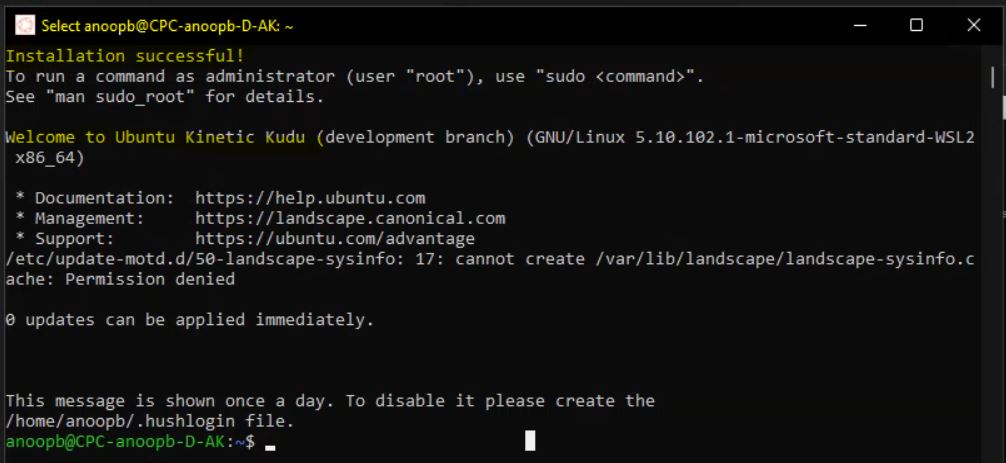
Installation was successful! To run a command as administrator (user “root”), use “sudo. ” You can check out “man sudo_root” for details.
The welcome message is: Welcome to Ubuntu Kinetic Kudu (development branch) (GNU/Linux 5.10.102.1-microsoft-standard-WSL2 x86_64).
- Documentation: https://help.ubuntu.com
- Management: https://landscape.canonical.com
- Support: https://ubuntu.com/advantage
/etc/update-motd.d/50-landscape-sysinfo: 17: cannot create /var/lib/landscape/landscape-sysinfo.cache: Permission denied
Errors During Ubuntu Installation on Windows 11
Let’s see errors during Ubuntu installation on Windows 11. I tried to install the Ubuntu application on three Windows 11 devices. I have received the error 0x800701bc on one of the Windows 11 PC where I didn’t enable the Windows Sub System for Linux before installing the Ubuntu application.
The Ubuntu error occurred during Unpacking the distro step. The WslRegisterDistribution failed with error: 0x800701bc.
NOTE! – Error: 0x800701bc WSL 2 requires an update to its kernel component. For information, please visit https://aka.ms/wsl2kernel
I have tried to fix this using the following commands from Windows Terminals but didn’t fix the issue.
PS C:\Users\shine> wsl –shutdown
PS C:\Users\shine> wsl –unregister Ubuntu
Unregistering…
Fixed the issue by uninstalling the Ubuntu application and restarting Windows 11 -> installing it again.

