Let’s check the details about Business Edition Windows 365 Cloud PC end-user provisioning experience walkthrough. The Windows 365 Business is the version of Windows 365 specifically targeted at smaller companies (up to 300 seats).
Microsoft’s Windows 365 Cloud PC offering gives organizations an easy, streamlined way of providing Cloud PCs to their users. Windows 365 cloud PC securely streams your personalized Windows desktop, apps, settings, and content from the cloud to any device using the Windows 365 web client.
With Windows 365 Cloud PCs, you can stream your apps, data, content, settings, and storage from the Microsoft cloud. You can read more about Windows 365 Cloud PC and Cloud PC Windows 365 FAQs Frequently Asked.
The three-step process to creating a new Windows 365 Business Cloud PC. First, buy a Windows 365 Business license. You can do this through a partner, or you can do this directly through the Microsoft 365 admin center. Next, assign that license to a user in the Microsoft 365 admin center.
And lastly, once those licenses are assigned, you will have a Cloud PC created for that user, which they can then use their Azure Active Directory credentials to log into.
- Compare Windows 365 Business Vs Enterprise Cloud PC
- Windows 365 Enterprise Cloud PC Web Client End User Experience Walkthrough
Prerequisites – Business Edition Windows 365 Cloud PC Web Client
Let’s check the Prerequisites of Business Edition Windows 365 Cloud PC Web Client. I hope most of the supported web browsers from Windows 11, Windows 10, and macOS, operating systems support Cloud PC web clients.
You also should have corporate credentials to log in to Cloud PC with your Azure AD username and password.
Software Requirements
If the users are accessing the Business edition of Windows 365 Cloud PC from a corporate network, then ensure all the proxy and firewall ports are open to access the web client, and the security policies on the base device are causing issues with the Cloud PC experience.
The end user’s device must meet the following requirements to access a Cloud PC.
- Supported operating systems: Windows, macOS, ChromeOS, Linux
- Modern browser: Microsoft Edge, Google Chrome, Safari, or Mozilla Firefox (v55.0 and later).
Admin Experience while Provisioning Business Edition of Cloud PC
Let’s What is the Admin Experience while Provisioning Business Edition of Cloud PC. You must purchase the Business edition license through the valid options available.
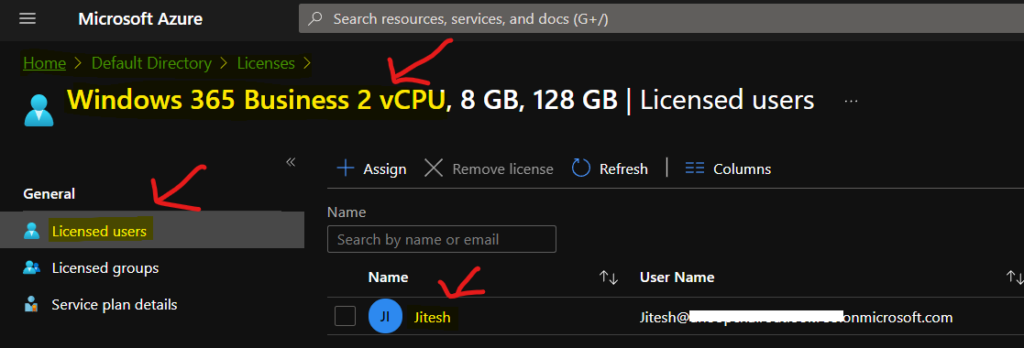
Log in to the Microsoft Admin Center portal or Azure portal to assign the appropriate business edition Windows 365 license to the user. You will have similar options with the enterprise edition.
Login to Azure Portal – Azure Active Directory (Microsoft Entra ID) – Licenses and add Business edition of Windows 365 Cloud PC. You can also do the license assignment from the Office or Microsoft 365 admin portal.
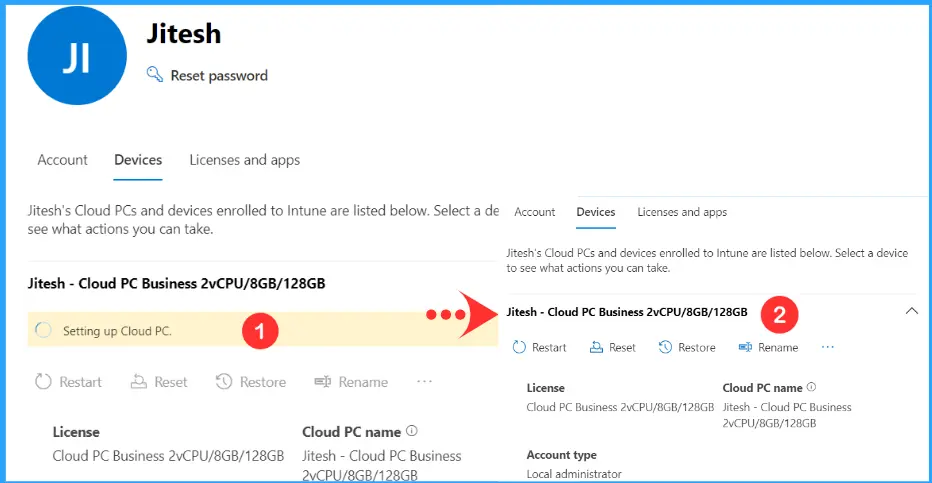
As soon as you assign a license to a user, Windows 365 will create a Cloud PC for that user. This process can take up to 30 minutes. You can see the message indicating “Setting up Cloud PC”. Once the process is completed, It will appear with the details inside Devices.
End User Provisioning Experience – Business Edition Windows 365 Cloud PC
Let’s walk through the Business Edition Windows 365 Cloud PC End User Provisioning Experience. Let’s try it out. I’m navigating directly into the Cloud PC portal.
You can use the Cloud PC URL – https://windows365.microsoft.com/ to launch Windows 365 service and start working on a personalized desktop in the cloud.
The End users can access their Cloud PCs in different ways –
- Windows365.microsoft.com
- Windows 365 App
- Microsoft Remote Desktop Client (How To Deploy Remote Desktop Client Using ConfigMgr)
It will prompt you to sign in and Enter your licensed username and password. Click Sign in to get inside.

Here you go with the first-time experience for the Business edition of Windows 365 end-user (Web Client Portal). Once you log in, you will be presented with the user experience.
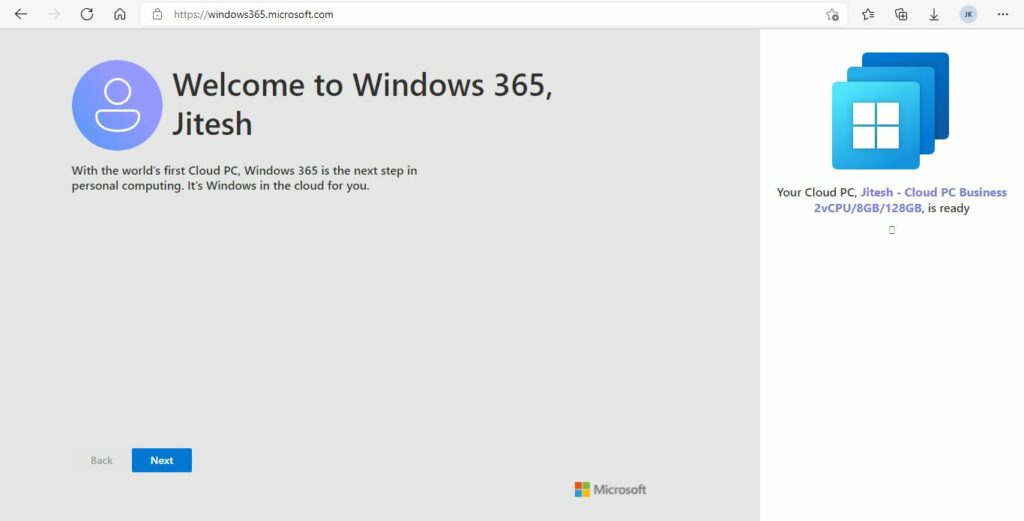
Welcome to Windows 365, Jitesh ->With the world’s first Cloud PC, Windows 365 is the next step in personal computing. It’s Windows in the cloud for you. On the Right side of your screen, You will see details of the configuration.
Your Cloud PC, Jitesh – Cloud PC Business 2vCPU/8GB/128GB (CPUs, RAM, and storage) is ready.
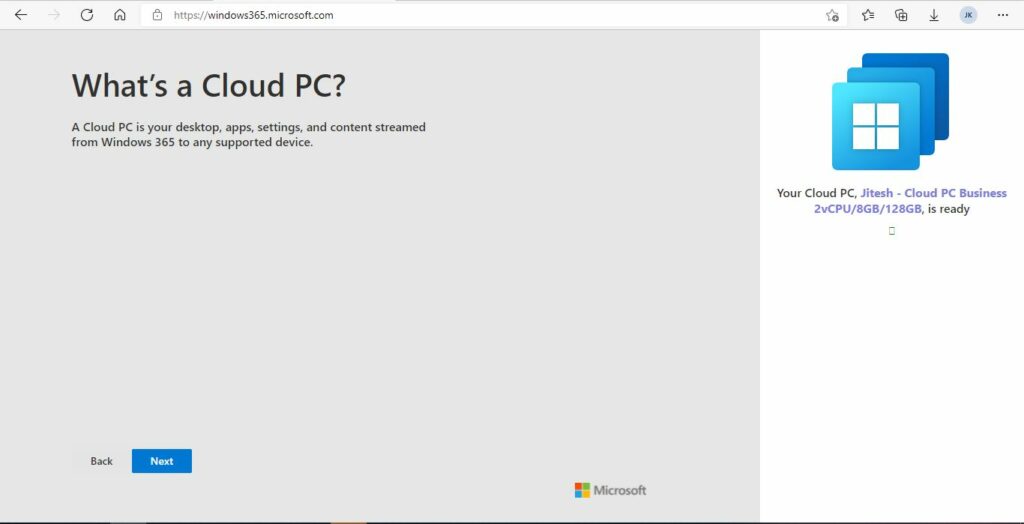
What’s a Cloud PC? A Cloud PC is your desktop, apps, settings, and content streamed from Windows 365 to any supported device. Click on the Next button to continue.
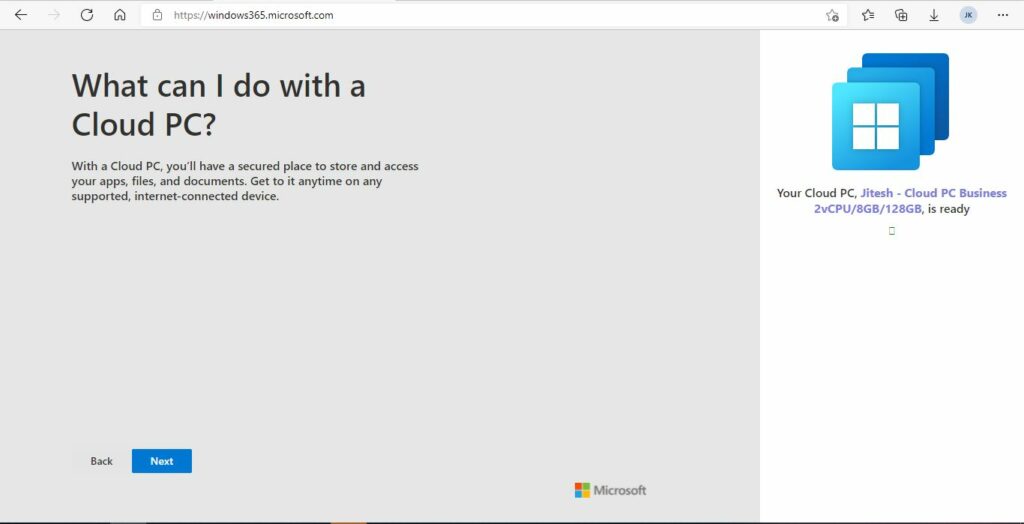
What can I do with a Cloud PC? With a Cloud PC, you’ll have a secure place to store and access your apps, files, and documents. Get to it anytime on any supported, internet-connected device. Click on the NEXT button to continue.
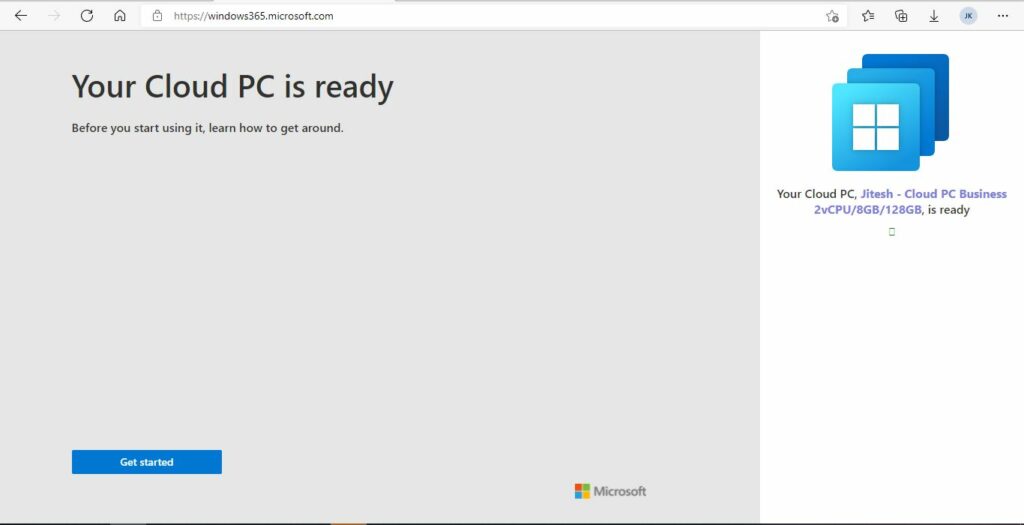
Your Cloud PC is ready – Learn how to get around before you start using it. Now, click on the Get Started button to complete the provisioning process.
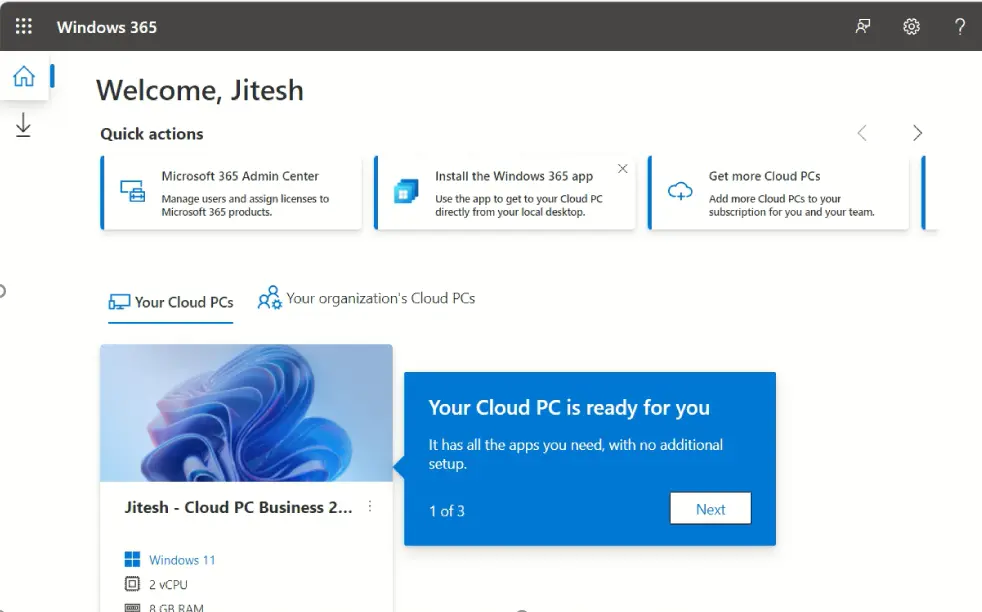
You can see the different Cloud PC sets assigned to you in the Windows 365 web client portal. The end-user gets a rich experience with the following messages. Your cloud PC is ready for you – It has all the apps you need, with no additional setup.
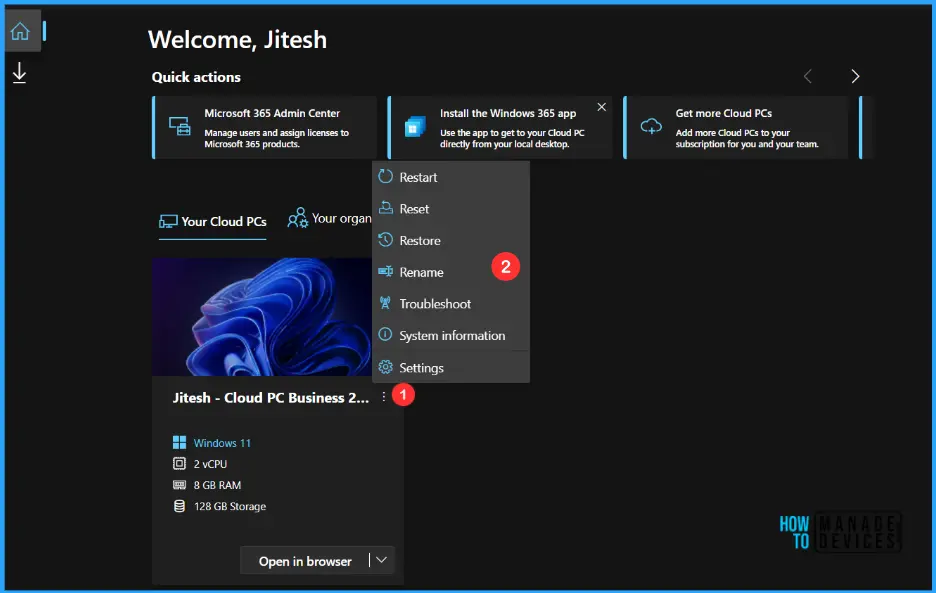
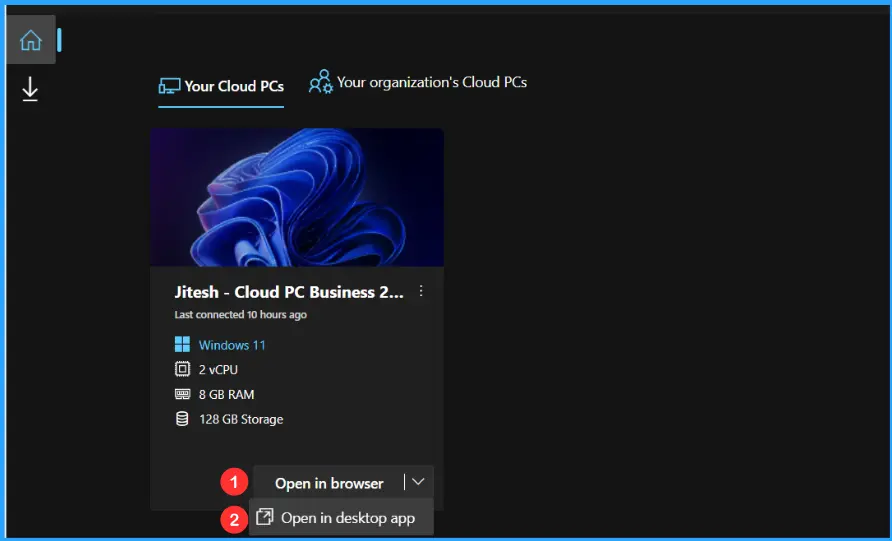
The end-user will get an option to Cloud PC from your browser. You need to click on the Open in Browser or Open in Desktop app option to launch the cloud PC. You can click on Settings to see the capabilities end-users can use to perform maintenance on cloud PCs.
Self Service Options in Windows 365 Business Web Client
End users can efficiently perform cloud PC maintenance via the Windows 365 web portal. The portal has a settings button to take quick actions on the Windows PC assigned to you. Let’s look at the actions that are supported for Windows 365 Business.
- Restart – You can Restart the Cloud PC assigned to you.
- Rename – This button helps end-users change the display name of the cloud PC Windows 365 Portal.
- Reset– Reset does the following:
- Reinstalls Windows.
- Removes your personal files (OneDrive data remains).
- Removes any changes you made to settings.
- Removes your app
- Restore – This action allows users to initiate the restore service, End users can opt to restore their Cloud PC themselves.
- Troubleshoot – This helps to troubleshoot the basic connectivity issues.
- System information – Displays information about the Cloud PC specification.
- Settings – Allow you to select the Integrated experiences to connect directly from sign-in on device that boot to Cloud PCs (Connect while signed in to device).
Note – Before resetting your Cloud PC, make sure to back up any important files you need to keep to a cloud storage service or external storage. Resetting your Cloud PC will delete these files.
Web Client End User Experience Business Edition Windows 365 Cloud PC
Let’s check what is the Business Edition Windows 365 Cloud PC Web Client End User Experience. On the Windows 365 home page, select the Microsoft Remote Desktop apps icon (under the home icon).
You can find all the clients at the downloads tab in the Windows 365 web portal, where you can download and install Remote Desktop client for Windows, macOS, iOS, and Android.
Microsoft Remote Desktop apps – You can use a Remote Desktop app to connect to a remote PC, virtual apps, and desktops made available to you. You can Get a Subscription URL for all platforms to connect to Cloud PC.
The following are the options to download Microsoft RD Client for Windows 365 Cloud PC for different types of devices.
- Download Windows RD Client -> Windows 64-bit, Windows 32-bit, Windows ARM64
- Microsoft Remote Desktop for Mac – https://apps.apple.com/app/microsoft-remote-desktop/id1295203466?mt=12
- Microsoft Remote Desktop for iOS -> https://apps.apple.com/app/microsoft-remote-desktop/id714464092
- Microsoft Remote Dekstop for Android -> https://play.google.com/store/apps/details?id=com.microsoft.rdc.androidx

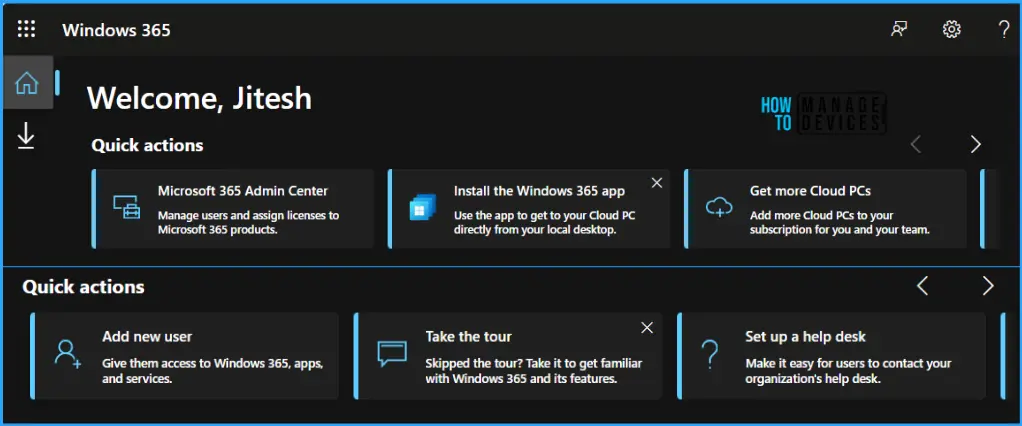
In Windows 365 Portal, You will find the ‘Quick Actions’ at the top that will help you to redirect the settings easily. The following options under Quick actions are available for end users.
- Manage your organization – Manage users and assign licenses for Microsoft 365 products.
- Install the Windows 365 app – Use the app to get to your Cloud PC directly from your local desktop.
- Download Remote Desktop – Access your Cloud PC directly from your device with the Remote Desktop.
- Get more Cloud PCs – Add more Cloud PCs to your subscription for you and your team.
- Add new user – Go to the Microsoft Admin Center to add a new user.
- Take the tour – Skipped the tour? Take it to get familiar with Windows 365.
- Set up a help desk – Make it easy for users to contact your organization’s help desk.
- Get help from Microsoft – Visit the help and support center to create and track support tickets.
Here under Your Cloud PCs, You can see the assigned Cloud PC and the message “Cloud PC is ready”. The process will take around 10 – 30 minutes. After that, the user can directly log on to their cloud PC.
Users have two options to connect to your Cloud PC, Let’s select Open in browser to see how Windows 365 Cloud PC works.
- Select Open in browser to open their Cloud PC in the web client
- Select Open in Remote Desktop app to open their Cloud PC in Remote Desktop.
You will be prompted to select the desired level of access that the Cloud PC to your local resources. In Session Settings, You can choose the devices or features your Cloud PC can use from the options Printer, Microphone, Clipboard, Location (Preview), and Keyboard shortcuts (Preview).
Click on Show Advanced Settings, Here you can use an alternative keyboard layout to enter complex characters while logging into Windows 365 Cloud PC.
Here you can also select the remote keyboard layout that you want to use in your remote session. This keyboard must be installed in the remote session. Once you are done with the settings configuration, Click on Connect.

Here you can see the login screen of Windows 365 Business Cloud PC, Provide your username and password. Click Sign In.

Once you log in successfully, You will be landed to Cloud PC Desktop. This is how the screen will appear for you. Cloud PC is ready for productivity with Microsoft 365 Apps, OneDrive, Microsoft Edge, and Teams (Optimized) pre-installed and configured.
Note – Microsoft 365 Apps and Teams is only supported on 2vCPU/4GB/64GB and higher SKUs.
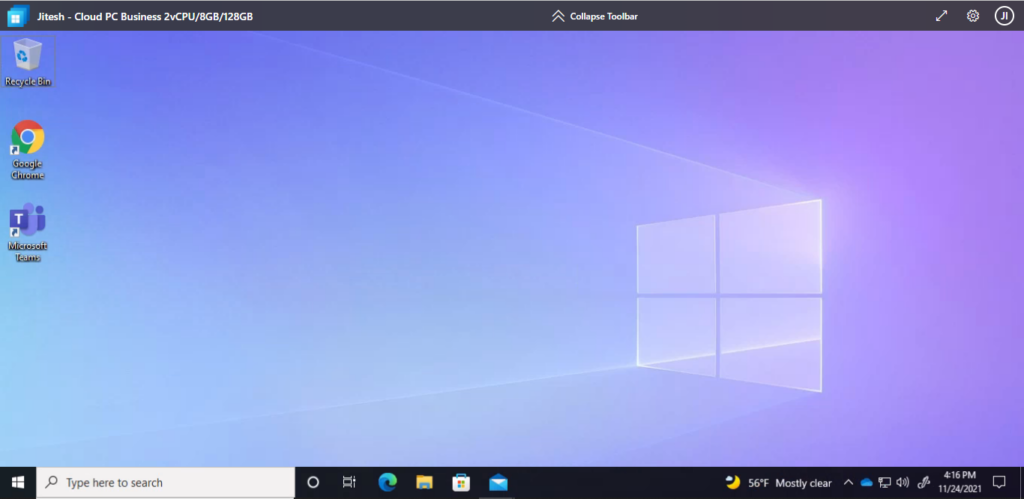
Inside the PC, You can see the various options available to improve the end-user experience while accessing Cloud PC.
- Collapse Toolbar – You can click on Collapse Toolbar, which automatically hides the top banner.
- Full Screen – Clicking on Double Arrow will present full screen, You can click ESC to exit full-screen mode.
- Settings Button – You can manage the option to add additional configurations even after being connected to Windows 365 Cloud PC from the Windows 365 end-user portal.
Here you will see the options to Enable alternative keyboard layout and Select remote keyboard layout. Click on Update. A prompt will appear Disconnect to update settings: For changes to take place, you’ll need to disconnect from your Cloud PC. You can choose when to delay these changes if you’re still working.

Windows 365 Keyboard Shortcut keys for Cloud PC. You will be able to use the keyboard shortcuts for Windows 365 Cloud PC in the new web client experience –
- Switch focus between Cloud PC and browser – Ctrl + Alt + Home
- Windows logo key – Alt + F3
- View Ctrl + Alt + Del menu – Ctrl + Alt + End

You can check the access to a user account by navigating to Windows Settings > Account > Your info. All Windows 365 Business users have local administrator privileges on their Cloud PCs.

We are on WhatsApp. To get the latest step-by-step guides and news updates, Join our Channel. Click here –HTMD WhatsApp.
Author
About Author – Jitesh, Microsoft MVP, has over six years of working experience in the IT Industry. He writes and shares his experiences related to Microsoft device management technologies and IT Infrastructure management. His primary focus is Windows 10/11 Deployment solution with Configuration Manager, Microsoft Deployment Toolkit (MDT), and Microsoft Intune

Can you please add the steps to configure vnet, virtual gateway and local network gateway.
Hi Udit – For the business edition, these things are not needed. Are you looking to set this up for business or enterprise edition?