Let’s learn how to set the default display language for Windows 365 Cloud PC using Provisioning Policy. The addition of setting up display language will increase user productivity.
Users can always change the display language through the Settings app in Windows. But the Windows experience is more welcoming if the user sees the right language immediately, starting when they first sign in.
There are two different ways to provide a localized Windows experience when users first sign in:
- Use a provisioning policy – If you plan on using a gallery image, you can select the language when creating the provisioning policy. You can also edit provisioning policies to change the Language & Region configuration.
- Create a custom device image – If you plan to use a custom image and manage your Cloud PCs through group policy, you can include the language as part of the custom image.
You need to add the URLs to your firewall allow list for both the provisioning policy and custom image options to set up the display languages.
Here we will explore the first option of using the gallery image. All Cloud PCs provisioned with galley image and added configuration policy would have the chosen language pack at the first sign-in experience.
- Deploy Windows 365 Security Baseline Policies to Cloud PCs
- Windows 365 Cloud PC Azure AD Joined Provisioning Process
- Backup and Restore Windows 365 Cloud PC | Point-in-time Restore Option
Set Default Display Language Using Windows 365 Provisioning Policy
Let’s look at the steps to modify an existing Provisioning Policy for Windows 365 Cloud PCs, and Here you can also update general information, image, and network connection –
- Sign in to the Microsoft Endpoint Manager admin center https://endpoint.microsoft.com/.
- Select Devices > Windows 365 (under Provisioning) > Provisioning policies.
- Select a policy from the lists which you want to modify.
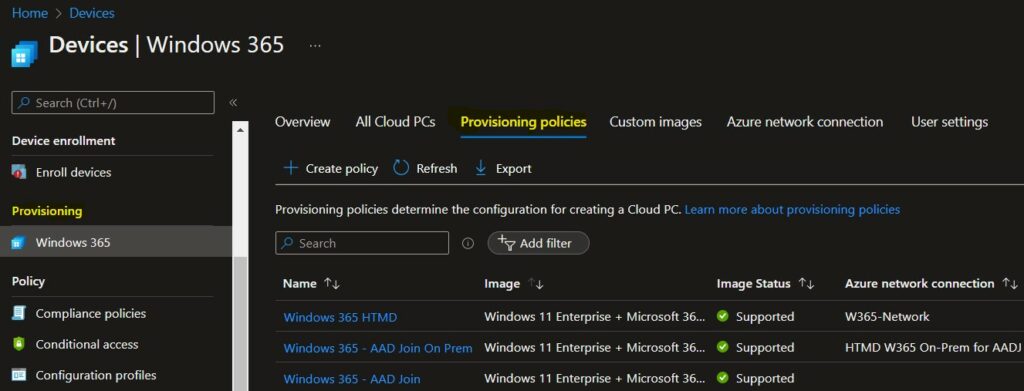
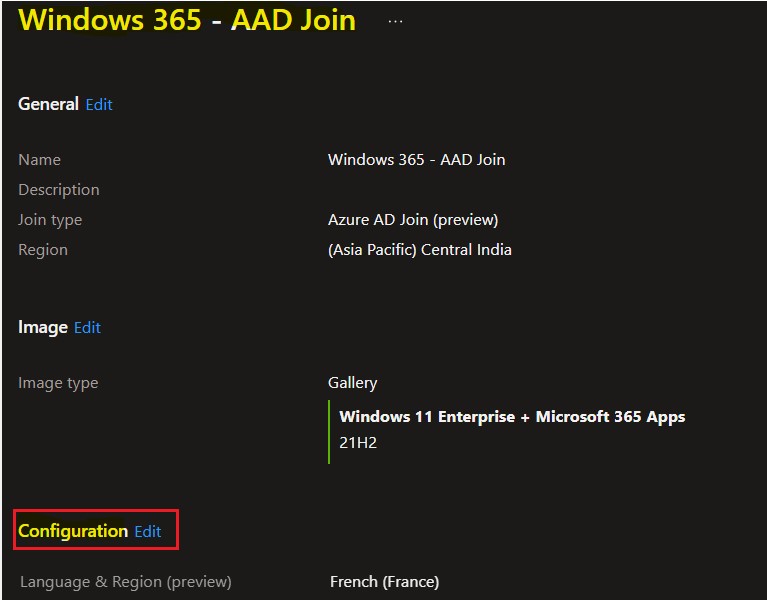
Once you have selected Provisioning policies, Scroll down and click on Edit in the Configuration.
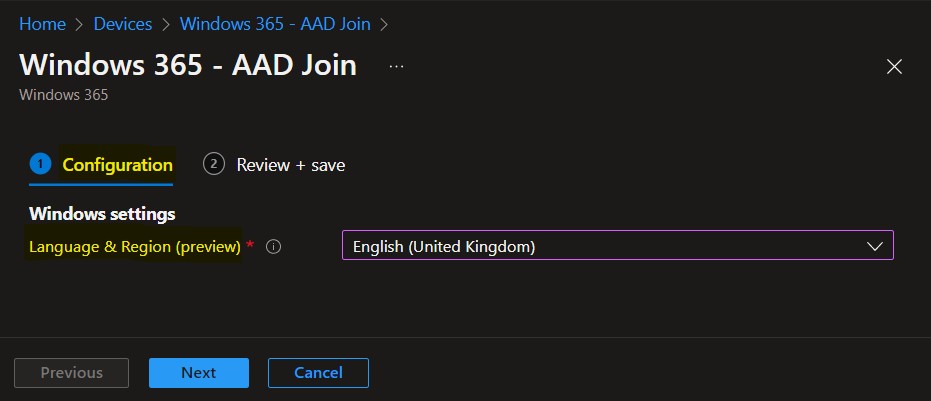
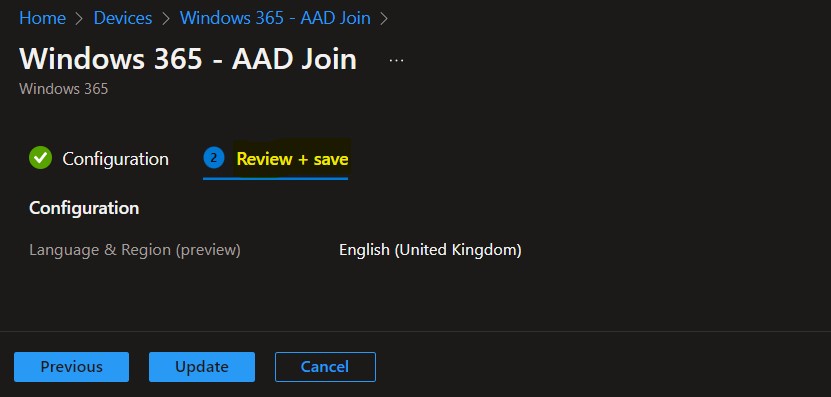
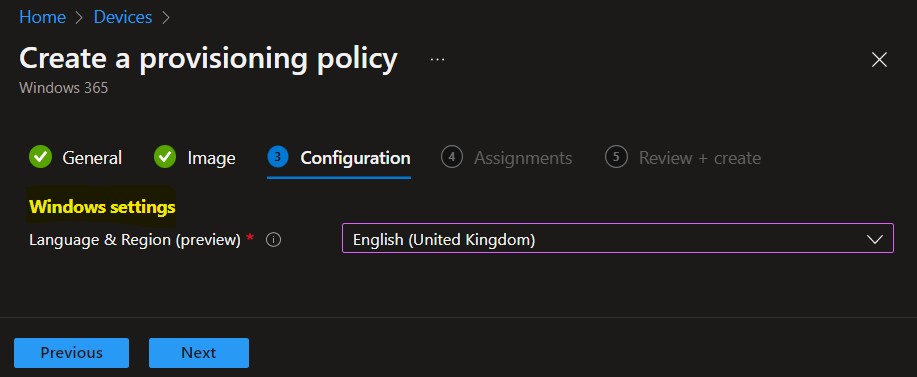
On the Configuration page, choose a language pack in the dropdown (For Example, I selected English (United Kingdom). The selected language pack will be installed on Cloud PCs provisioned with this policy. Select Next.
Note – There are 38 Windows language packs available for Windows 365. Windows 365 will automatically use the default remote keyboard layout for the language pack.
On the Review+Create window, review the added configuration and click Update.
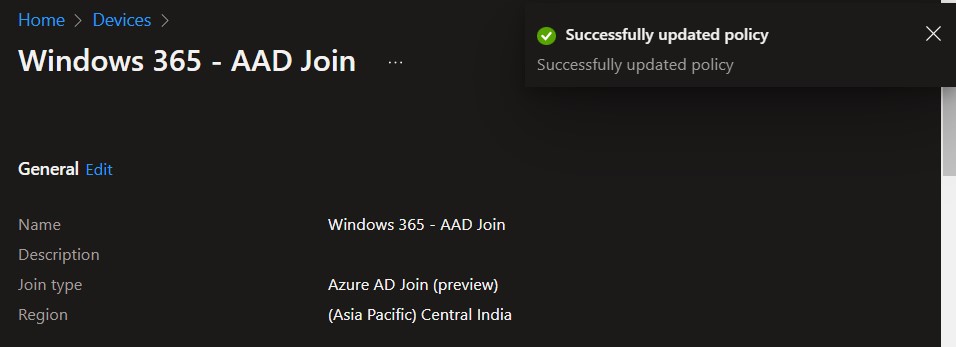
A notification will appear automatically in the top right-hand corner with the message “Successfully updated policy.”
After you save the policy and reprovision the Cloud PCs, the chosen language pack will be on the Cloud PCs.
Newly provisioned Cloud PCs will honor the changes in your provisioning policy. To change the previously provisioned Cloud PCs to align with the changes, you must reprovision Cloud PCs.
Important – When the Reprovision remote action starts, the user is signed off. The original Cloud PC is deleted, including all user data, applications, customizations, etc.
Here, you can learn how to reprovision Windows 365 Cloud PC
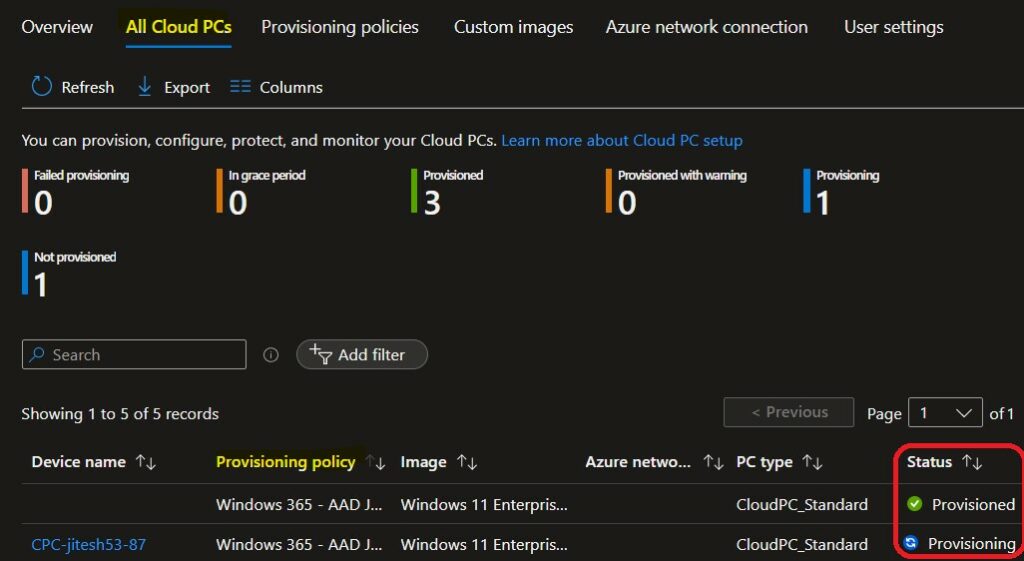
When you initiate the Reprovisioning of a Cloud PC, the initial status you see is Provisioning.
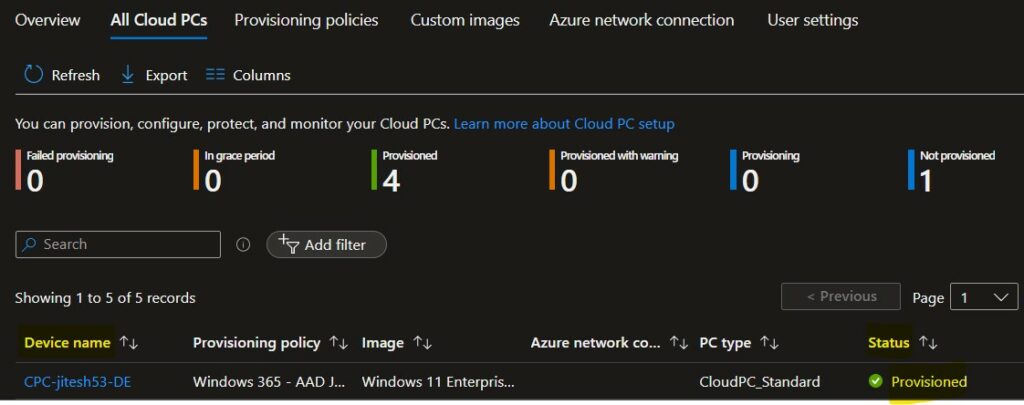
After a few minutes, the provisioning got completed successfully. You will see that the status is changed to provisioned, and the device name is changed from CPC-jitesh53-87 to CPC-jitesh53-DE. The cloud PC is ready to use with the added language pack.
Create Provisioning Policy for Windows 365 Cloud PC – Set Default Display Language
While creating a new provisioning policy, the next option you had specifies the configuration settings.
Let’s follow the steps to create Windows 365 Cloud PC provisioning policies. You need to specify the connection, Windows 10/11 images, and user groups here. The provisioning policy helps you configure the settings required to host and manage cloud PCs.
When creating a Provisioning Policy in Windows 365, you need to specify the join type. There are two options for selecting the join type for Cloud PC.
You can check more about the Azure AD Join and Hybrid Azure AD Join for Windows 365 Cloud in the post –
On the Configuration page of Create a provisioning policy, select the language and region settings. Click the drop-down and select your desired language and region.
The chosen language pack will be installed on Cloud PCs provisioned with this policy. Click Next.
On the Assignments page, click on Add groups > choose the groups you want this policy assigned to > Select, then click on Next.
On the Review + create the page, select Create.
The provisioning policies (Windows 365 – AAD Join) successfully added a new policy under the Provisioning policies tab.
The entire process could take approx 20-25 minutes, and Once the provisioning process will successfully get completed. Cloud PCs will appear under the All Cloud PCs tab.
End Users Experience
Here you can see the end-user experience for the Cloud PCs –
You can use the Cloud PC URL – https://windows365.microsoft.com/ to launch Windows 365 service and start working on a personalized desktop in the cloud.
👉Let’s check more details about Windows 365 cloud PC web client end-user experience walkthrough – Windows 365 Cloud PC Web Client End User Experience.
Here you can see the different Cloud PCs assigned to you in the Windows 365 web client portal. End users can easily perform maintenance on cloud PCs via the Windows 365 web portal. Let’s select Open in browser –
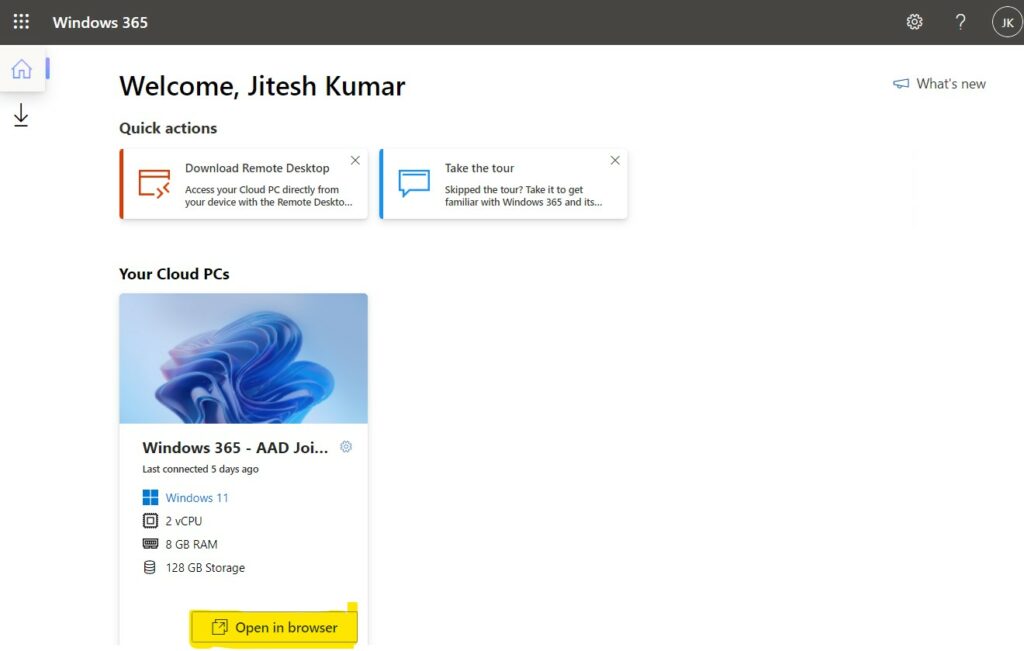
You will be prompted to select the desired level of access that the Cloud PC to your local resources. You can choose from the options Printer, Microphone, and Clipboard. Once you are done with the settings configuration, Click on Connect.
After that, you will see the login screen of Windows 365 Cloud PC; provide your username and password. Click Sign In.
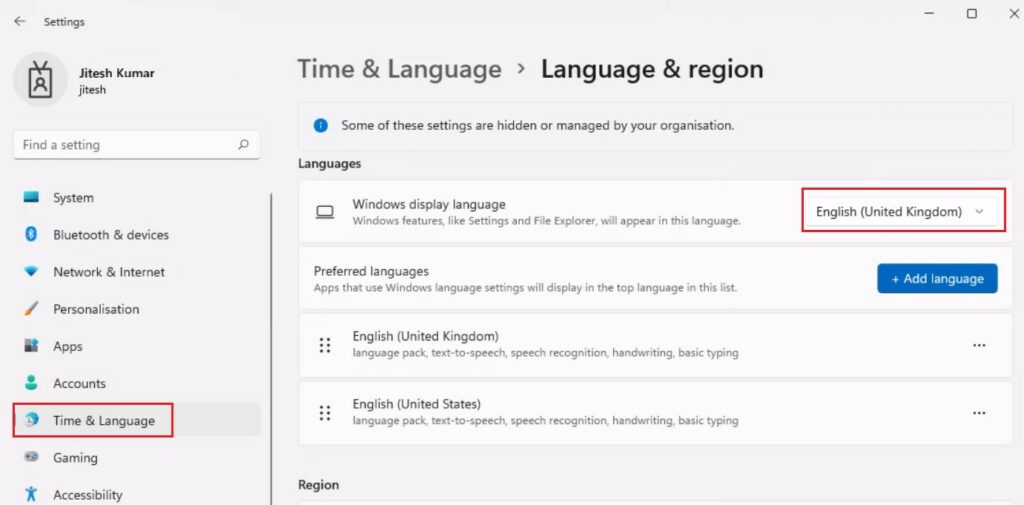
Once you log in successfully, You will be landed on Cloud PC Desktop. Here you can validate the default display language for the Cloud PCs. As you can see below, the selected language English (United Kingdom) is applied.
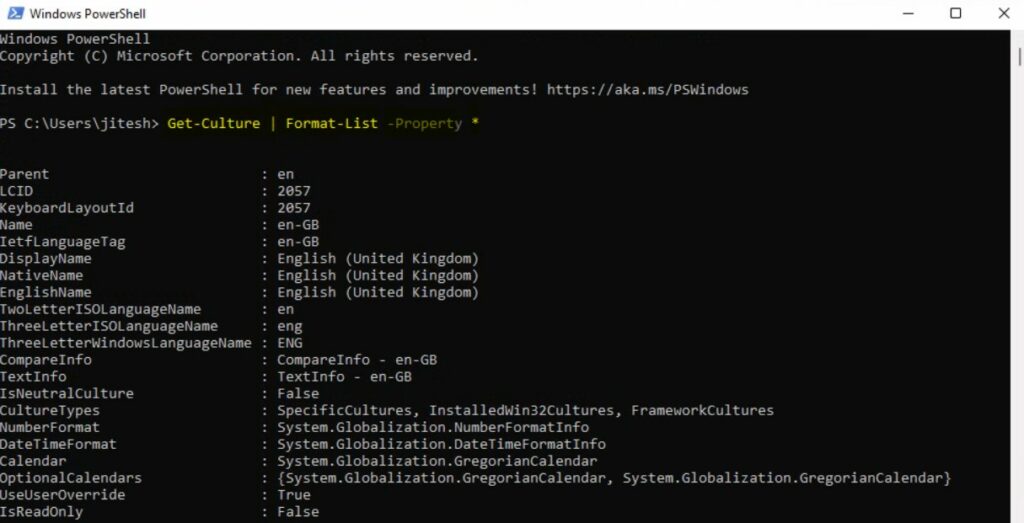
Run the following PowerShell commands with user context. Copy and paste the command below into the command prompt, and press Enter.
Get-Culture | Format-List -Property *Parent : en
LCID : 2057
KeyboardLayoutId : 2057
Name : en-GB
IetfLanguageTag : en-GB
DisplayName : English (United Kingdom)
NativeName : English (United Kingdom)
EnglishName : English (United Kingdom)
TwoLetterISOLanguageName : en
ThreeLetterISOLanguageName : eng
ThreeLetterWindowsLanguageName : ENG
CompareInfo : CompareInfo - en-GB
TextInfo : TextInfo - en-GB
IsNeutralCulture : False
CultureTypes : SpecificCultures, InstalledWin32Cultures, FrameworkCultures
NumberFormat : System.Globalization.NumberFormatInfo
DateTimeFormat : System.Globalization.DateTimeFormatInfo
Calendar : System.Globalization.GregorianCalendar
OptionalCalendars : {System.Globalization.GregorianCalendar, System.Globalization.GregorianCalendar}
UseUserOverride : True
IsReadOnly : False