Hello, All of You There!!! In this post, We will go through the topic of how to enroll macOS in Intune reviewing each of the processes step by step. Also, we have covered the process on both Intune Portal(As Admin) steps and on client devices (User) steps to enroll the device without any issues.
The latest Microsoft Intune release 2211 supports 6 platforms such as Windows, iPadOS/iOS, macOS, Android, ChromeOS, and Linux OS. Let’s review each step needed to set up macOS enrolment for company-owned and BYOD devices.
As both company-owned (Corporate) and BYOD (Personal) setup devices can be managed in MDM (mobile device management) Microsoft Intune. However, a few prerequisites need to be met before the setup of the device enrollment process, which consists of configuring the Apple MDM Push Certificate.
Once the macOS device is enrolled with Intune app Company Portal, the device can securely gain access to all the work-related resources, files, and apps. Once the device status is shown as managed, it can apply company policies.
| No. of Steps | macOS Enrollment Descriptions |
|---|---|
| 1 | Setup Apple ID |
| 2 | Set up Apple MDM Push Certificate |
| 3 | Device Enrollment ( Install Company Portal app) |
| 4 | Verify Device enrollment status in Microsoft Endpoint Manager |
- Get Intune Environment Ready for iOS / Mac Devices Microsoft Endpoint Manager
- Microsoft Intune Vs Jamf macOS Device Management Enhancements
Set up Apple ID
The initial step, as mentioned earlier, is to create an Apple ID on the Apple website (if it doesn’t exist). Please continue to log in and in the new tab login to the Microsoft Intune portal to start the configuration.
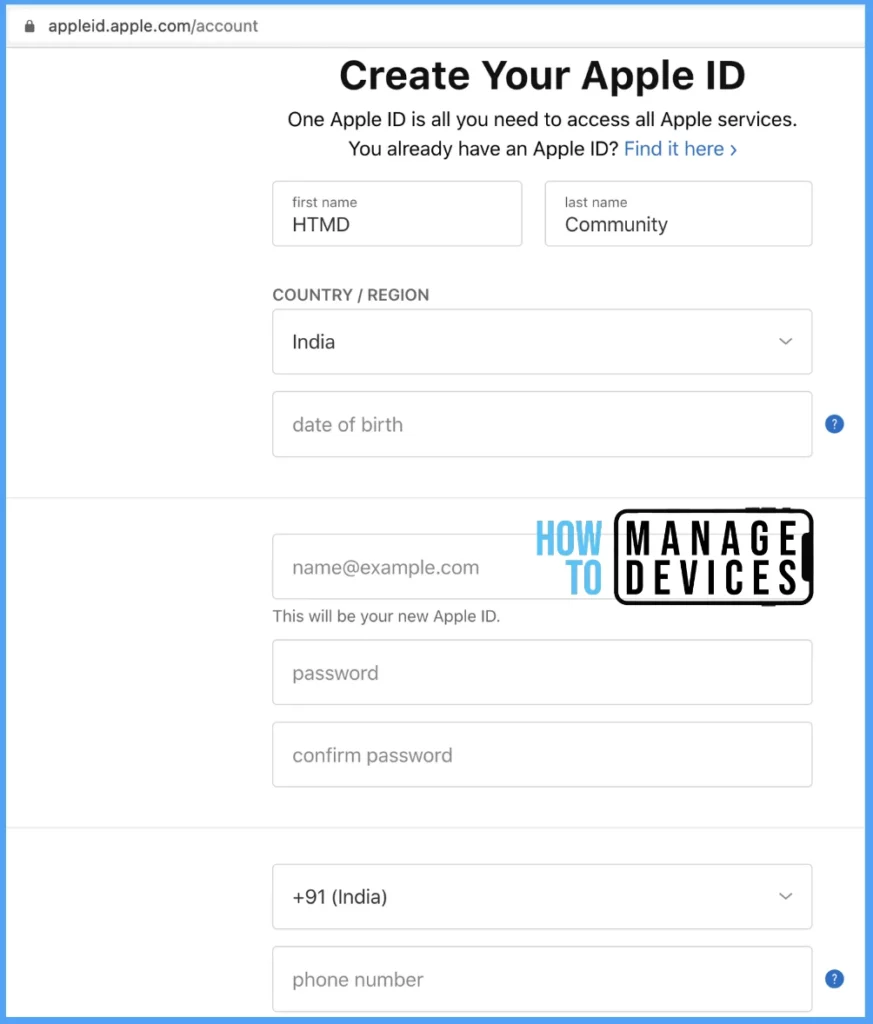
Set up Apple MDM Push Certificate
The next step is to set up Apple MDM Push Certificate on Intune Portal. To complete the admin configuration, follow the below steps to create Apple Push notification certificate.
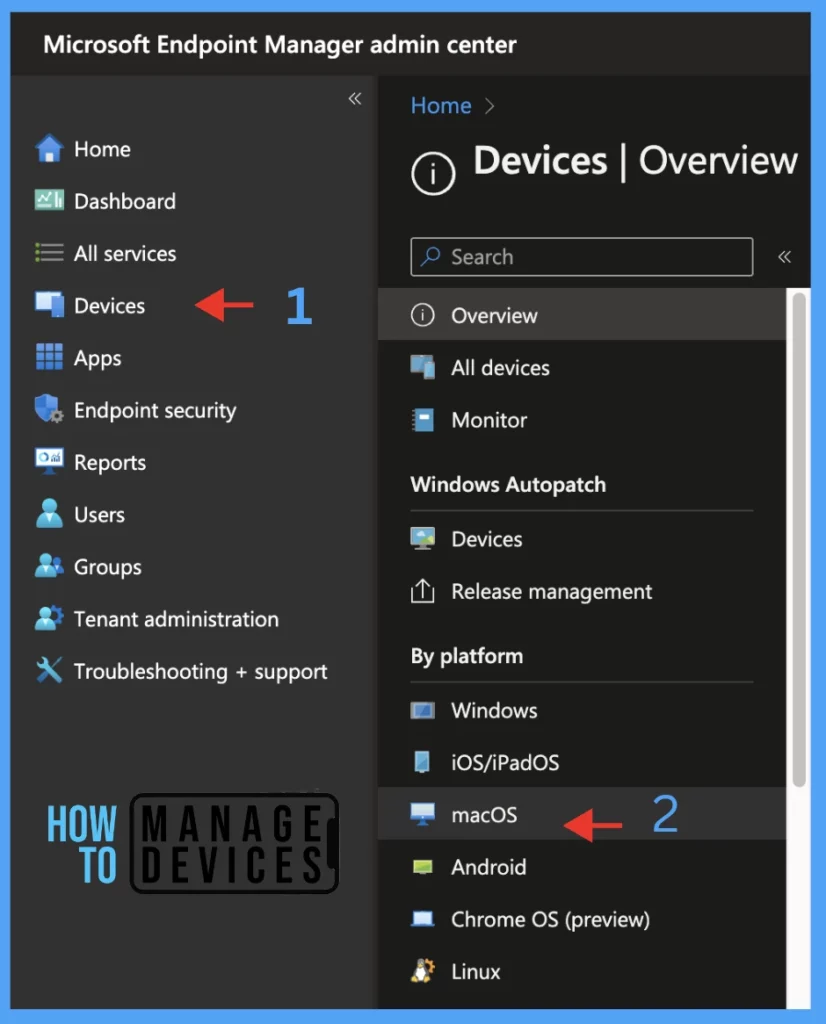
- Login to Microsoft Intune Admin Center https://endpoint.microsoft.com/ using the Admin account.
- Navigate to Devices > Under By platform category select macOS.
Once you are in the macOS window, Click on the macOS enrollment and next click on Apple MDM Push Certificate.
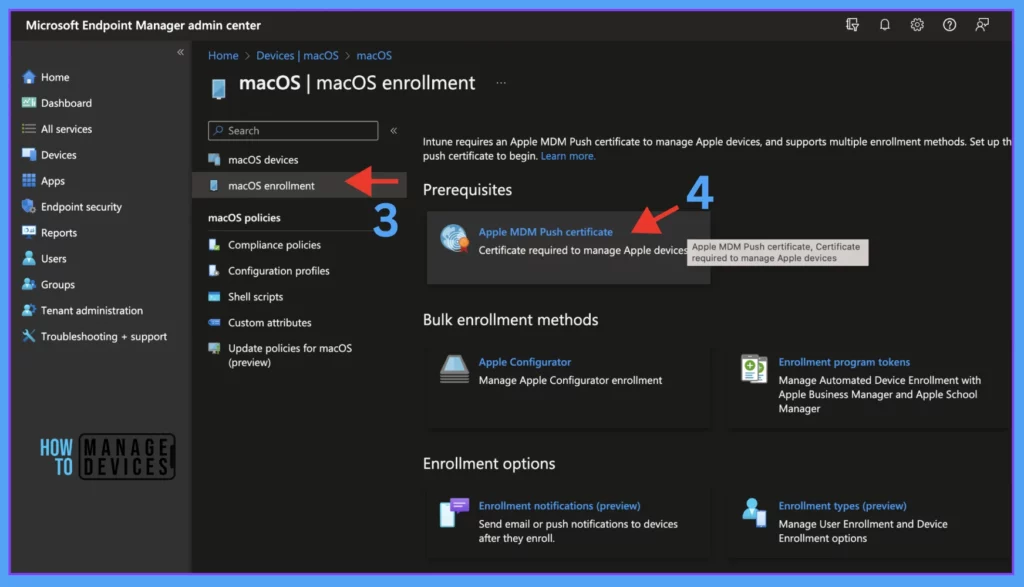
As a prerequisite, Intune requires an Apple MDM Push certificate to manage Apple devices after enrollment. Check out the steps below to set up the Apple MDM Push certificate.
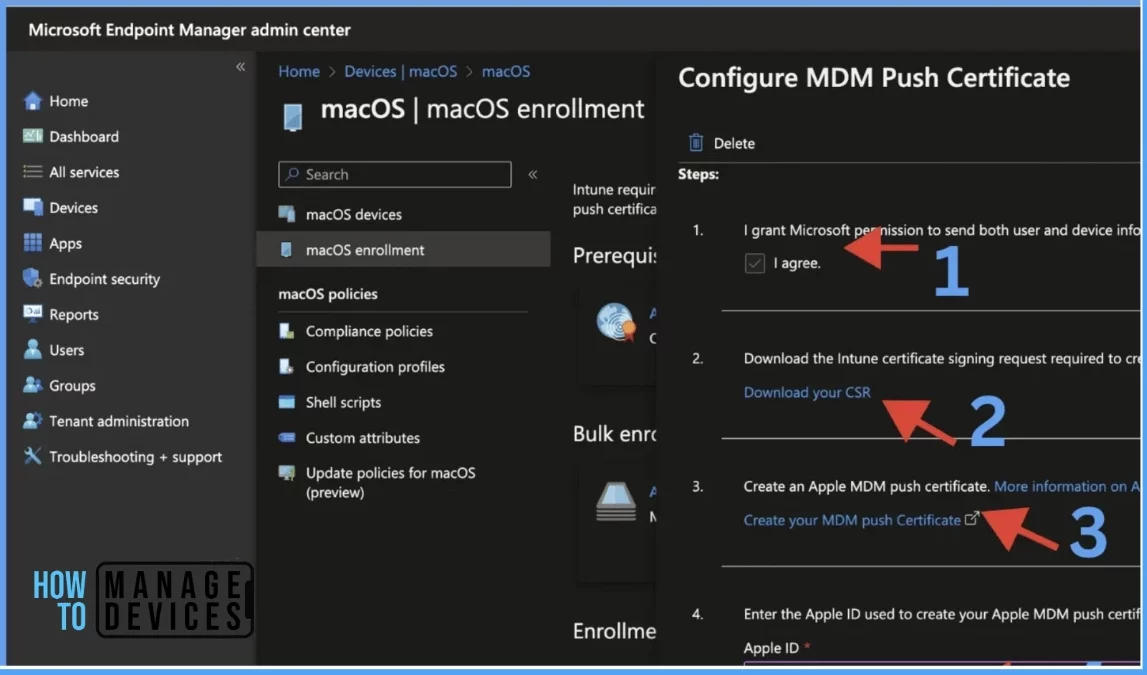
Once the Configure MDM Push Certificate window appears, follow the below steps to complete the configuration steps.
- Click on “I Agree” to grant Microsoft permission to send info to Apple.
- Click on Download your CSR, an Intune certificate sign-in request that will be required for step #3. The certificate will be downloaded with a CSR extension. For me, it’s downloaded as IntuneCSR.csr
- Click on Create your MDM push Certificate hyperlink, and you will be redirected to the Apple Push certificates portal.
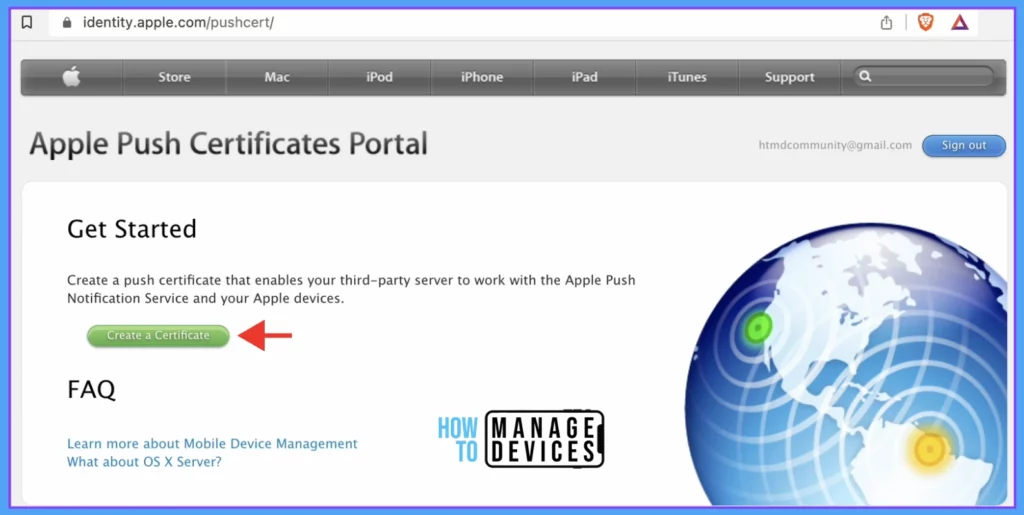
Let’s get started to create a push certificate that enables your third-party server to work with Apple Push Notification service and your Apple devices. Click on Create a Certificate button.
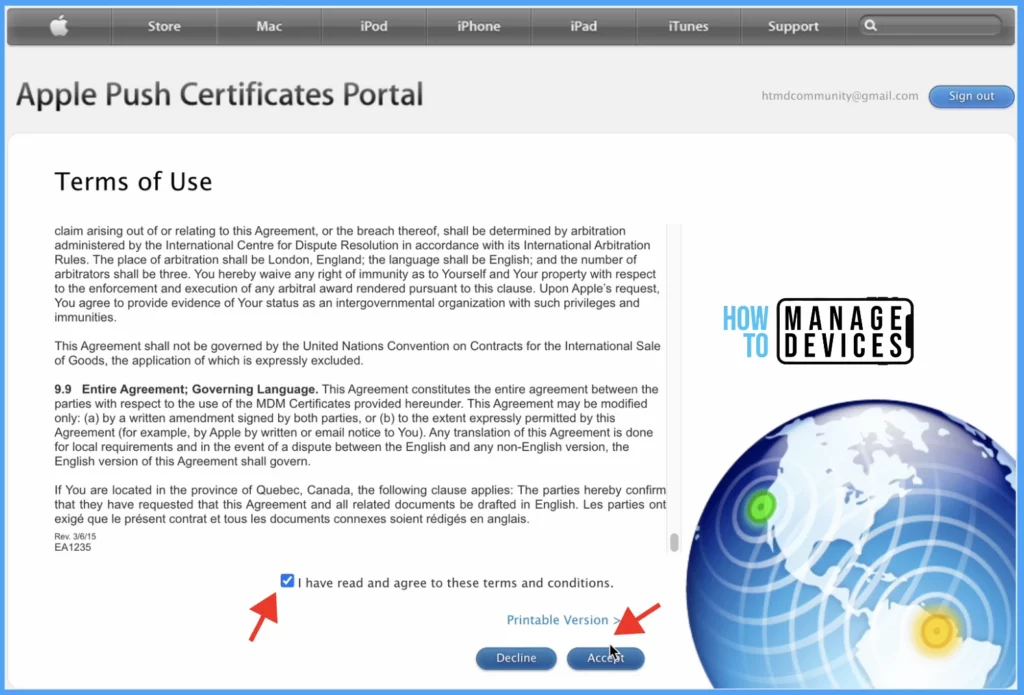
In the Apple push certificates portal, you will be asked to accept the terms of use. Check the “I have read and agree to these terms and conditions” and click on Accept button.
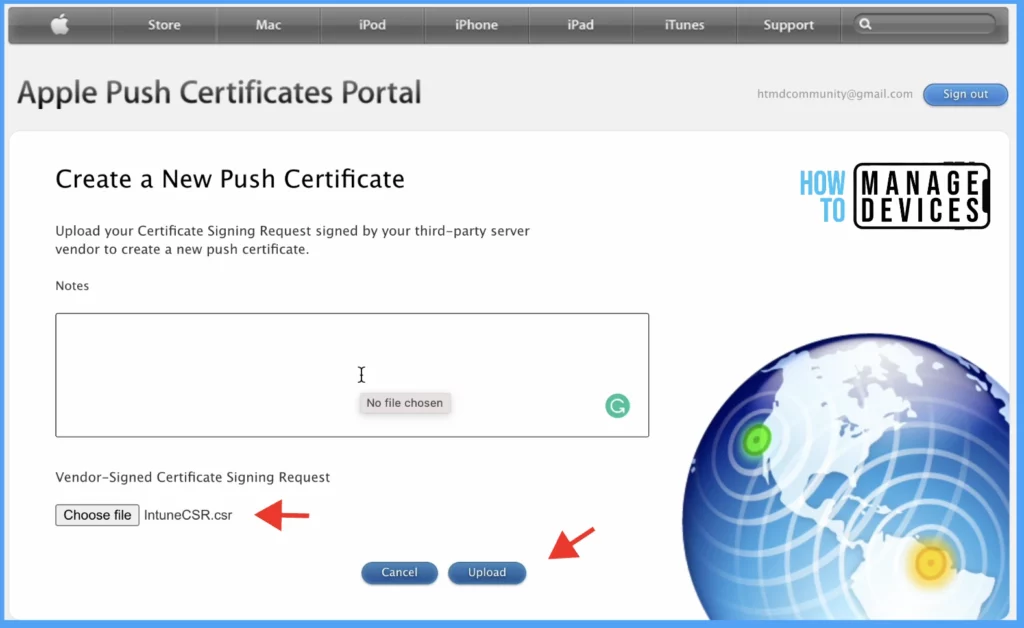
As a note, you may provide easy-to-remember notes (not a mandate option) and upload the Certificate. This requires you to select Vendor-Signed Certificate Signing Request, which we downloaded while performing step#2 (while clicking on Download your CSR), and click on the Upload button.
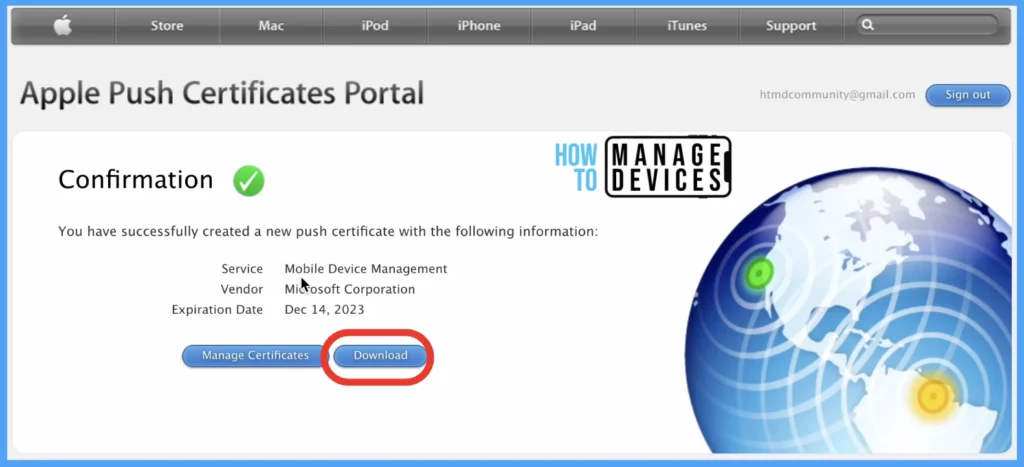
Click on Download to grab the certificate in .pem format, I got the following certificate MDM_ Microsoft Corporation_Certificate.pem
A list of certificates will be displayed under Certificates for Third-Party Servers. The Apple MDM push certificate is valid for 365 days. You must renew it annually to maintain iOS/iPadOS and macOS device management.
Once the certificate expires, there is a 30-day grace period to renew it. Renew the MDM push certificate with the same Apple account you used to create it.
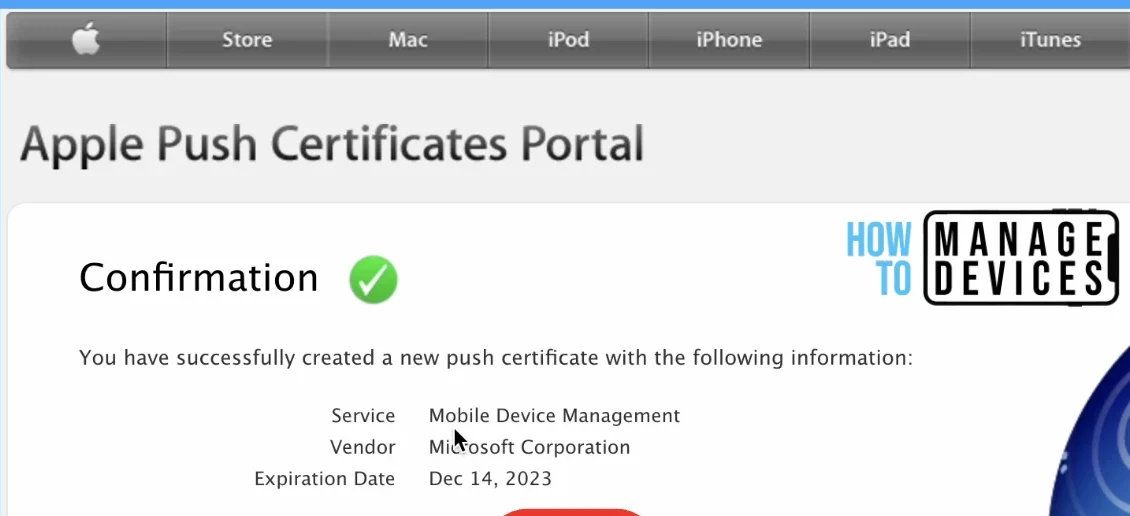
Let’s go back to the Microsoft Intune portal where we were on Configure MDM Push Certificate page. Here you need to Enter the same Apple ID used to create your Apple MDM push certificate.
Browse to the Apple MDM push certificate to upload, select the Apple MDM push certificate we recently created with the .pem extension and click on Upload.
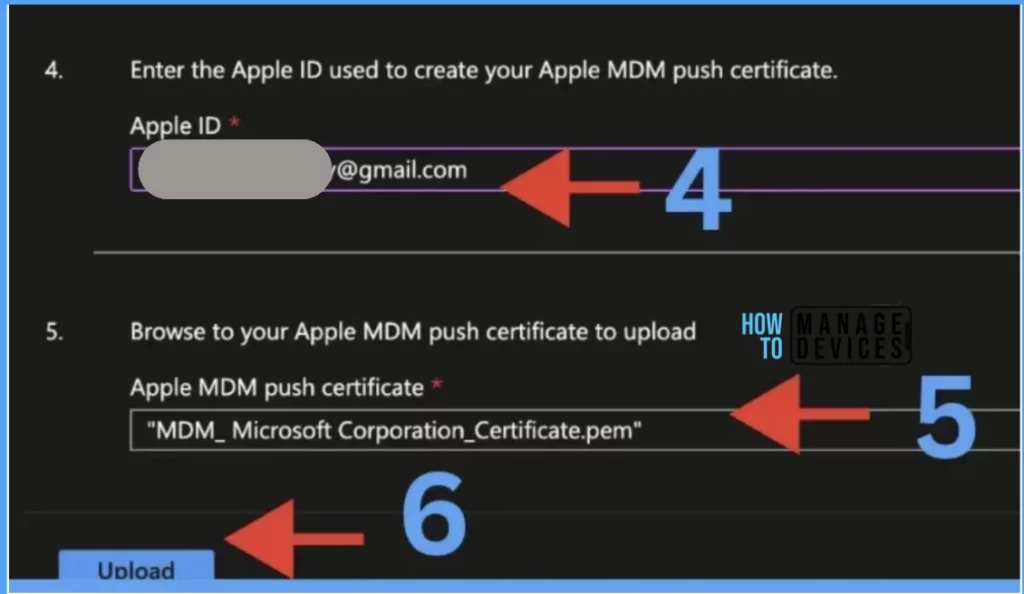
Let’s wait for a few minutes until you get a notification, Your MDM push certificate was successfully created.

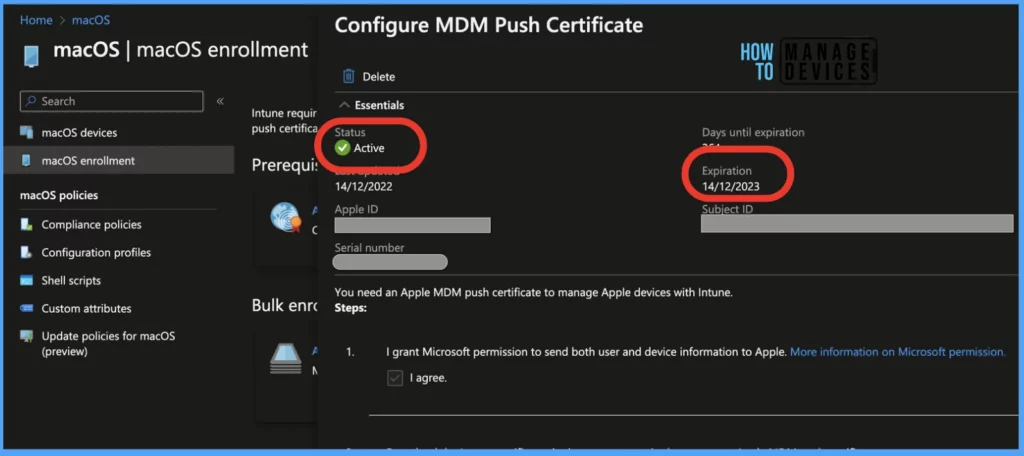
Once the certificate is successfully uploaded, On the Intune macOS enrollment page, you will see that MDM Push Certificate is created with the new expiration date, Apple ID, Subject ID, etc.
- Should you upgrade to Mac OS Ventura v13 managed using Intune
- MAC Device Management with SCCM Vs Intune
Mac Device Enrollment – Install Company Portal App
Before performing the installation of the Company Portal, make sure to assign the appropriate Intune license to the user, which consists of the following licenses, Device-Only Subscription
- Microsoft Enterprise Mobility + Security (EMS)
- Enterprise Mobility + Security E3
- Enterprise Mobility + Security E5
- Microsoft 365
- Microsoft 365 E3
- Microsoft 365 E5
Or else you may get the below error in case the user doesn’t have any of the above-mentioned licenses.
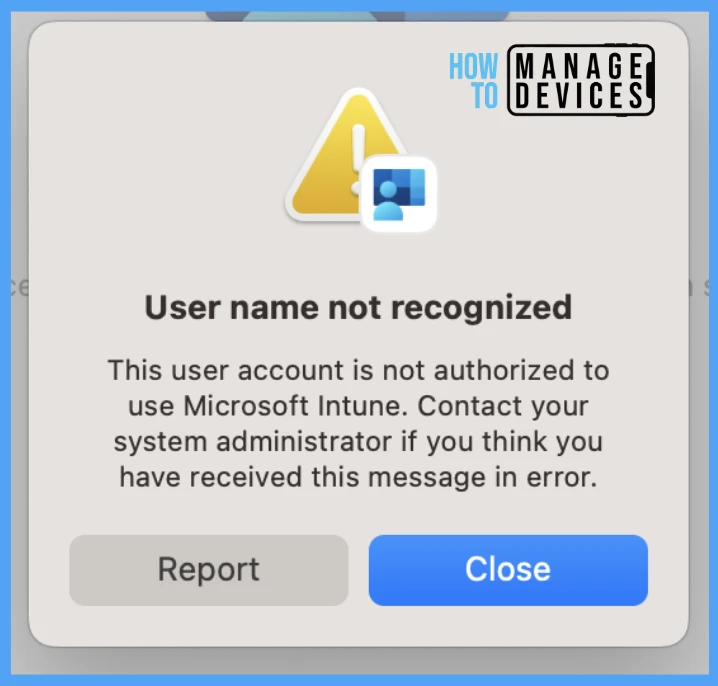
Log in to a Mac device and download Company Portal installer .pkg file, once downloaded, execute CompanyPortal-Installer.pkg file and continue through the steps. Ensure your device must be running macOS 10.15 or later.
Note: You won’t be able to install Company Portal from App Store as this app is available only on the App Store for iPhone/iPadOS or macOS.
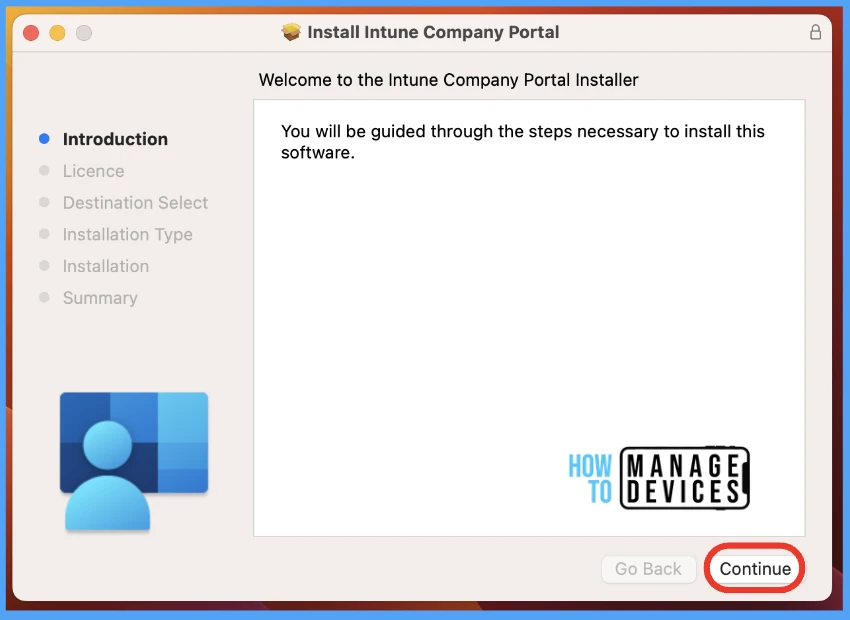
Once the Company Portal Installer is launched, click Continue.
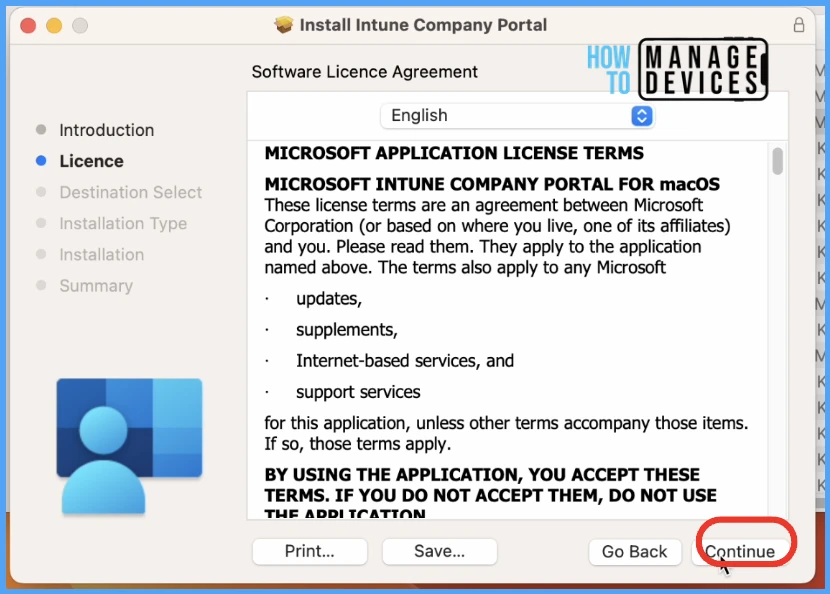
You need to accept the software license agreement to continue the enrollment process. On the License page, click Continue.
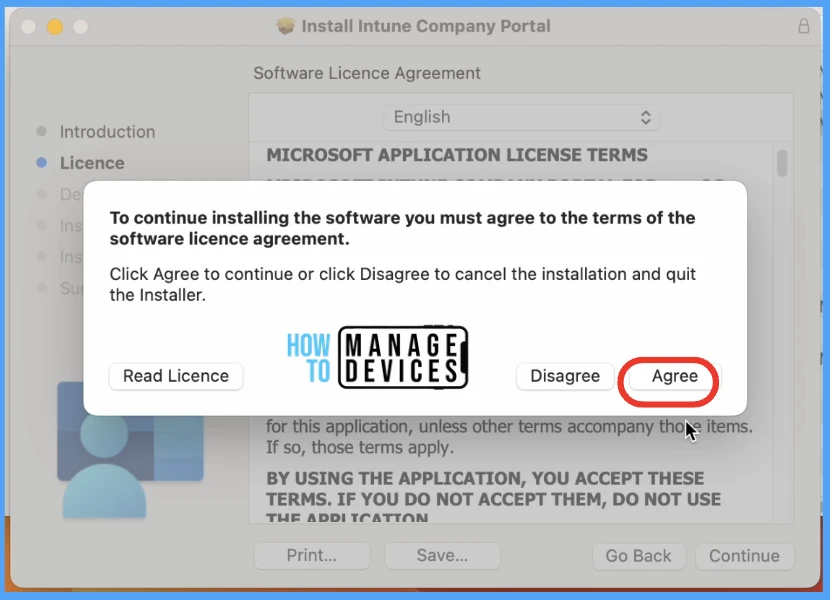
A prompt will appear here click on Agree button to continue the installation.
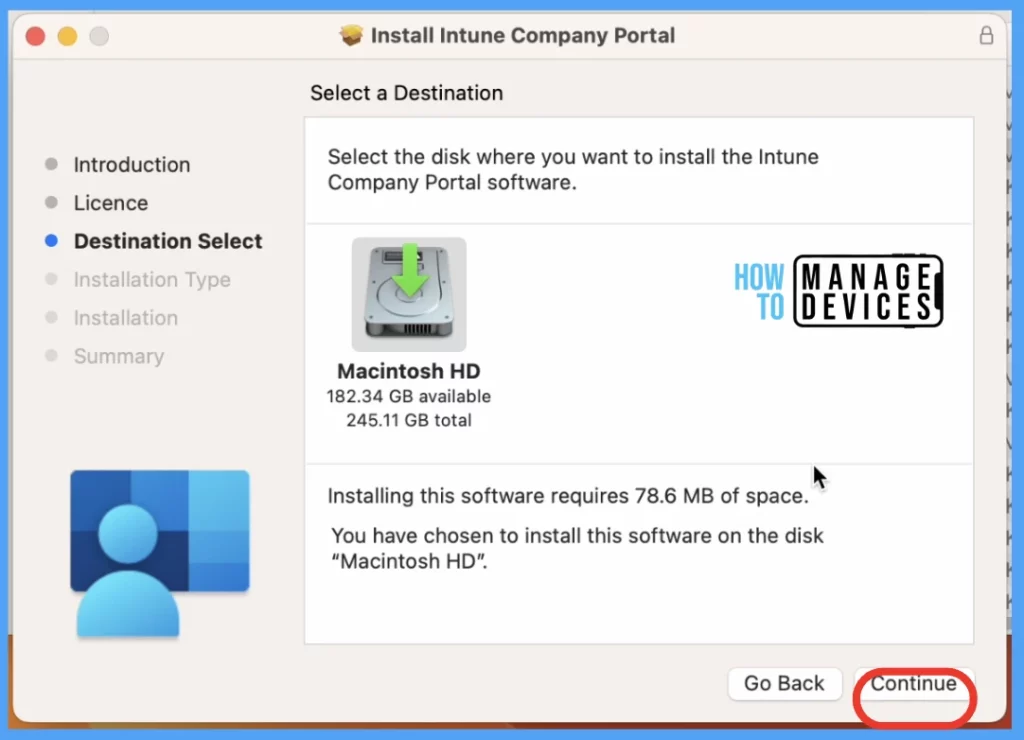
On the Destination Select page, you will be asked to select the disk where you want to install the Intune company portal software. Here I am leaving the option default and clicking continue.
On the Installation Type page, Click on Install. The Intune company portal app will take up 78.6 MB of space on your mac device.
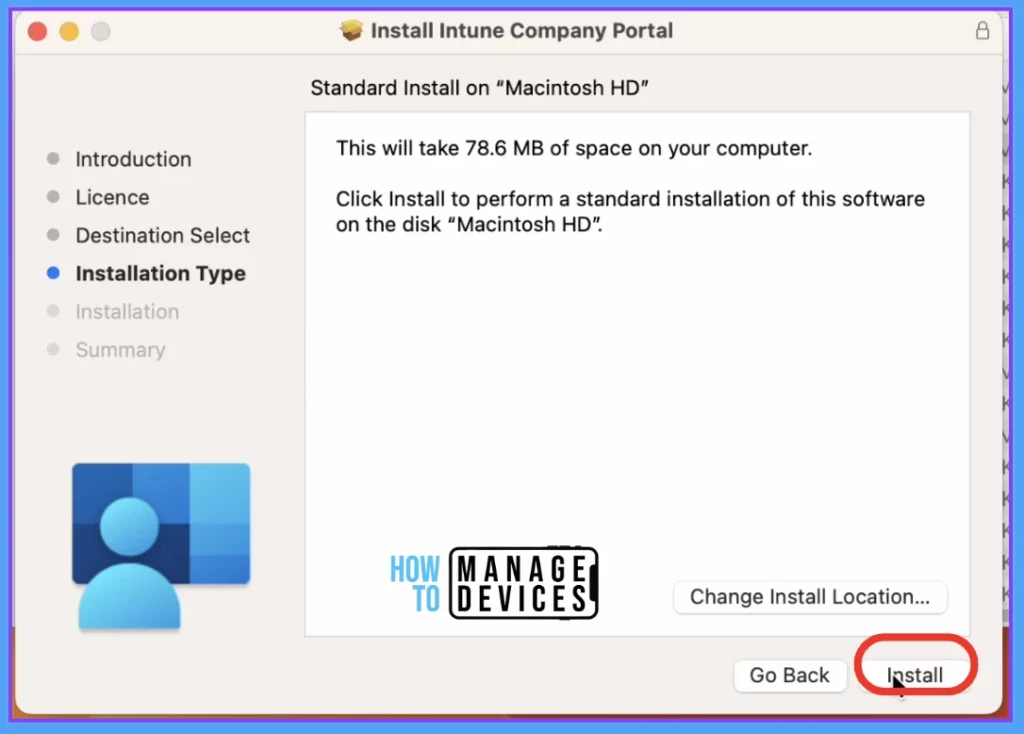
Wait for the installation to get completed. Once the installation gets completed, you will see the message “The installation was successful”. Click on Close.
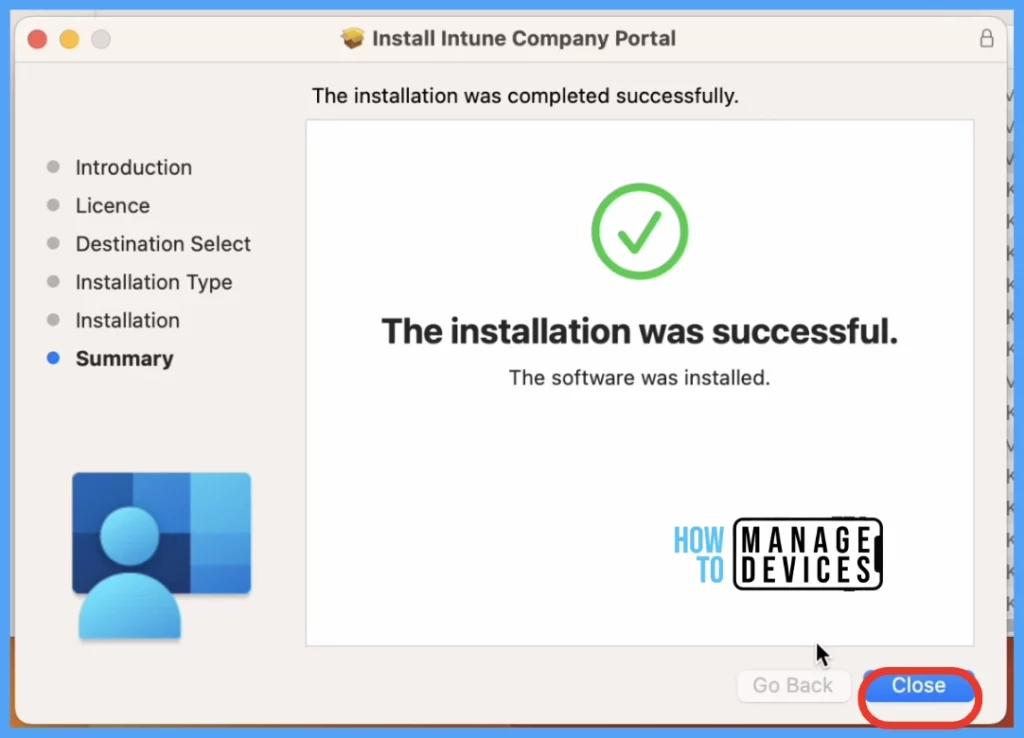
As the Intune company portal application is installed successfully, To launch it follow the below steps.
- Press Command + Spacebar to open Spotlight Search.
- Type Company Portal, and press the Return key.
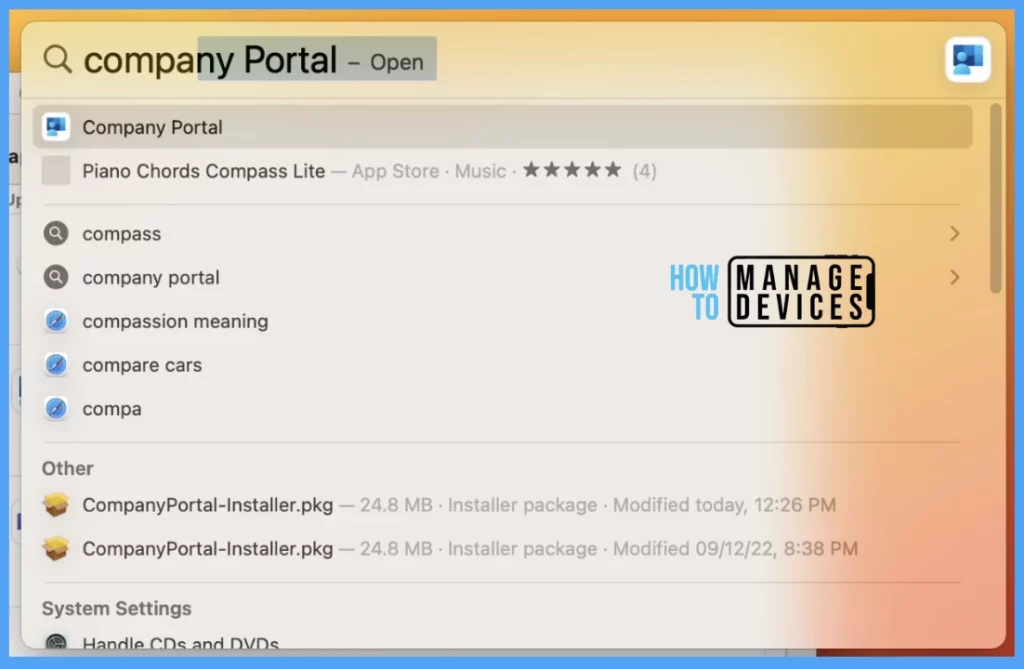
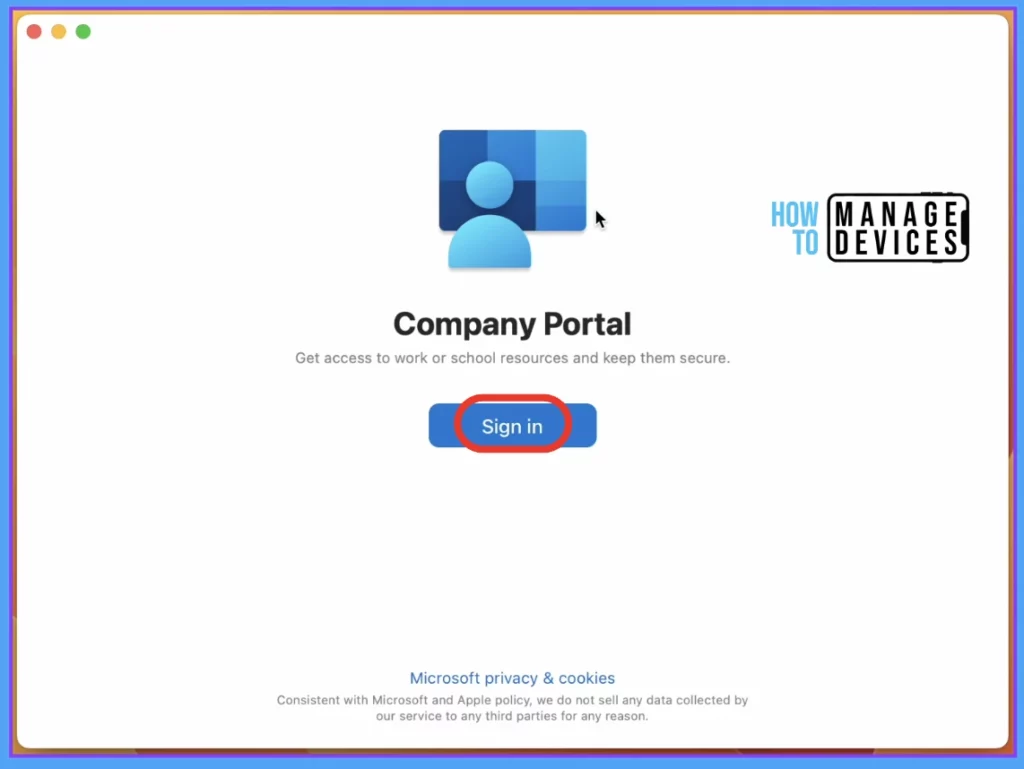
After clicking the Open, you should sign in to your Company portal. The Company portal helps you access company resources and keep them secure.
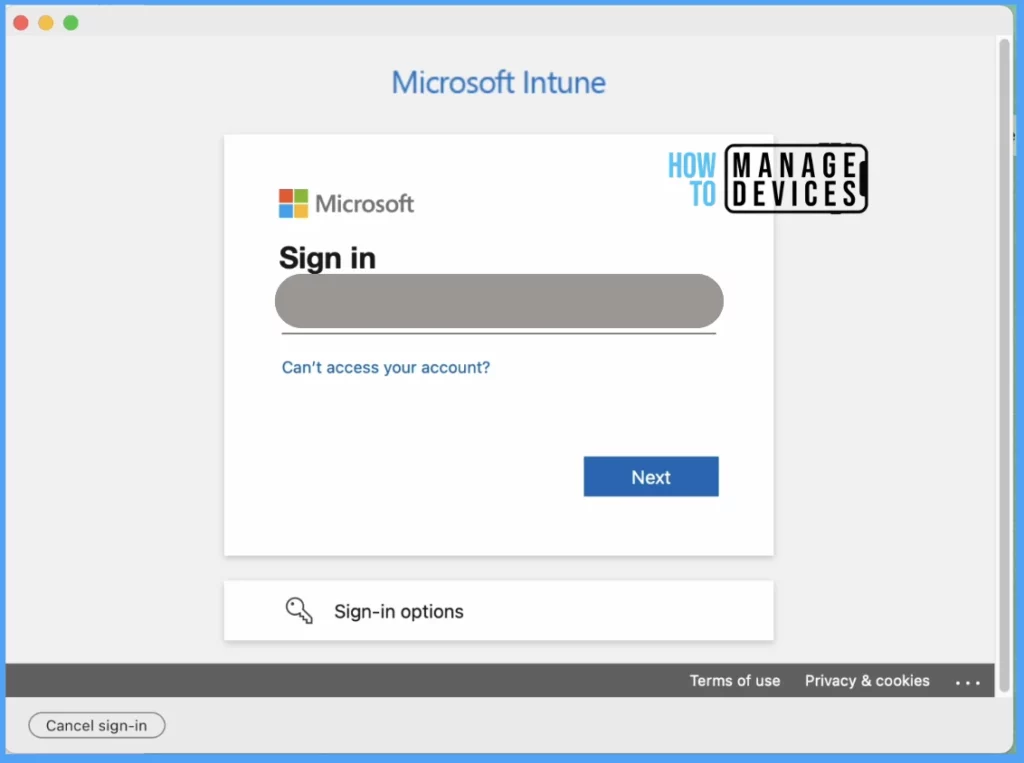
Click on Sign in to log in with username credentials having the appropriate Intune license assigned.
Enter your Email address to Sign in to the Company Portal app on your Mac. After entering your work account Email address, you should click the Next button.
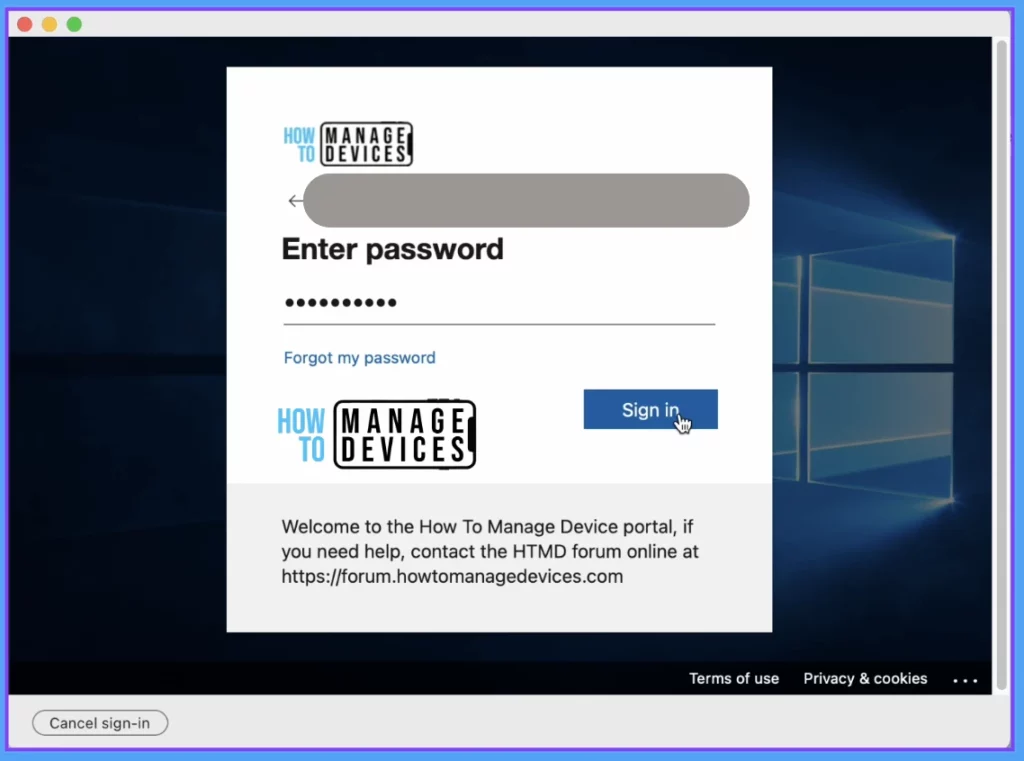
You should have entered your Work account password in the Company portal below. If you forgot your password, click “Forgotten my password” and reset the new password.
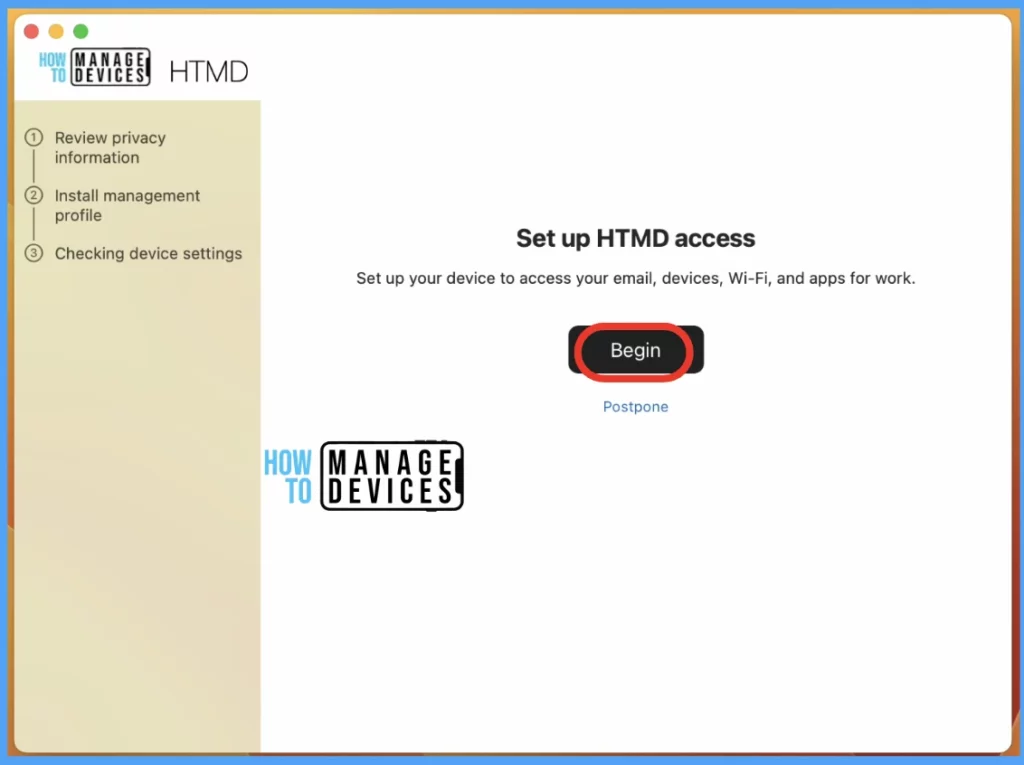
Once logged in, we can see Set up Portal access asking for more information to register the device, this is required for setting up your device to access email, devices, Wi-Fi, and apps for work, click Begin.
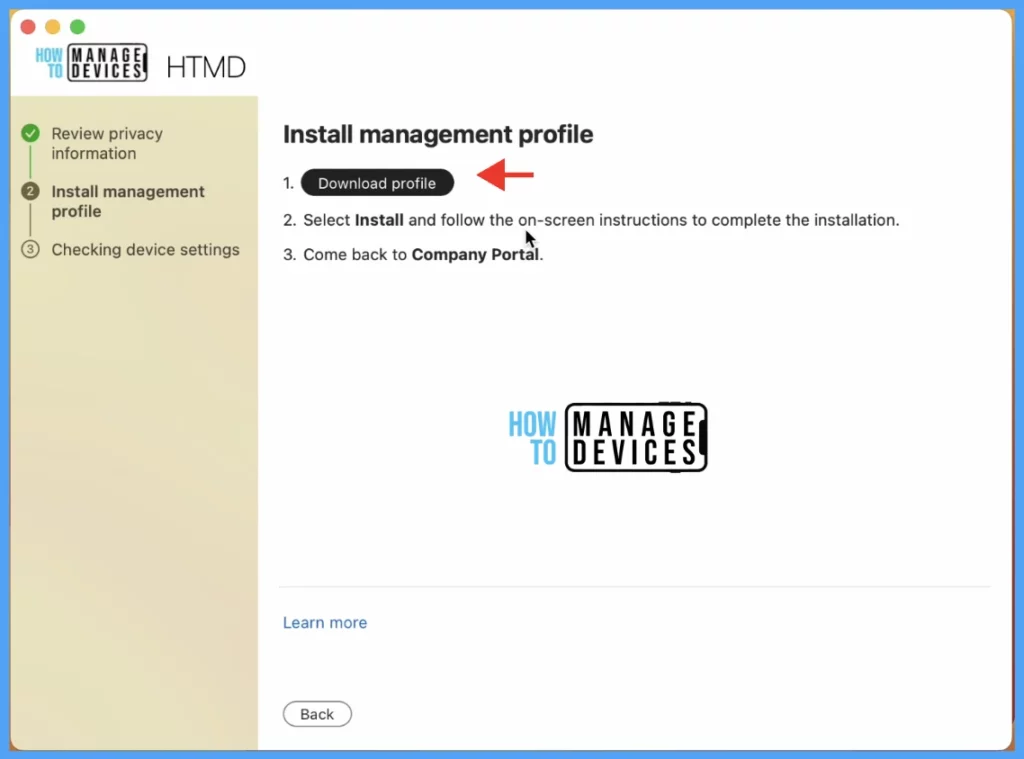
On the Install management profile page, click on Download profile.
On the Review privacy information page, you will see the message what your organization can’t do vs can do, click Begin. This will launch the Management Profile page, and click on it to install the profile.
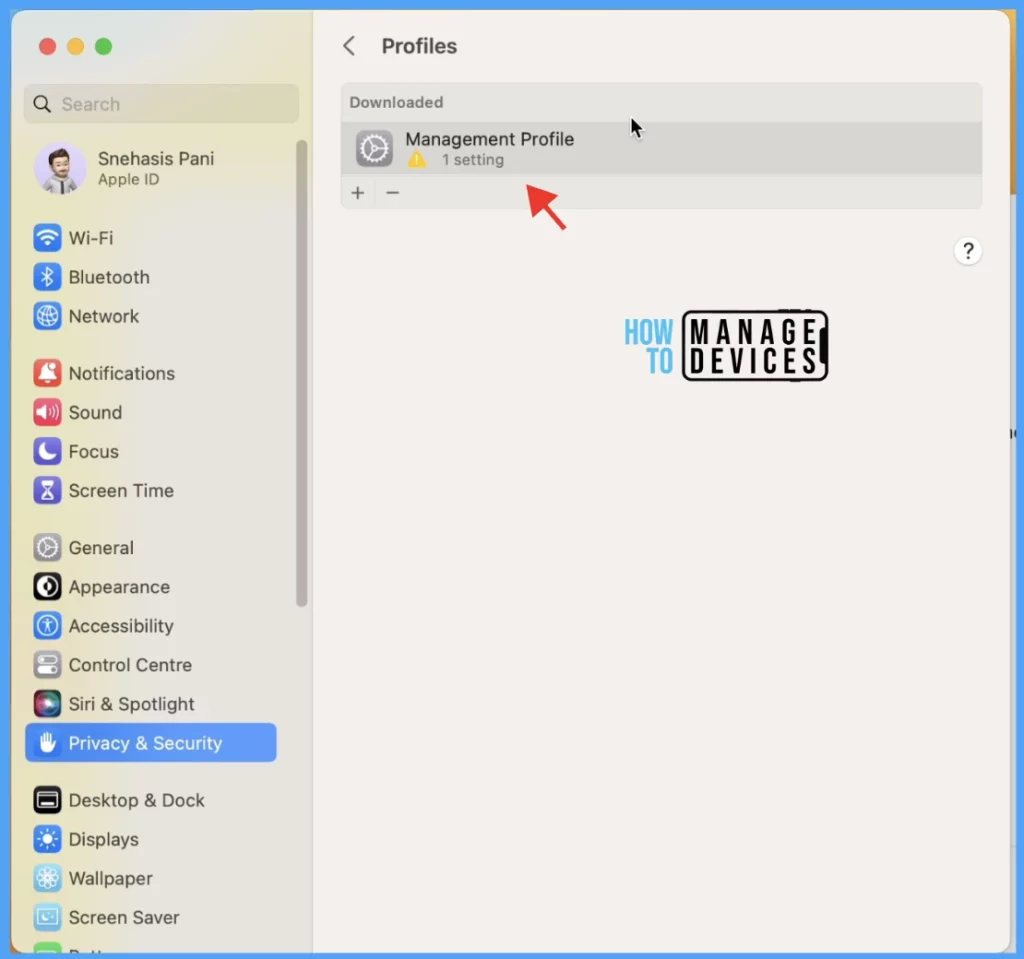
Click on the Install button to start the installation of the Management Profile. If you’re prompted to, enter your device password.
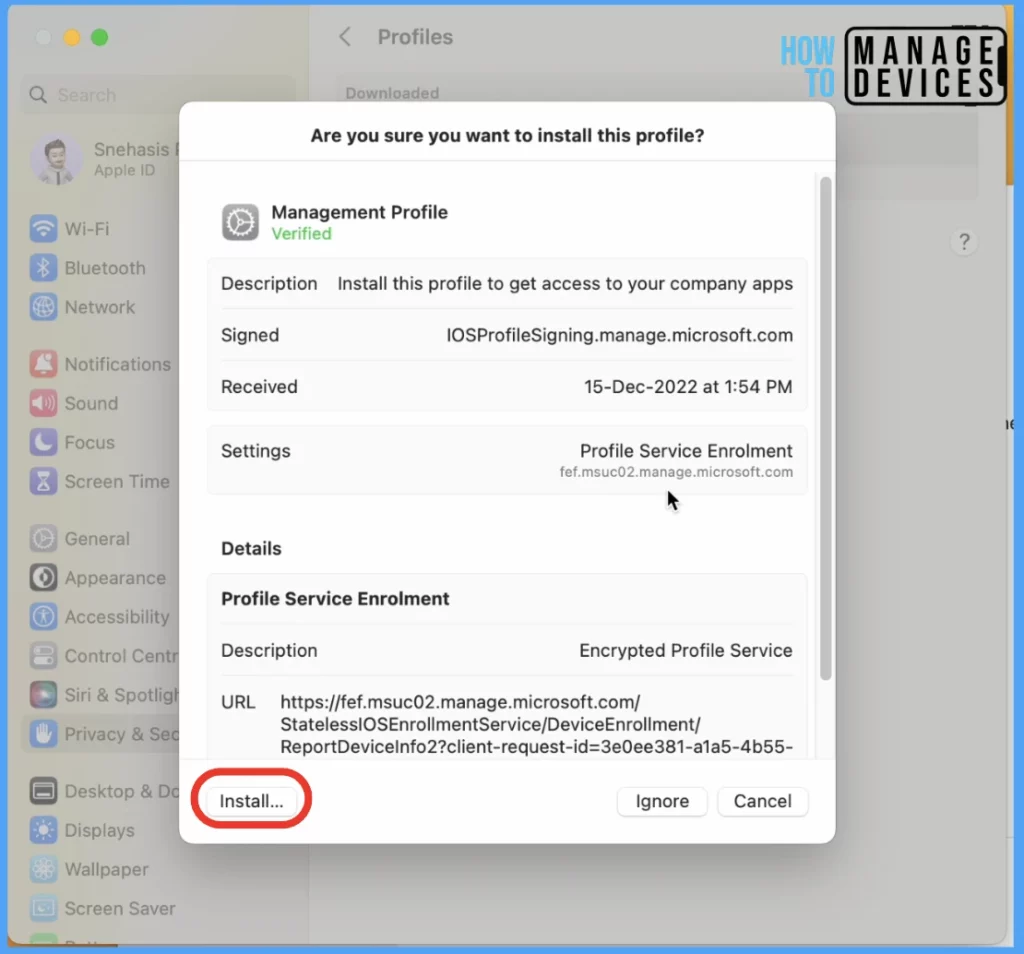
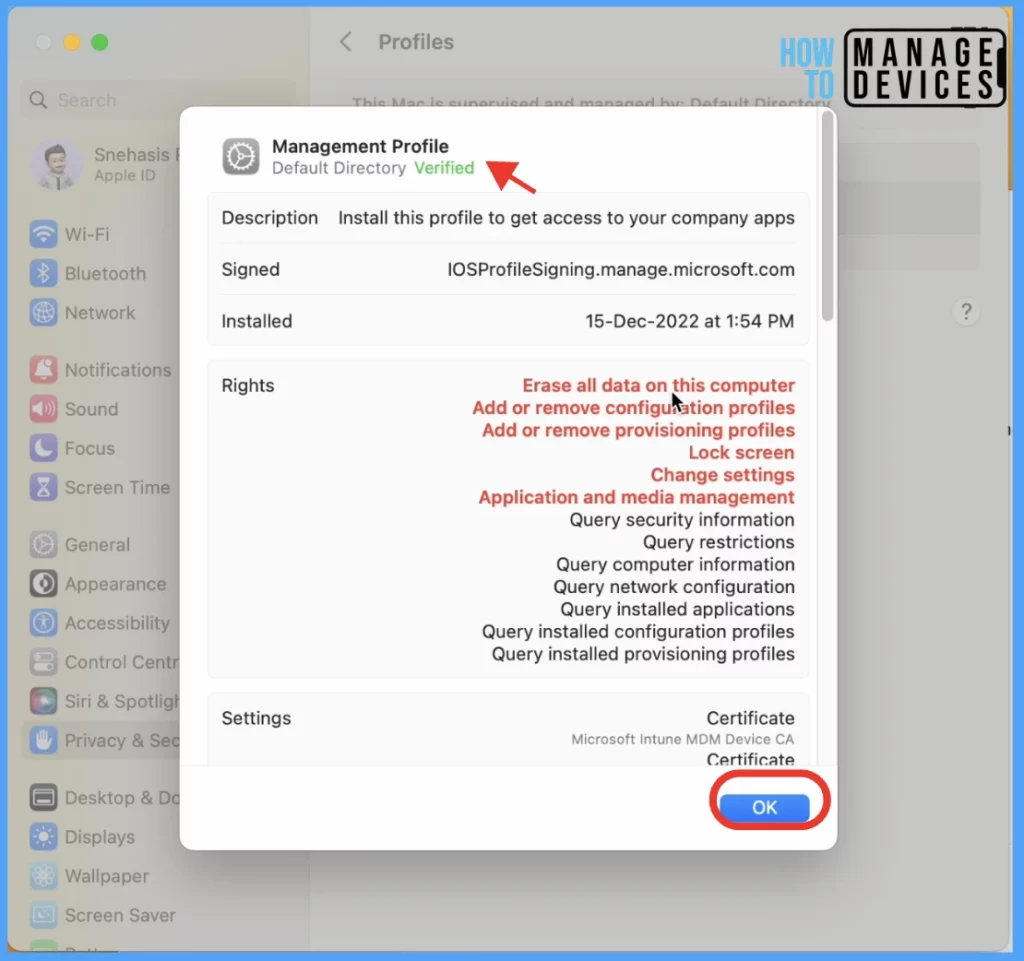
Once Management Profile is installed, you can see the status showing as Verified, which will show all the right MDM authority.
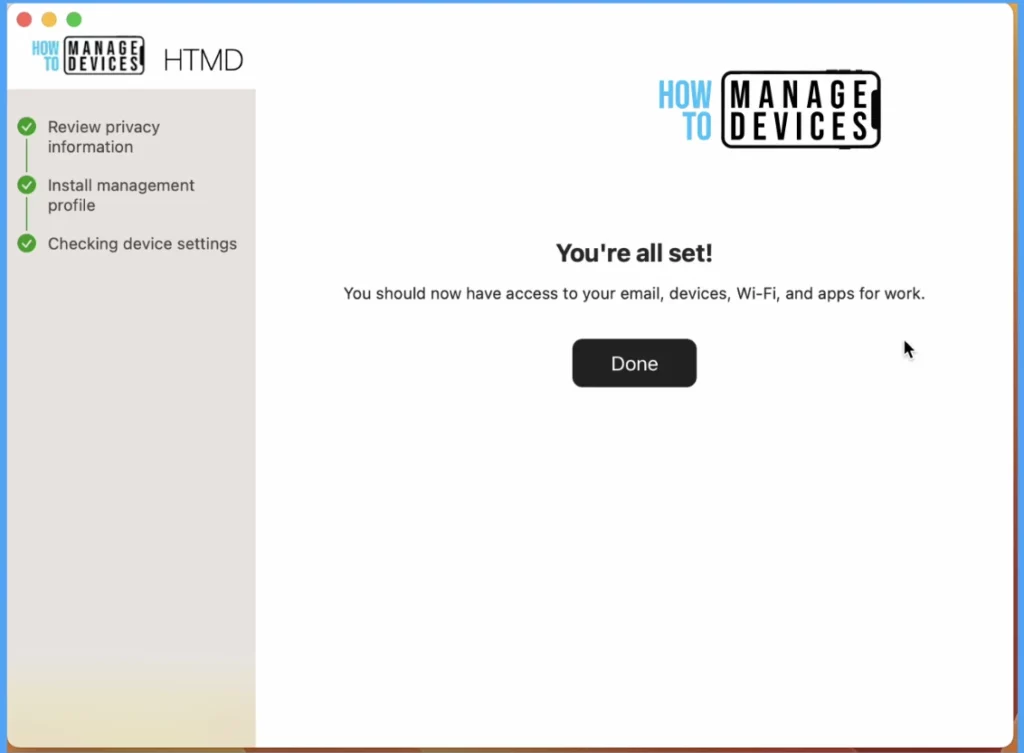
On the Checking device settings page, you will get a success message and click on Done to exit. You’re all set, you should now have access to your email, devices, Wi-Fi, and apps for work.
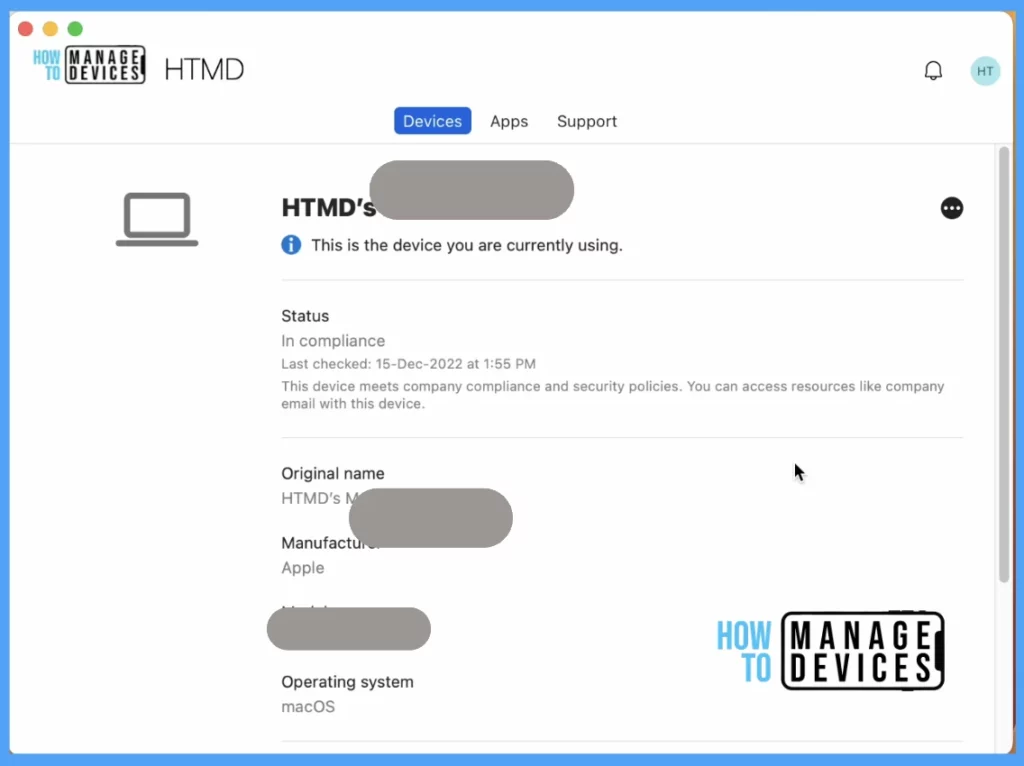
Your device is enrolled in the Company Portal app. Launch the Company portal app to see your devices. Here you can see MDM authority details on the top, along with various tabs such as Devices, Apps, and Support.
The Device Menu in the Company portal shows that your device is fully enrolled with Intune, and a workspace profile has been created. If you have any issues during the enrolment process, Go to your newly installed company portal app icon and check for any notifications within the portal.
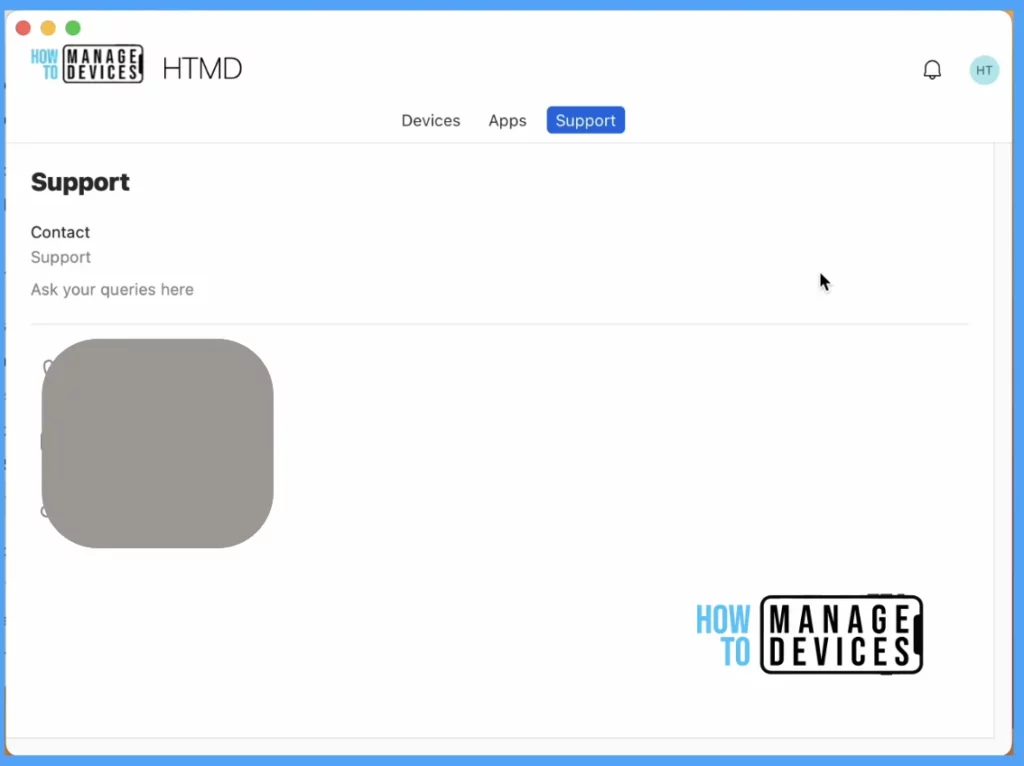
The Support menu in the Company portal helps you to show the supportive section; it includes the cell number, support@test.com, etc. You can easily ask your queries in the Company portal support section.
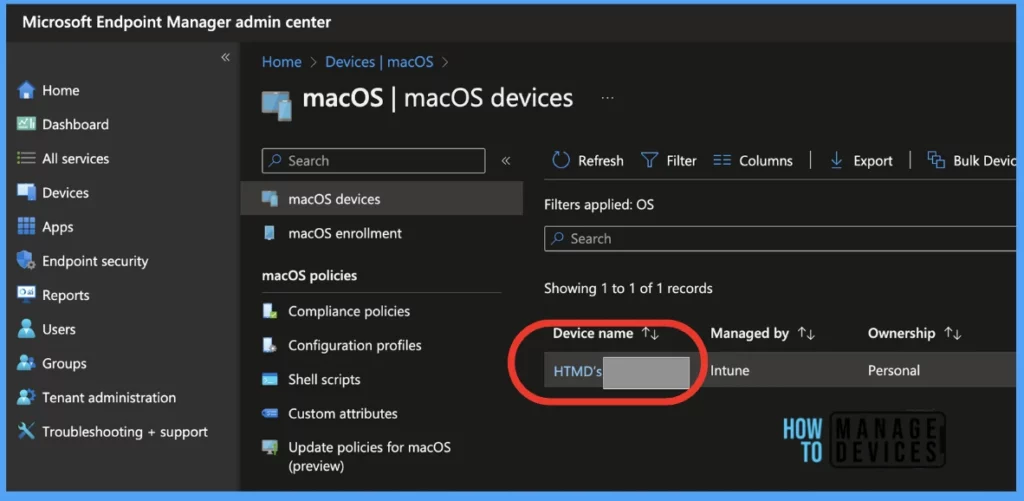
MacOS Enrollment Status in Intune Portal
It’s time to verify the status of the MacBook in Intune, Sign in to Intune Portal. Navigate to the macOS devices by clicking on Devices > macOS > macOS devices, and we can see the device status is showing as enrolled and managed by Intune.
Author
Snehasis Pani is currently working as a JAMF Admin. He loves to help the community by sharing his knowledge on Apple Mac Devices Support. He is an M.Tech graduate in System Engineering.

Ok, but how to deploy Company Portal automatically during ADE? When I create macOS line-of-business app I have got error “One or more apps contain invalid bundleIDs. (0x87D13BA2)”
Here, you can check more details about handling the error 0x87D13BA2 and possible reasons :https://www.anoopcnair.com/intune-macos-lob-apps-error-0x87d13ba2/
After enrolling a user and restarting the device, the computer doesnt accept the username and password. what may have changed? during the enrolment into intune, i enrolled mac and ipad and he was forced to change password during the ipad enrolment has he didnt meet password complexity requirement.
since the ipad and mac are under the same apple id, will he use the new password on the mac too?
I have the problem that I stuck at the point when I want to install the profile after I have installed the company portal app on the macbook. When I try to install the profile I get a message, that it’s not possible to install the profile.
Something with credentials have expired.
Do you have any idea what I can check?
Hi Dominic,
There may be multiple reasons that can block the enrolment such as :
1. Check if you already have the MDM profile as existing, if so ,you can remove the older MDM profile before enrolling again.
2. Sometimes we also forgot to renew the Apple Push certificate in Intune MDM, make sure that is showing as active.
3. Also if you blocked enrolment for particular devices with min macOS version or personal mac enrolment that might cause the issue as-well.
Hope I was able to help you with the fix.