
Key Takeaways
- Enable the Windows Autopilot Diagnostics Page through the Enrollment Status Page settings in Microsoft Intune.
- Configure the app and profile configuration progress setting to Yes.
- Enable log collection and the diagnostics page for end users.
- View deployment information, network connectivity, Autopilot settings, and enrollment status.
- Export diagnostic logs to investigate Windows Autopilot deployment failures.
Let’s learn how you can Configure Enrollment Status Page Diagnostics for Windows Autopilot using Intune. By enabling the Windows Autopilot Diagnostics Page, IT administrators can have a better visibility and control over their devices and diagnose the issues more efficiently. The Autopilot Diagnostics page is a tool that can be used to troubleshoot issues with the Autopilot process. This page displays information such as the device’s Autopilot profile, its enrollment status, and any errors that may have occurred during the Autopilot process.
Table of Contents
Table of Contents
Configure Enrollment Status Page Diagnostics for Windows Autopilot using Intune
This feature can save IT administrators valuable time and effort in resolving issues with Autopilot deployment, including devices that are not properly enrolling or issues with Autopilot profile configurations. When you deploy Windows 11 with Autopilot, you can enable users to view detailed troubleshooting information about the Autopilot provisioning process. A new Windows Autopilot diagnostics page is available, which provides a user-friendly view to troubleshoot Windows Autopilot failures.
If you are looking for a simple way to export and import your Windows Autopilot devices, there are multiple methods available, and Intune has a built-in option. Learn how to export the windows autopilot devices in Intune.
- Delete Windows Autopilot Device From Intune
- Windows Autopilot Failing With 0x87D1041C After Company Portal Installation Issues
- PS Script To Add Or Modify Group Tag Of Autopilot Devices In Intune
Enable Windows Autopilot Diagnostics Page
To deploy the ESP to devices, you have to create an ESP profile in Microsoft Intune. Within the profile, you can configure the ESP settings that control. Here’s how you can enable Windows Autopilot Diagnostics Page. Sign in to the Microsoft Intune admin center.

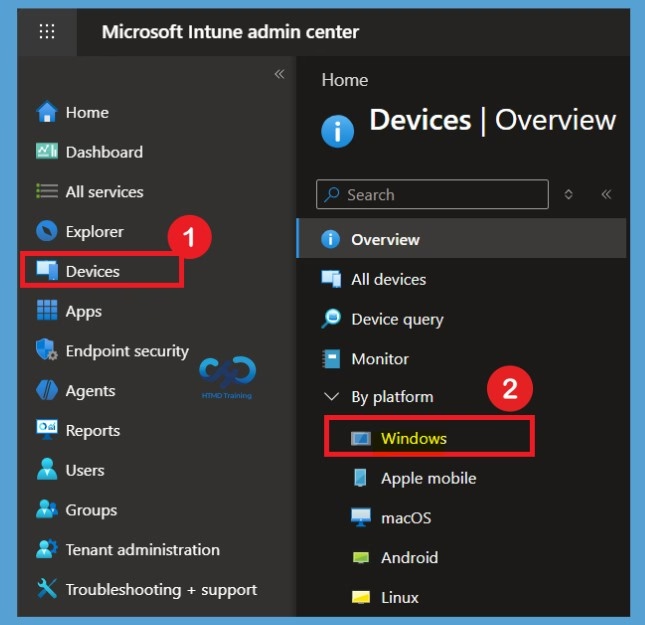
- Navigate to Devices > Windows.
Select Enrollment Status Page
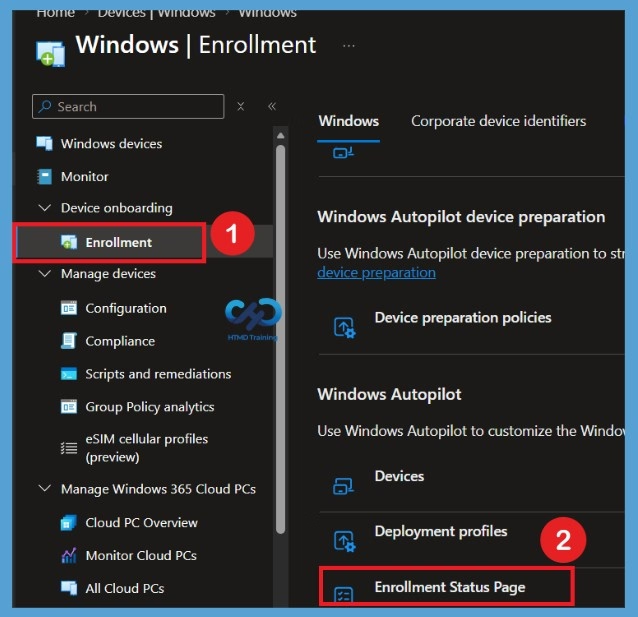
After clicking on Devices, select the Windows section. You will now enter the Windows enrollment area. Under Windows enrollment, go to the Device onboarding section and select it. The Enrollment Status Page option will appear in the right pane of the window. Click on it to view the available Enrollment Status Page profiles.
- Select Windows enrollment > Enrollment Status Page.
Select the Existing ESP
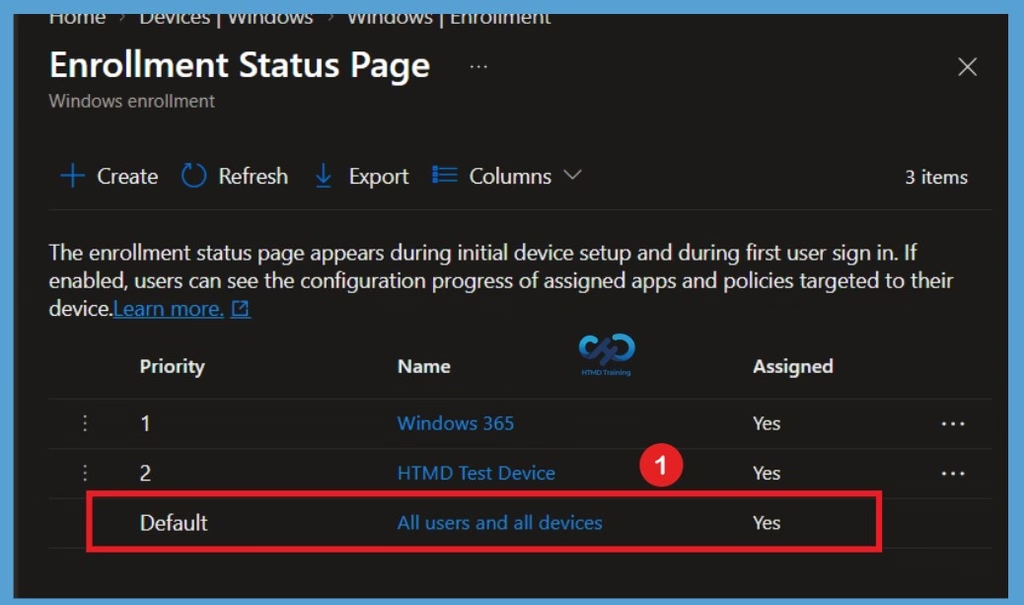
After clicking on Enrollment Status Page, you will see the available Enrollment Status Page profiles. You can select an existing ESP profile based on your requirements. Here, I am selecting the Default for All Users and All Devices ESP profile to configure the Windows Autopilot diagnostics settings.
Setting of ESP
On the Enrollment Status Page, select the existing ESP profile you want to modify. Open its Properties section and select Edit to change the configuration. Make sure you choose the correct profile assigned to your Autopilot devices so that the diagnostics settings apply to the intended deployment.
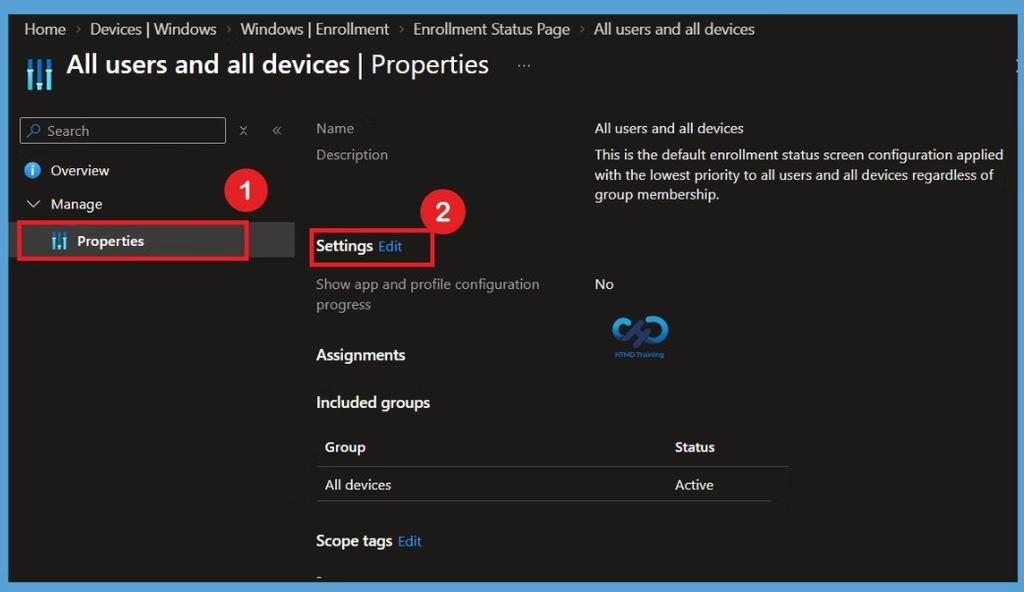
Settings Page
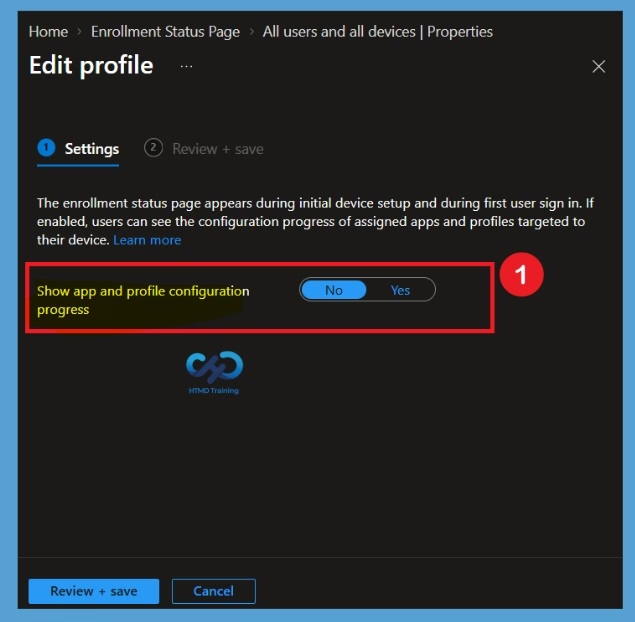
After selecting the settings option, you will be taken to the settings page. The Enrollment Status Page appears during the initial device setup and the first user sign-in, allowing users to view the configuration progress of assigned apps and profiles. In the settings section, locate Show app and profile configuration progress. Set this option to Yes by moving the toggle to the right. Enabling this setting allows the additional diagnostics and log collection option to appear, which you can configure in the next step.
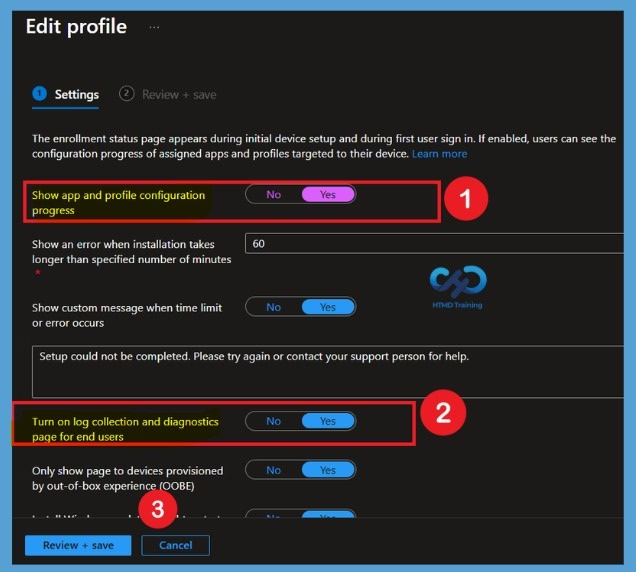
Once you enable this setting, the additional option Turn on log collection and diagnostics page for end users will appear below it. Set this option to Yes as well to enable diagnostic log collection and make the diagnostics page available to end users. After configuring both settings, click Review + save to proceed.
| ESP Settings | Info |
|---|---|
| Show app and profile configuration progress | Yes |
| Diagnostic log collection and make the diagnostics page available to end users | Yes |
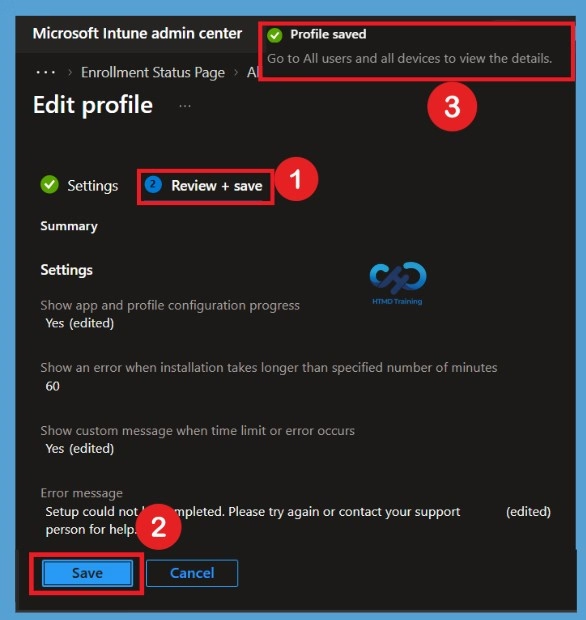
Review+ Save
After updating the settings, proceed to the Review + save or summary screen, depending on the portal interface. Review your selections to confirm that both settings are enabled, and then select Save. Intune will display a notification confirming that the profile has been saved successfully. The updated configuration will apply to devices assigned to the profile when they receive the policy.
Example of Deployment Info
The diagnostics page is currently supported for commercial OOBE, and Autopilot user-driven mode. It’s available on Windows 11 users can still collect and export diagnostic logs when this setting is enabled in Intune. The following example shows details for Deployment info, which includes Network Connectivity, Autopilot Settings, and Enrollment Status. You can also Export logs for detailed troubleshooting analysis.
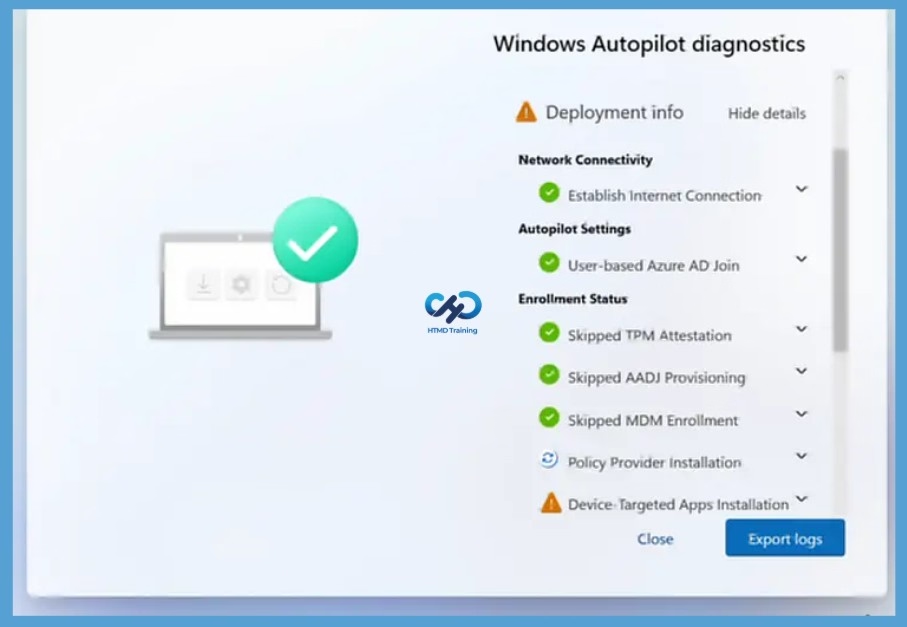
The best way to troubleshoot Windows autopilot deployment is from the Windows Enrollment status screen. Recommend reading post about Windows Enrollment Status Screen Troubleshooting. Windows Autopilot diagnostics will automatically capture diagnostics about Windows Autopilot failures that occur on the Enrollment Status Page (ESP).
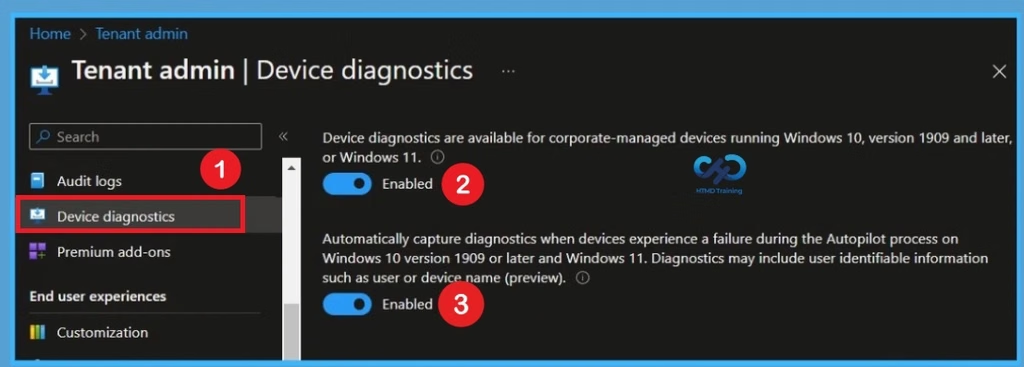
In this post, you will learn more details about how to collect Intune logs using the Intune portal. This is helpful to collect Intune logs for Windows 11. All the troubleshooting related to Intune and MDM can be done using these diagnostic logs. First, you need to enable the device diagnostic settings from the Tenant Admin blade of Intune MEM Portal as shown in the screenshot below.
Need Further Assistance or Have Technical Questions?
Join the LinkedIn Page and Telegram group to get the latest step-by-step guides and news updates. Join our Meetup Page to participate in User group meetings. Also, join the WhatsApp Community and the Whatsapp channel to get the latest news on Microsoft Technologies. We are there on Reddit as well.
Author
About Author – Jitesh, Microsoft MVP, has over five years of working experience in the IT Industry. He writes and shares his experiences related to Microsoft device management technologies and IT Infrastructure management. His primary focus is Windows 10/11 Deployment solution with Configuration Manager, Microsoft Deployment Toolkit (MDT), and Microsoft Intune.